

This post may contain affiliate links. Please read our disclosure policy.
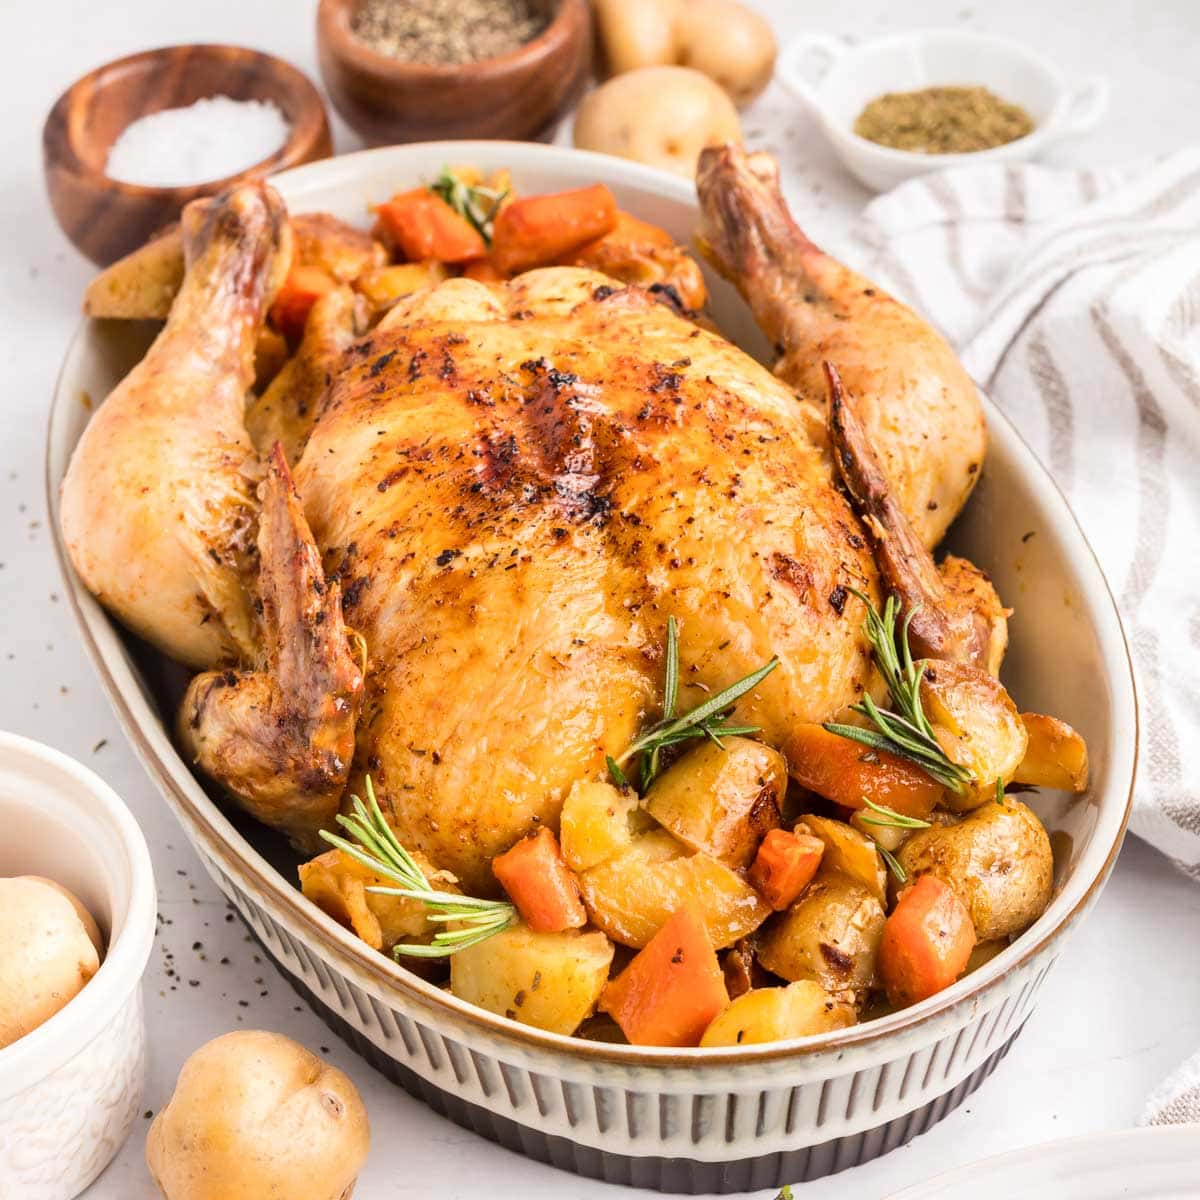
Sunday dinner doesn’t get much easier than this. This Dutch Oven Roasted Whole Chicken bakes low and slow right on top of buttery potatoes and carrots, so the vegetables soak up every drop of chicken drippings while the bird gets perfectly golden, crispy skin. One pot, minimal cleanup, and a table full of happy faces. Let’s get cooking!
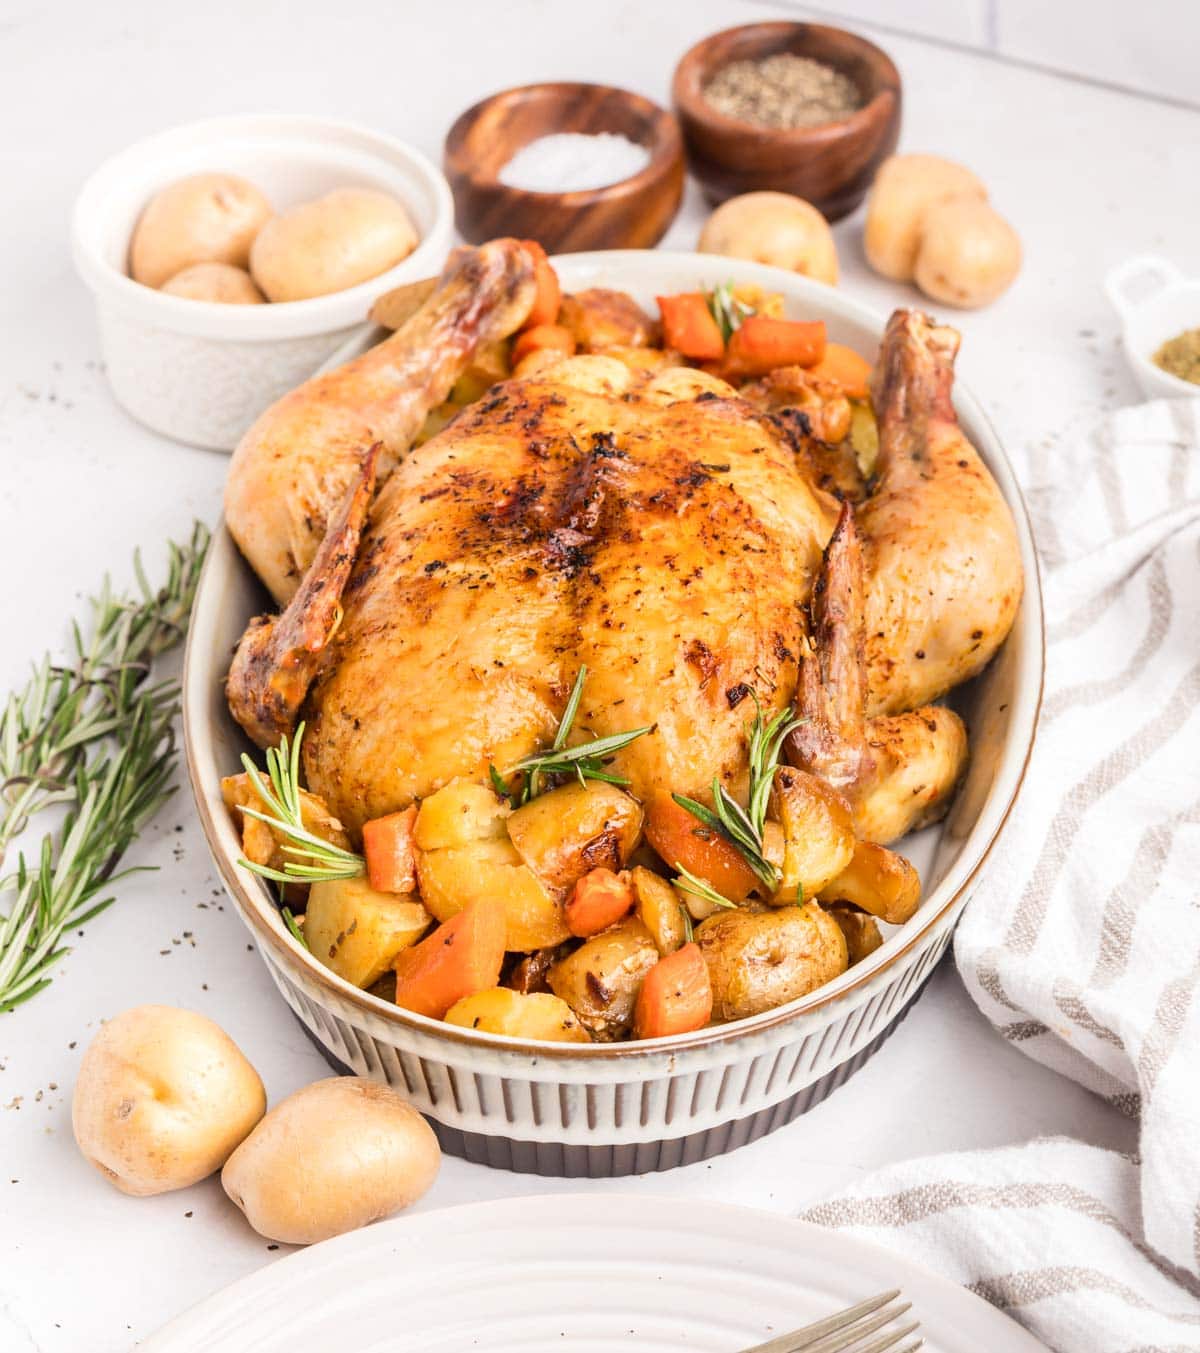
For me, a whole roasted chicken is one of the coziest meals there is. I’ve roasted chicken just about every way you can think of, and this Dutch oven method is the one I keep coming back to. It’s about as foolproof as it gets. You end up with juicy chicken and tender, flavor-packed vegetables cooked right in the same pot! I love stuffing the cavity with garlic, lemon, and rosemary to season the bird from the inside out as it roasts, and that quick blast under the broiler at the end is what gives you that irresistibly crispy, golden skin every single time.
This is my go-to for a cozy Sunday dinner, but I’ll let you in on a little secret, it’s also perfect for a small holiday gathering. Sometimes roasting a whole turkey just isn’t necessary, especially if it’s a smaller crowd or an intimate get-together. This chicken gives you all that same special, sit-down-dinner feeling without the extra work!
If you love a good roasted chicken dinner, you’ll want to bookmark a few of my other favorites too. My Juicy Oven Baked Chicken Breasts are perfect for busy weeknights, and if dark meat is more your speed, my Crispy Baked Chicken Thighs never disappoint!
Why you’ll love this Roasted Whole Chicken in a Dutch Oven
❥ One-pot meal: Everything cooks together in a single Dutch oven, meaning way less cleanup and vegetables that taste like they’ve been simmering in chicken drippings all afternoon.
❥ Simple pantry seasonings: Paprika, garlic powder, onion powder, and thyme are seasonings you likely already have on hand, so there’s no special trip to the store required.
❥ Foolproof for beginners: With a meat thermometer and a little patience, even a first-time roaster can pull off a golden, juicy chicken that looks amazing and tastes just as good.
Nikki’s Top Tips Before You Start
- Let the chicken come to room temperature before roasting. A cold chicken straight from the fridge cooks unevenly, so give it about 20 minutes on the counter while you prep the vegetables. This helps it cook more evenly from edge to center.
- Pat the chicken completely dry. Excess moisture on the skin steams instead of crisping up in the oven. A few extra minutes with paper towels make a big difference in how golden and crackly the skin turns out.
- Spread the vegetables in an even layer. Piling them up unevenly means some pieces will cook faster than others. An even layer also lets every potato and carrot soak up those chicken juices as they roast.

My Signature Fall Dinner Dishes!
FREE EMAIL BONUS: My greatest hits: bold, cozy, and brag-worthy.n
Ingredients
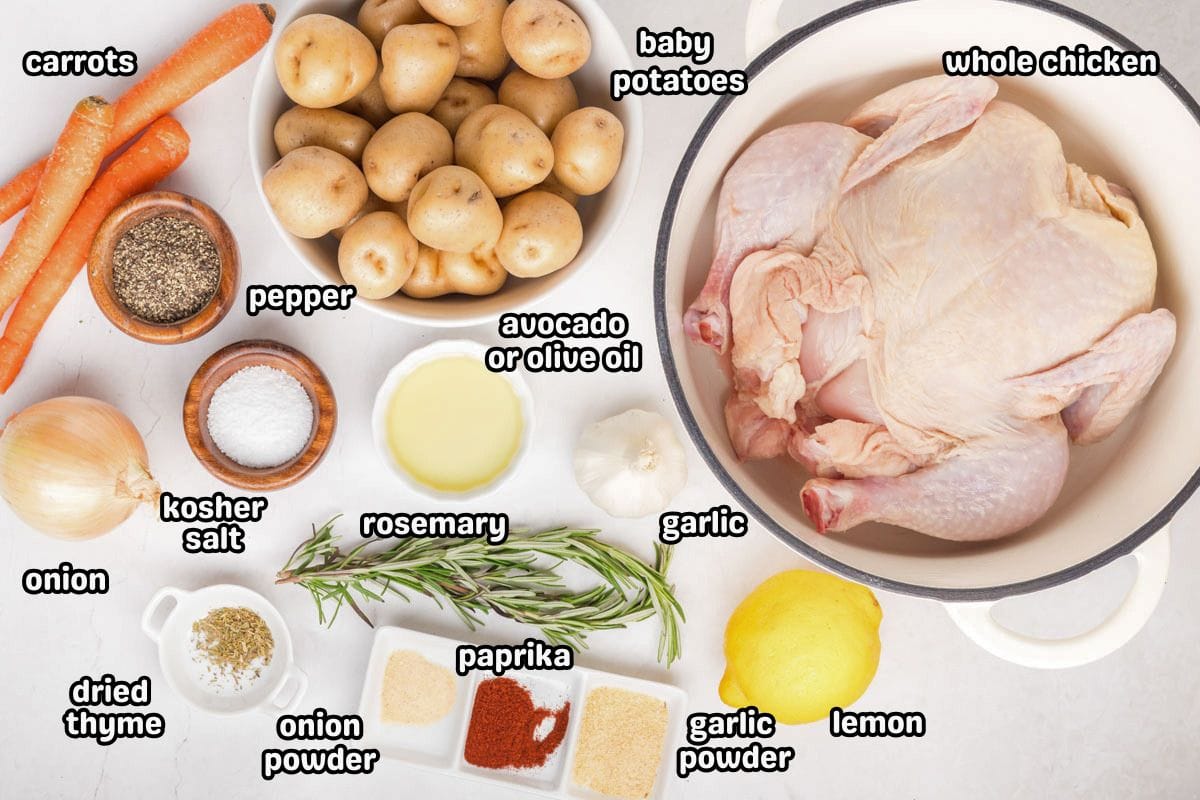
- Whole chicken: Look for a bird with the neck and giblets already removed. Anything in the 4- to 5-pound range works well here, just know that a chicken on the larger end will need a bit more time in the oven to roast through.
- Baby potatoes: These hold their shape beautifully and soak up all the flavorful drippings as they roast alongside the chicken.
- Carrots: Sliced carrots add natural sweetness and color to the pot. Use more or less depending on how many vegetable lovers you’re feeding.
- Yellow onion: Chopped and tossed in with the vegetables, it mellows and sweetens as it roasts.
- Garlic bulb: Half goes into the vegetable mixture for flavor, and the other half gets stuffed whole into the chicken cavity.
- Lemon: Half is juiced into the vegetables, and the other half is tucked inside the chicken to add bright flavor as it cooks.
- Avocado oil: Its high smoke point makes it ideal for roasting at higher temperatures without burning.
- Coarse kosher salt & black pepper: Be sure to season the vegetables and the chicken with salt and pepper. You can add more to taste.
- Fresh rosemary: Stuffed into the cavity, it infuses the chicken with earthy, aromatic flavor as it bakes.
- Paprika, garlic powder, onion powder, dried thyme: This simple spice blend rubbed on the outside of the chicken creates deep flavor and a beautifully seasoned crust.
How To Make a Dutch Oven Roasted Whole Chicken
✱ Below shows step-by-step photos and instructions. For the complete recipe, along with ingredient amounts, scroll down to the recipe card.
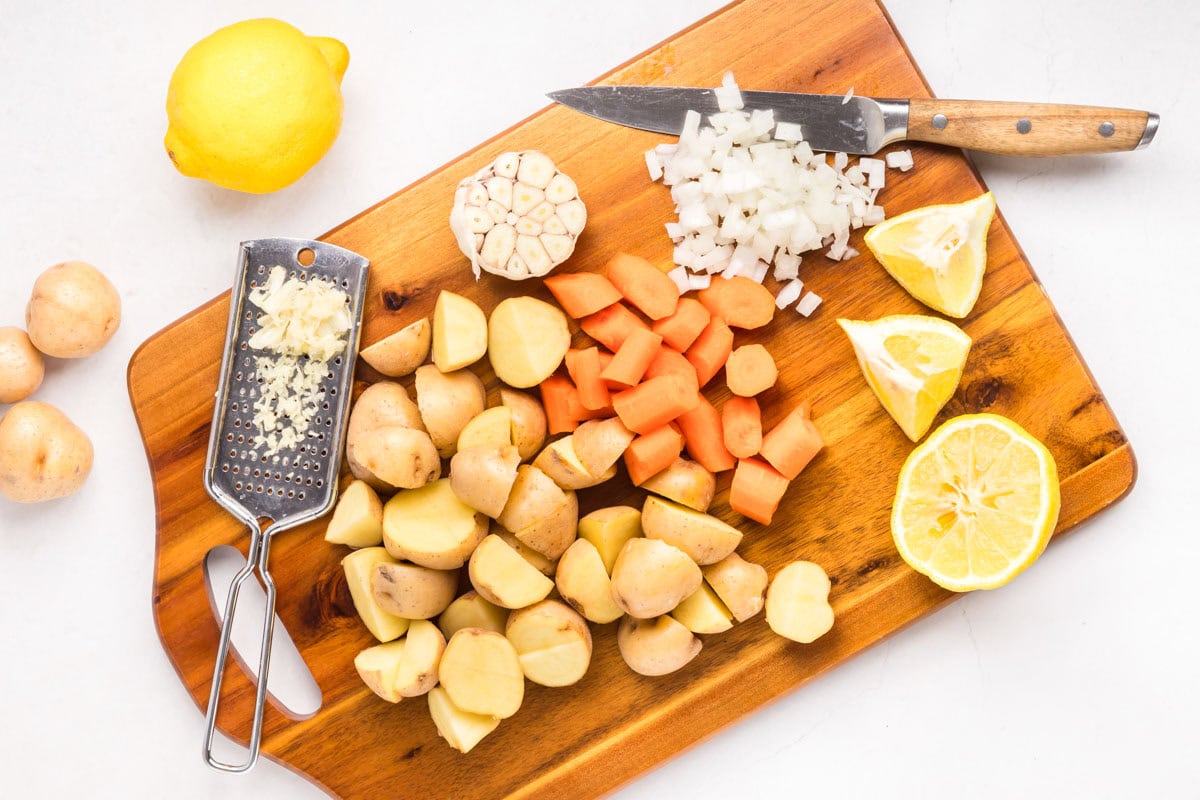
Step 1 | Preheat & Prep
Preheat the oven to 350°F. Remove the chicken from the refrigerator while you prep the vegetables and gather the remaining ingredients.
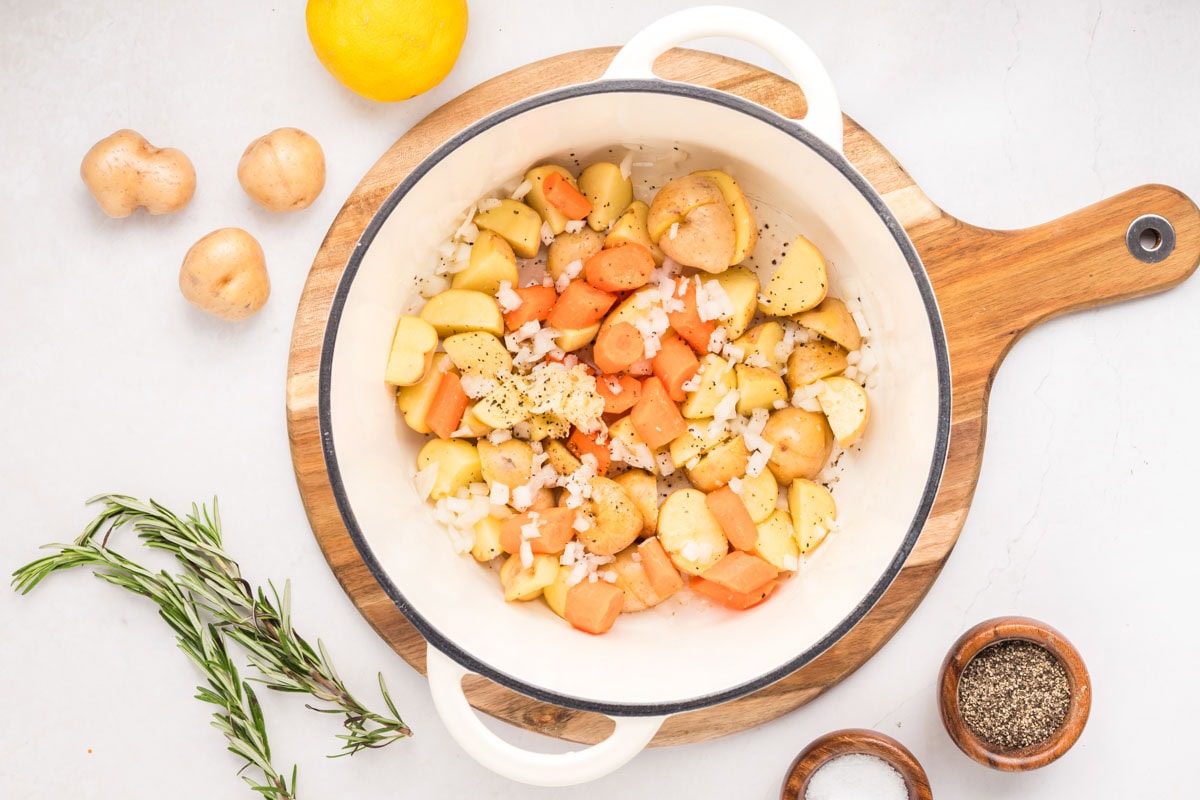
Step 2 | Place Veggies in Dutch Oven
Add the potatoes, carrots, onion, grated garlic from ½ bulb, juice from ½ lemon, 1 tablespoon avocado oil, ½ teaspoon salt, and ½ teaspoon black pepper to a Dutch oven. Spread the vegetables into an even layer so they coat the bottom of the Dutch oven, this allows them to cook evenly. Toss until everything is well coated.
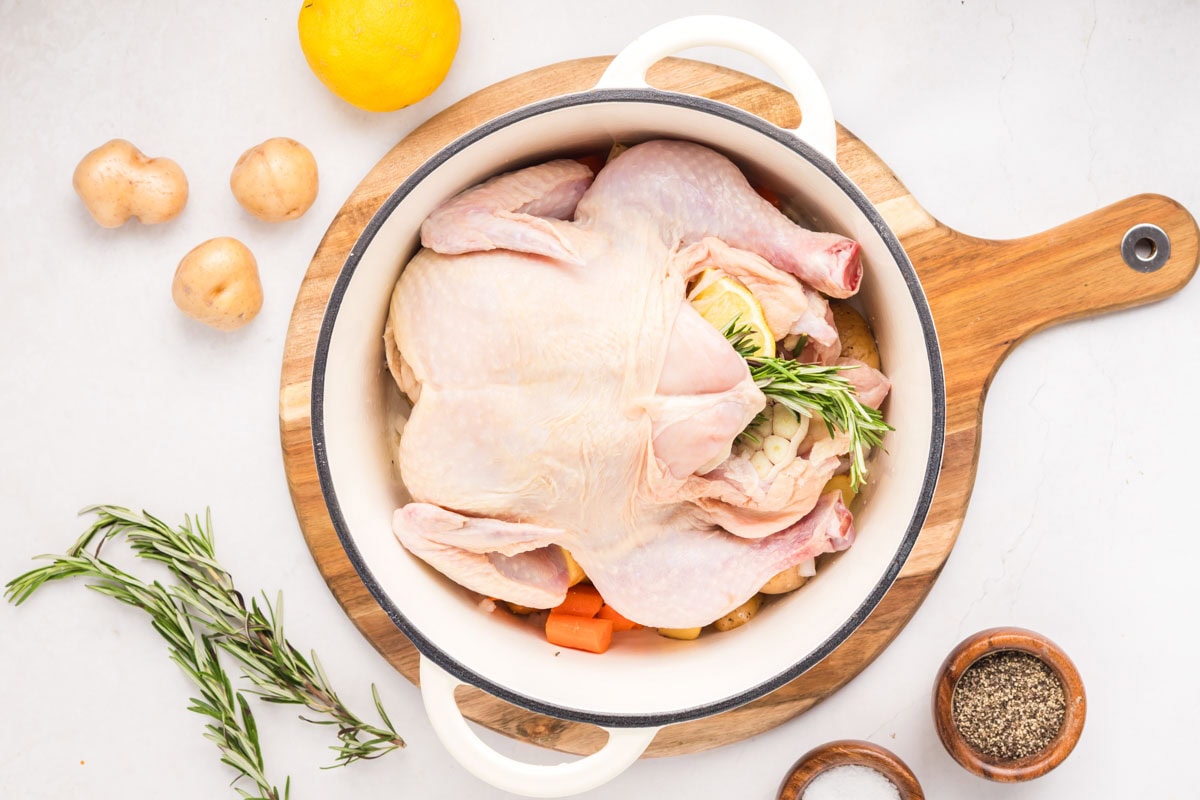
Step 3 | Stuff the Cavity
Remove the chicken from the packaging. Discard any giblets from inside the cavity, then pat the chicken dry with paper towels. Stuff the cavity of the chicken with the remaining ½ bulb of garlic (skin on), the remaining ½ lemon, and the fresh rosemary.
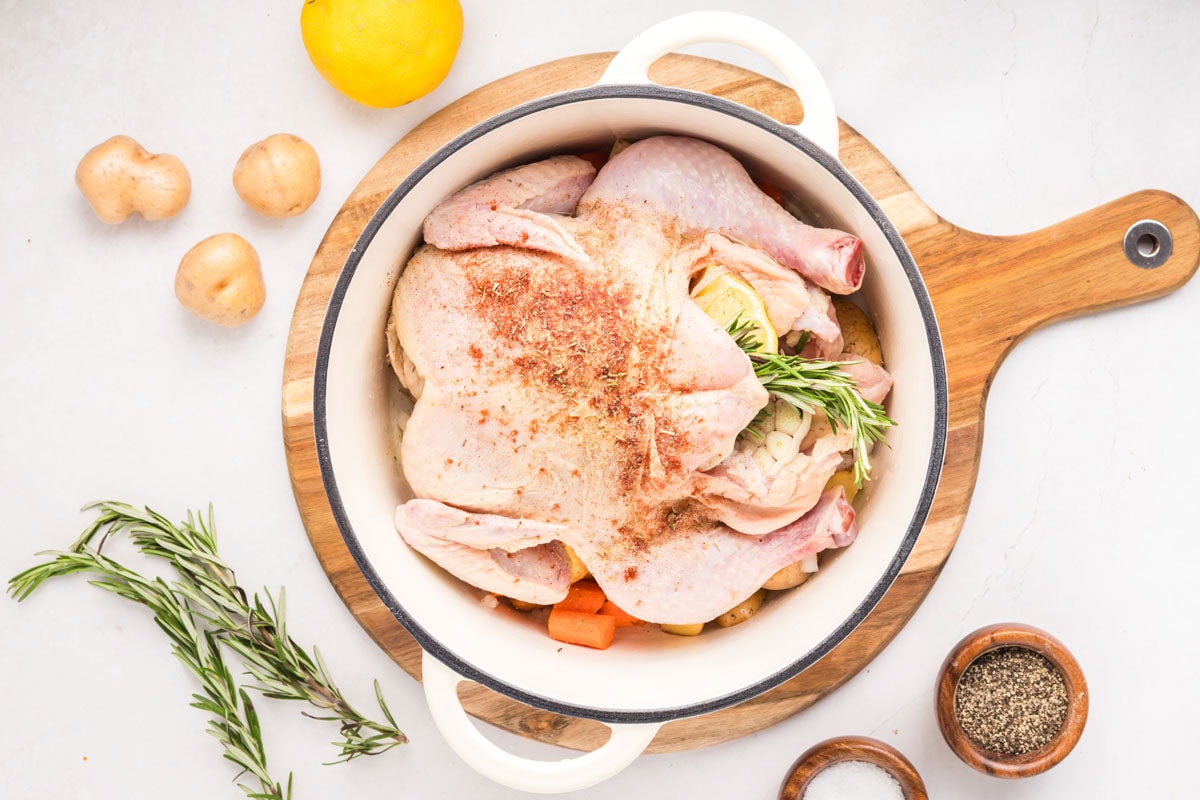
Step 4 | Season the Chicken
Coat the outside of the chicken with the remaining avocado oil and dried seasonings, rubbing them all over until the chicken is evenly coated.
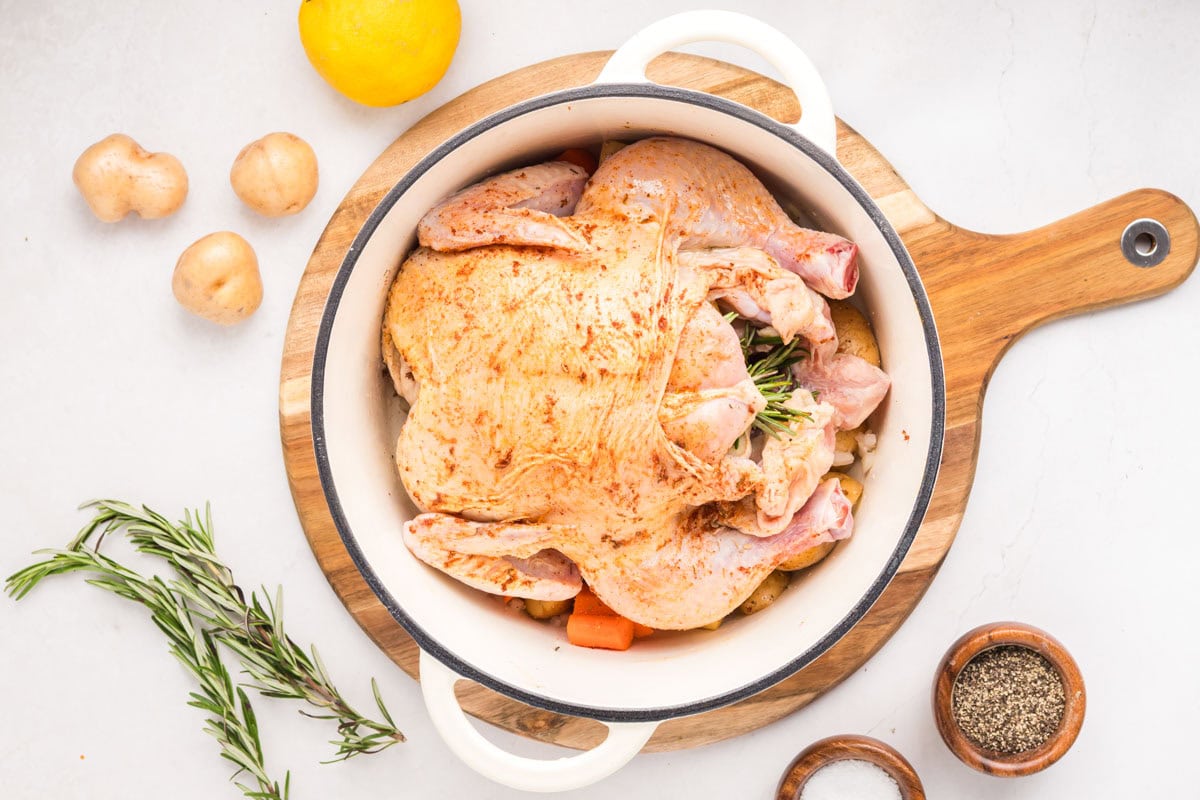
Step 5 | Bake
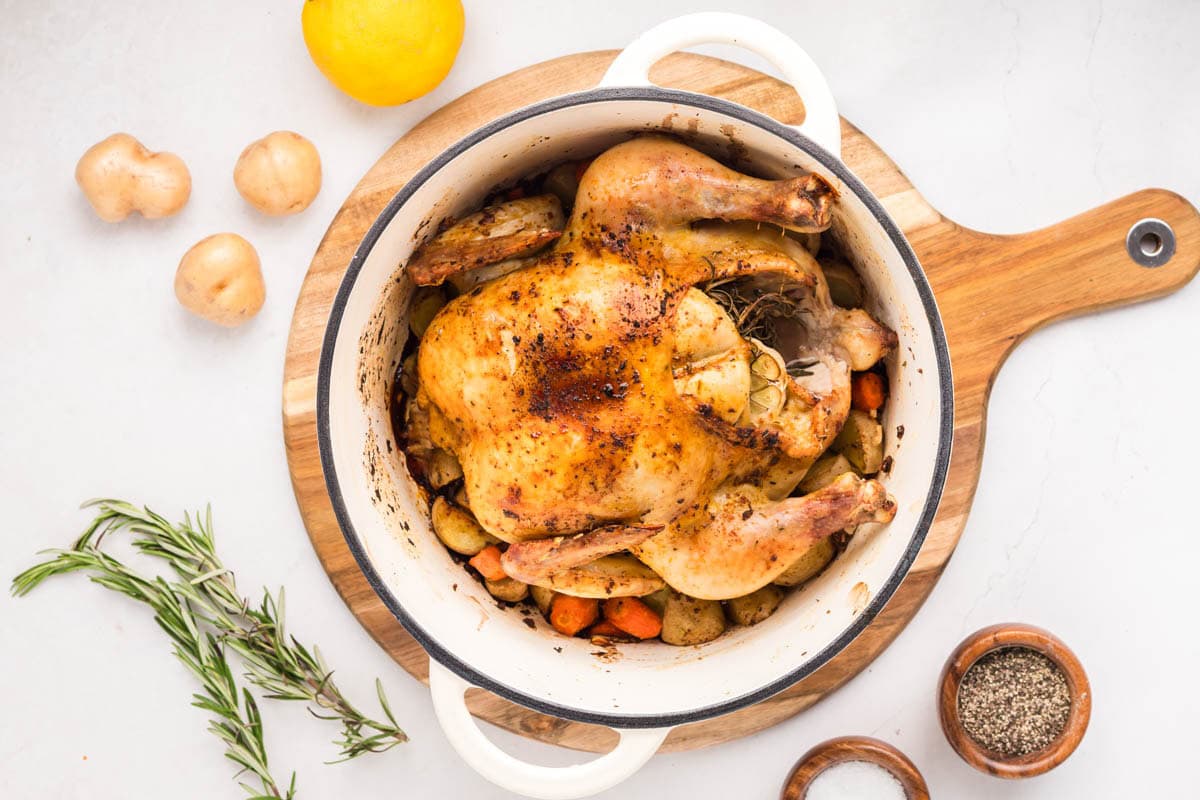
Place the chicken breast-side up on top of the vegetables in the Dutch oven. Bake, uncovered, for 1 hour. Increase the oven temperature to 425°F and continue baking for an additional 30–35 minutes.
Step 6 | Broil & Enjoy
Turn the broiler on high for 2 minutes to crisp the skin. Allow the chicken to rest for 10 minutes before serving.
Variations & Substitutions
- Swap the avocado oil. Olive oil or any neutral cooking oil works just as well if that’s what you have in your pantry already.
- Use bone-in chicken pieces instead of a whole chicken. Thighs, drumsticks, or a mix of pieces all work. Just keep an eye on the cooking time since pieces cook faster than a whole bird.
- Swap in sweet potatoes. If you want a slightly sweeter side, sweet potato chunks make a delicious substitute for the baby potatoes.
- Add more vegetables. Mushrooms and celery are great additions to the pot, just note that more vegetables can mean a slightly longer cook time.
Gluten-Free
Good news! This Dutch oven roasted chicken is naturally gluten-free as written. There’s no flour, breading, or gluten-containing thickeners anywhere in the recipe. As always, double-check the labels on your seasonings and avocado oil, since cross-contamination or additives can sometimes sneak in, but otherwise this one is safe to serve as-is for anyone avoiding gluten.
Expert Tips
- Always check the temperature in two spots. Insert your meat thermometer into the thickest part of both breasts, not just one side. Chicken is only safe to eat once it reaches 165°F all the way through.
- Invest in a good meat thermometer. It’s the single easiest way to guarantee juicy, perfectly cooked chicken every time instead of guessing and risking dry meat.
- Don’t skip the resting time. Cutting into the chicken right out of the oven lets all those juices run straight onto the cutting board. Ten minutes of resting lets the juices redistribute so every slice stays moist.
- Use the broiler as your finishing touch, not your main cooking method. A quick 2-minute blast at the very end gives you that deeply golden, crackly skin without drying out the meat underneath.
What to Serve With Dutch Oven Whole Roasted Chicken
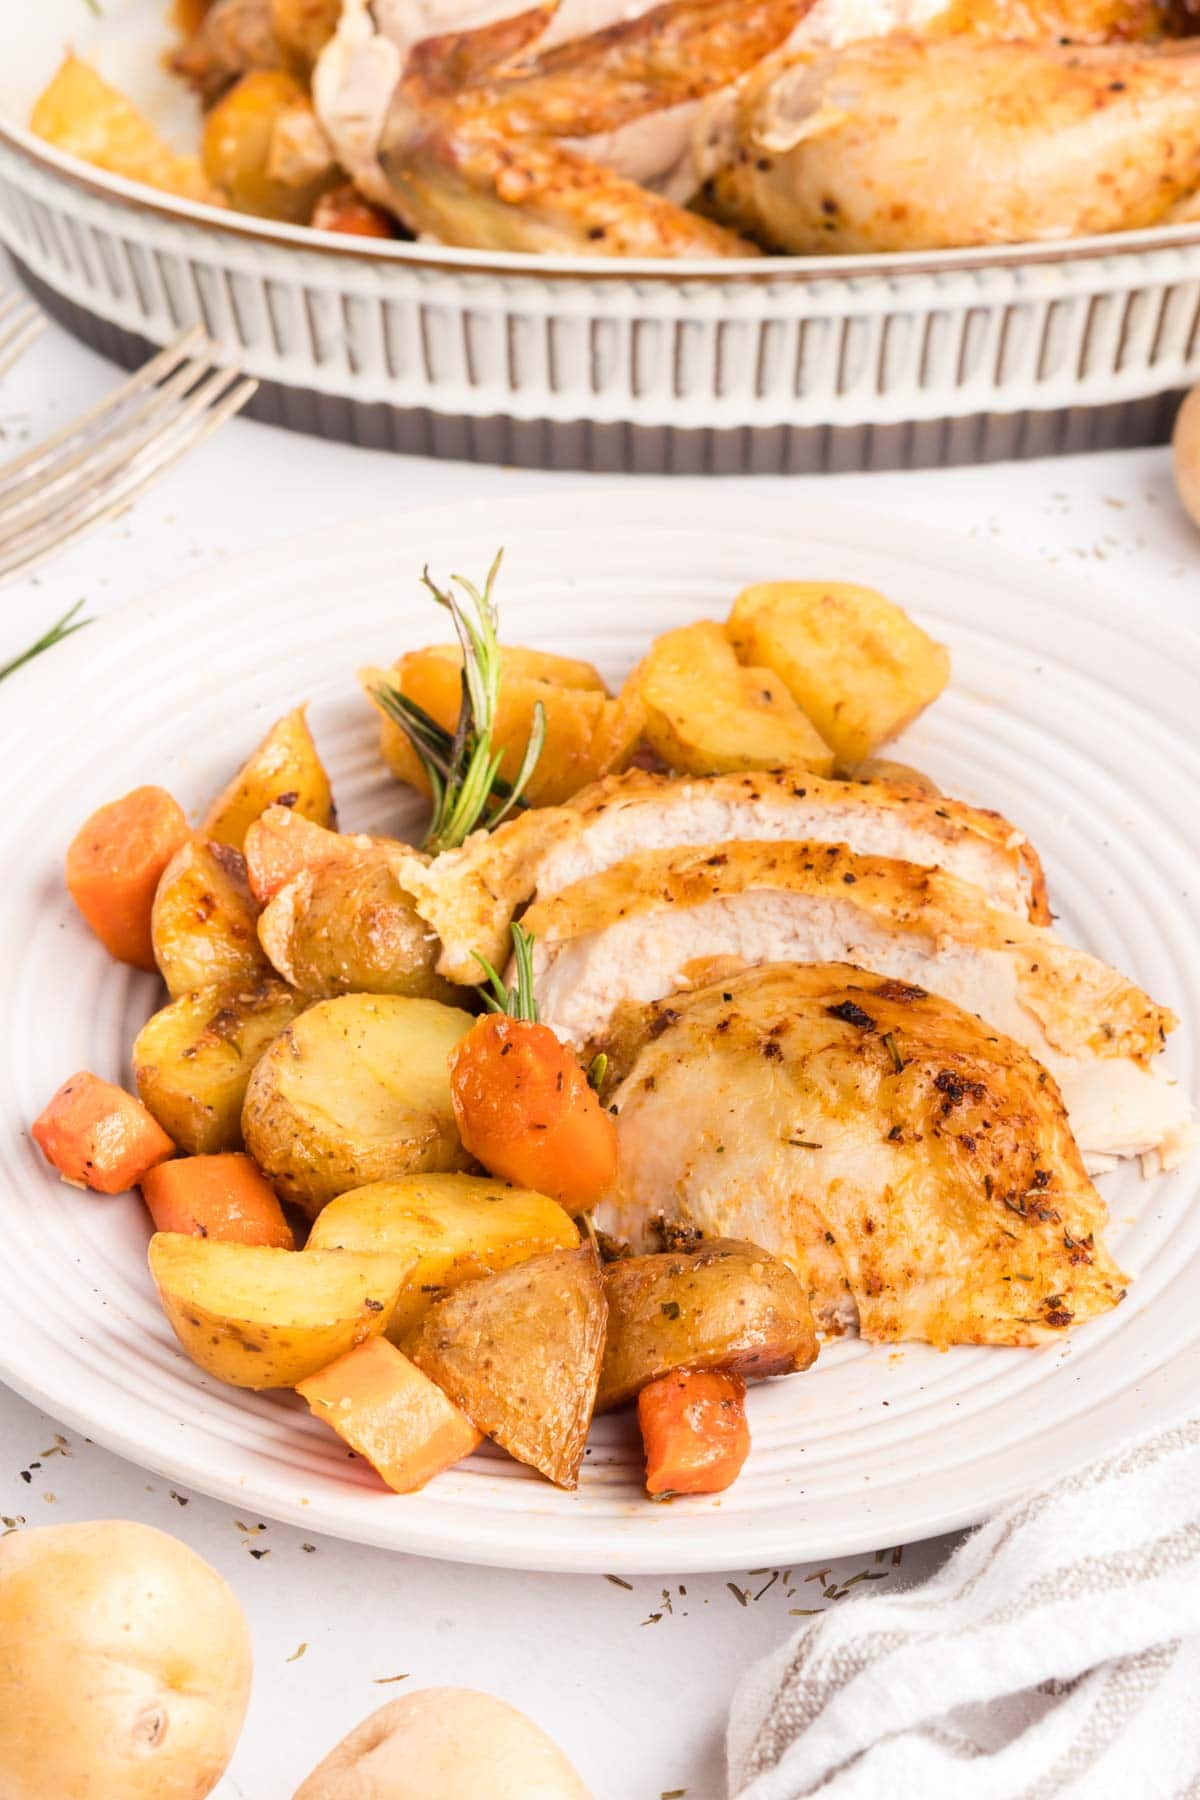
Since the potatoes and carrots roast right alongside the chicken, this dinner is practically a meal on its own, but a few extra sides never hurt! Some classic sides are Homemade Mashed Potatoes or Crock Pot Green Beans. I also love it with Homemade Dinner Rolls!
Storage, Make-ahead
Storage: Keep leftover whole roast chicken in an airtight container in the refrigerator for up to 4 days.
Freeze: Remove the chicken from the bones and store it in a freezer-safe container for up to 3 months.
Make Ahead: You can prepare this a day in advance and store it in the refrigerator, reheating gently in the oven until warmed through, though it’s always better fresh out of the oven.
Frequently Asked Questions
Yes! A Dutch oven traps heat and moisture beautifully, which helps keep the chicken juicy while the heavy lid-free roasting still lets the skin crisp up nicely.
Starting at 350°F and finishing at a higher 425°F, like in this recipe, gives you gentle, even cooking followed by a final burst of heat for golden, crispy skin.
Placing the chicken breast-side up, as this recipe does, helps the thighs (which sit lower and closer to the heat) cook through at the same rate as the breast. If you notice the breast browning too quickly, you can loosely tent it with foil for part of the cooking time to slow it down while the thighs catch up.
Baby Yukon Gold potatoes are ideal because they hold their shape and turn perfectly creamy inside, though any small potato will work.
Uncovered is best if you want crispy, golden skin, which is why this recipe bakes the chicken uncovered the whole time. Covering it traps steam and softens the skin, so it’s better to keep it uncovered.
Hungry for more easy, home-cooked, delicious recipes?
Sign up for my free recipe club to get family-friendly recipes in your inbox each week! Find me sharing daily meal-time inspiration on Pinterest, Facebook, and Instagram.
Dutch Oven Roasted Whole Chicken

Click Stars To Rate
Ingredients
- 4-5 pound whole chicken
- 1 ½ pounds baby potatoes - quartered or halved
- 2-4 Carrots - sliced
- ⅓ cup chopped yellow onion
- Garlic bulb - divided
- Lemon - halved, divided
- 2 tablespoons avocado oil - divided
- 21/2 teaspoons coarse kosher salt - divided
- 1 teaspoon black pepper - divided
- 2 sprigs rosemary
- ½ teaspoon paprika
- ½ teaspoon garlic powder
- ½ teaspoon onion powder
- ¼ teaspoon dried thyme
Instructions
- Preheat the oven to 350°F.
- Remove the chicken from the refrigerator while you prep the vegetables and gather the remaining ingredients.
- Add the potatoes, carrots, onion, grated garlic from ½ bulb, juice from ½ lemon, 1 tablespoon avocado oil, ½ teaspoon salt, and ½ teaspoon black pepper to a Dutch oven. Spread the vegetables into an even layer so they coat the bottom of the Dutch oven, this allows them to cook evenly. Toss until everything is well coated.
- Remove the chicken from the packaging. Discard any giblets from inside the cavity, then pat the chicken dry with paper towels.
- Stuff the cavity of the chicken with the remaining ½ bulb of garlic (skin on), the remaining ½ lemon, and the fresh rosemary.
- Coat the outside of the chicken with the remaining avocado oil and dried seasonings, rubbing them all over until the chicken is evenly coated.
- Place the chicken breast-side up on top of the vegetables in the Dutch oven. Bake, uncovered, for 1 hour.
- Increase the oven temperature to 425°F and continue baking for an additional 30–35 minutes, or until the skin is golden brown and the chicken reaches an internal temperature of 165°F. Check both sides of the breast for doneness.
- Turn the broiler on high for 2 minutes to crisp the skin.
- Allow the chicken to rest for 10 minutes before serving.
Notes
- Let the chicken sit at room temperature for about 20 minutes before roasting for more even cooking.
- Use a meat thermometer and check both sides of the breast. Chicken is done at 165°F.
- Let the chicken rest for 10 minutes before carving so the juices stay in the meat instead of on the cutting board.
- Leftovers keep in the fridge for up to 4 days, or freeze the meat for up to 3 months.
Want to Save this Recipe?
By submitting this form, you consent to receive emails from Soulfully Made.
Nutrition
Soulfully Made is not a dietician or nutritionist, and any nutritional information shared is an estimate. If calorie count and other nutritional values are important to you, we recommend running the ingredients through whichever online nutritional calculator you prefer. Calories and other nutritional values can vary quite a bit depending on which brands were used.
