


This post may contain affiliate links. Please read our disclosure policy.
You only need 6 simple ingredients to make these homemade dinner rolls, and they’re everything you want—soft, buttery, and baked to perfection. Whether you’re a seasoned home cook or just starting out, this easy step-by-step recipe will guide you, giving you confidence to bake rolls that will steal the show at any meal.
I don’t know about you, but I’m a bread lover through and through. Honestly, I could make a meal out of it alone, and don’t even get me started on the smell of fresh bread baking—it’s pure comfort wafting through the house! When I first started making bread, I was a little intimidated too, but trust me, there’s no reason to hold back.
If you’re new to bread baking, this is the perfect recipe to dive into. I’ll walk you through every single step, whether you’re using a stand mixer or working by hand—you’ve got this!
My family absolutely adores these dinner rolls, and so does our amazing community. Sophie give this 5 Stars, “These dinner rolls were a game-changer at our family gathering—everyone was clamoring for seconds!”
Before you know it, you’ll be whipping up fluffy, buttery rolls for every occasion (or no occasion at all). Once you start, you won’t want to stop!
Why We Love This Homemade Dinner Rolls Recipe
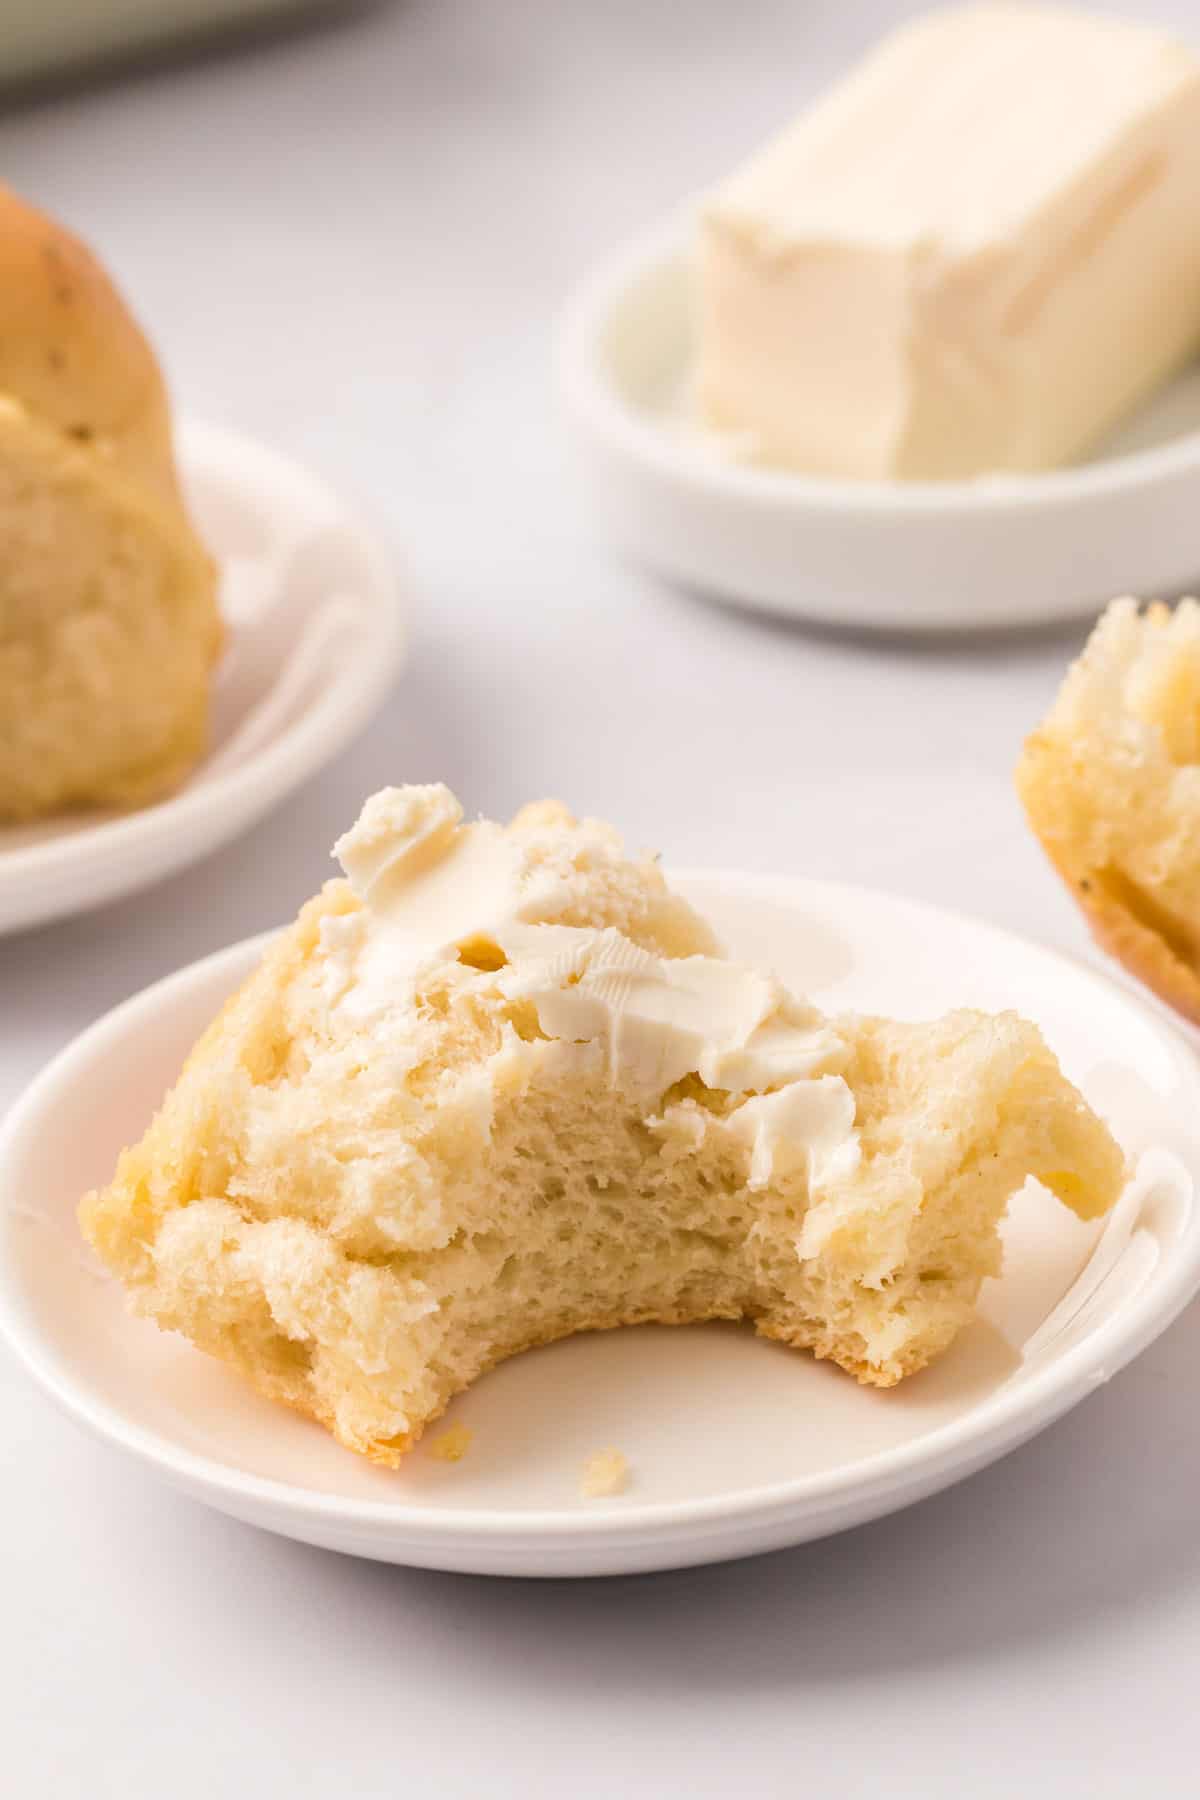
- Fluffy Dinner Rolls: Soft and fluffy dinner rolls are the perfect complement to any dish. Honestly, they are the star of the meal for this carb lover.
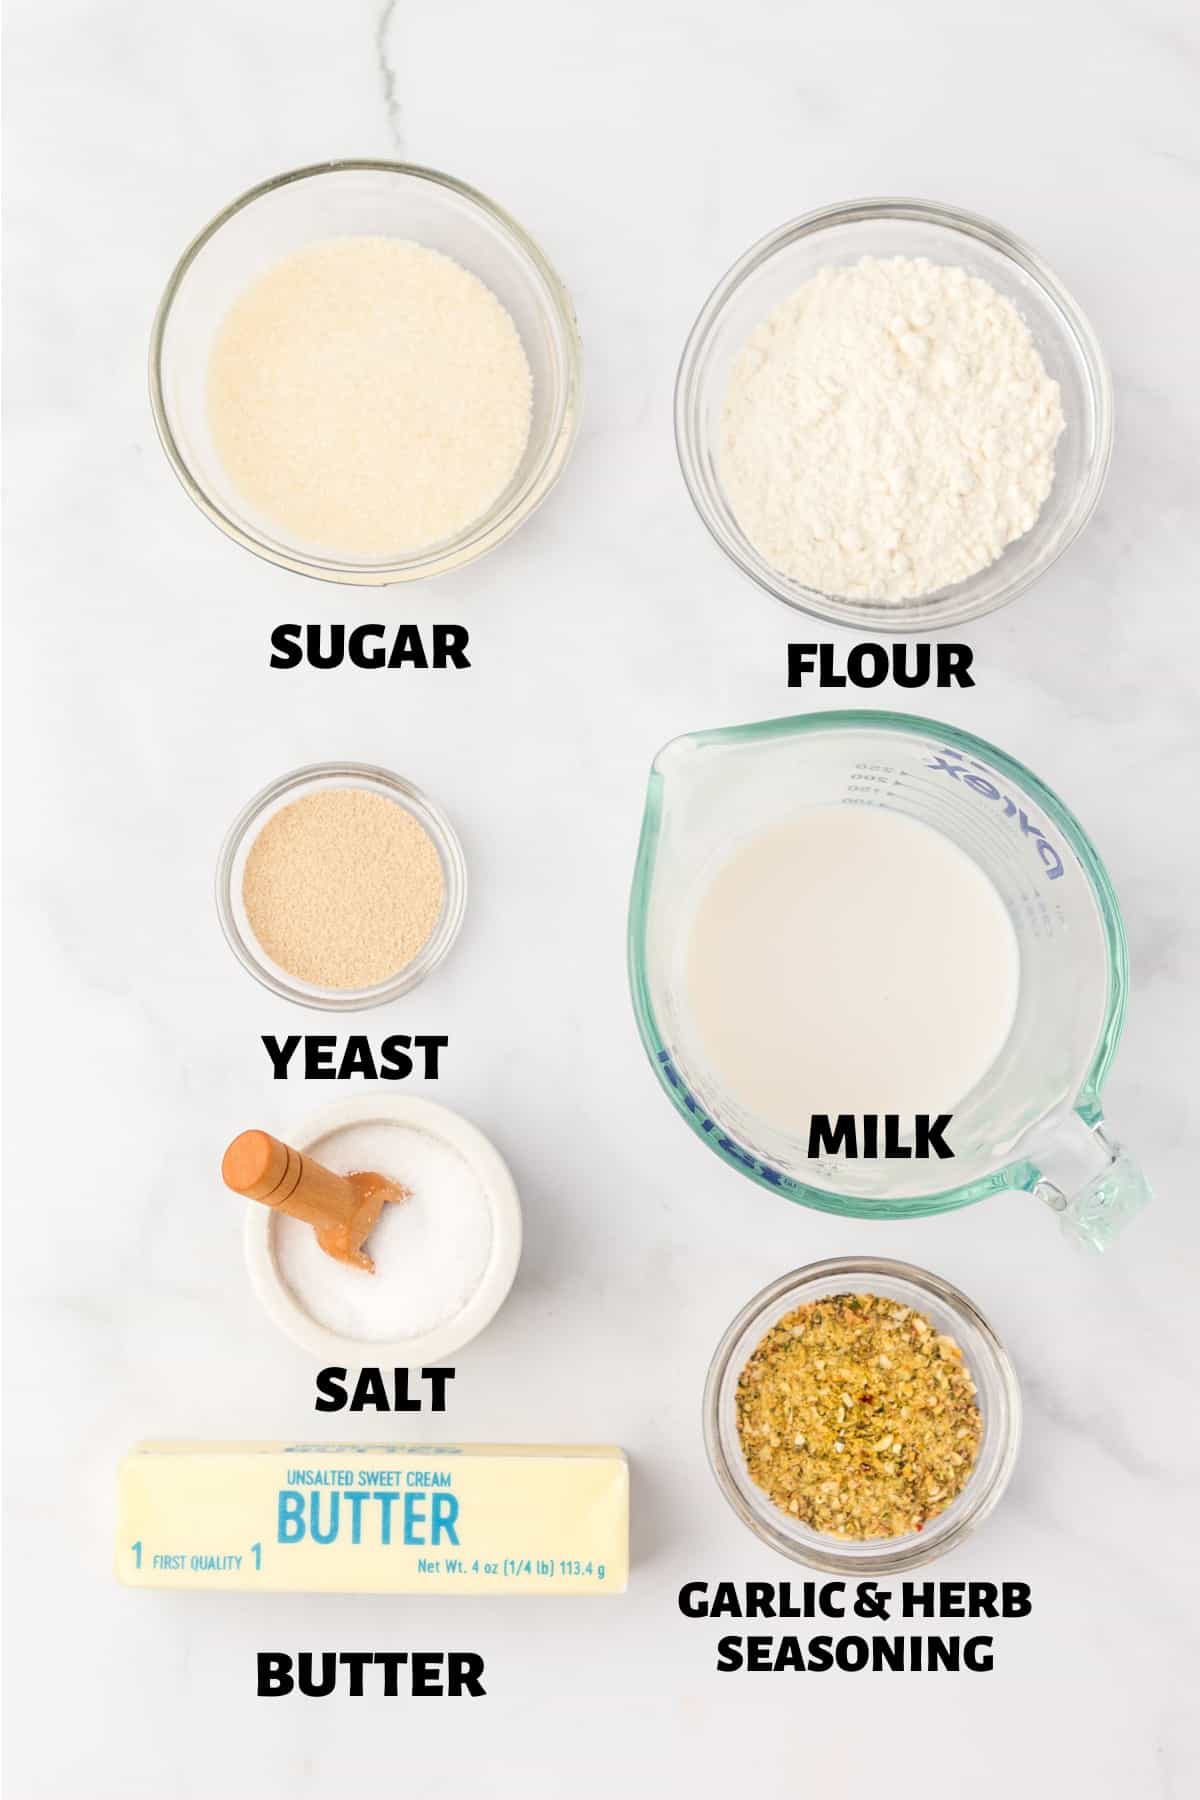
- Simple Ingredients: You only need 6 basic ingredients to make these homemade rolls from scratch! You will find you probably already have them on hand.
- A Delight: Who doesn’t love the fragrance of the house when fresh and delicious homemade yeast rolls are in the oven?
If you are a baking bread beginner, don’t let bread baking intimidate you. Just jump on in. This recipe will teach you how to make homemade dinner rolls with simple, clear instructions and tips to get you on your way to successful baking.
This dough can be made easily by hand or in a stand mixer. Making them by hand is super simple, you just need a little bit of elbow grease (not too much, though), and using a stand mixer even makes the job a little easier.
Bread baking doesn’t have to be overcomplicated to be delicious! Whether you are a seasoned baker or a newbie, this delicious yeast roll recipe is for you!
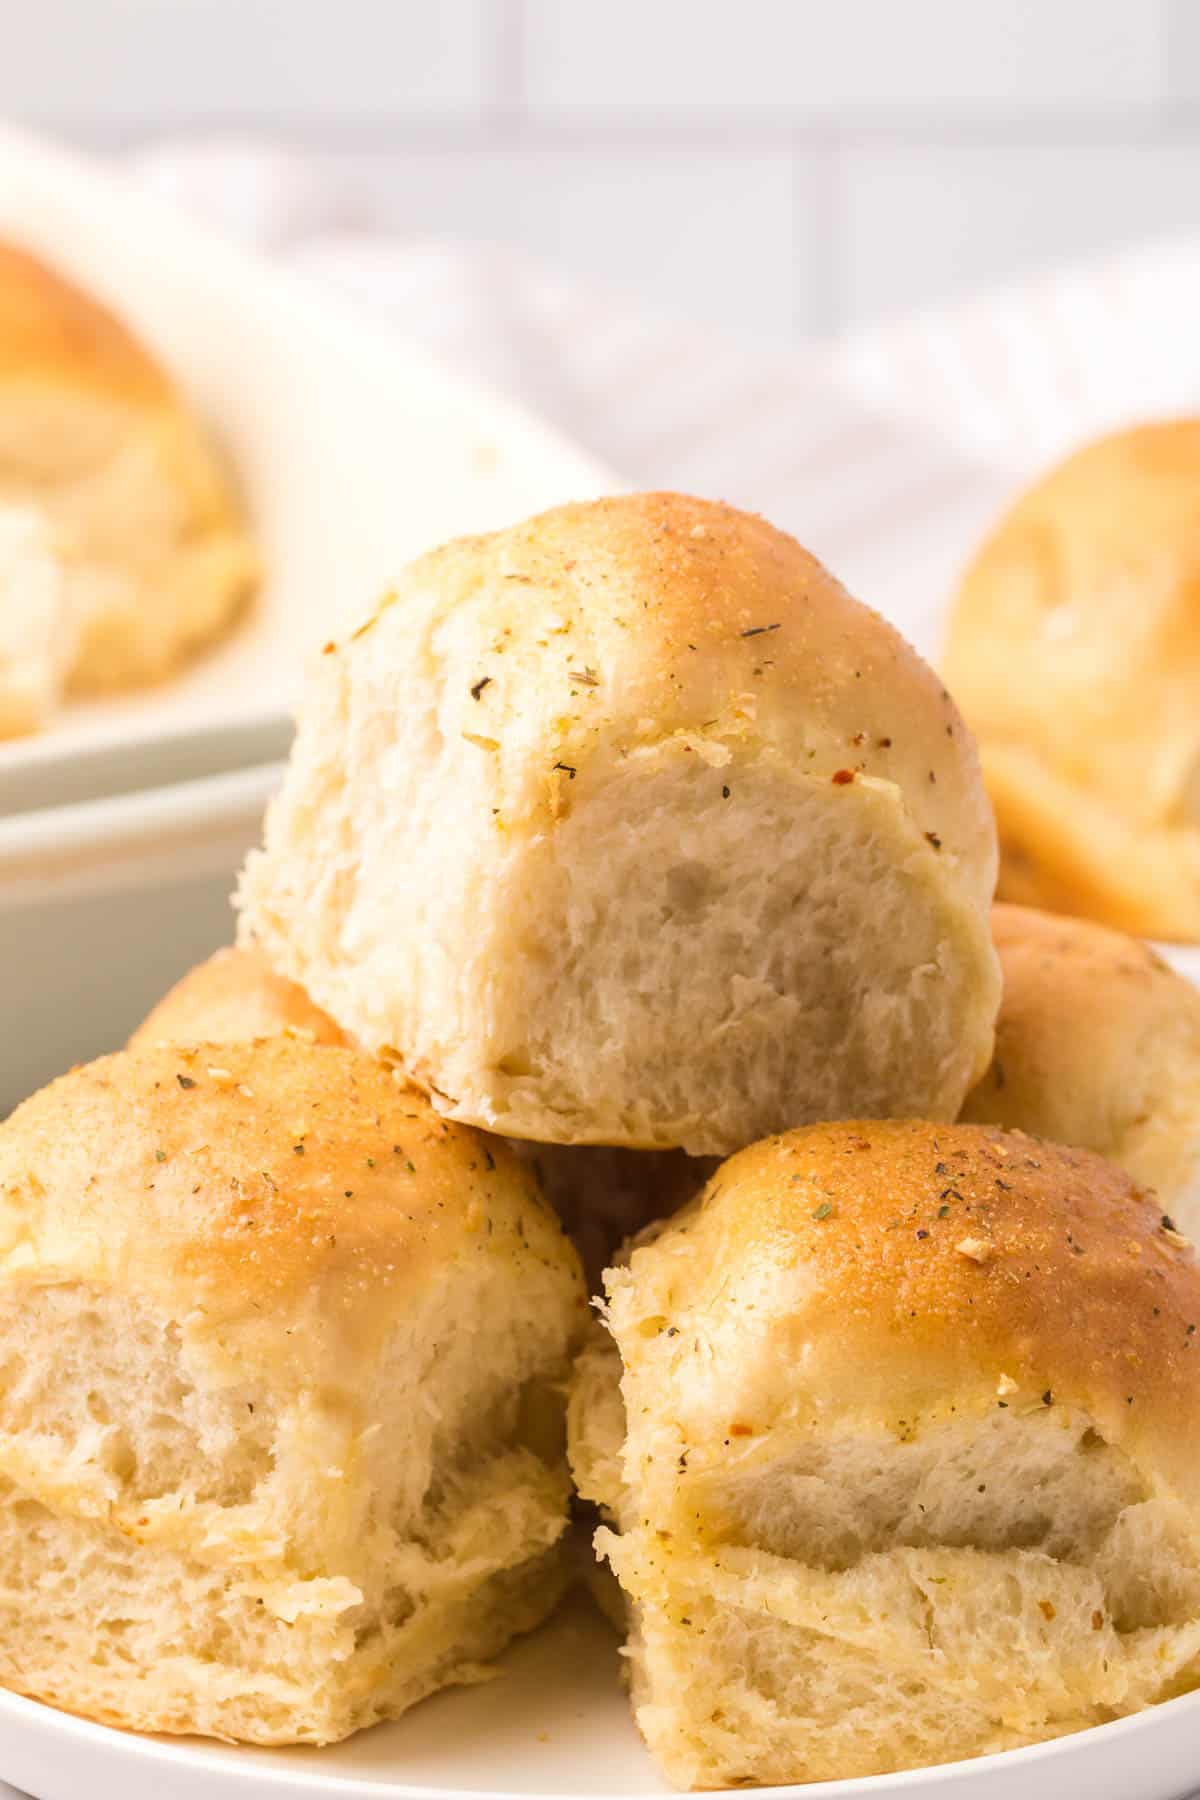
Best Homemade Dinner Rolls Recipe
Variations of These Easy Homemade Dinner Rolls
I added our favorite garlic and herb seasoning to this recipe. You can certainly eat them as is or brush on butter alone. Here are some other flavor combinations that are delicious add-ins. You can bake these right in the batter
Likewise, you can change up the toppings on the rolls.
Really the sky is the limit, or I should say your imagination is!
How to Make Homemade Dinner Rolls
✱ Be sure to see the recipe card below for exact ingredients and full recipe instructions!
Step 1 | Make the Milk Mixture
Add the milk, ¼ cup of butter, and the sugar in a medium saucepan. Heat the mixture over medium-low heat, bringing the milk mixture up to about 110 degrees F, then remove it from the heat.
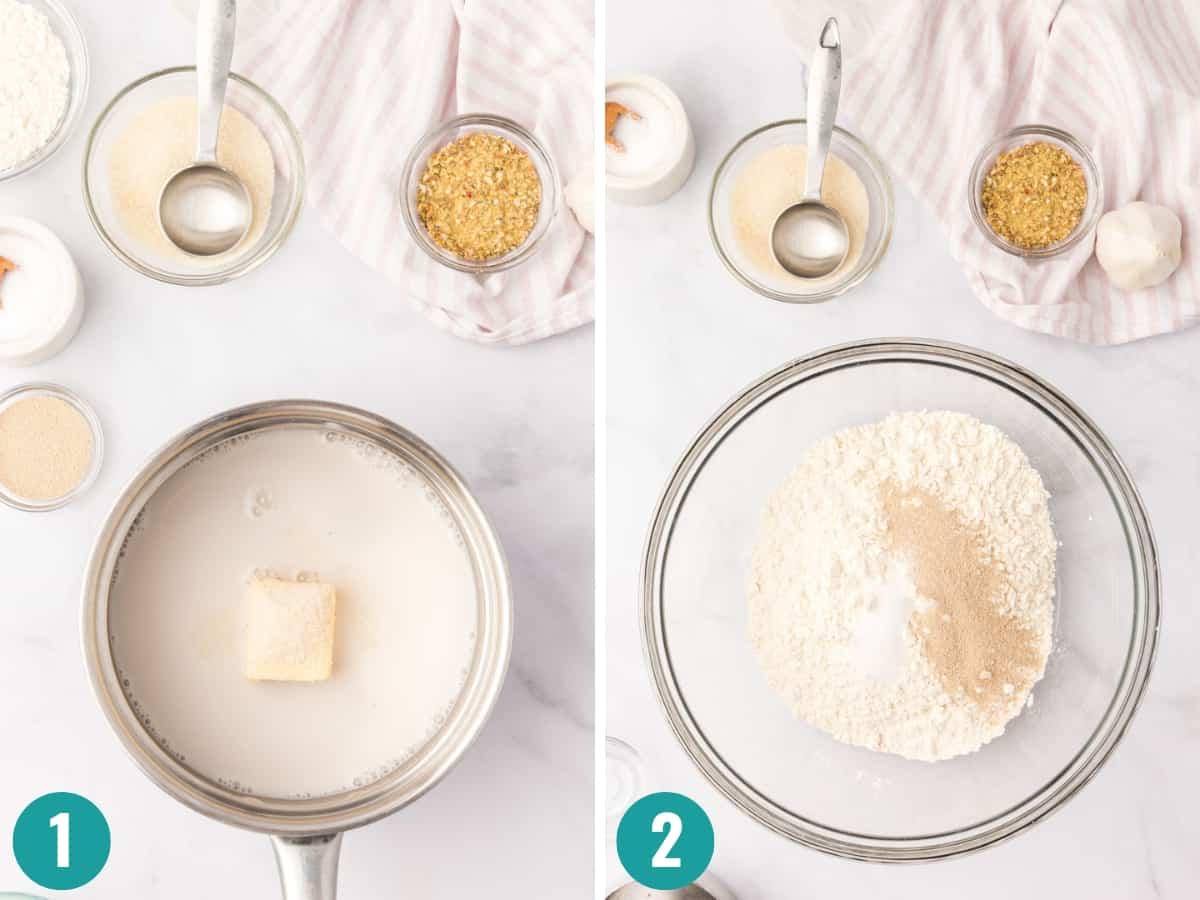
Step 2 | Mix the Flour
Next, add the dry ingredients– all-purpose flour, yeast, and salt in a large mixing bowl or your stand mixer and give it a quick stir to incorporate.
Stand Mixer: If you are using a stand mixer, connect the dough hook attachment, set it to low, and stir to combine.
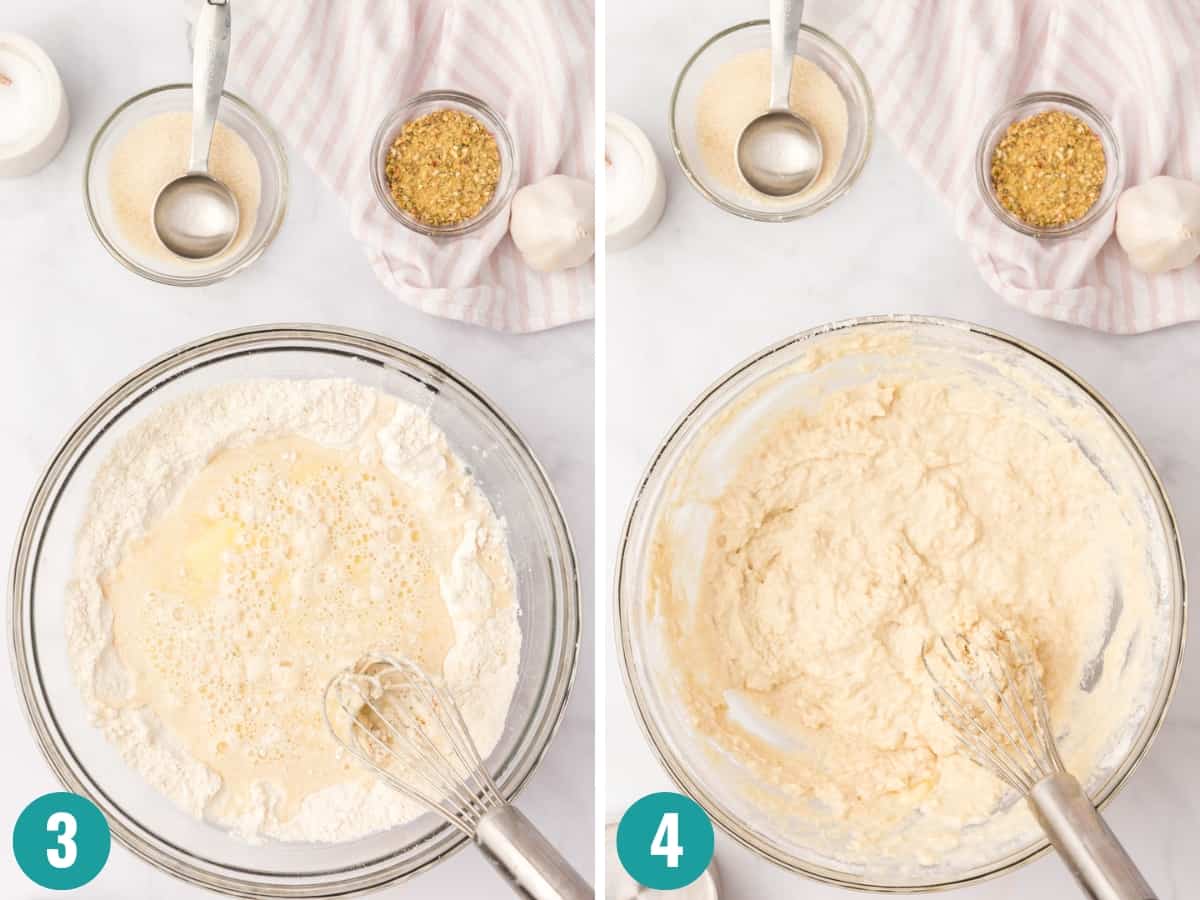
Step 3 | Make the Bread Dough
When the milk mixture is ready, pour the warm milk mixture onto the flour mixture.
**Please note: If the milk mixture is too hot, allow it to cool. If the milk is too hot, it can burn the yeast causing your dough to not rise.
Using a stand mixer or a whisk, stir to incorporate the dough. **It will be a bit lumpy and wet at this point.
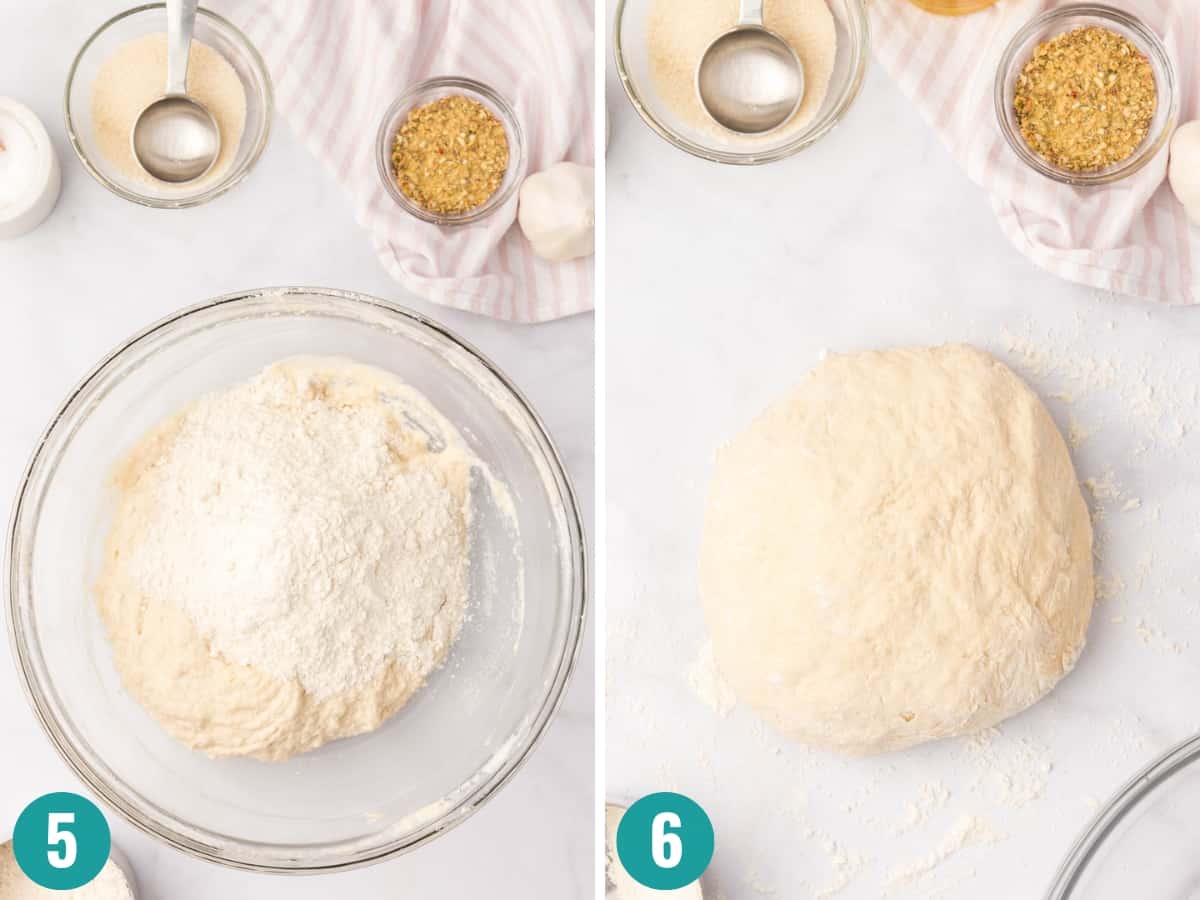
Then, slowly add in the remaining flour, one cup at a time.
Knead the dough until all of the flour has been incorporated and the dough is no longer sticking to the counter. **The dough will be smooth and springy.
Stand Mixer: If you are using a stand mixer, set it to low speed, and add about ¼ cup of flour at a time to the bowl of the stand mixer until you get to the full 3 ½ cups of flour, scraping down the sides as needed. Once the dough is incorporated, set it to medium speed and knead until the dough is soft and easily comes away from the sides of the bowl.
TIP: The dough will be smooth and springy. The amount of flour you add in bread making is always an approximation and you should go by feel. Add more or less flour until the dough reaches this consistency.
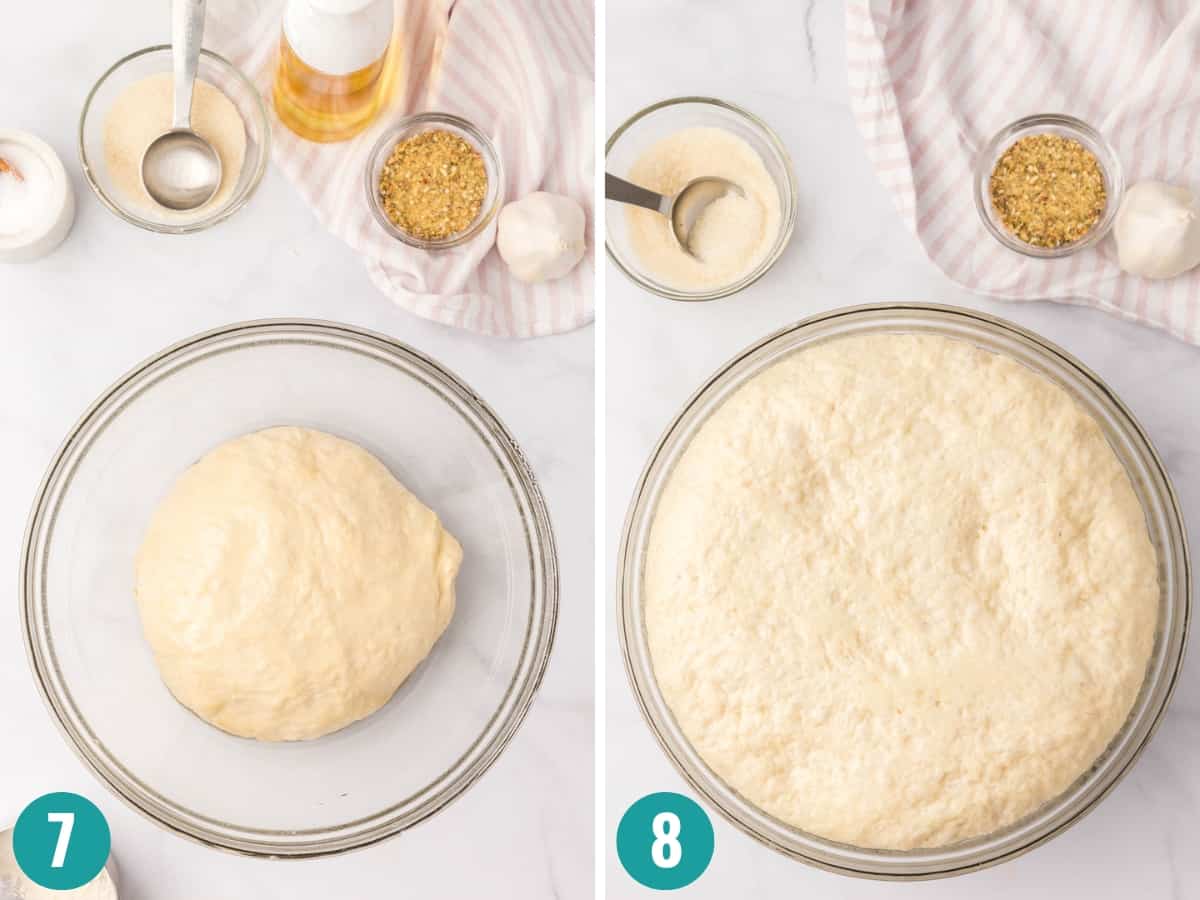
Step 4 | The Rising Process
Now, place the smooth ball of dough in a lightly greased bowl for the first rise. Cover with plastic wrap or a tea towel and allow it to rise on the counter for 2 hours or until the dough has doubled in size.
In the meantime, prepare a 9×13 casserole dish with parchment paper and some spray oil or cooking spray.
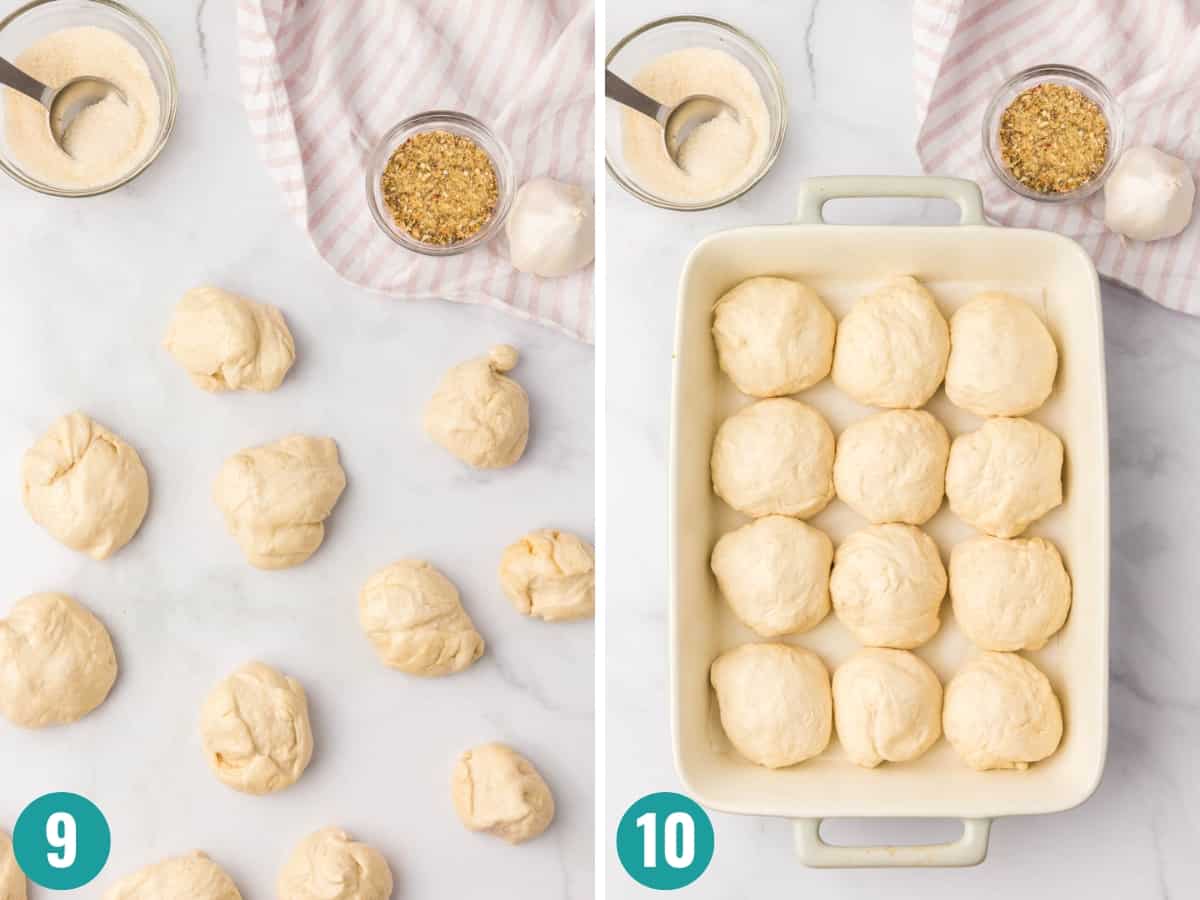
Step 5 | Form the Dough Balls
Once the dough has doubled in size, turn the dough out onto a lightly floured surface and divide the dough into 12 equal parts. Roll the dough into a ball. Place the rolled dough onto the lined casserole dish. Continue this process until all of the little balls of dough have been formed.
Then, cover the rolls for the second rise, allowing them to rise for 30 minutes.
Step 6 | Time to Bake
Ten minutes before the rise time is finished, preheat the oven to 375° F.
Then bake the dinner roll dough for 30 minutes or until they are golden brown.
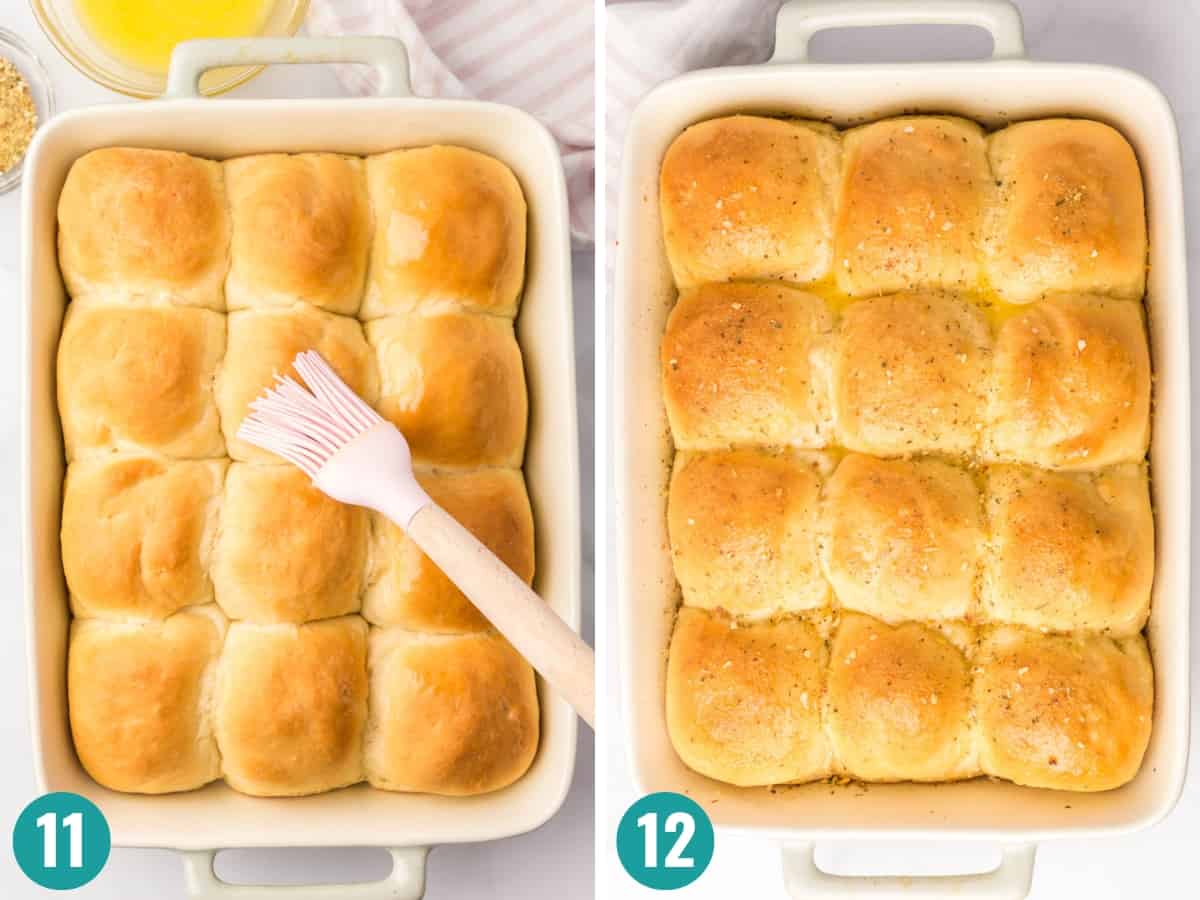
A few minutes before the rolls are done baking, in a small microwave-safe bowl, melt the remaining butter in the microwave.
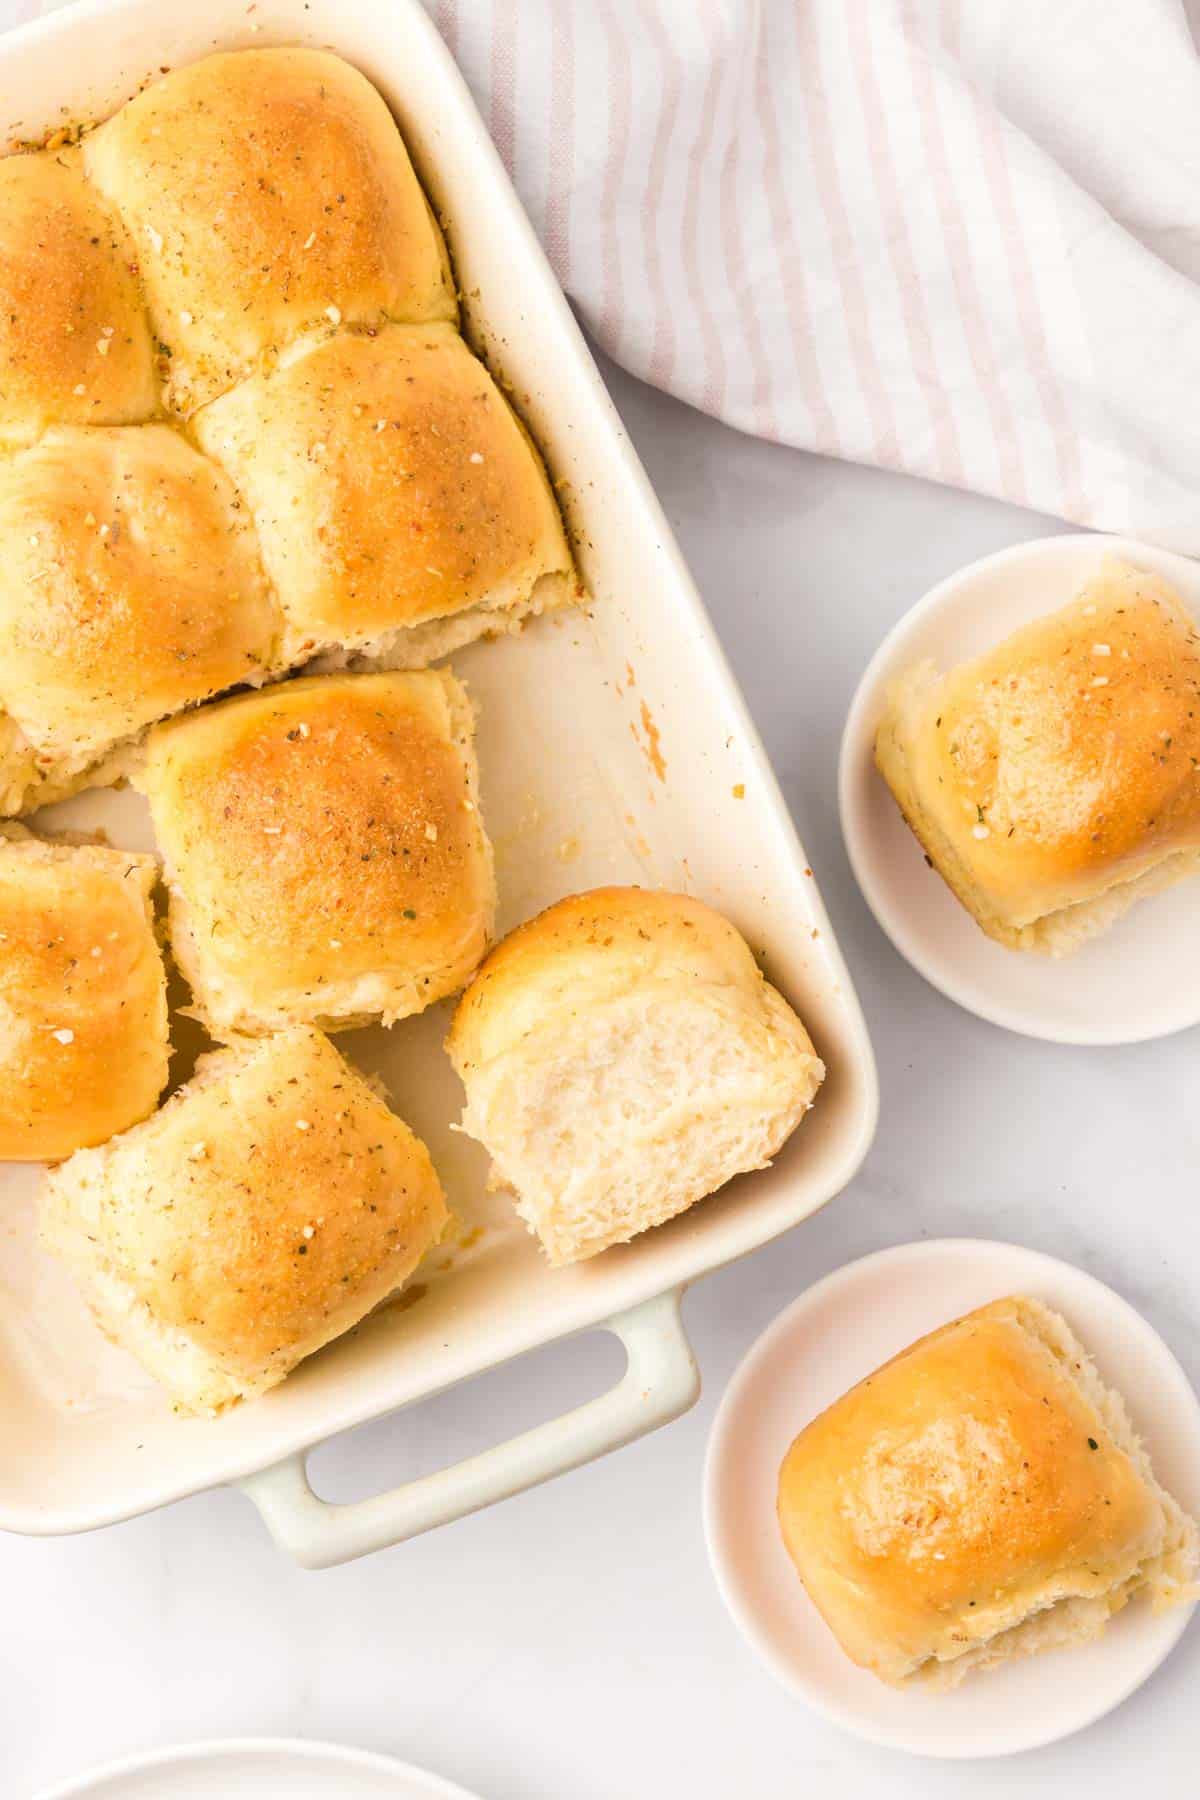
Once the rolls have finished baking, brush on some butter and sprinkle on some garlic and herb seasoning if you’d like. You can also stir the seasoning into the melted butter and brush it onto the baked rolls.
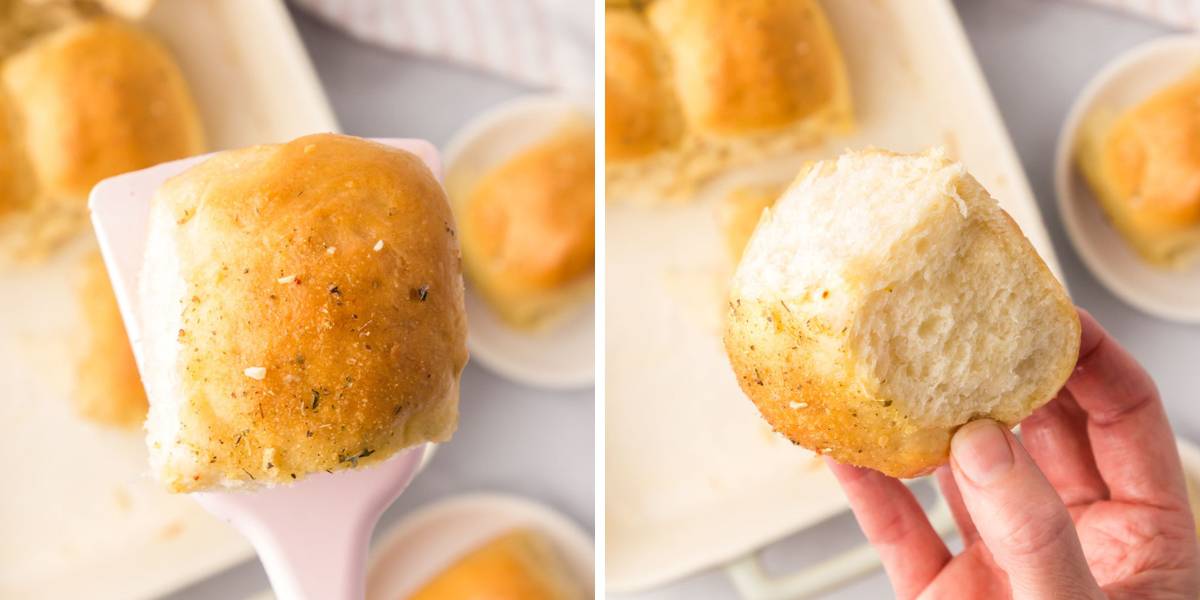
Serve the best homemade dinner rolls hot out of the oven and straight to your plate.
Tips For Making The Best Homemade Dinner Rolls
- Expired: Ensure your yeast is not expired, or it will not rise correctly and produce light and fluffy rolls.
- Measure Flour Correctly: Spoon and level your flour, do not scoop it out of the package or storage container. Measuring the flour is key to the right amount of flour in the dough. You want fluffy rolls, having too much flour will make them dense and heavy.
- Let it Rise: Find a warm place for the dough ball to rise for a perfect dough rise every time! When you crave the flavor of a savory, buttery yeast roll, the rise creates the roll’s texture. Don’t rush it!
- Water Temp: Ensure your water temperature is between 100 and 110F so the yeast bubbles and proofs. Use a cooking thermometer to get the temperature just right.
What to Serve With Homemade Dinner Rolls
The question is, what can you NOT serve with these gorgeously golden rolls? Here are a few suggestions:
- Make Ham Sandwiches with leftover Cola and Mustard Glazed Ham.
- Serve on the side of a Columbia 1905 Salad.
- Make for Sunday dinner alongside Prime Rib.
In fact, there are so many ways to treat yourself to an over-the-top meal simply any night of the week with all of the kitchen tools at our fingertips. I adore these Air Fryer Honey Garlic Chicken Wings and my Slow Cooker Buffalo Chicken for any night I need a dinner hit (it’s delicious served inside the rolls too). Finish the night off with a S’mores Cereal Bar, and your family will feel like you have spent all day in the kitchen—just for them!
Also, keep in mind you don’t have to use these just for dinner time. These make perfect sliders, or even use them for breakfast sandwiches.
You can also shape them in all kinds of ways- into knots (garlic knots = yum) or even into cloverleaf-shaped rolls. I have even used these for hot dog buns for my air fryer hot dogs.
Storage & Make Ahead Instructions
Make Ahead Instructions:
Overnight Refrigerator: Prepare the dough through the steps of shaping the rolls into balls. Cover the dough tightly and refrigerate overnight for about 15 to 16 hours. At least 3 hours before needing to serve, remove the rolls from the refrigerator and allow them to rise on the counter for 1 to 2 hours. You can also let the dough do the 1st rise in the refrigerator overnight. Remove from the refrigerator and allow the dough to rise for 2 hours and then proceed with the recipes.
Freezing Instructions: Freeze the dough balls before baking for the best result. Prepare shaped dough before the 2nd rise and place on a greased baking pan, cover tightly with freezer wrap, and freeze for up to 3 months. You can also freeze them on a flat surface and then store them in a freezer-safe zip bag.
On the day you want to serve them, arrange the dough in a greased baking dish, cover it tightly with plastic wrap, and let thaw for 4 to 5 hours. Bake as directed.
Storage:
Storage: Cover with foil or plastic wrap or place in an airtight container and store in the refrigerator for 3 days.
Freeze: If you need to freeze after baking, let the rolls cool completely, then freeze in an airtight container or freezer-safe bag for up to 3 months. Thaw in the refrigerator or at room temperature. You can reheat as desired. If reheating with a whole pan or multiple rolls, covered lightly with foil and place them in a 300°F oven for 10 minutes or until warmed through.
Homemade Dinner Rolls Recipe FAQs
Dinner rolls are a type of bread prepared in small round balls. They are usually served as a side with dinner and are thus called dinner rolls.
Yes, instant yeast can also be used instead of dry yeast if that’s what you have on hand. It’s a 1:1 ratio, so replace it with equal amounts.
If your dinner rolls do not turn out light and fluffy you could have added too much flour to the dough causing a dense dough. Be sure to measure your flour properly. See below how to spoon & level instructions.
The other reason could be that your yeast was not activated. Either the milk mixture was too hot and burned the yeast or your yeast has gone bad.
So that you are getting the most accurate amount of flour, use the spoon and level method to measure the flour. First, take a spoon and fluff the flour in the container or package. Then spoon the fluffed flour into a dry measuring scoop. Next, level it off with a knife or the flat end of the spoon. For complete accuracy, you can measure on a kitchen scale. 1 cup of flour is approximately 125 grams.
The recipe is not tested or designed to be gluten-free. Baking gluten-free recipes require a different chemistry. However, I have had some say that a gluten-free blend did work well. I have not tested it myself, though.
Yes, there are two separate rises to this yeast dough. The 1st rise before shaping the rolls (about 2 hours or until dough is doubled in size) and the 2nd rise after shaping the rolls (30 minutes). This will give you nice and fluffy dinner rolls.
Other Bread Recipes
Hungry for more easy, home-cooked, delicious recipes?
Sign up for my free recipe club to get family-friendly recipes in your inbox each week! Find me sharing daily meal-time inspiration on Pinterest, Facebook, and Instagram.
Homemade Dinner Rolls Easy
Click Stars To Rate
Ingredients
- 1 ½ cups milk
- ½ cup unsalted butter
- 1 tablespoon granulated sugar
- 3 ½ cups all-purpose flour
- 1 package dry active yeast
- 1 tablespoon garlic and herb seasoning - optional
Instructions
- In a saucepan, add the milk, ¼ cup of butter, and sugar. Heat over medium-low heat. Bring the milk mixture up to about 110 degrees F. (The butter will just start to melt and it will be warm to the touch but not hot.) Remove from heat.
- In a large mixing bowl or the bowl of your stand mixer, add 2 cups of All-Purpose Flour, yeast, and salt. Stir to combine. If using a stand mixer, connect the dough hook and stir to combine.
- When the milk mixture is ready, pour the milk mixture onto the flour mixture.**Please note: If the milk mixture is too hot, allow it to cool. If the milk is too hot it can burn the yeast causing your dough to not rise.Using a stand mixer or a whisk, stir to incorporate the dough. **It will be a bit lumpy and wet at this point.
- Slowly add in the remaining flour. By Hand: If you are making them by hand, using a spatula, slowly add in as much of the remaining flour as you can by adding in about ¼ cup at a time. Once you cannot incorporate any more of the flour using a spatula, transfer the dough to a lightly floured surface.Knead the dough until all of the flour has been incorporated and the dough is no longer sticking to the counter. Stand Mixer: If you are using a stand mixer set it to low speed, and add about ¼ cup of flour at a time to the bowl of the stand mixer until you get to the full 3 ½ cups of flour, scraping down the sides as needed. Once the dough is incorporated set it to medium speed and knead until the dough is soft and easily comes away from the sides of the bowl. TIP: The dough will be smooth and springy. The amount of flour you add in bread making is always an approximation and you should go by feel. Add more or less flour until the dough reaches this consistency.
- Transfer the dough to a lightly greased bowl. Cover with plastic wrap or a tea towel and allow to rise on the counter for 2 hours or until the dough has doubled in size.
- Prepare a 9×13 casserole dish with a piece of parchment paper and some spray oil.
- Once the dough has doubled in size, turn the dough out onto a lightly floured surface and divide the dough into 12 equal parts. Roll the dough into a ball. Place the rolled dough onto the lined casserole dish. Continue this process until all of the rolls have been formed.
- Cover the rolls and allow them to rise for 30 minutes.
- Ten minutes before the rise time is finished, preheat the oven to 375° F.Bake at 375°F for 30 minutes, or until they are golden brown.
- A few minutes before the rolls are done baking, in a small microwave-safe bowl, melt the remaining butter in the microwave (about 30 seconds).Once the rolls have finished baking, brush on some butter and sprinkle on some of the garlic and herb seasoning (optional). You can also stir the seasoning into the melted butter and brush it onto the baked rolls.
- Serve immediately.
Notes
Storage & Make Ahead Instructions
Make Ahead Instructions:
Overnight Refrigerator: Prepare the dough through the steps of shaping the rolls into balls. Cover the dough tightly and refrigerate overnight for about 15 to 16 hours. At least 3 hours before needing to serve, remove the rolls from the refrigerator and allow them to rise on the counter for 1 to 2 hours. You can also let the dough do the 1st rise in the refrigerator overnight. Remove from the refrigerator and allow the dough to rise for 2 hours and then proceed with the recipes. Freezing Instructions: Freeze the dough balls before baking for the best result. Prepare shaped dough before the 2nd rise and place on a greased baking pan, cover tightly with freezer wrap, and freeze for up to 3 months. You can also freeze them on a flat surface and then store them in a freezer-safe zip bag. On the day you want to serve them arrange the dough in a greased baking dish, cover it tightly with plastic wrap, and let thaw for 4 to 5 hours. Bake as directed.Storage:
Storage: Cover with foil or plastic wrap or place in an airtight container and store in the refrigerator for 3 days. Freeze: If you need to freeze after baking, let the rolls cool completely, then freeze in an airtight container or freezer-safe bag for up to 3 months. Thaw in the refrigerator or at room temperature. You can reheat as desired. If reheated a whole pan or multiple rolls, covered lightly with foil and place them in a 300°F oven for 10 minutes or until warmed through.Want to Save this Recipe?
By submitting this form, you consent to receive emails from Soulfully Made.
These are SO yummy!! I tried them out before Easter. They will be making their for Easter, they were that good. Thank you so much!
Thank you for making them! So glad you enjoyed them! Have a blessed Easter!
These dinner rolls were a game-changer at our family gathering – everyone was clamoring for seconds! They’re definitely going to be making regular appearances on the table.
Thank you, Sophie! I am glad to hear they are making their way into your meal plans in the future!
These rolls were so light and fluffy! Worth all the effort.
Thank you, Katherine! I agree! A little effort goes a long way in homemade bread!
Soft, fluffy and so easy to make! My go-to rolls recipe. 10/10!
Thank you, Min! Love that these are a staple in your kitchen!
Holy. Guac. A. Mole. Those look so good! I’m a big fan of dinner rolls. I will fill up on those before I even get to th remain course. I can’t wait to make these!
I am right there with you! I could make a meal of just these rolls!