


This post may contain affiliate links. Please read our disclosure policy.
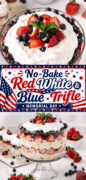
If you need a dessert that looks like it took serious effort but absolutely did not, this is the one. The moment you set that trifle bowl full of those red, white, and blue layers on the table, people stop and stare. It is festive, it is beautiful, and it is exactly what you want to bring to a 4th of July cookout (or Memorial Day) when you want to show up with something that really wows. And then they taste it, and that is when it really wins them over. Creamy, a little tangy, fresh berries, soft cake. Every bite just tastes like summer.
And here is the thing. There is no baking. No stress. Just a little layering, a little patience while it chills, and you are done. I will walk you right through it.
Why This Red, White, and Blue Trifle Is a Summer Favorite
This is the kind of dessert that earns a permanent spot in your summer rotation. Here is why.
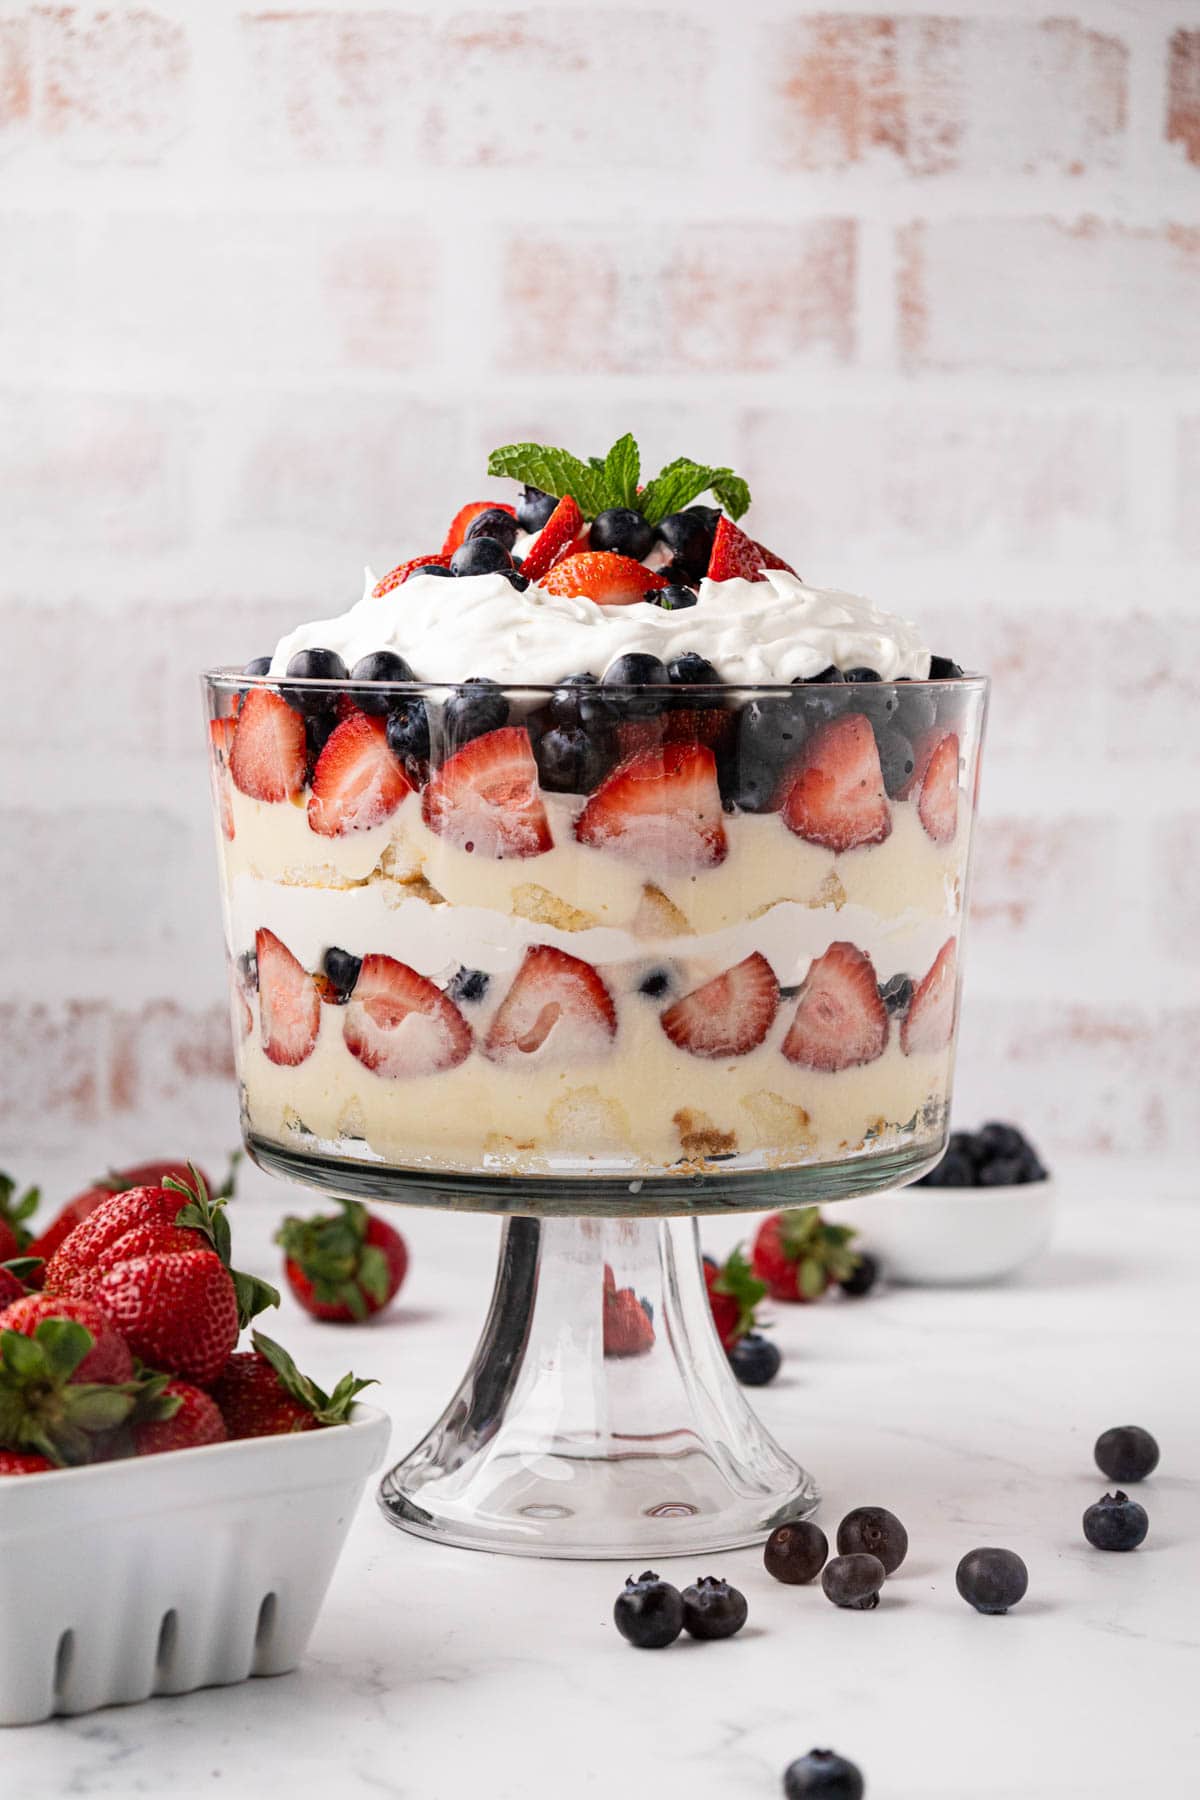
- It looks like you worked way harder than you did. Those gorgeous red, white, and blue layers do all the talking. Take a couple of extra minutes to press the berries along the outside edge of the bowl, and the presentation completely sells itself.
- The pudding layer is the secret everyone wants to know. Using two different pudding mixes with a fold of sour cream gives you a filling that tastes way more like something homemade than anything that came out of a box. People always ask what is in it.
- Zero baking required. Store-bought angel food cake is perfectly at home in this recipe. It is light, it is soft, and it soaks up that creamy pudding layer in the best possible way.
- It is a true make-ahead dessert. Put it together the night before or earlier in the day, and just pull it from the fridge when you are ready. One less thing to think about on a busy holiday.
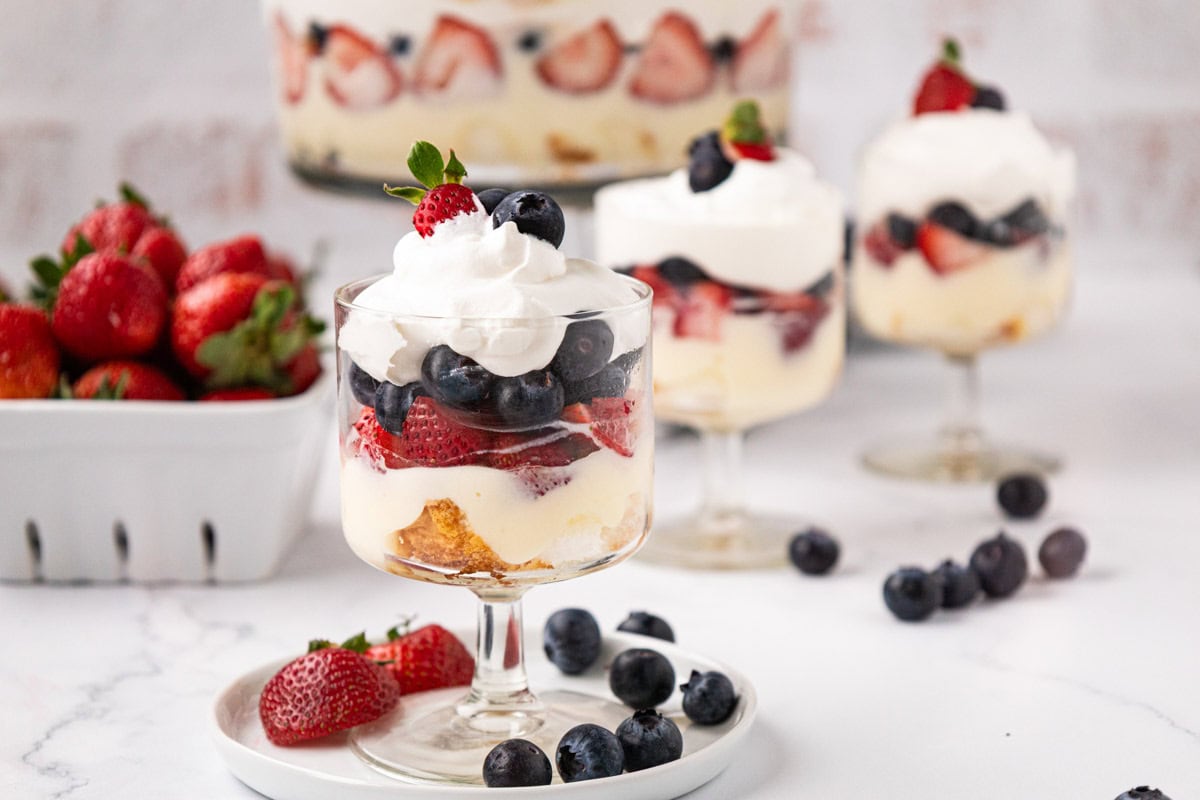
- It feeds a crowd without any extra effort. Twelve generous servings from one bowl. That is always a win.
Ingredient Needed To Make A Simple Trifle Recipe
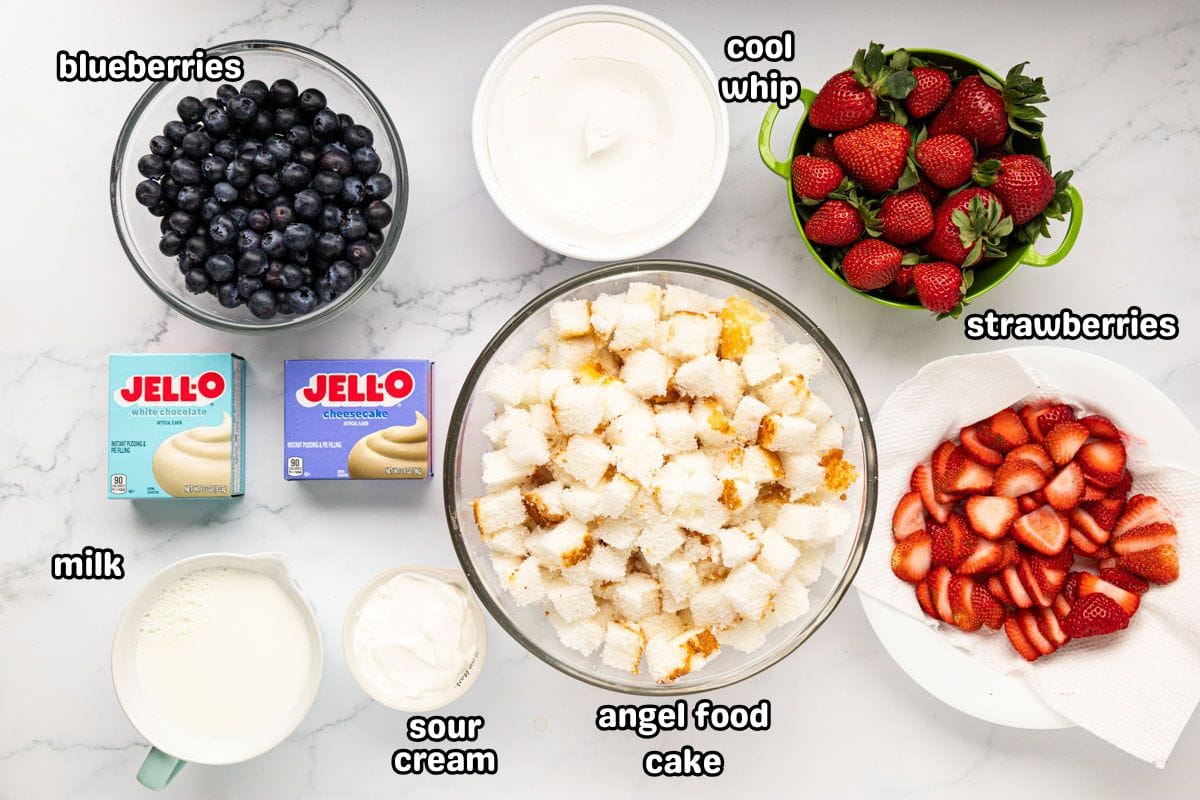
- Instant white chocolate pudding mix (3.4 oz): Half of the filling combination that makes this trifle so good. It brings a light, creamy sweetness that plays perfectly off the cheesecake mix.
- Instant cheesecake pudding mix (3.4 oz): The other half of the magic. On their own, either mix is fine. Together, they give the filling depth that neither one delivers on its own.
- Whole milk: Cold whole milk gives you the best texture. If you decide to leave out the sour cream, bump this up to 4 cups.
- Sour cream: This is the ingredient nobody sees coming. Stir it smooth before folding it in. It adds just enough tang to make the filling taste as if you made it from scratch. Do not skip it if you can help it.
- Store-bought angel food cake: Light, airy, and made for a trifle. It softens just enough as it sits without turning mushy. Cut it into 1-inch cubes before you start layering.
- Whipped topping, thawed: You need two full containers here, one for the middle layer and one for the top. Make sure both are fully thawed so they spread easily.
- Fresh strawberries: Wash, hull, slice, and pat them completely dry before you start. That step matters more than it seems, and I will explain why in a minute.
- Fresh blueberries: Wash and dry them well. They tuck in beautifully between the strawberry layers and pop against that white cream in the most gorgeous way.
How to Make a Red, White, and Blue Trifle Step by Step
✱ Below shows step-by-step photos and instructions. For the complete recipe, along with ingredient amounts, scroll down to the recipe card.
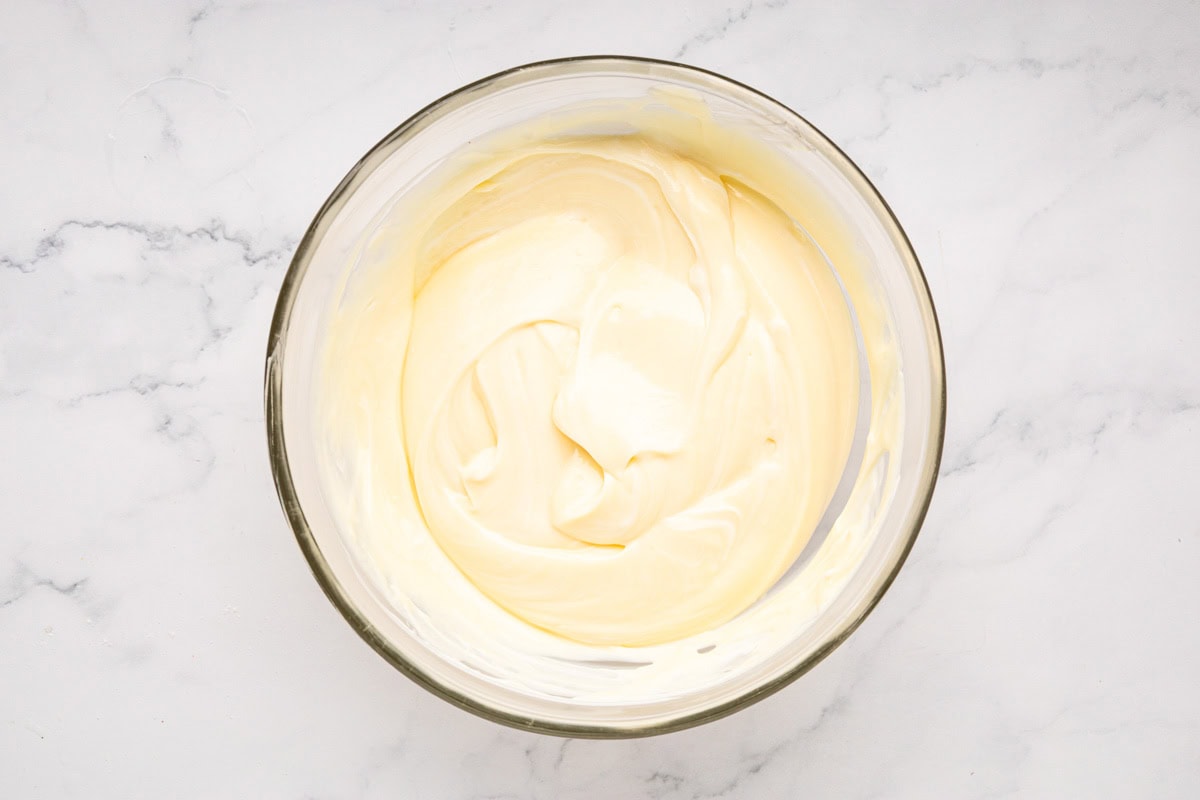
Step 1 | Make the Pudding Layer

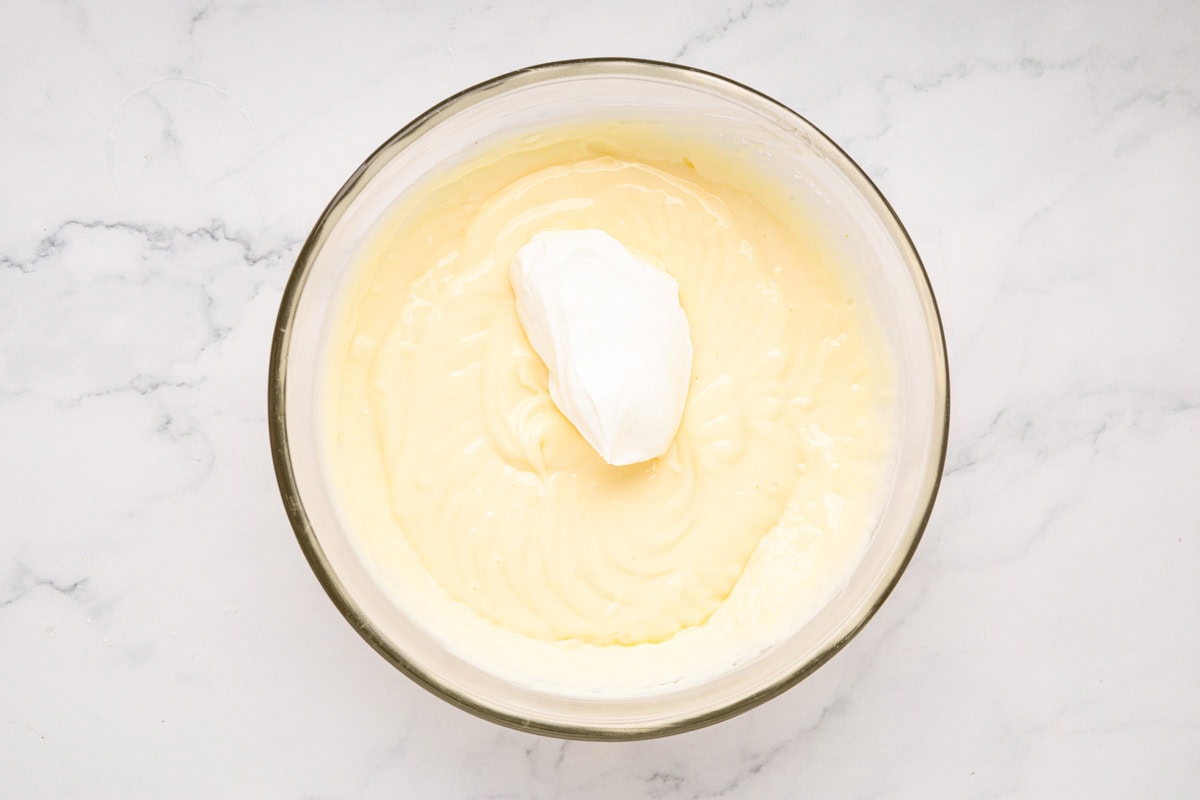
In a stand mixer with the paddle attachment, or in a large bowl with a hand mixer, combine both pudding mixes and the cold whole milk. Mix until it starts to thicken.
Fold in the sour cream until smooth. Pop it in the fridge and let it chill until fully set before you start building your layers.
Step 2 | Prep Your Berries and Cake
While the pudding chills, get everything else ready to go. Slice your strawberries and pat them dry with paper towels. Wash and dry your blueberries. Cut the angel food cake into 1-inch cubes. Having it all prepped before you start layering makes the whole process quick and easy.
Step 3 | Start the First Layer

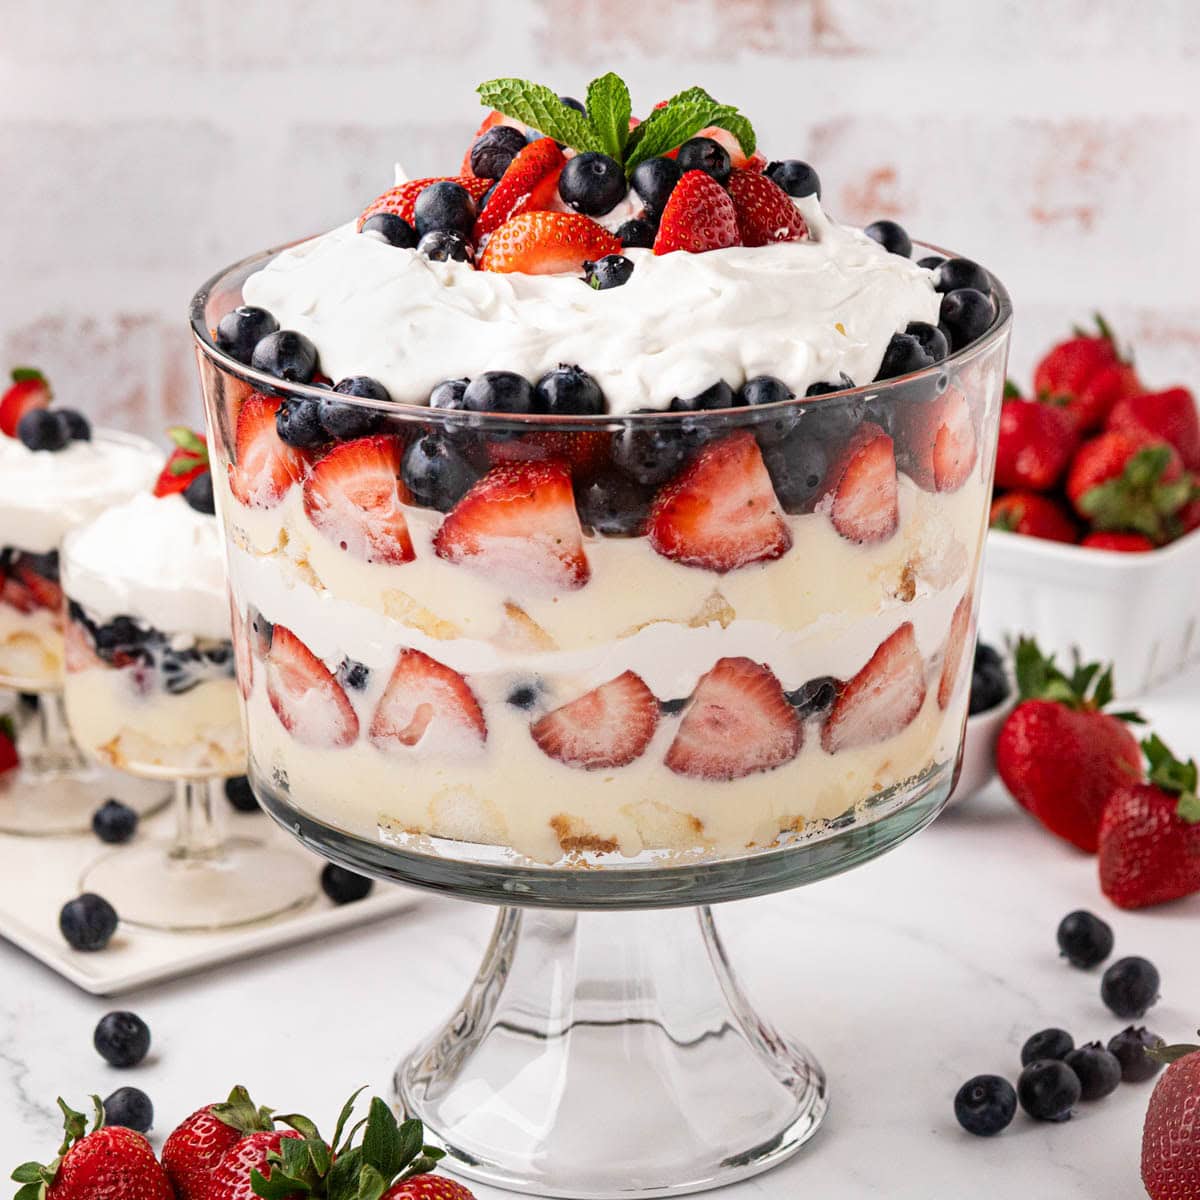
Add a single layer of angel food cake cubes to the bottom of your trifle bowl.
Then, spoon half of the chilled pudding mixture evenly over the top.
Step 4 | Add the Berries
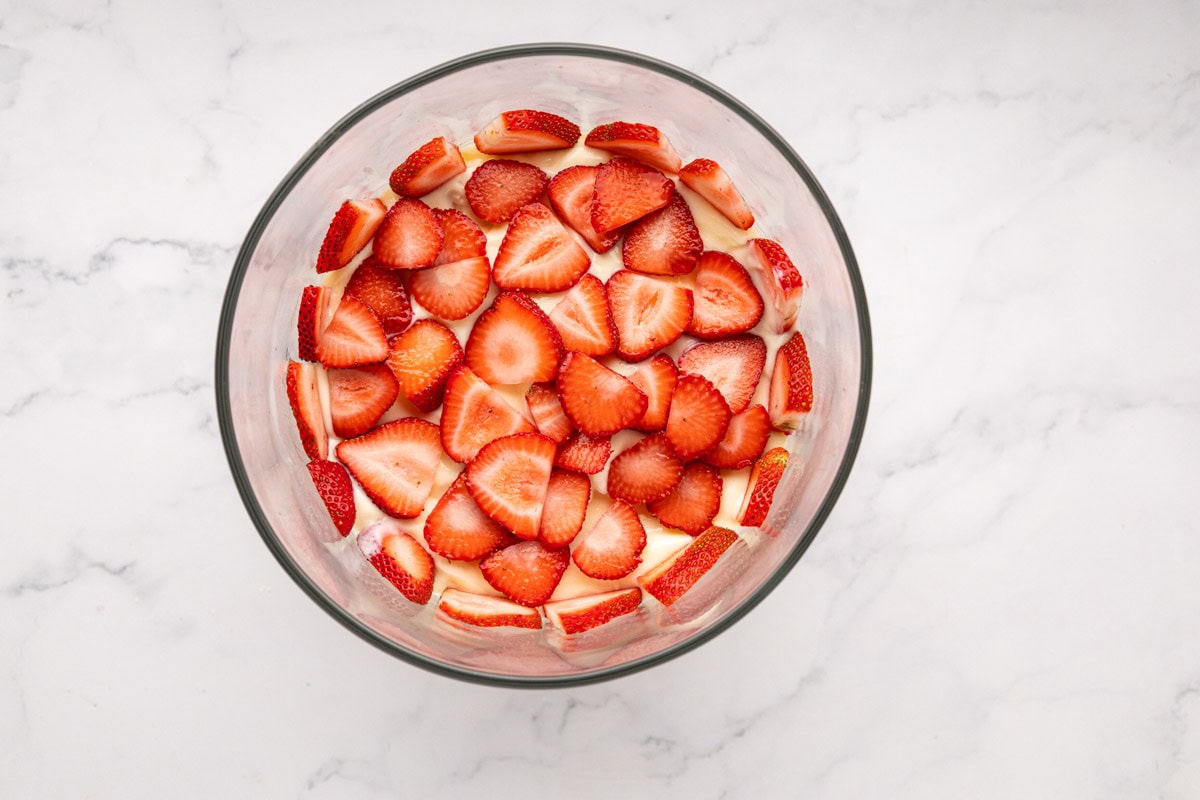
Here is where the magic happens. Press sliced strawberries along the outside edge of the bowl first, cut side facing out. Take your time with this part because it is what gives the trifle that showstopping look from the outside.
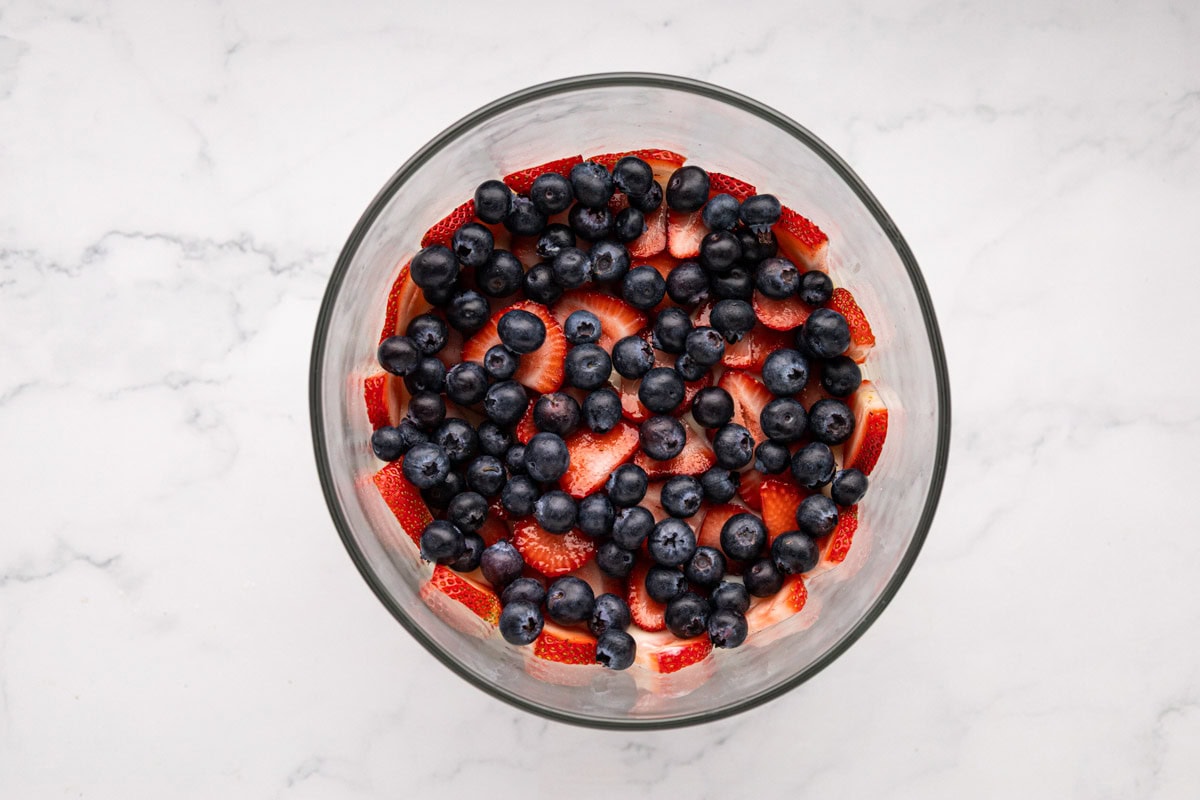
Then add a single layer of strawberries over the pudding, followed by a layer of blueberries.
Step 5 | Add the First Whipped Topping Layer
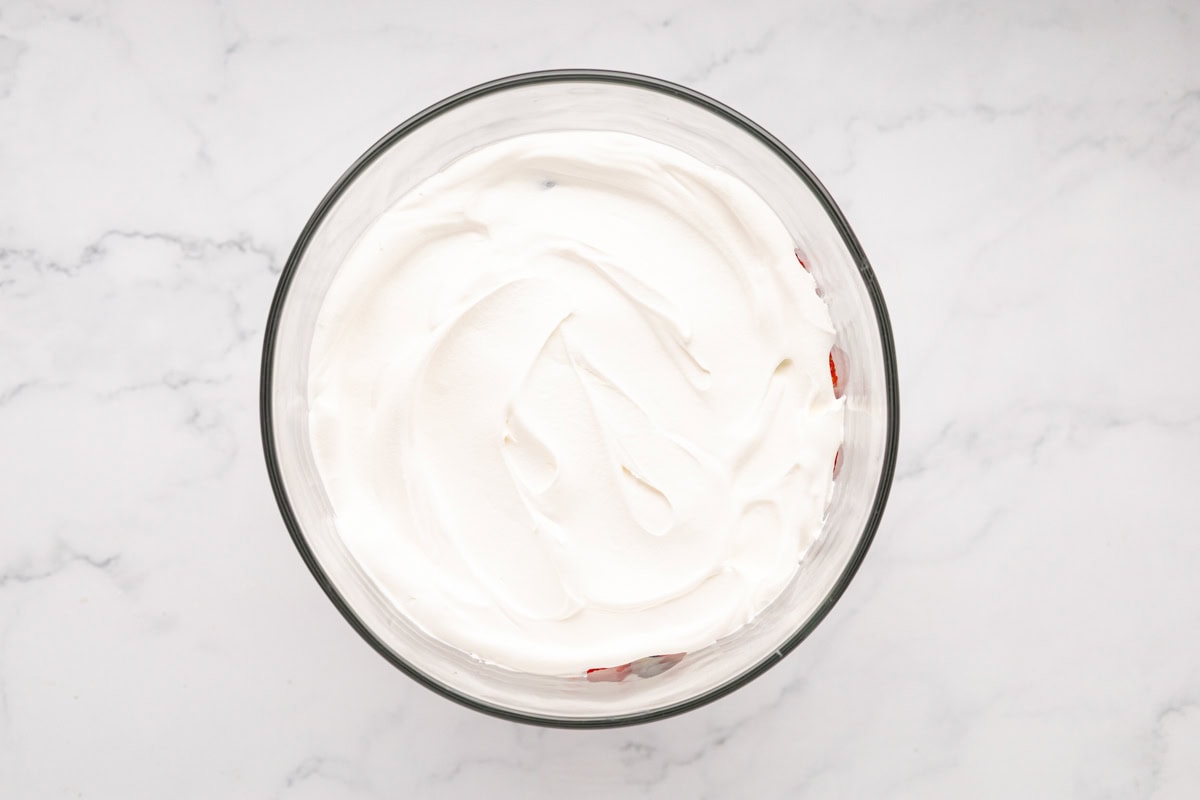
Spread one full container of whipped topping evenly over the berries, all the way to the edges, so the layers stay nice and defined.
Step 6 | Repeat the Layers
Add another layer of cake cubes, spoon over the remaining pudding, then add your strawberries and blueberries just like before.
Spread the second container of whipped topping across the top.
Step 7 | Finish and Decorate
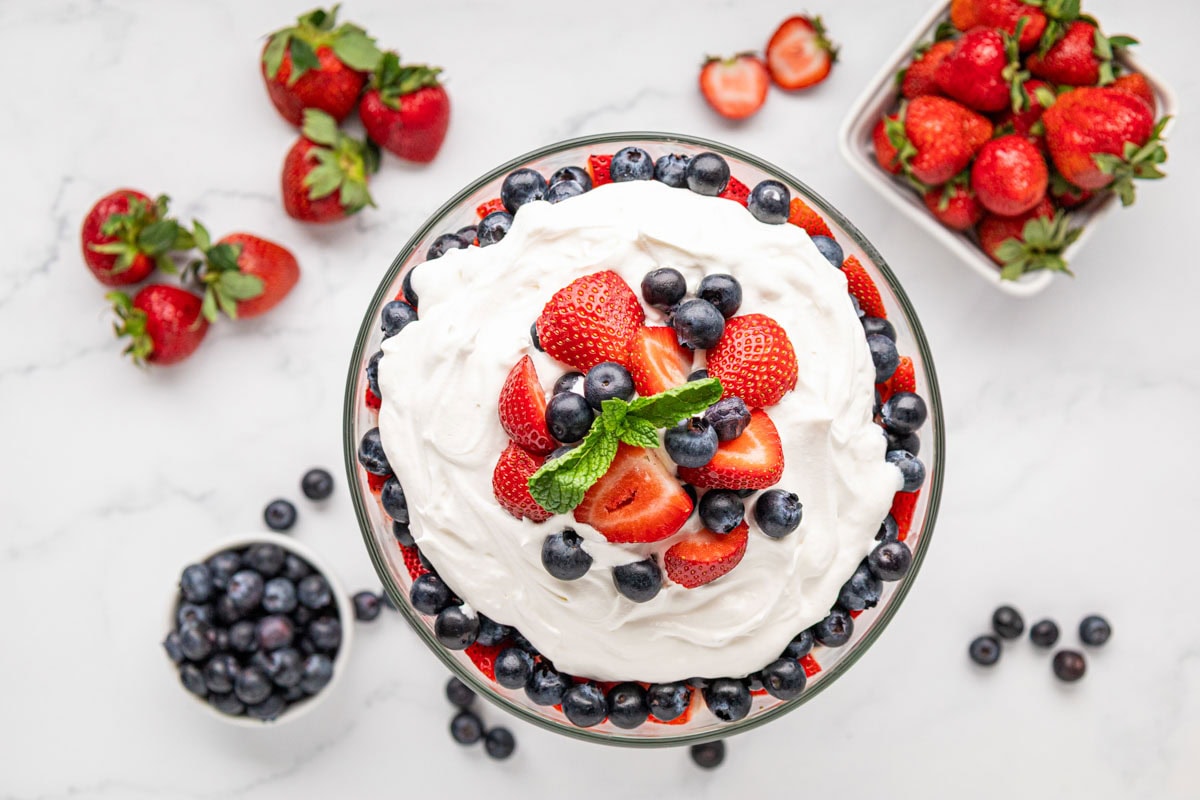
Decorate with your remaining berries to make it as festive on top as it looks on the sides. This is the fun part!
Step 8 | Chill Before Serving
Refrigerate for at least one hour before serving. This gives everything time to settle in together and the flavors to really come through.
Variations and Substitutions
- Swap the pudding mixes. You can use all white chocolate pudding, all cheesecake pudding, or swap both for vanilla. All three work well here.
- Skip the sour cream. Just increase the cold milk to 4 cups when mixing the pudding, and you are good to go.
- Angel food cake swap. A store-bought pound cake or vanilla sponge cake works beautifully here if angel food is not available. It is a little denser but still delicious.
- Mix up the berries. Fresh raspberries work wonderfully in place of or along with the strawberries and keep that red, white, and blue color theme going strong.
- Make it a lemon trifle. Swap the white chocolate pudding for lemon pudding, and you have a bright, citrusy version that is just as good for summer gatherings.
- Individual servings. Layer everything into mason jars or individual glasses for a fun single-serve presentation that is great for parties where everyone grabs their own.
- Dairy-free. Use your favorite dairy-free milk in place of whole milk for the pudding layer and swap in a dairy-free whipped topping. Just check your pudding mix labels, as some varieties contain milk ingredients.
Gluten Free Patriotic Trifle:
Good news. This red, white, and blue trifle is easy to make gluten-free with just a few simple swaps. Here is what to watch for. The cheesecake pudding mix contains barley and is not gluten-free, so swap it for vanilla pudding instead. The white chocolate pudding mix does not contain gluten-containing ingredients and is generally considered safe, but always check your specific package label, as formulations can change. You will also need a GF angel food cake, either homemade or store-bought, if you can find one in your area. Check the labels on your whipped topping as well, since ingredients can vary by brand. For anyone cooking for someone with celiac disease, check every single label before you start and look for certified gluten-free on each product.
Tips for the Best Berry Trifle
- Dry your berries really well. Wet berries release moisture as the trifle sits and can make the whole thing watery over time. A thorough pat down with paper towels before you start layering is the step that keeps everything looking and tasting its best.
- Chill the pudding before assembling. If it is too loose when you go to layer it, things will slide, and the layers will not be as clean and defined. Give it the time it needs to fully set in the fridge.
- Take your time with the edges. Pressing those strawberry slices along the outside of the bowl is what makes this trifle look as impressive as it does. It only takes a couple of extra minutes, and it is absolutely worth it.
- Use a clear trifle bowl. The whole beauty of this dessert is seeing those layers from the outside. A clear glass bowl around 3.25 quarts is exactly what you want. Any large clear glass bowl will do if you do not have a trifle bowl.
- Do not rush the chill time. That hour in the fridge after assembling is what pulls everything together. The cake softens just slightly, the layers settle, and every bite comes out just right.
What to Serve With Angel Food Cake Trifle
This trifle is the perfect ending to a 4th of July cookout spread. Serve it alongside my Classic Macaroni Salad and Frito Corn Salad for a table that has something for everyone. If you want to keep the patriotic theme going from start to finish, my American Flag Layered Dip makes a fun and festive appetizer to kick things off.
Round it all out with my Grilled Summer Vegetable Pasta Salad or BBQ Chicken Sliders, and you have yourself a full summer celebration menu.
Storage & Make Ahead Instructions
Storage: Cover tightly and keep refrigerated. This trifle is best within 2 to 3 days. The layers will soften as it sits, but it still tastes wonderful the next day.
Make Ahead: This is one of the best make-ahead desserts you can bring to a gathering. Put it together the night before or earlier in the day and refrigerate until you are ready to serve. If you want the berry topping to look its freshest, hold off on decorating the top until closer to serving time.
Recipe FAQs
You can, but store-bought whipped topping holds its shape much better over time, especially for a make-ahead dessert. Homemade whipped cream can soften and deflate as it sits, which affects both the look and the texture.
A trifle bowl is ideal because those clear sides are what make the layers visible, but any large deep clear bowl will work. Just make sure it holds at least 3 quarts.
Fresh berries are really the way to go here. Frozen berries release a lot of liquid as they thaw and can make the trifle watery and muddy-looking. Save the frozen ones for smoothies.
Absolutely. Layer everything into individual glasses or mason jars for a fun single-serve presentation that is great for parties where everyone grabs their own.
Up to 24 hours ahead works beautifully. Any longer and the cake can get too soft and the berries may start releasing more moisture into the layers.
Hungry for more easy, home-cooked, delicious recipes?
Sign up for my free recipe club to get family-friendly recipes in your inbox each week! Find me sharing daily meal-time inspiration on Pinterest, Facebook, and Instagram.
Red White and Blue Trifle
Click Stars To Rate
Equipment
Ingredients
- 3.4 ounces instant white chocolate pudding mix
- 3.4 ounces instant cheesecake pudding mix
- 3 ½ cups cold whole milk
- ½ cup of sour cream - stirred until smooth and fluffy
- 14 ounces store-bought angel food cake - cut into 1-inch cubes
- 16 ounces thawed whipped topping - two 8-ounce containers
- 32 ounces fresh strawberries - washed, stems removed, sliced and pat dry
- 18 ounces fresh blueberries - washed and dried
Instructions
- In a stand mixer with paddle attachment or in a large bowl with an electric hand mixer, add both pudding mixes along with the whole milk and mix until well combined and a pudding like texture. Fold in the sour cream. Chill until set.
- In a trifle bowl (about 3.25 quarts), create a single layer of 1-inch cake cubes at the bottom.
- Spoon half of the pudding mixture over the cake layer.
- Layer sliced strawberries along the outside edges of the bowl for decoration, then add a single layer of sliced strawberries over the pudding.
- Next add a layer of blueberries over the strawberries.
- Spread 1 of the containers of thawed whipped topping over the berries.
- Repeat layers: cake cubes, remaining pudding, strawberries and blueberries.
- Finish with the remaining container of thawed whipped topping on top.
- Decorate the top with remaining sliced strawberries and blueberries.
- Refrigerate the trifle for at least 1 hour before serving. Keep refrigerated until ready to serve.
Want to Save this Recipe?
By submitting this form, you consent to receive emails from Soulfully Made.