

This post may contain affiliate links. Please read our disclosure policy.
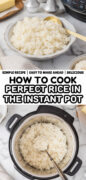
If you have ever pulled the lid off your Instant Pot and found sticky, gummy rice, this recipe is for you. When I first got my Instant Pot, rice was one of the first things I made, and once I nailed the rinse-and-release method, I never went back. I honestly cannot believe it took me this long to get it on the blog because it has been one of the most-used recipes in my kitchen for years.
Whether you are putting together a busy weeknight dinner or prepping sides ahead of time, having a hands-off method for rice is a real game-changer. You press a button, walk away, and come back to a pot of perfectly cooked rice every single time.
Why This Instant Pot White Rice Works Every Time
This Instant Pot white rice is the kind of simple, reliable recipe that earns a permanent spot in your routine.
- Truly hands-off. Once the lid goes on, you are done. No hovering over the stove, no checking for boiling over, no babysitting. The Instant Pot does all the work while you focus on everything else.
- Perfectly fluffy every time. The combination of rinsing the rice and using a full 15-minute natural release is what makes this recipe work. You get light, separated grains instead of sticky, gummy rice.
- Ready in about 20 minutes. With only 2 minutes of prep and a short cook time, this comes together fast enough for even the busiest nights.
- Easy to scale. Need more rice? Just double or triple the recipe using the same 1:1 ratio and the same cook time. It is that straightforward.
- Naturally gluten-free. This recipe is gluten-free as written, making it a safe and easy side for nearly any meal or dietary need.
Ingredients
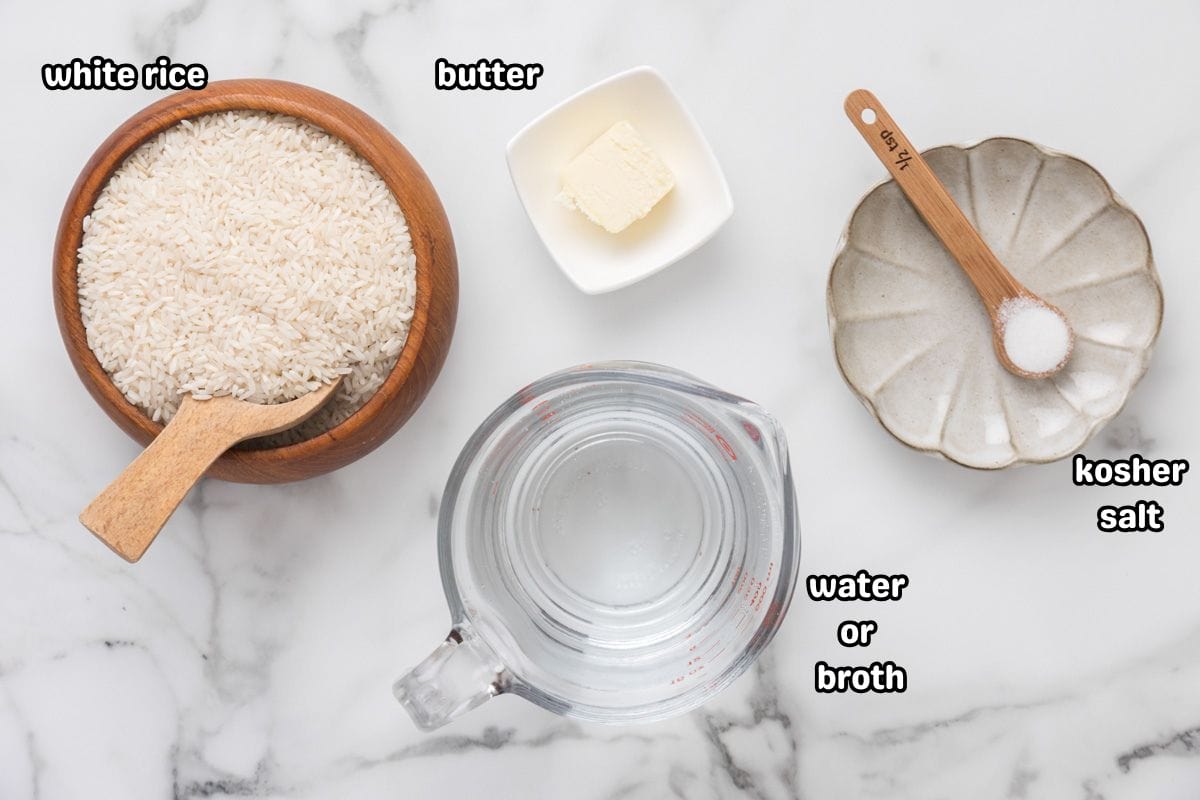
- White Rice: Long-grain white rice works best here for light, fluffy results. Rinse it well in a fine-mesh strainer until the water runs clear, then add it to the pot. That step removes surface starch and is one of the two things that keep your rice from turning sticky.
- Water: The 1:1 instant pot white rice ratio is key when cooking rice under pressure. Unlike stovetop cooking, there is no evaporation in the Instant Pot, so you do not need extra water. You can also swap water for chicken, beef, or vegetable broth to add a layer of flavor without any extra effort.
- Kosher Salt: Do not skip this. Salt seasons the rice from the inside out as it cooks and makes a noticeable difference in the final flavor. Adjust to your taste.
- Butter: This is optional, but I always add it. A tablespoon of butter adds a subtle, savory flavor and helps with texture. You can swap it for olive oil or any fat you prefer, or leave it out entirely for a dairy-free version.
How to Make White Rice in the Instant Pot
✱ Below shows step-by-step photos and instructions. For the complete recipe, along with ingredient amounts, scroll down to the recipe card.
Step 1 | Rinse the Rice
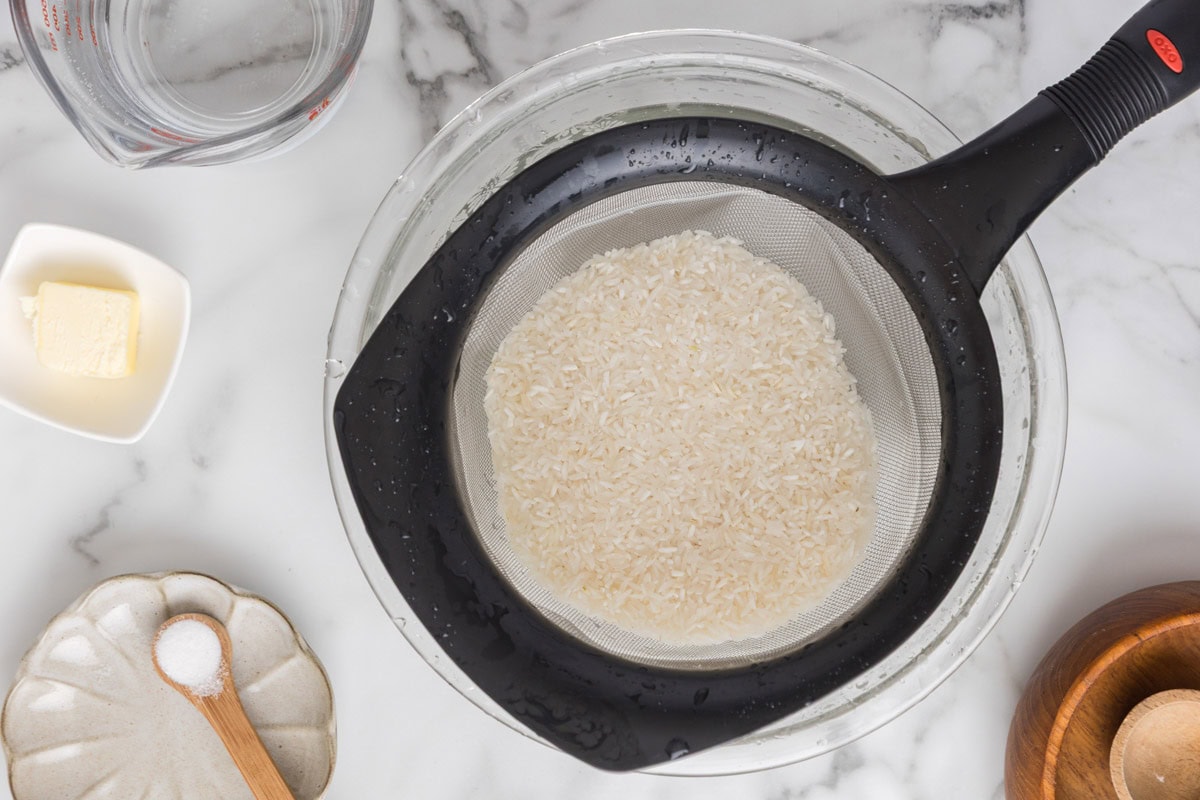
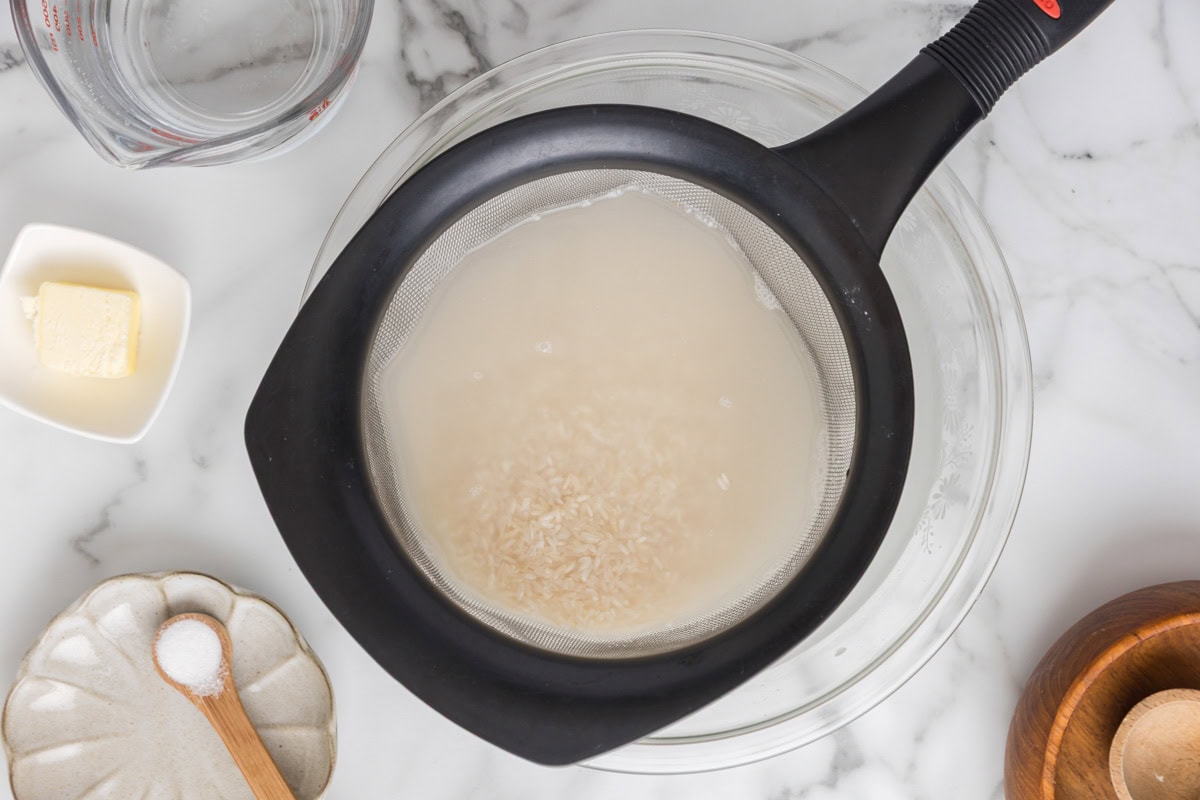
Place your rice in a fine mesh strainer and rinse under cold running water until the water runs clear.
This removes excess starch, dust, and debris. It only takes a minute or two and makes a real difference in the final texture.
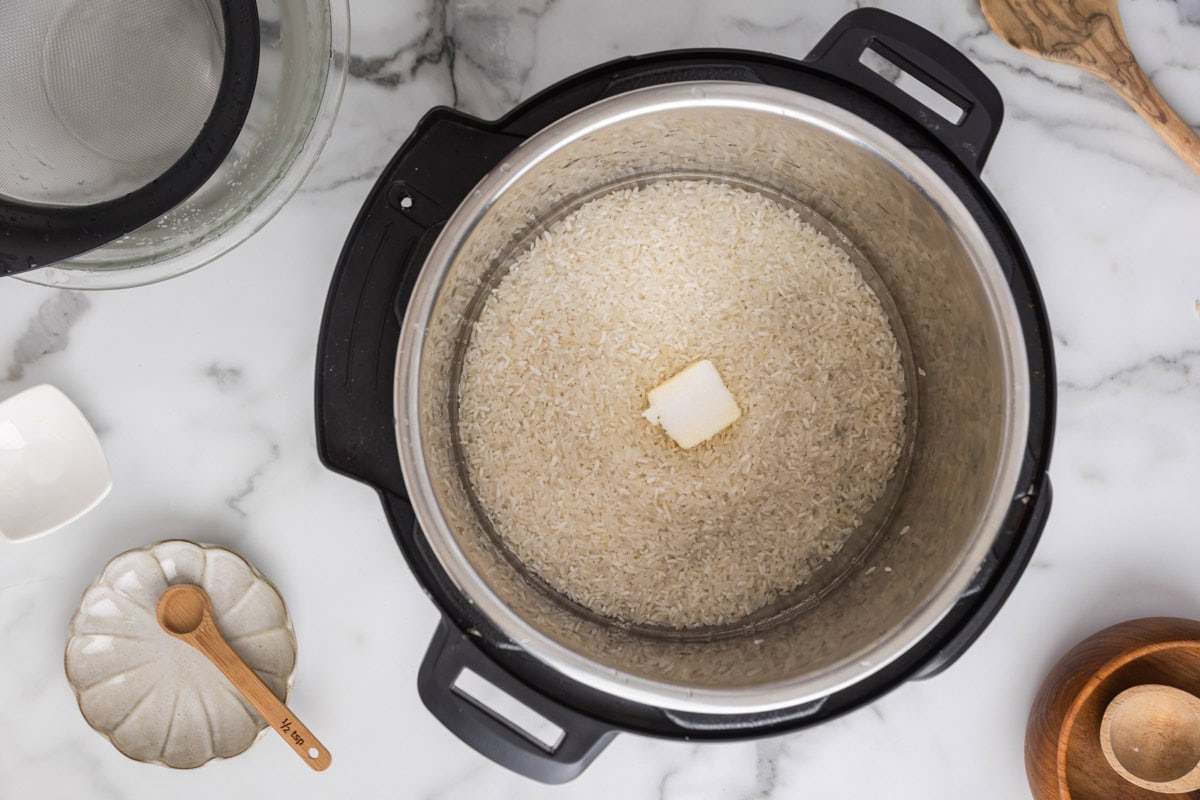
Step 2 | Add Everything to the Pot
Add the rinsed rice, water, salt, and butter to the Instant Pot insert. Give it a stir to make sure everything is evenly combined, and all the rice is covered by the water.
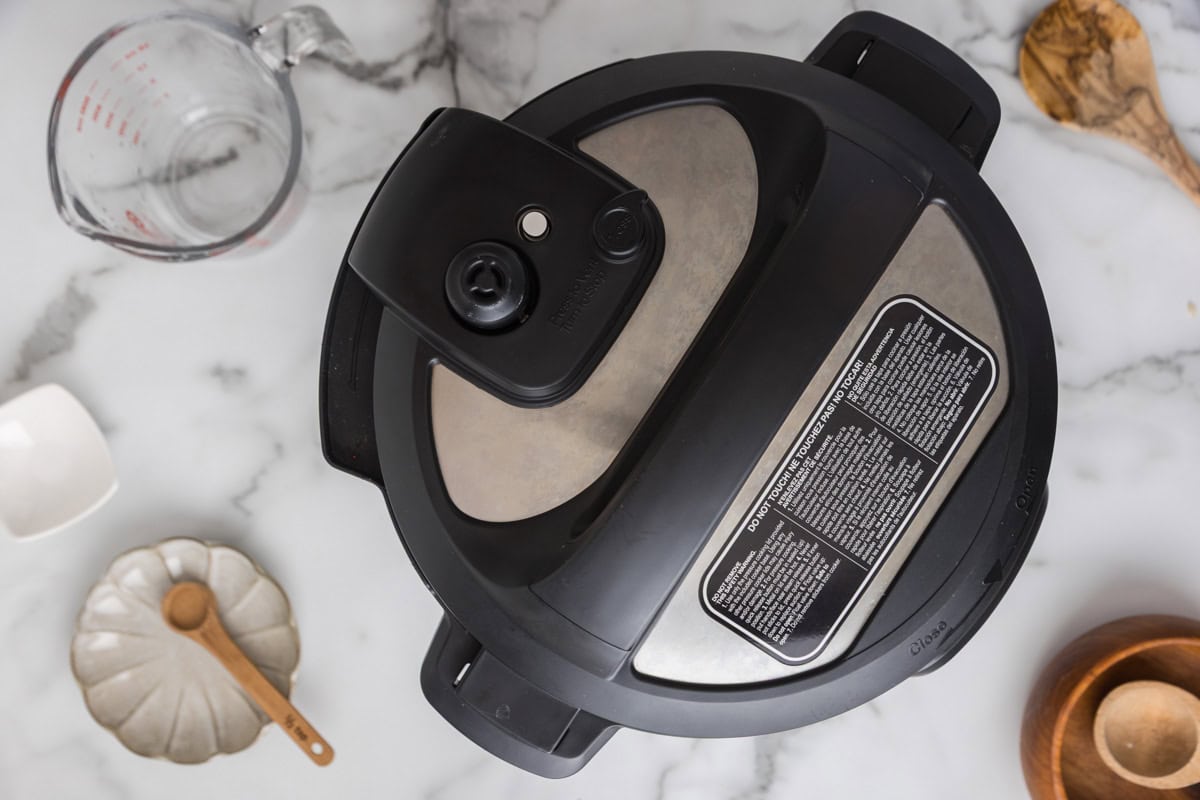
Step 3 | Seal and Set
Place the lid on the Instant Pot and set the valve to the sealing position. Set to high pressure and cook for 4 minutes. The pot will take a few minutes to come to pressure before the cook time begins.
Step 4 | Natural Release
When the cook time is up, let the Instant Pot naturally release pressure for a full 15 minutes. Do not open the valve early.
This resting time is what allows the steam to finish doing its job and the grains to fully relax. After 15 minutes, carefully do a quick release to vent any remaining steam before opening the lid.
To Make Instant Pot Jasmine Rice
uses the same 1:1 ratio but does best with a slightly shorter cook time. Cook on high pressure for 3 minutes, followed by the same 15-minute natural release. The grains are a little more delicate than long-grain white rice, so the extra minute can make them mushy.
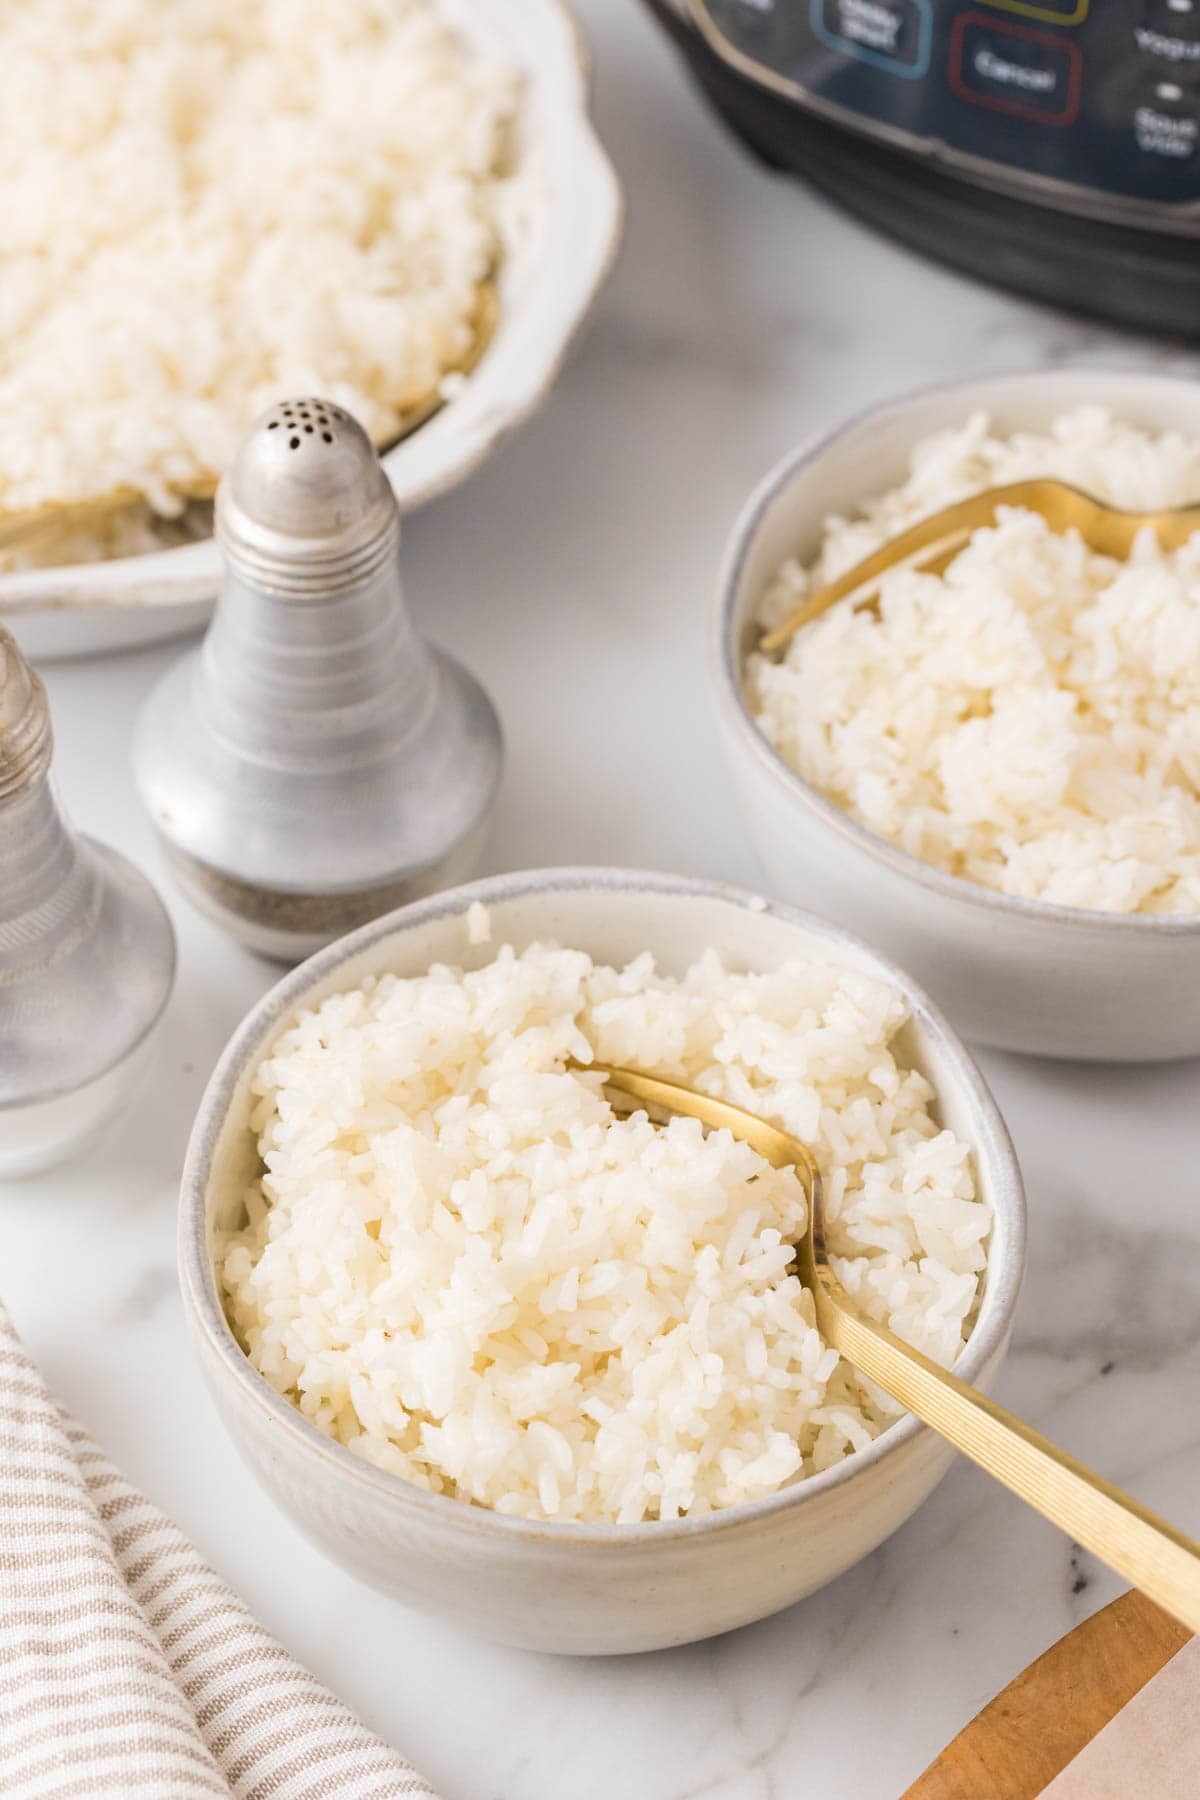
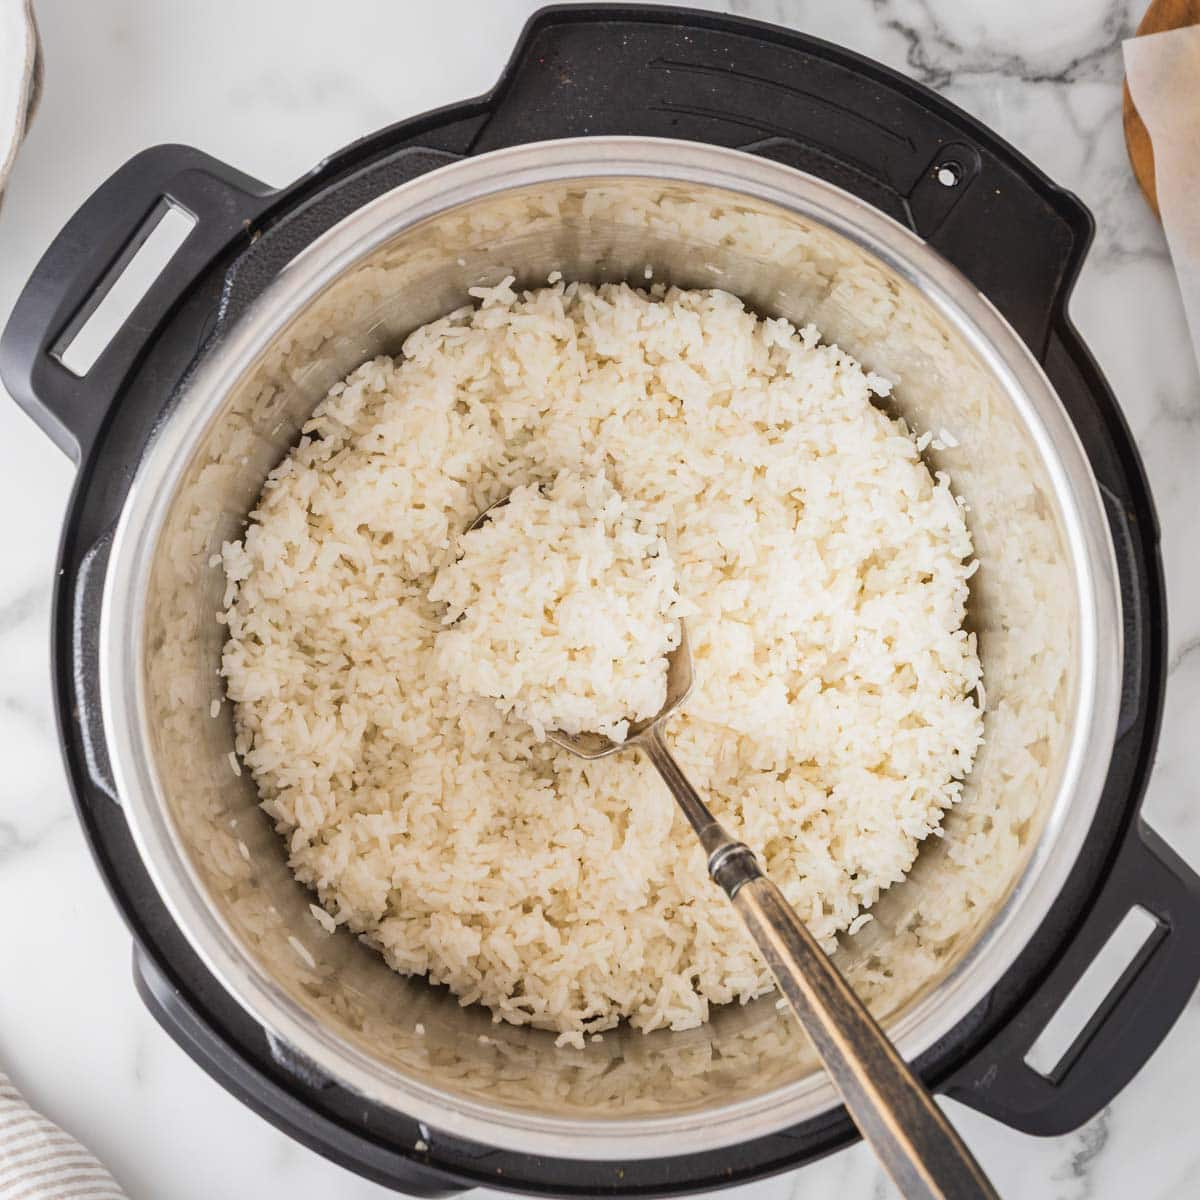
Step 5 | Fluff and Serve
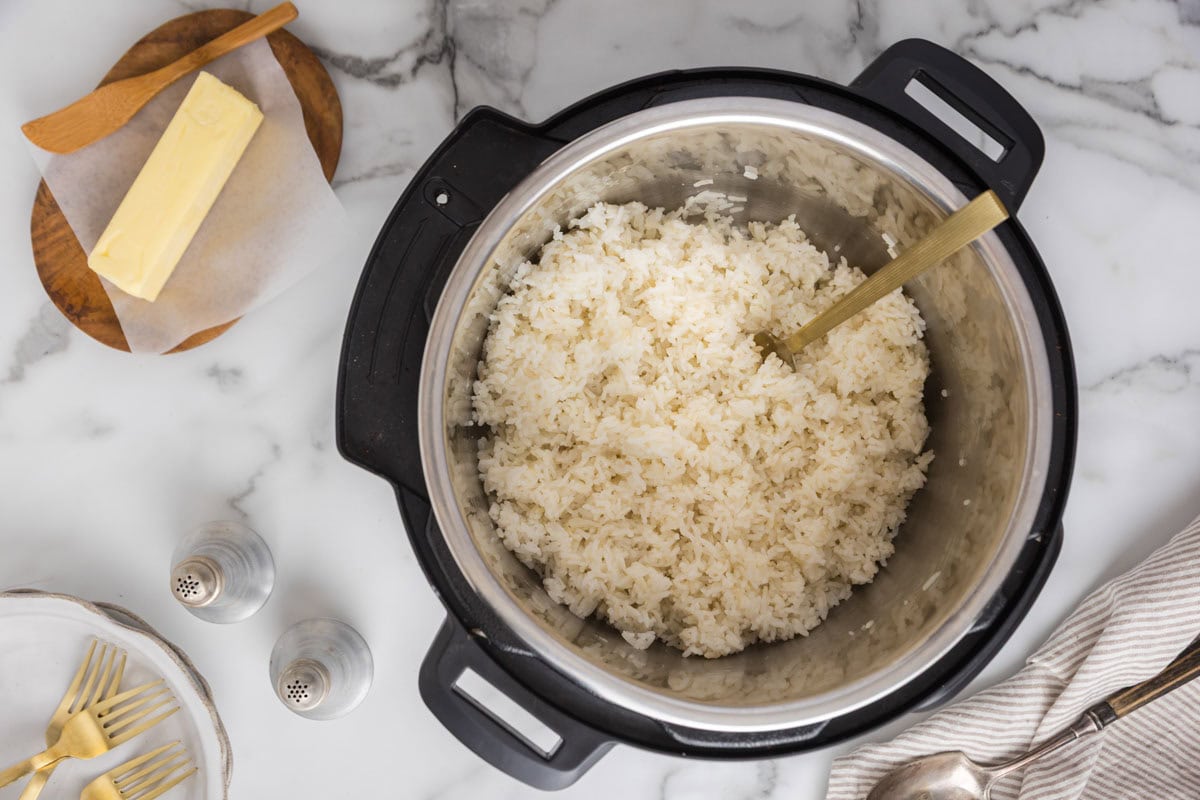
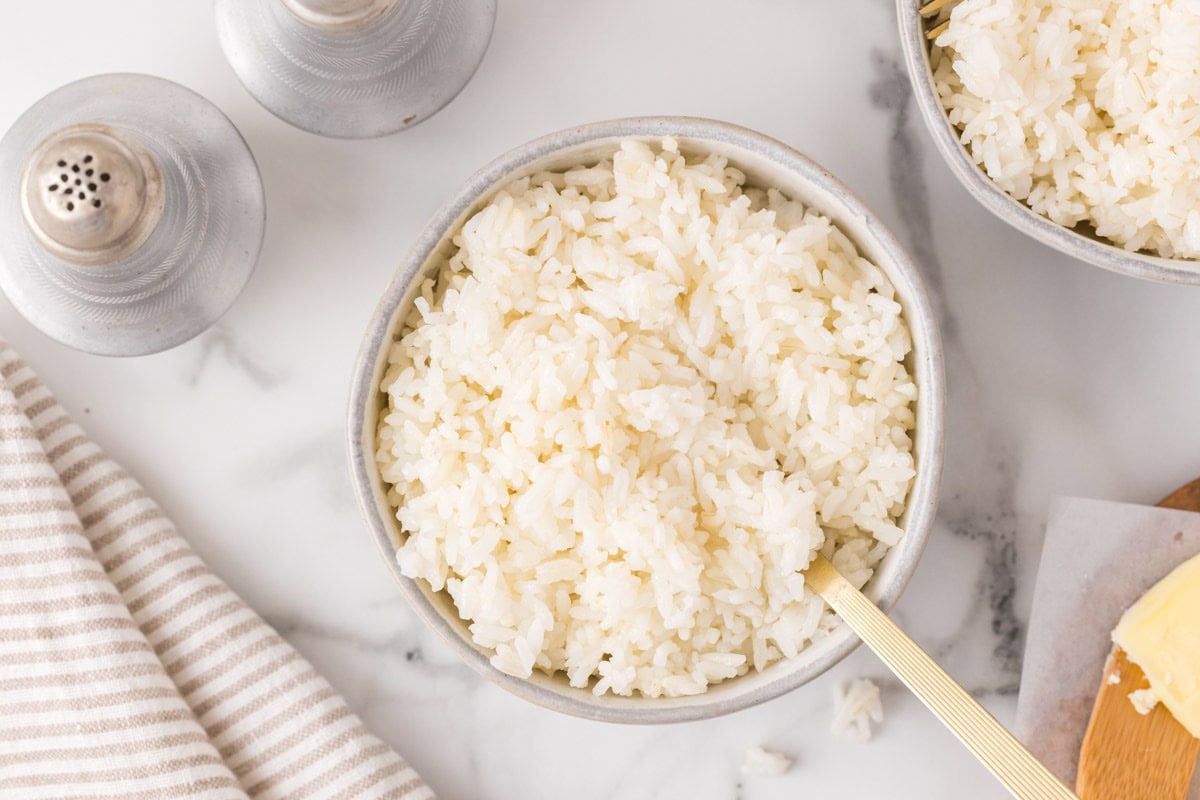
Open the lid and fluff the rice with a fork. It should be light, fluffy, and perfectly cooked. Serve immediately or keep warm until ready to eat.
Ways to Switch Up Your Instant Pot Rice
- Use broth instead of water. Chicken, beef, or vegetable broth adds a nice depth of flavor with zero extra work. Use the same 1:1 ratio.
- Swap the butter. Olive oil or any neutral oil works in place of butter. For a dairy-free version, just use oil or leave the fat out altogether.
- Make it a meal base. This rice is a great starting point for fried rice, stuffed peppers, rice casseroles, or soups. It reheats well and holds up in most dishes.
Gluten-free Instant Pot Rice: This recipe is naturally gluten-free as written. If you are using broth or stock in place of water, check the label carefully to make sure it is certified gluten-free. Anyone with celiac disease should check all labels carefully, including those for any seasoning blends or add-ins.
Flavor Variations
- Garlic butter rice — Add a teaspoon of minced garlic to the pot with your butter before sealing. Simple and so good.
- Lemon herb rice — Stir in fresh lemon zest and a handful of chopped parsley after fluffing. Light and fresh alongside fish or chicken.
- Coconut rice — Replace half the water with canned coconut milk for a slightly sweet, creamy rice that pairs beautifully with Asian or Caribbean dishes.
Savory Add-Ins
- Bay leaf — Toss one in before sealing and remove after cooking. Adds a subtle depth you will not put your finger on but will notice.
- Onion powder or garlic powder — A pinch of either goes a long way when you want a little more flavor without extra prep.
- Bouillon cube — Drop one in with your water if you are out of broth. Easy flavor boost.
Toppings After Cooking
- Fresh parsley or cilantro
- Sliced green onions
- Sesame seeds
- A drizzle of soy sauce or sesame oil for an Asian-inspired bowl
Expert Tips for Cooking Rice in Instant Pot
- Rinse the rice. This is not an optional step. Rinsing removes the surface starch that causes gummy, sticky rice. Run it under cold water until the water coming out of the strainer is clear.
- Use a clean inner liner. Make sure your Instant Pot insert is clean before you start. Any residue left in the pot can cause the rice to stick to the bottom.
- Do not skip the full natural release. Most recipes call for 10 minutes, but 15 minutes is the sweet spot. Those extra few minutes allow the steam to finish cooking the rice gently and let the grains fully relax. Open it too soon, and you risk rice that is still compacting.
- Add water right before sealing. Once water hits the rice, it starts absorbing. Stir and seal the pot right away so your ratio stays accurate.
- Start with at least 2 cups of rice. In a 6-quart Instant Pot, cooking just 1 cup of rice can lead to scorching on the bottom. Two cups is the safe starting point for the best results.
What to Serve With Fluffy Instant Pot White Rice
White rice is one of those sides that makes everything better, and nothing proves that more than a plate of Southern Fried Pork Chops served right on top of a bed of fluffy rice. It soaks up every bit of the pan drippings and turns a simple meal into something really satisfying. Add a pot of Southern Black Eyed Peas on the side, and you have got one of the most classic Southern plates around.
Rice is also the perfect base for something saucy. Spoon the gravy from Crock Pot Country Steak right over the top and let it soak in, or serve it alongside Southern Style Green Beans and Southern Collard Greens for a full Southern comfort plate that never gets old.
However you build the plate, this rice holds its own as the foundation of the meal. It is simple, it is reliable, and it goes with just about everything.
How to Store and Reheat White Rice
Storage: Cool rice completely and store in an airtight container in the refrigerator for up to 3 days. To reheat, add a splash of water and warm on the stovetop or in the microwave until heated through.
Make Ahead: This rice is great for meal prep. Cook a full batch at the start of the week and use it throughout the week in meals, bowls, or as a quick side.
Freezing: Freeze cooked rice in an airtight container or zip-top bag for up to 3 months. Portioning into 1-cup servings before freezing makes it even easier to grab what you need. Reheat from frozen in the microwave with a little water, or thaw overnight in the fridge and reheat as usual.
Recipe FAQs
Absolutely. Keep the 1:1 ratio and the same cook time. Just make sure you do not exceed your Instant Pot’s capacity. A 6-quart pot can hold up to 5 cups of uncooked rice, which yields about 15 cups cooked.
Leftover rice is great for fried rice, stuffed peppers, rice casseroles, soups, and rice pudding. It reheats well and is one of the most useful things to have already made in your refrigerator.
Two things usually cause this: skipping the rinse step or opening the valve before the full natural release is done. Both allow excess starch and steam to affect the final texture. Follow both steps, and you should get fluffy rice every time.
You can, but the rice button uses low pressure and a different time, and results can vary. The manual high-pressure method in this recipe gives you more consistent, reliable results.
Yes. Rinsing removes the surface starch that makes rice sticky and gummy. It takes less than two minutes and makes a noticeable difference in texture.
Put That Rice to Work: More Recipes to Try
- Instant Pot Black Eyed Peas — Smoky, savory, and made for a bowl of fluffy white rice.
- Instant Pot Southern Tomatoes and Rice — Your next favorite Southern side, ready in 15 minutes.
- Easy Instant Pot Mexican Rice — A bold, flavorful twist once you have the basics down.
- Chicken and Rice Casserole — Creamy, cheesy, and the definition of comfort food.
- Cheesy Unstuffed Pepper Skillet — All the flavors of stuffed peppers in one easy 30-minute skillet.
Hungry for more easy, home-cooked, delicious recipes?
Sign up for my free recipe club to get family-friendly recipes in your inbox each week! Find me sharing daily meal-time inspiration on Pinterest, Facebook, and Instagram.
Instant Pot White Rice Recipe
Click Stars To Rate
Equipment
Ingredients
- 2 cups rice
- 2 cups water - or broth
- 1 teaspoon kosher salt - or to taste
- 1 tablespoon butter - optional
Instructions
- Place rice in a fine mesh strainer and rinse thoroughly to remove any starch, dust, or debris.
- Add rice, water, salt, and butter to the Instant Pot Insert and stir to combine evenly, and make sure all the rice is covered by water.
- Add the lid and set the Instant Pot to the seal position.
- Set the Instant Pot to high pressure and cook for 4 minutes. The instant pot will take a few minutes to come to pressure.
- Once the cooking is complete, allow for a 15-minute natural release.
- Carefully do a quick release to vent any remaining steam before opening the lid.
- Fluff the rice with a fork and its is ready to serve.
Notes
- In place of water, you can also use beef, chicken, or vegetable broth or stock to give your rice some extra flavor.
- Adjust salt according to taste.
- Butter can be replaced with 1 Tbsp of olive oil or fat of choice.
- Top the rice with parsley, green onions, sesame seeds, or your favorite topping.
Want to Save this Recipe?
By submitting this form, you consent to receive emails from Soulfully Made.