


This post may contain affiliate links. Please read our disclosure policy.
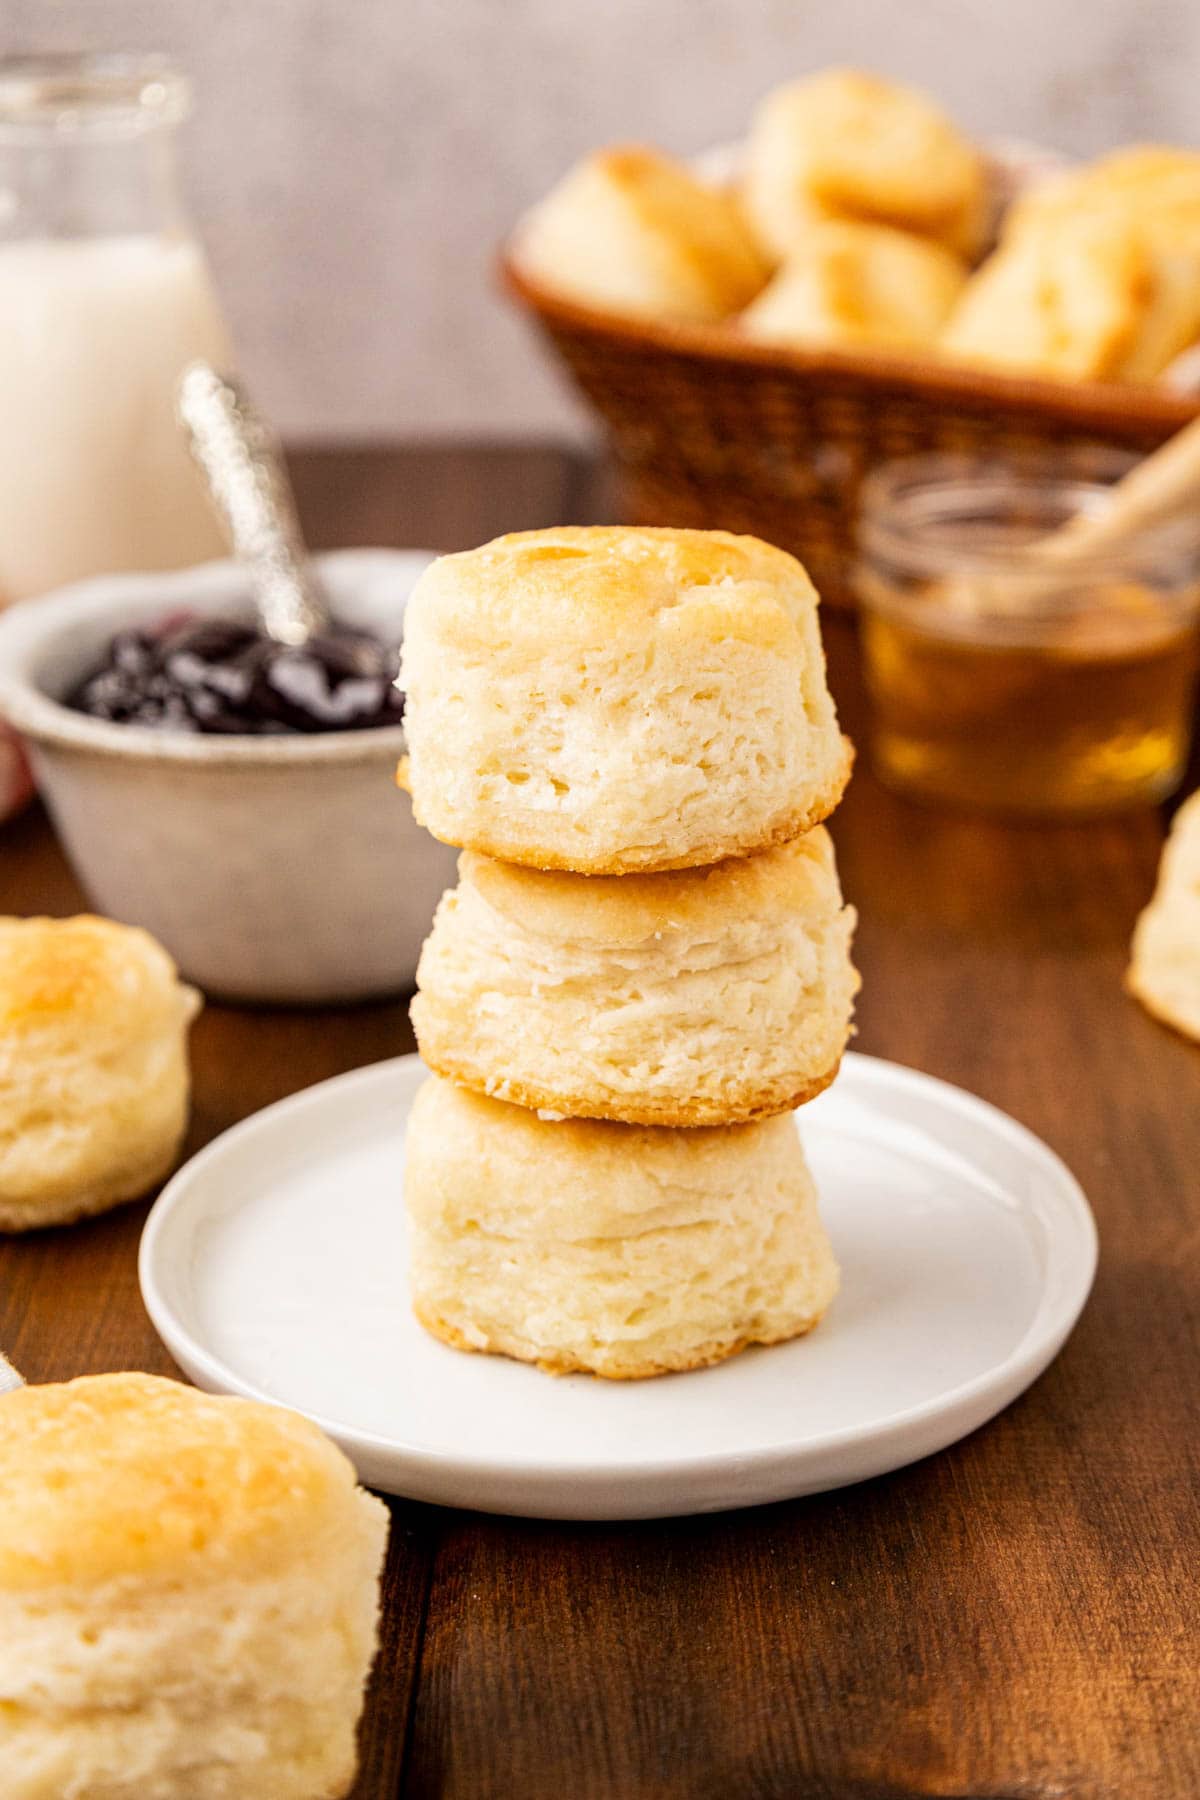
Making buttermilk biscuits from scratch is easier than most people think, and once you get the hang of it, you will make them all the time. Three simple ingredients, one easy folding technique, and about 35 minutes later, you have tall, flaky biscuits fresh from the oven. This recipe breaks it all down so you know exactly what to do and why it works.
These biscuits go all the way back to my Granny’s kitchen. I can still picture standing on a chair beside her, watching her hands move through the dough like she had done it a thousand times. Because she had. From breakfast to Sunday supper, biscuits showed up on her table, and I never once complained.
What I love most about this recipe is how straightforward it is. No special equipment, no complicated steps, and no reason to be nervous. Southern home cooks have been making homemade buttermilk biscuits like this for generations, and once you get the feel for the dough, you will too.
Why You’ll Love These White Lily Biscuits
- Flaky layers without much effort. The tri-fold technique sounds fancier than it is. It is just folding the dough like a letter, three times, and those folds are what give you layers that pull apart beautifully straight from the oven.
- Tender every single time. White Lily flour is the quiet secret Southern cooks have been using for generations. Lower protein means less gluten, and less gluten means a soft, tender biscuit instead of a tough, dense one.
- Ready in about 35 minutes. From bowl to table, these come together fast. Just as good on a busy weekday morning as they are on a holiday breakfast spread.
- Freezer-friendly. Make a full batch, freeze them unbaked, and pull out just what you need. Fresh biscuits any day of the week without starting from scratch.
- Works with what you have. No buttermilk on hand? A quick swap with milk and a splash of vinegar gets you there. The recipe is forgiving.
What You’ll Need to Make Homemade Buttermilk Biscuits
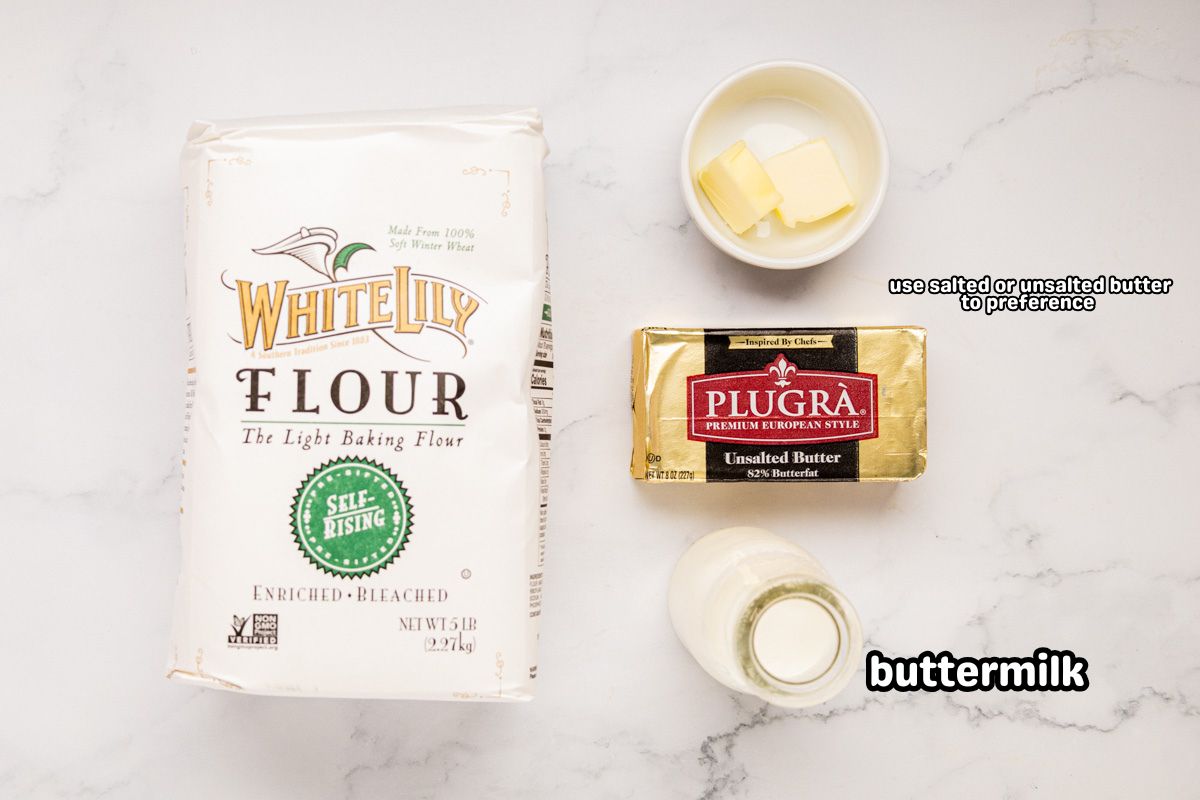
- White Lily Self-Rising Flour: The foundation of a good Southern biscuit. It produces a softer, more tender crumb than regular all-purpose flour. Find it in most grocery stores in the South or order it online. It also stores well in the freezer if you want to stock up.
- Cold Unsalted Butter: This is where your layers come from. Those small pieces of cold butter release steam as the biscuits bake, and that steam is what pushes the layers apart. Keep it cold right up until it goes into the dough.
- Buttermilk: The acidity reacts with the leavening in the self-rising flour to help the biscuits rise, and it adds a subtle tang that makes these taste like an actual homemade biscuit. Real buttermilk makes a difference, but a quick substitute works in a pinch.
- Melted Butter for Brushing: Goes on right before baking for that golden finish. A little more after they come out of the oven never hurts.
No Buttermilk? Here’s How to Make a Quick Substitute
Pour 1 tablespoon of white vinegar or fresh lemon juice into a liquid measuring cup. Add enough milk to bring it to the ¾ cup line, give it a stir, and let it sit for 5 to 10 minutes. It will thicken slightly and look a little curdled. That is exactly what you want.
Use it just like you would regular buttermilk. The flavor is close, and it still works well to help your biscuits rise.
What If You Only Have All-Purpose Flour?
White Lily is worth tracking down if you can find it, but all-purpose flour will work in a pinch. For every 1 cup of all-purpose flour, add 1½ teaspoons of baking powder and ½ teaspoon of salt. Whisk it together well before using.
Keep in mind that all-purpose flour has a higher protein content, so your biscuits may be slightly less tender. They will still be good, just a little different in texture. If you bake biscuits often, White Lily is worth keeping on hand. It stores well in the freezer, too!
How to Make Buttermilk Biscuits from Scratch
✱ Below shows step-by-step photos and instructions. For the complete recipe, along with ingredient amounts, scroll down to the recipe card.
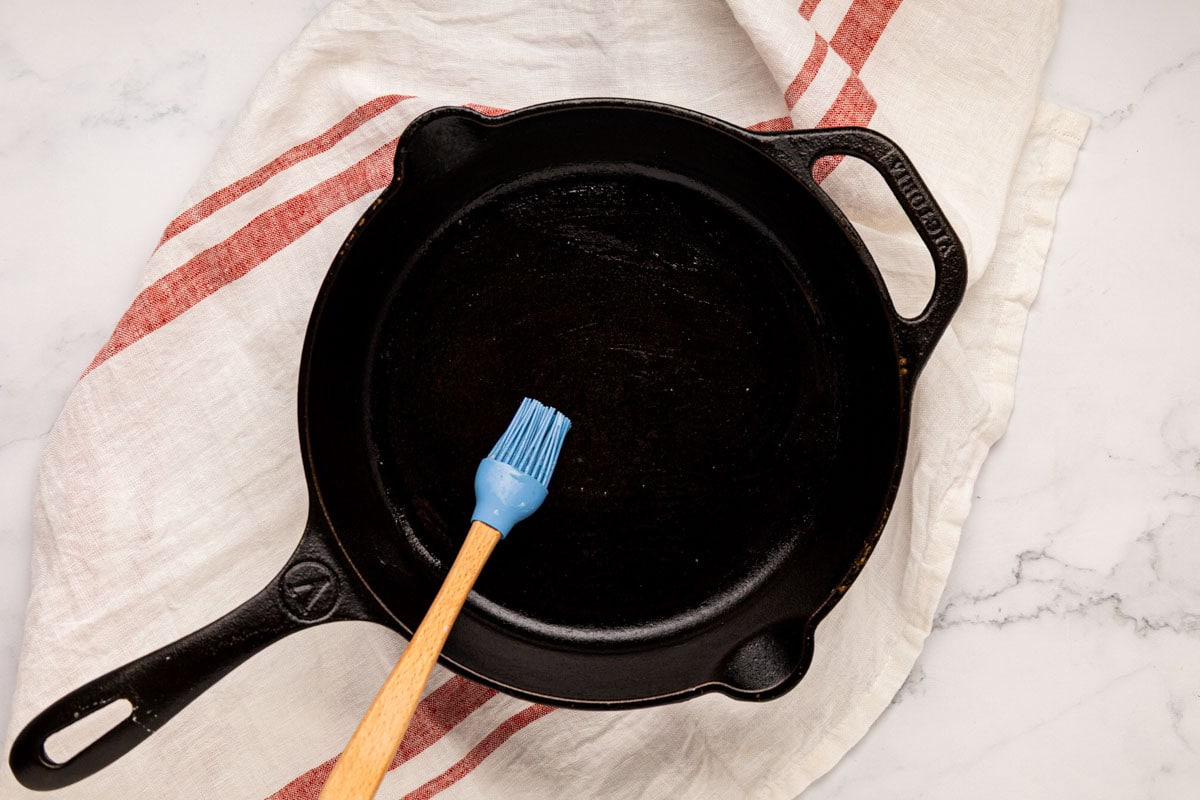
Step 1 | Preheat and Prep
Preheat your oven to 450°F. You can use a silicone-lined baking sheet or a well-seasoned cast-iron pan. If using cast iron, brush the pan with butter or oil before adding the biscuits.
Give the oven a full 10 to 15 minutes after the preheat beep before you slide the biscuits in. That intense heat in the first few minutes is what makes them spring up.
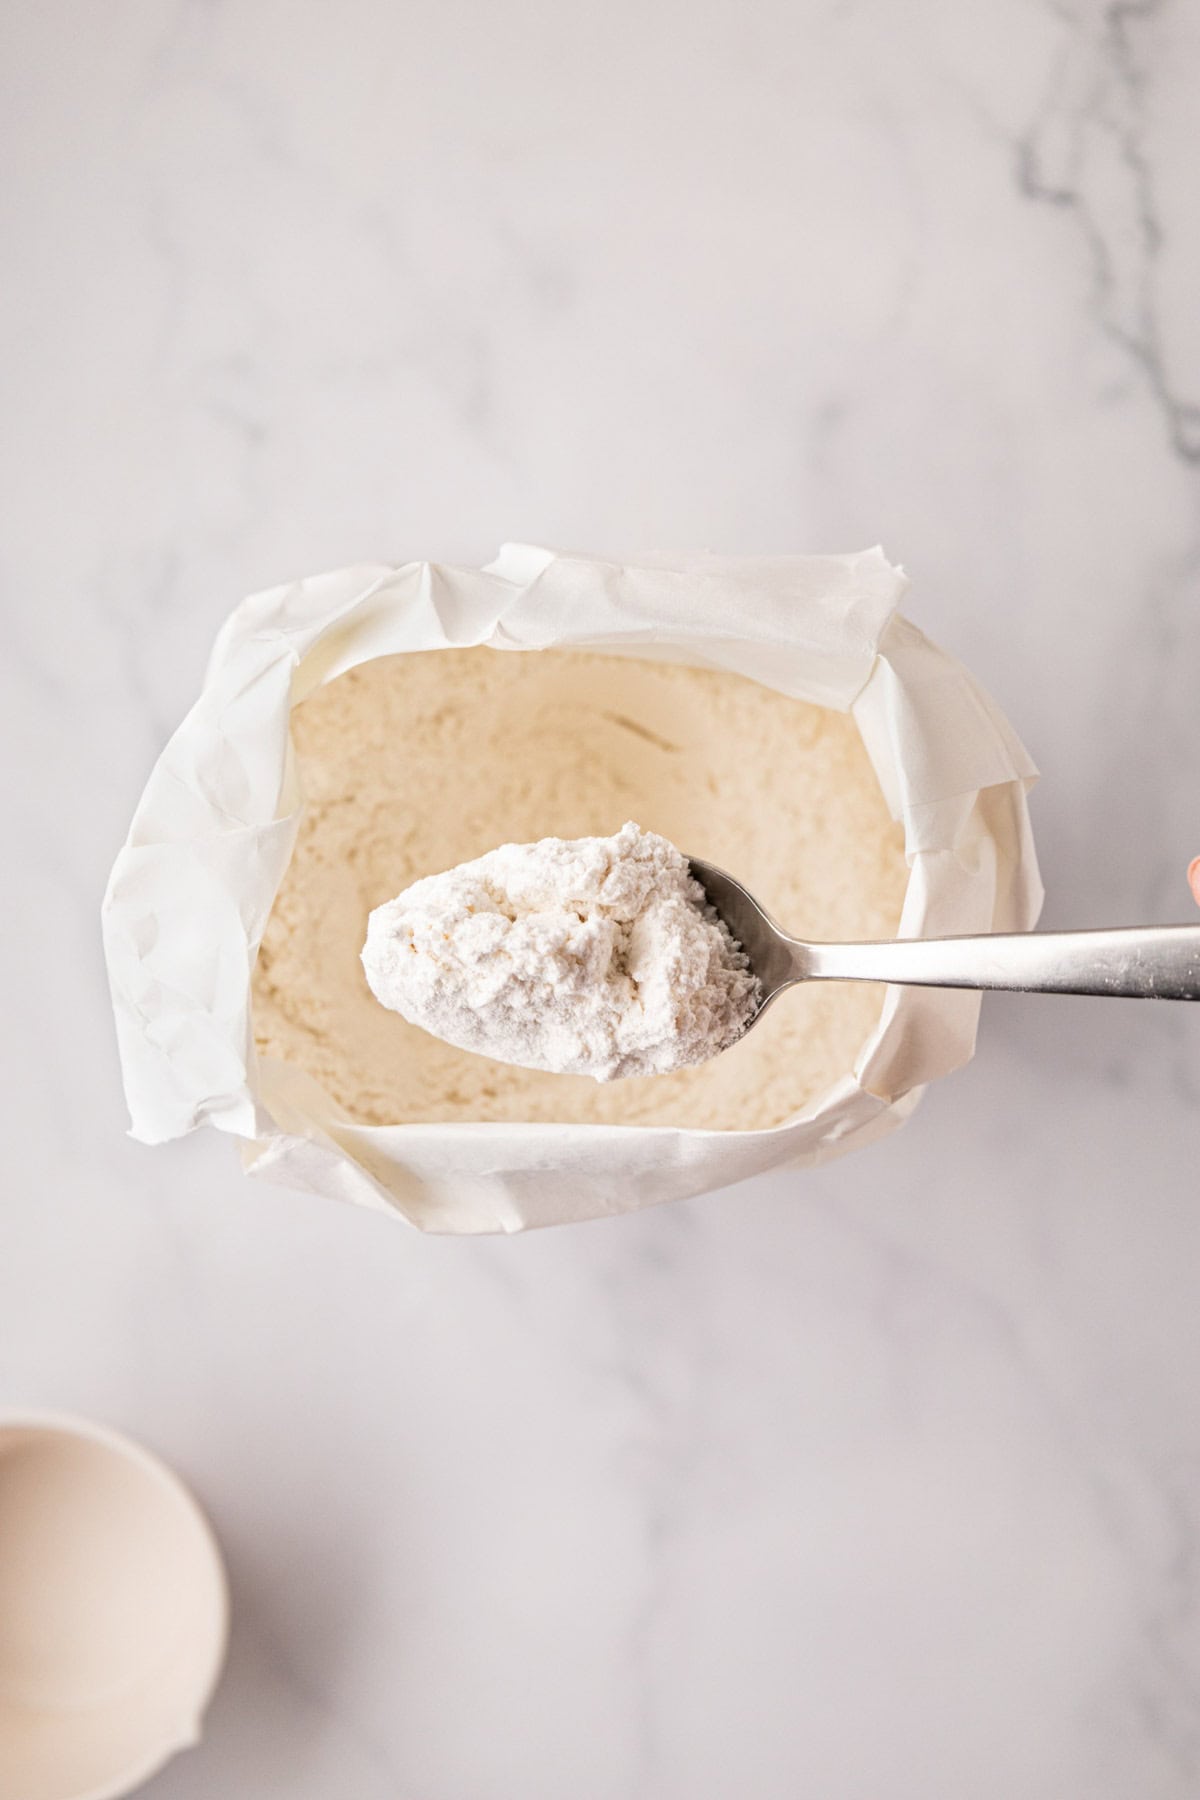
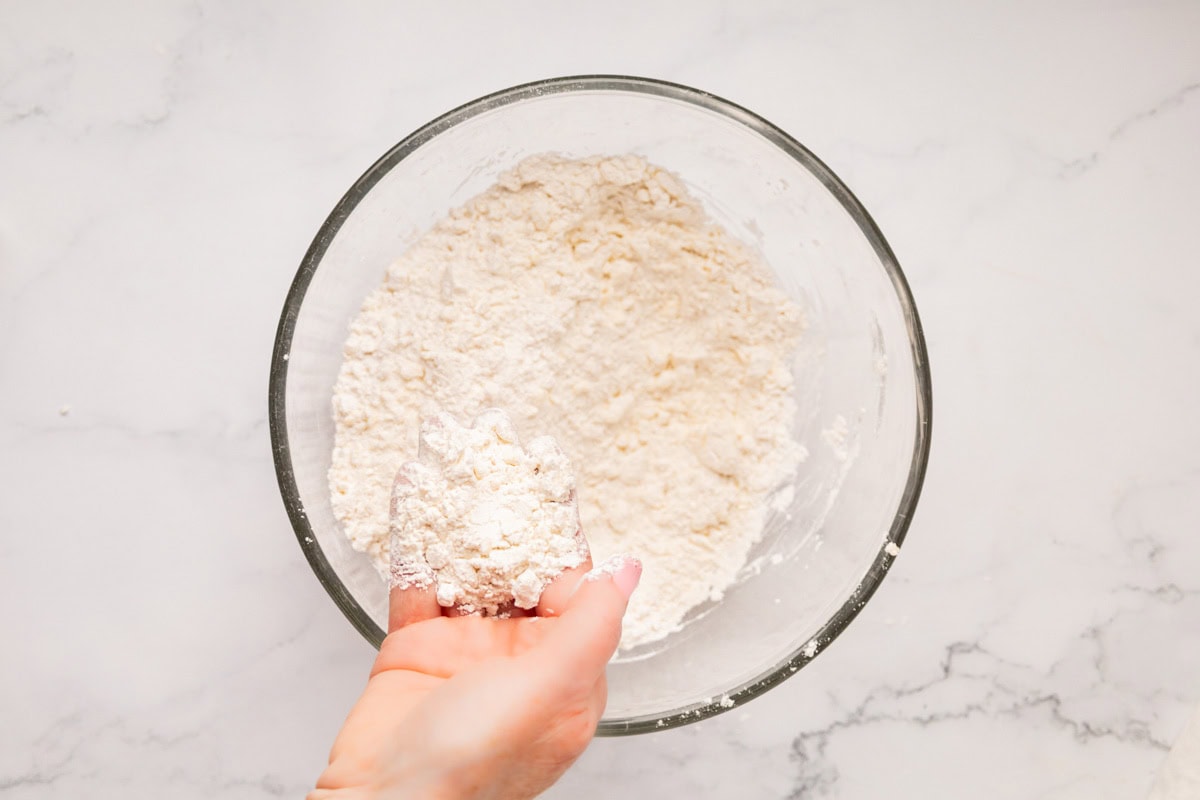
Step 2 | Measure Your Flour
First, fluff the flour in the bag with a fork.
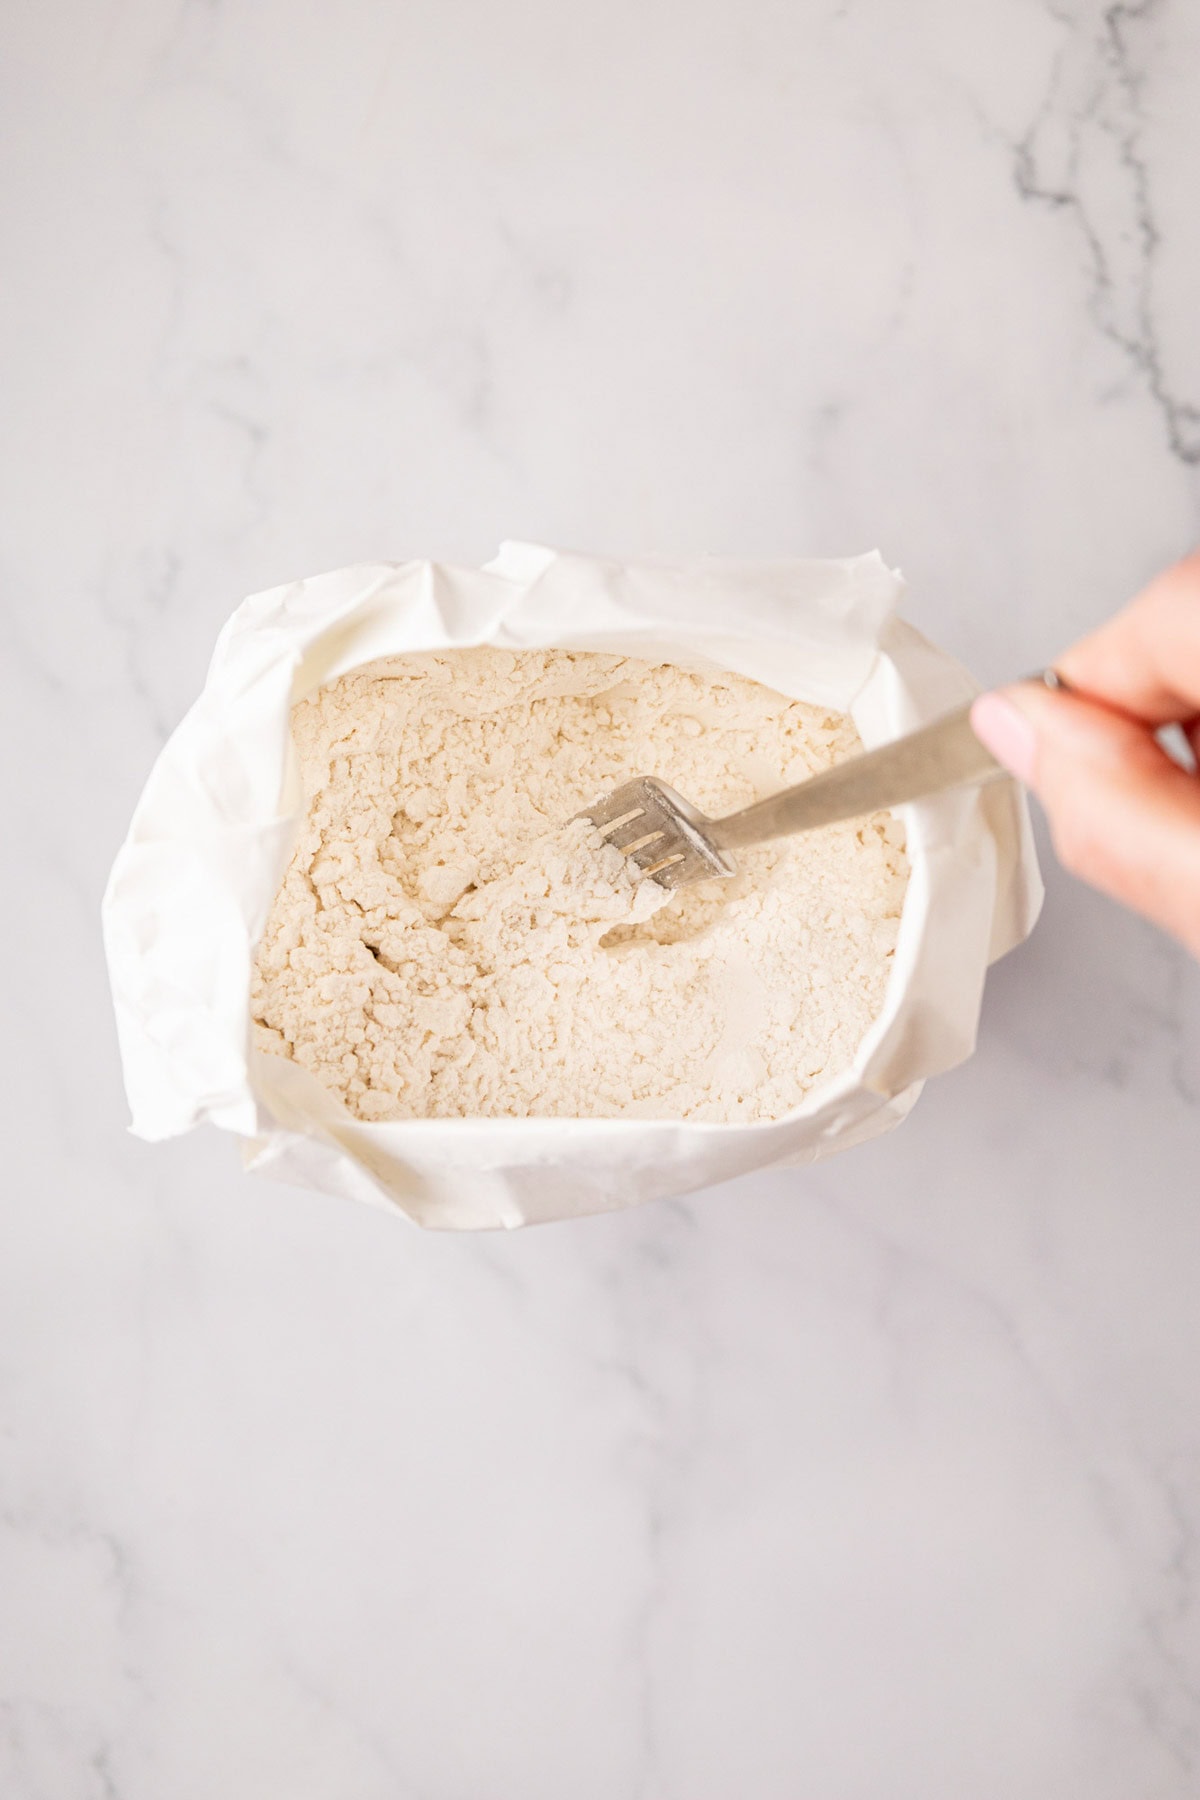
Then spoon it into a dry measuring cup and level it off with the flat edge of a knife.
Do not scoop directly from the bag. Packed flour is the most common reason biscuits come out dry and dense.

Step 3 | Cut in the Butter
Grate the frozen butter directly into the flour using the large holes of a box grater, then stir to coat the pieces in flour.
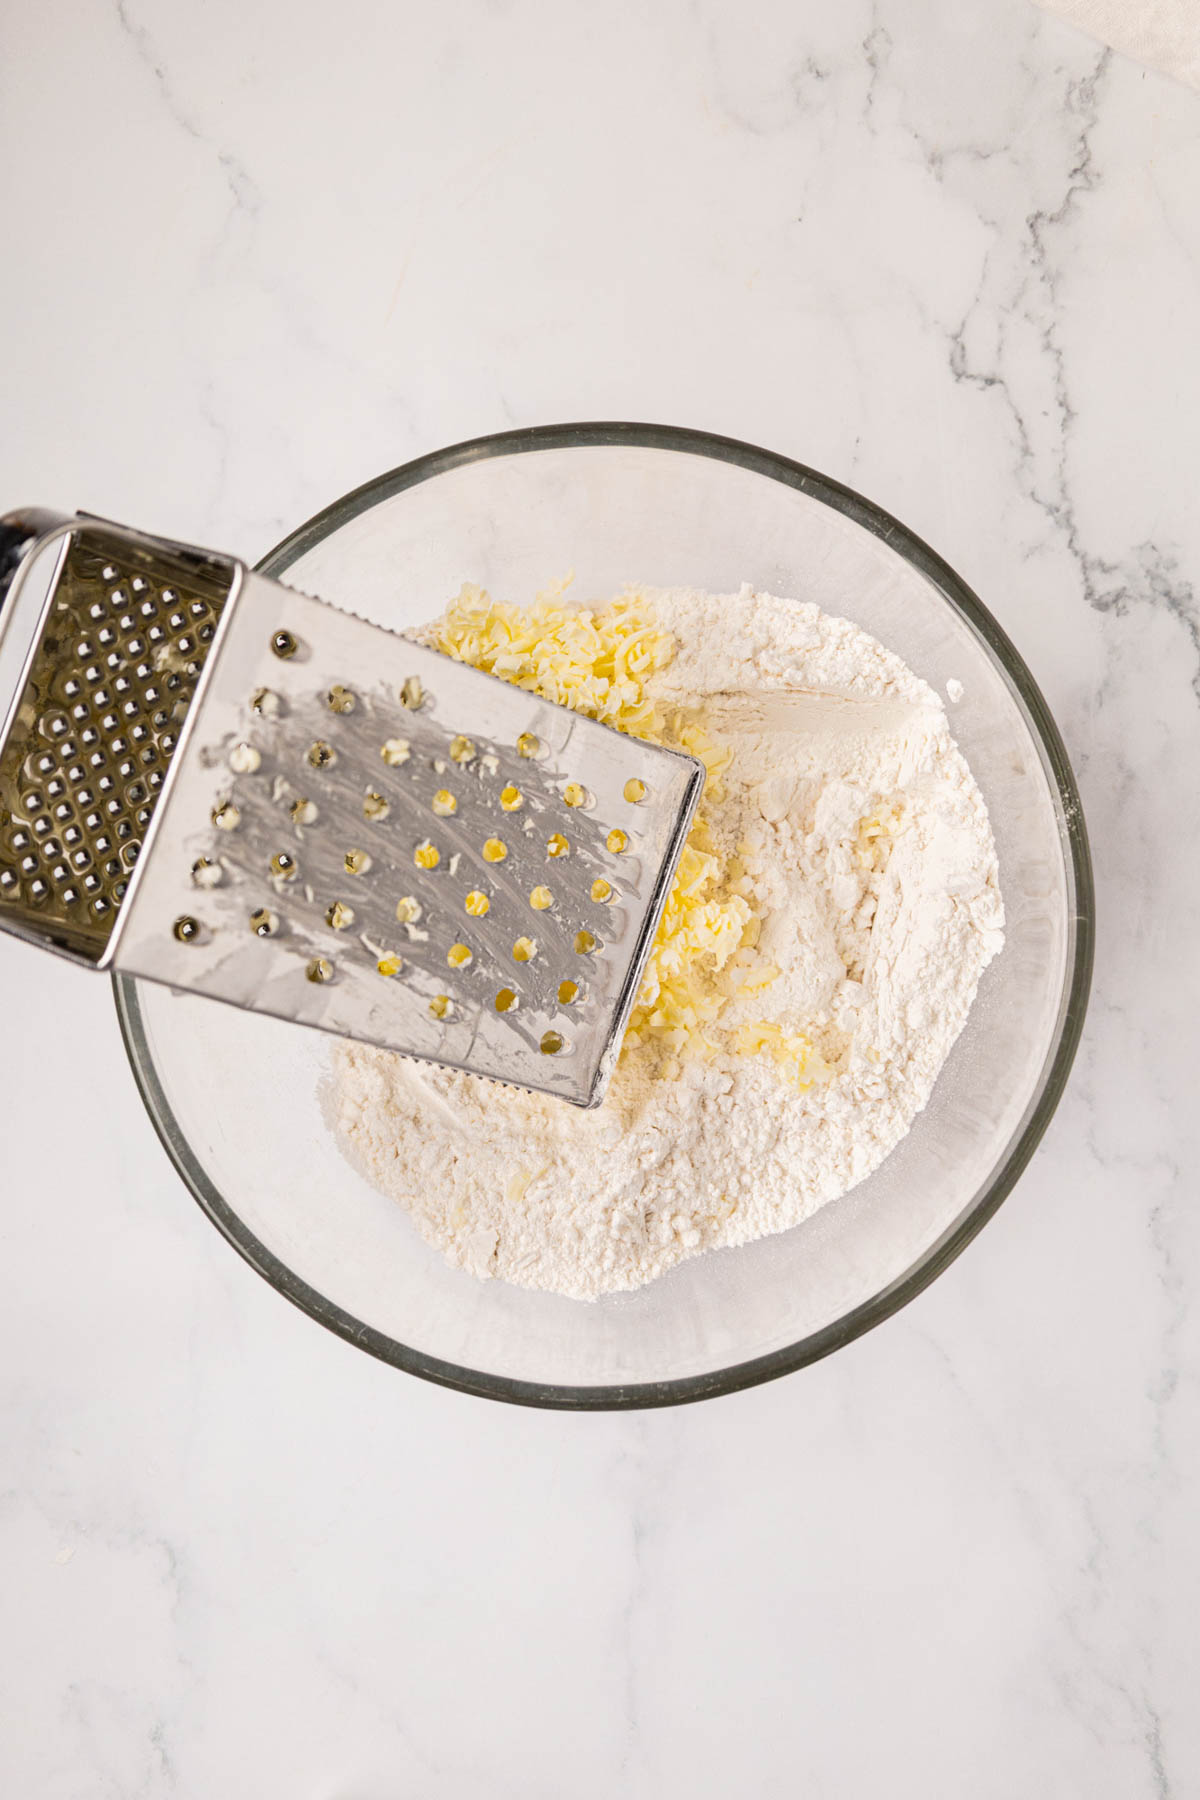
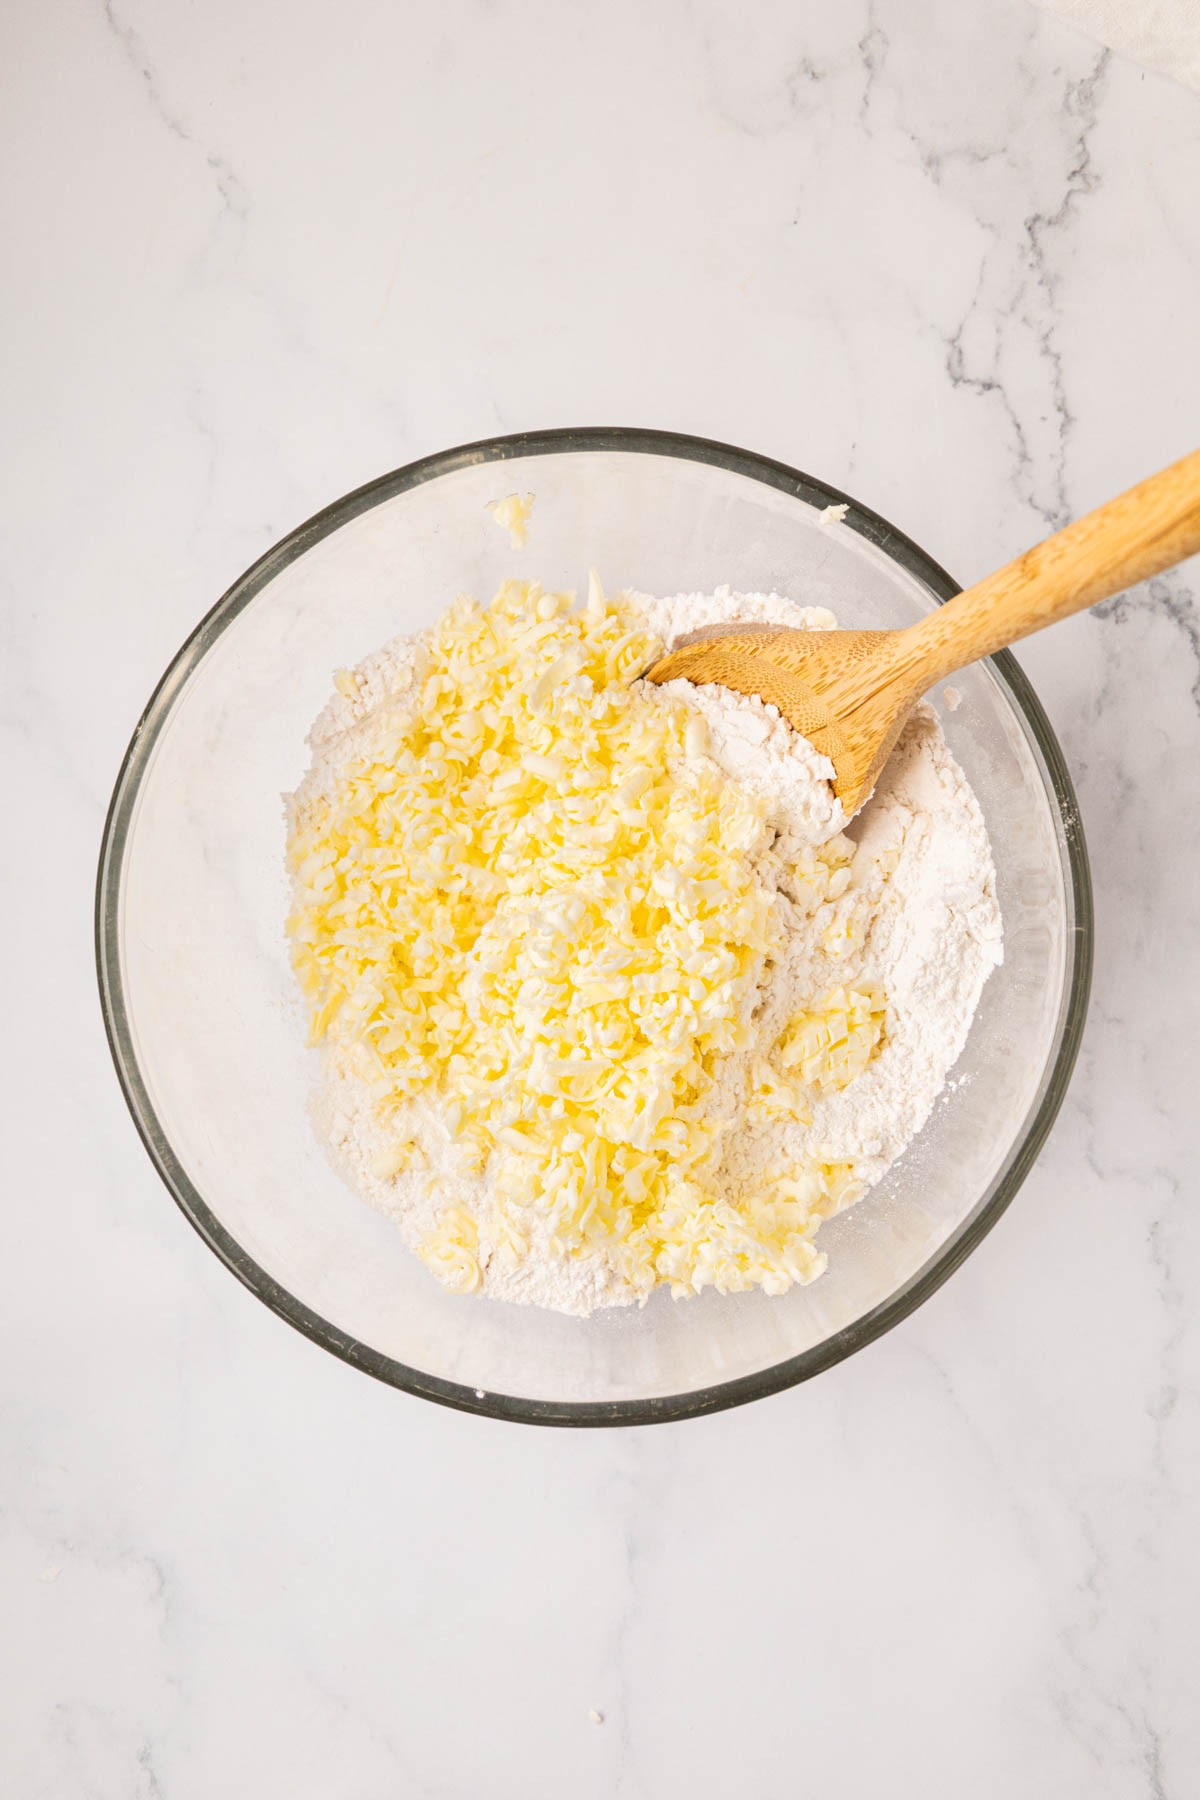
If your butter is not frozen, use a pastry blender to cut cold butter into the flour until the pieces are roughly the size of a small pea. You should still see small visible bits of butter throughout. Those pieces are what create your flaky layers.
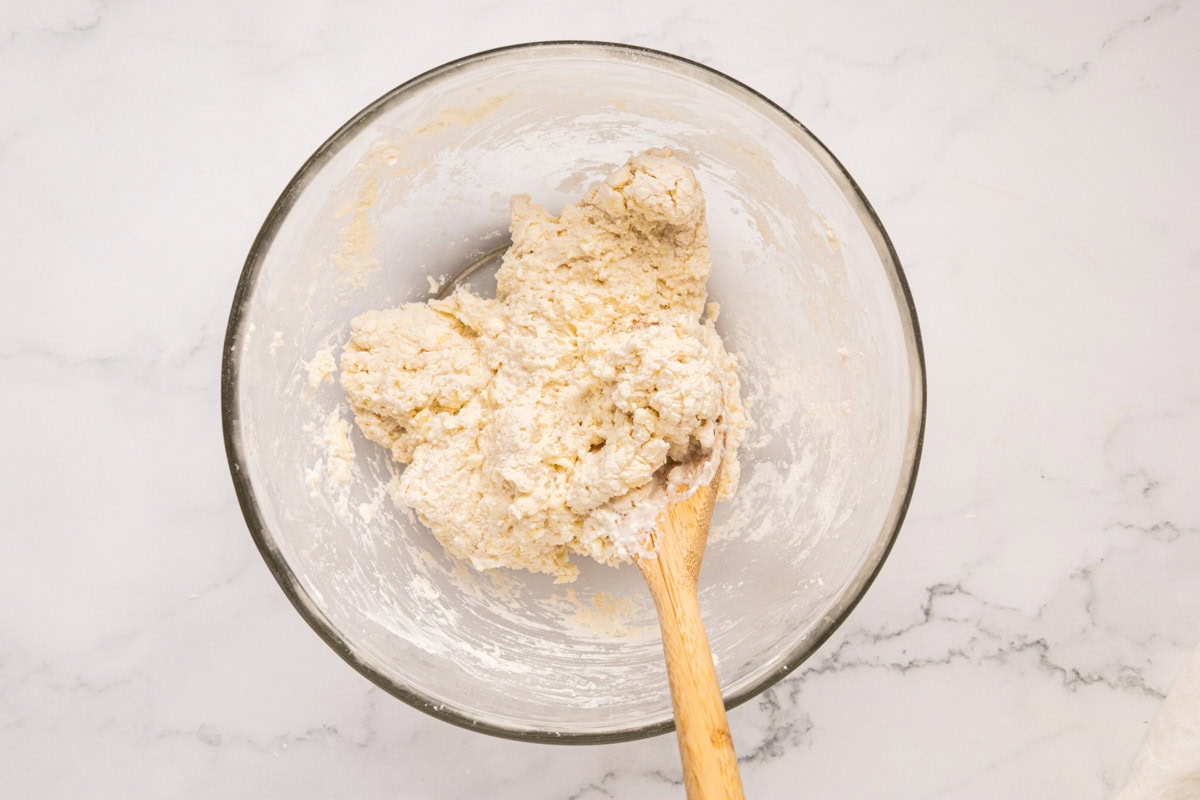
Step 4 | Add the Buttermilk
Pour in the buttermilk and stir just until the dough comes together. It should look like thick mashed potatoes.
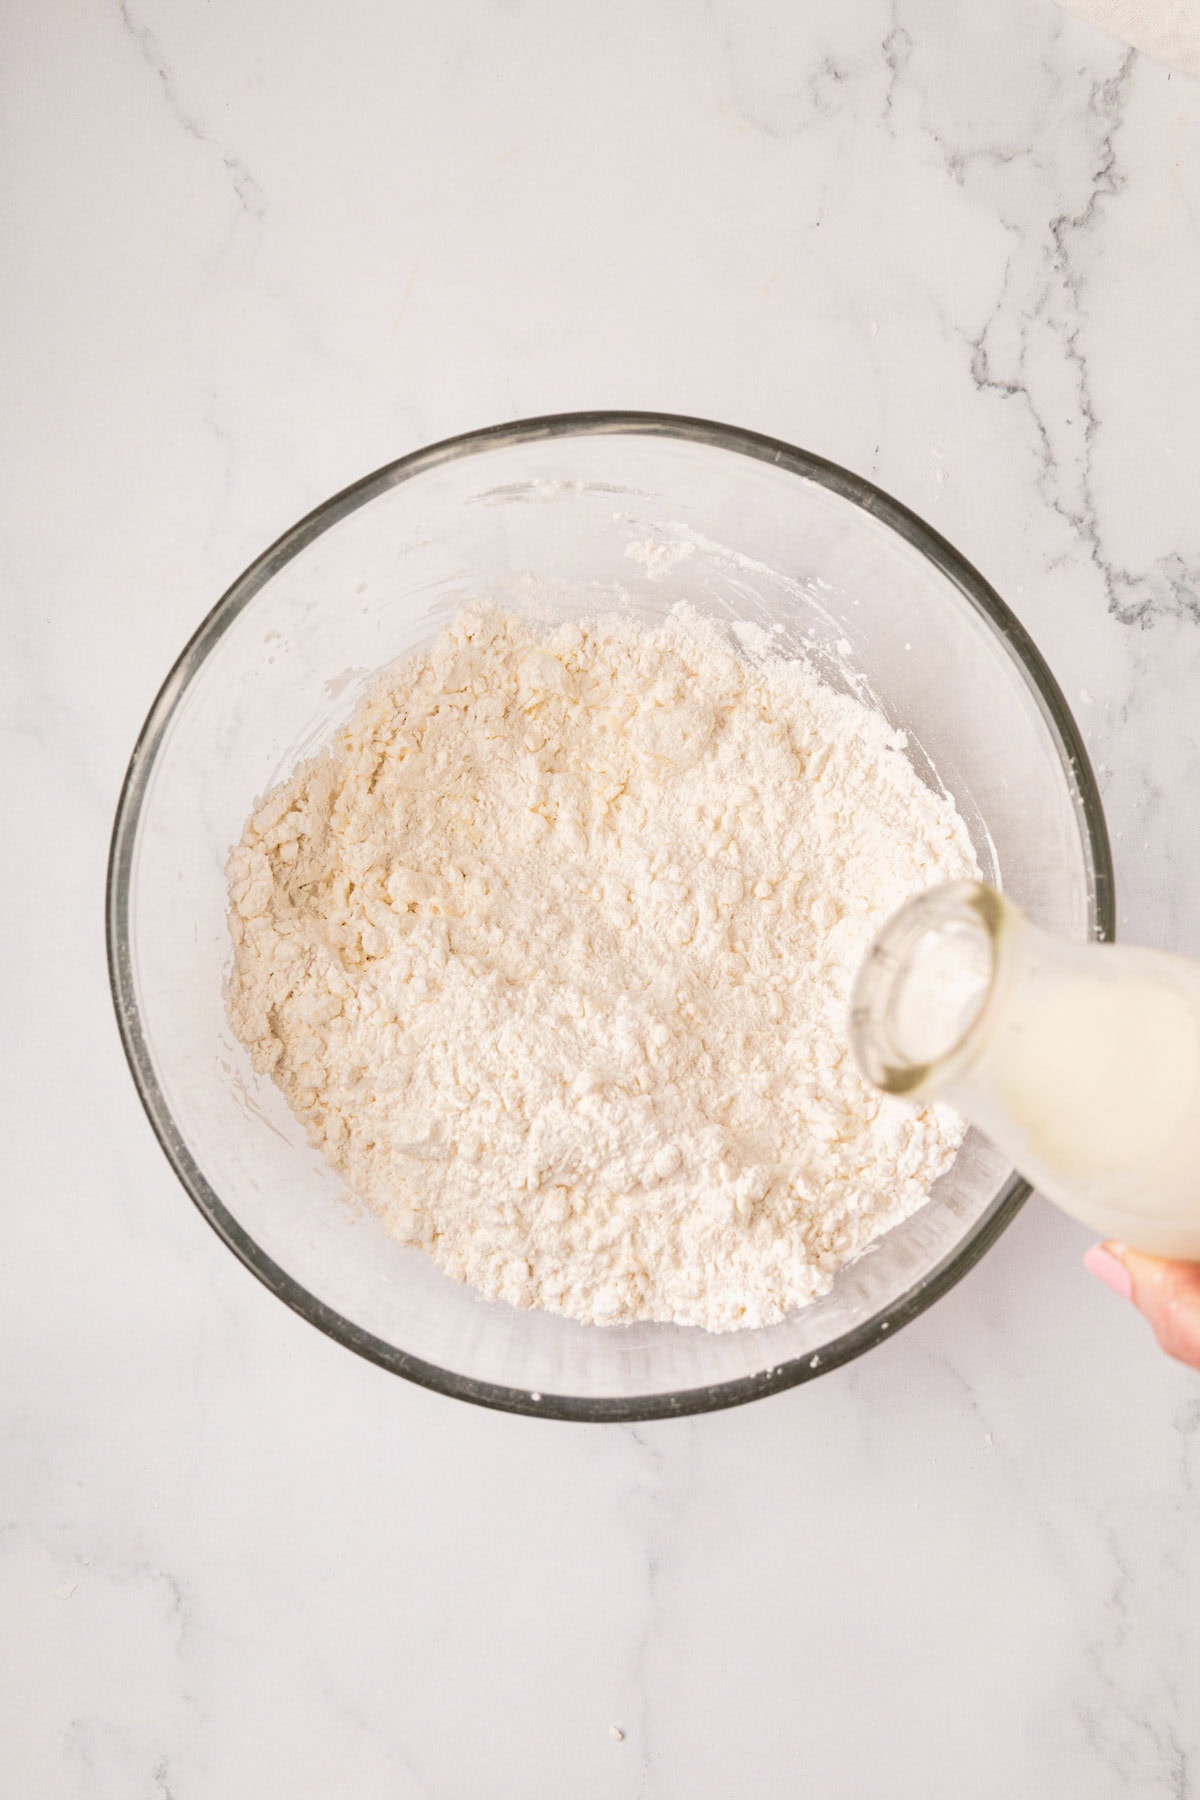

If it feels too sticky, add a little more flour, one tablespoon at a time. If it is not holding together, add a small splash more buttermilk.
Stop stirring the moment it comes together. Overworking at this stage will make your biscuits tough.
Step 5 | Fold for Layers (The Tri-Fold Method)
Turn the dough out onto a lightly floured surface.
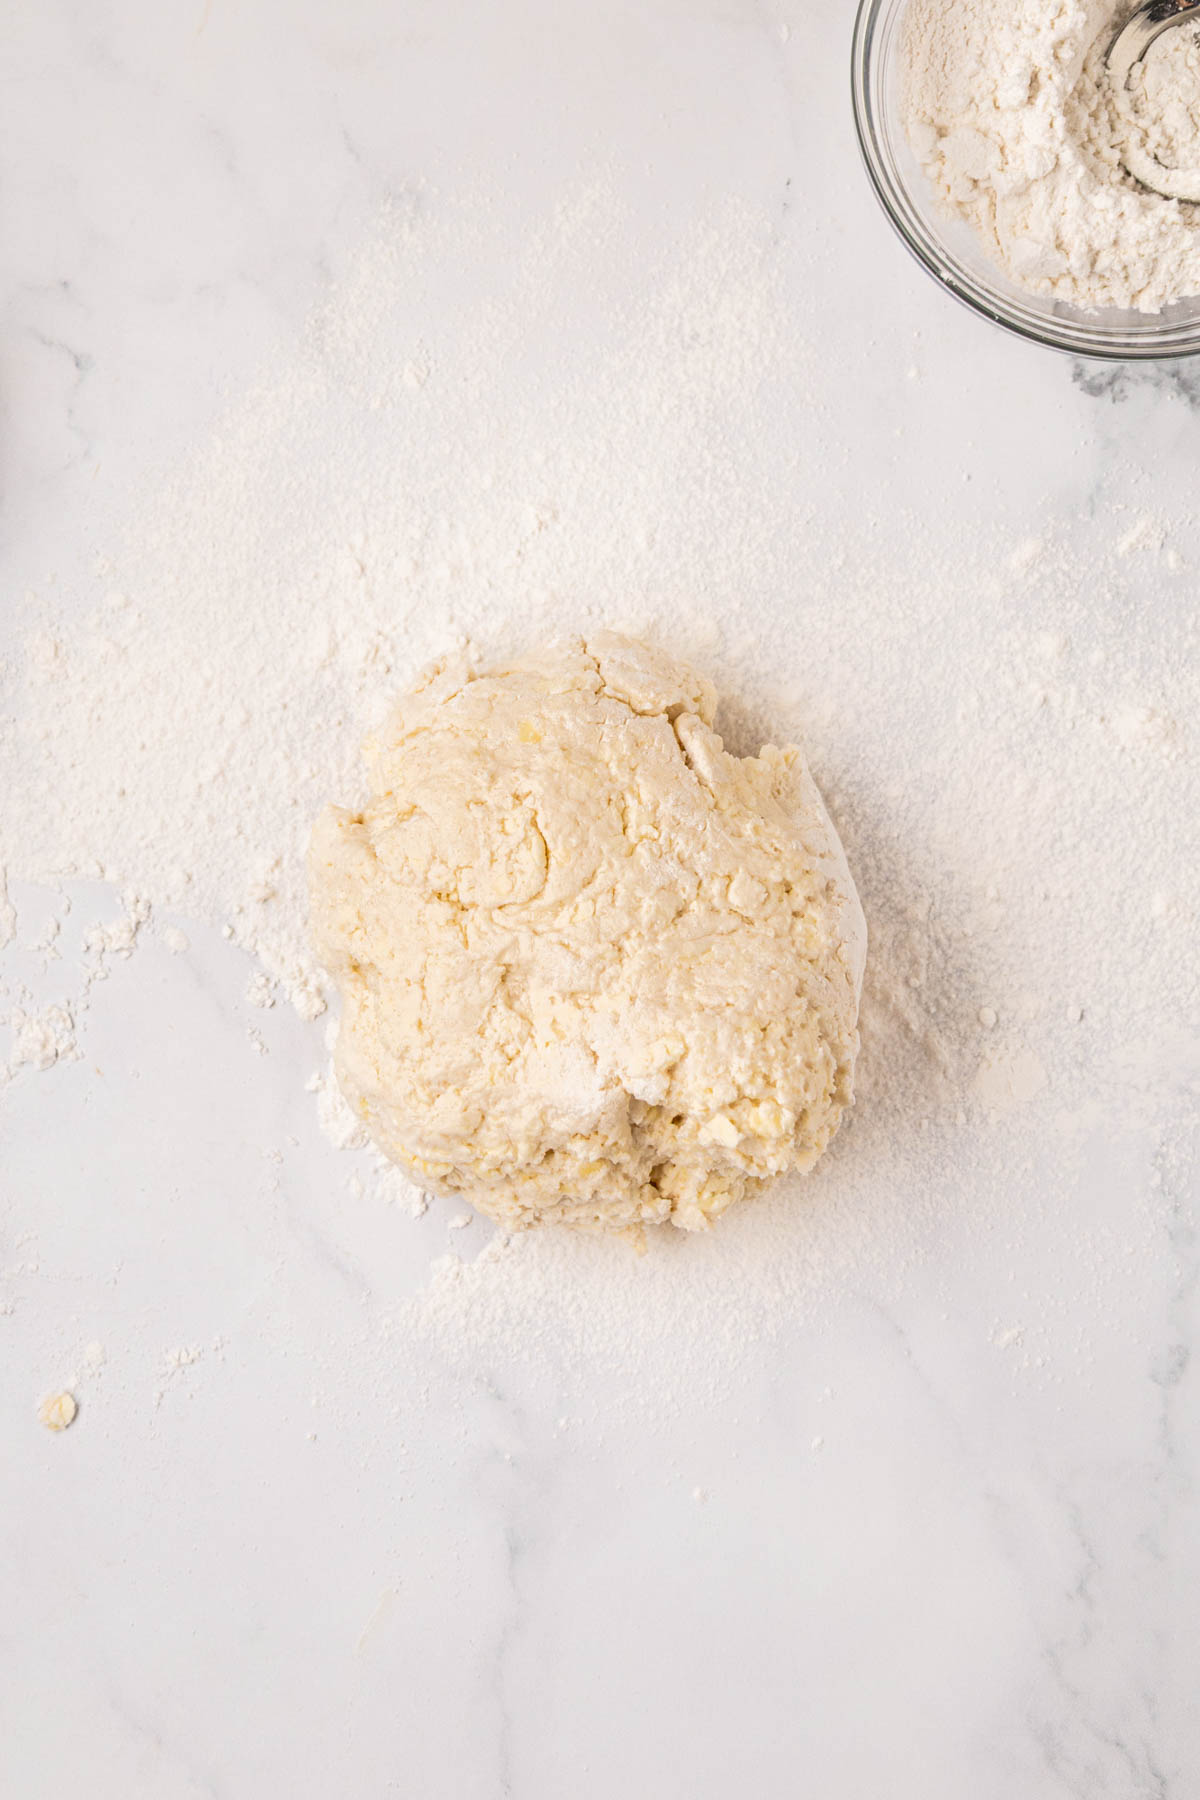
Flatten it into a rough rectangle about 1/2 inch thick.
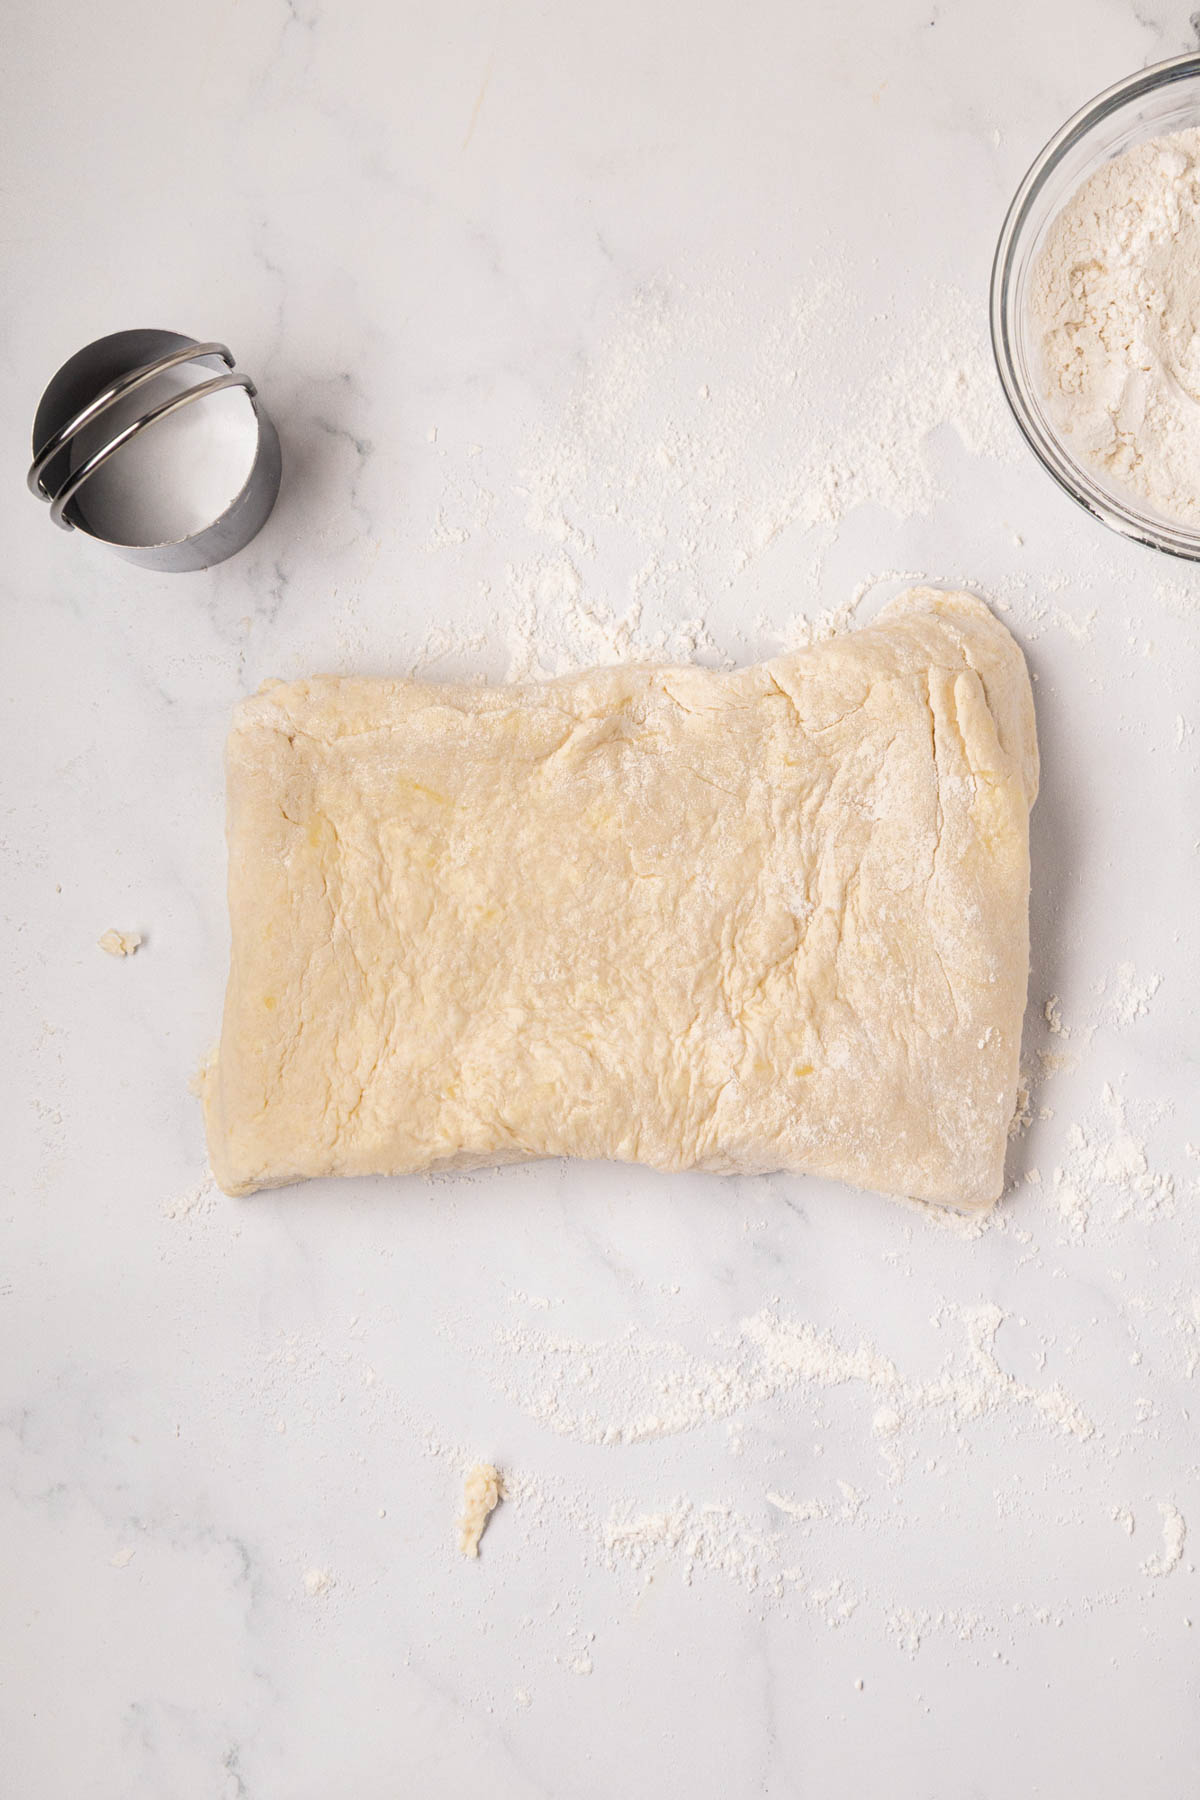
Fold it in thirds like a letter going into an envelope, bringing one side to the center and folding the other side over the top.
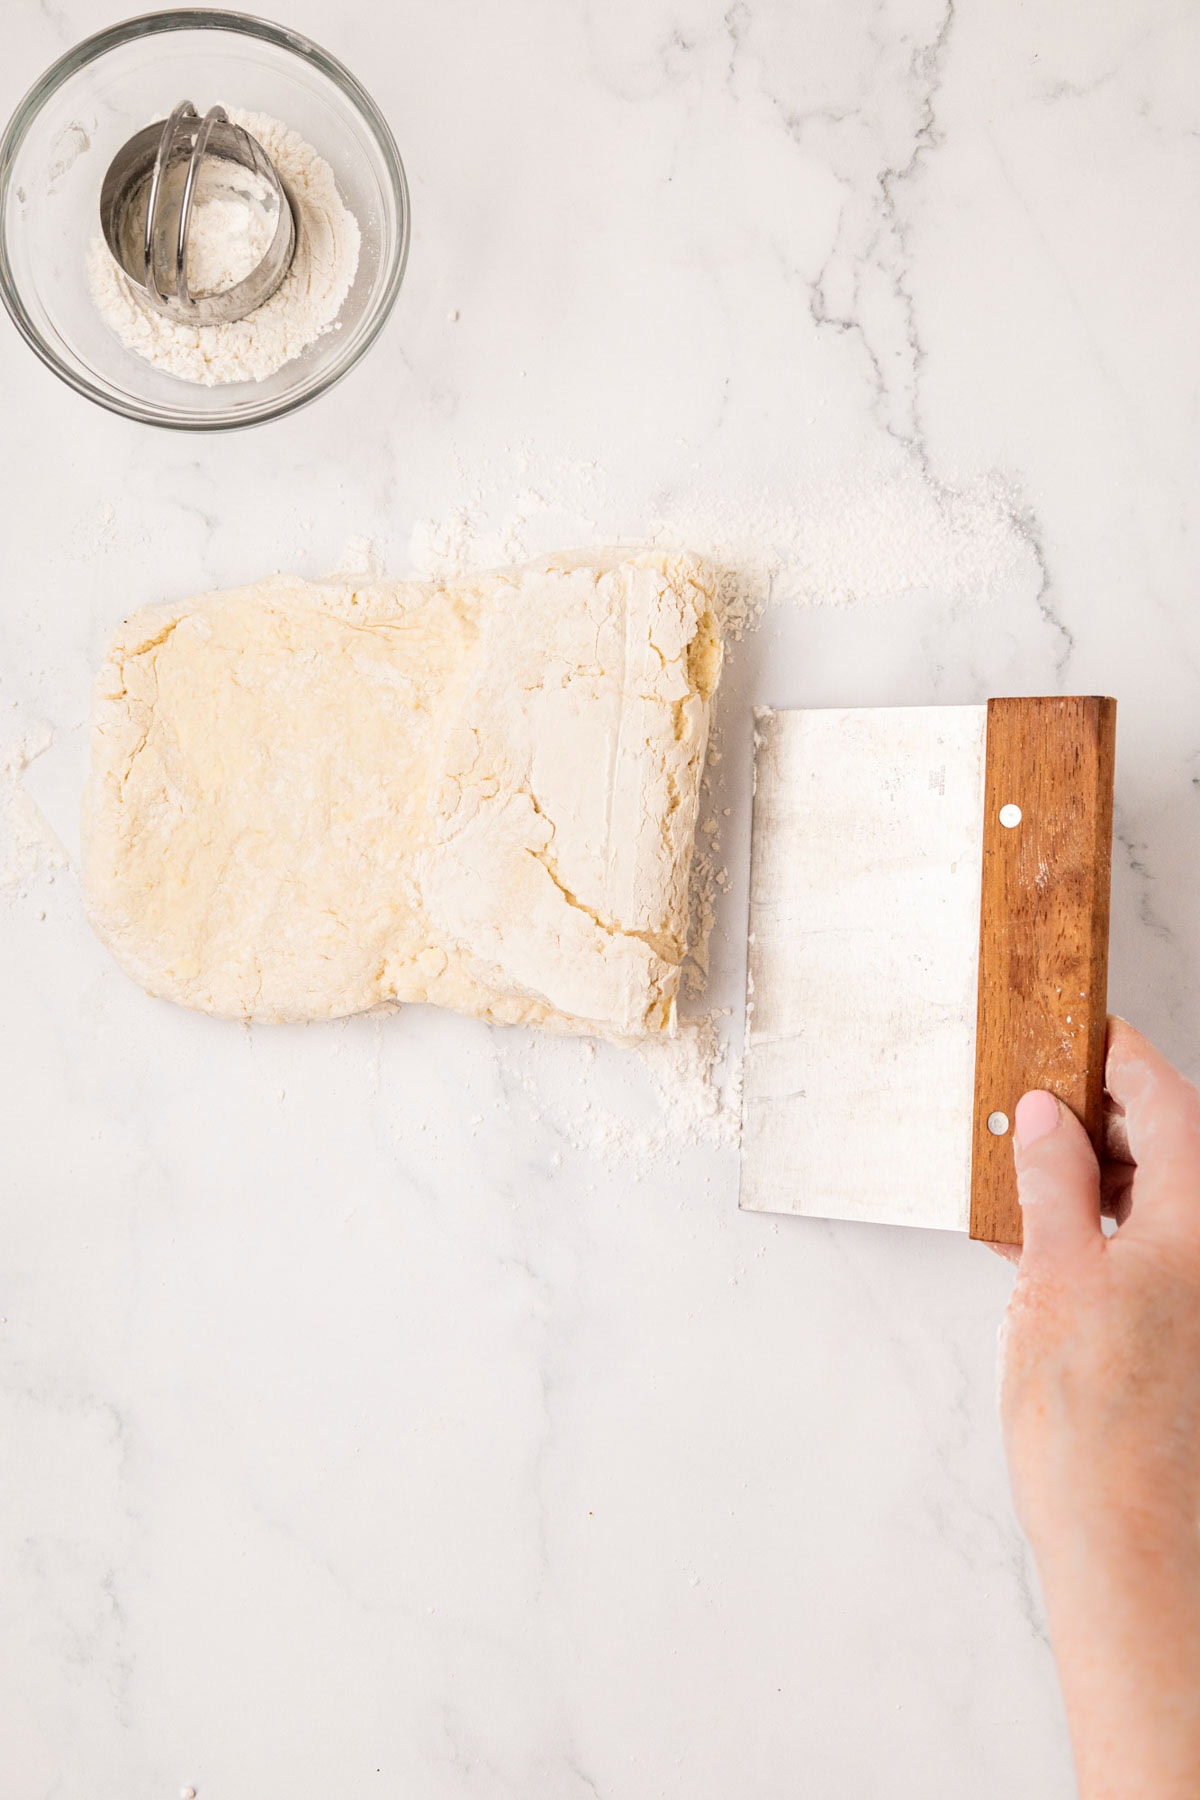
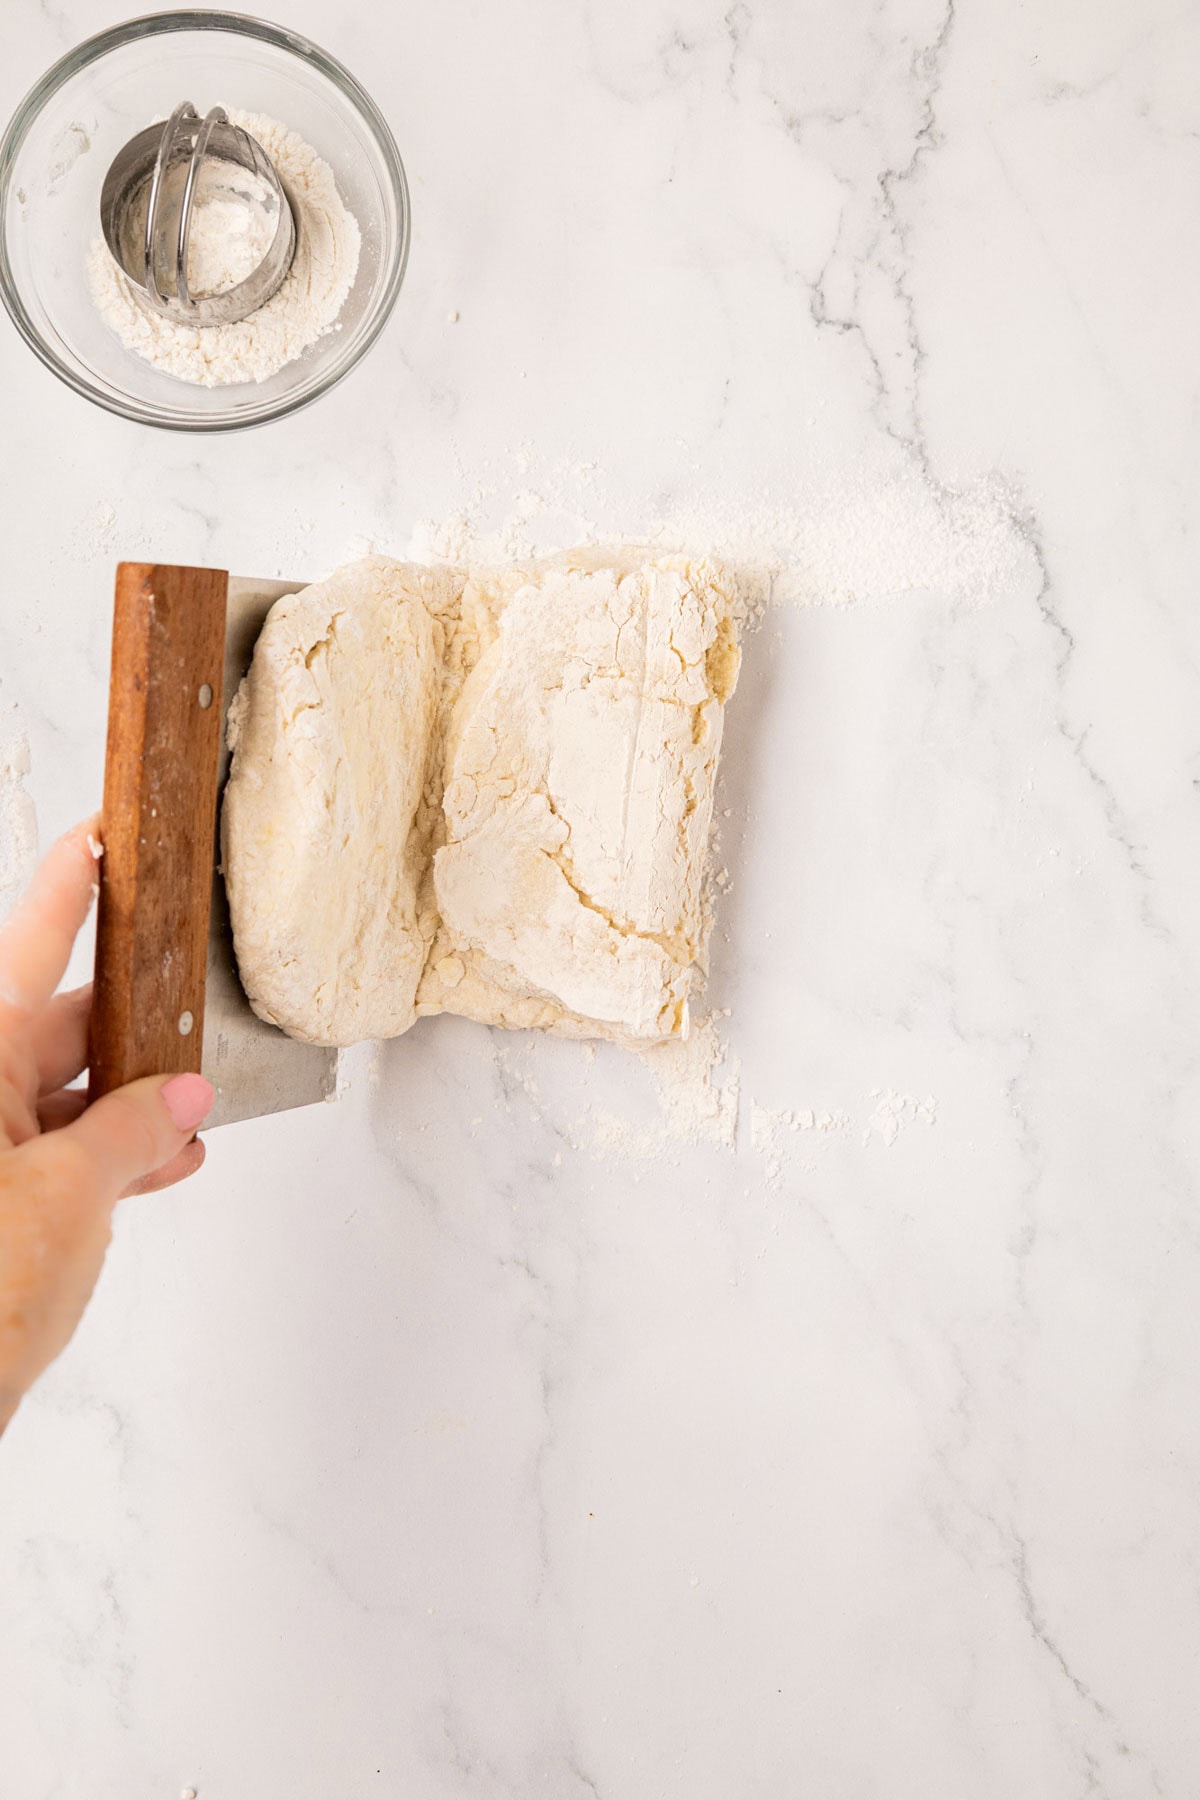
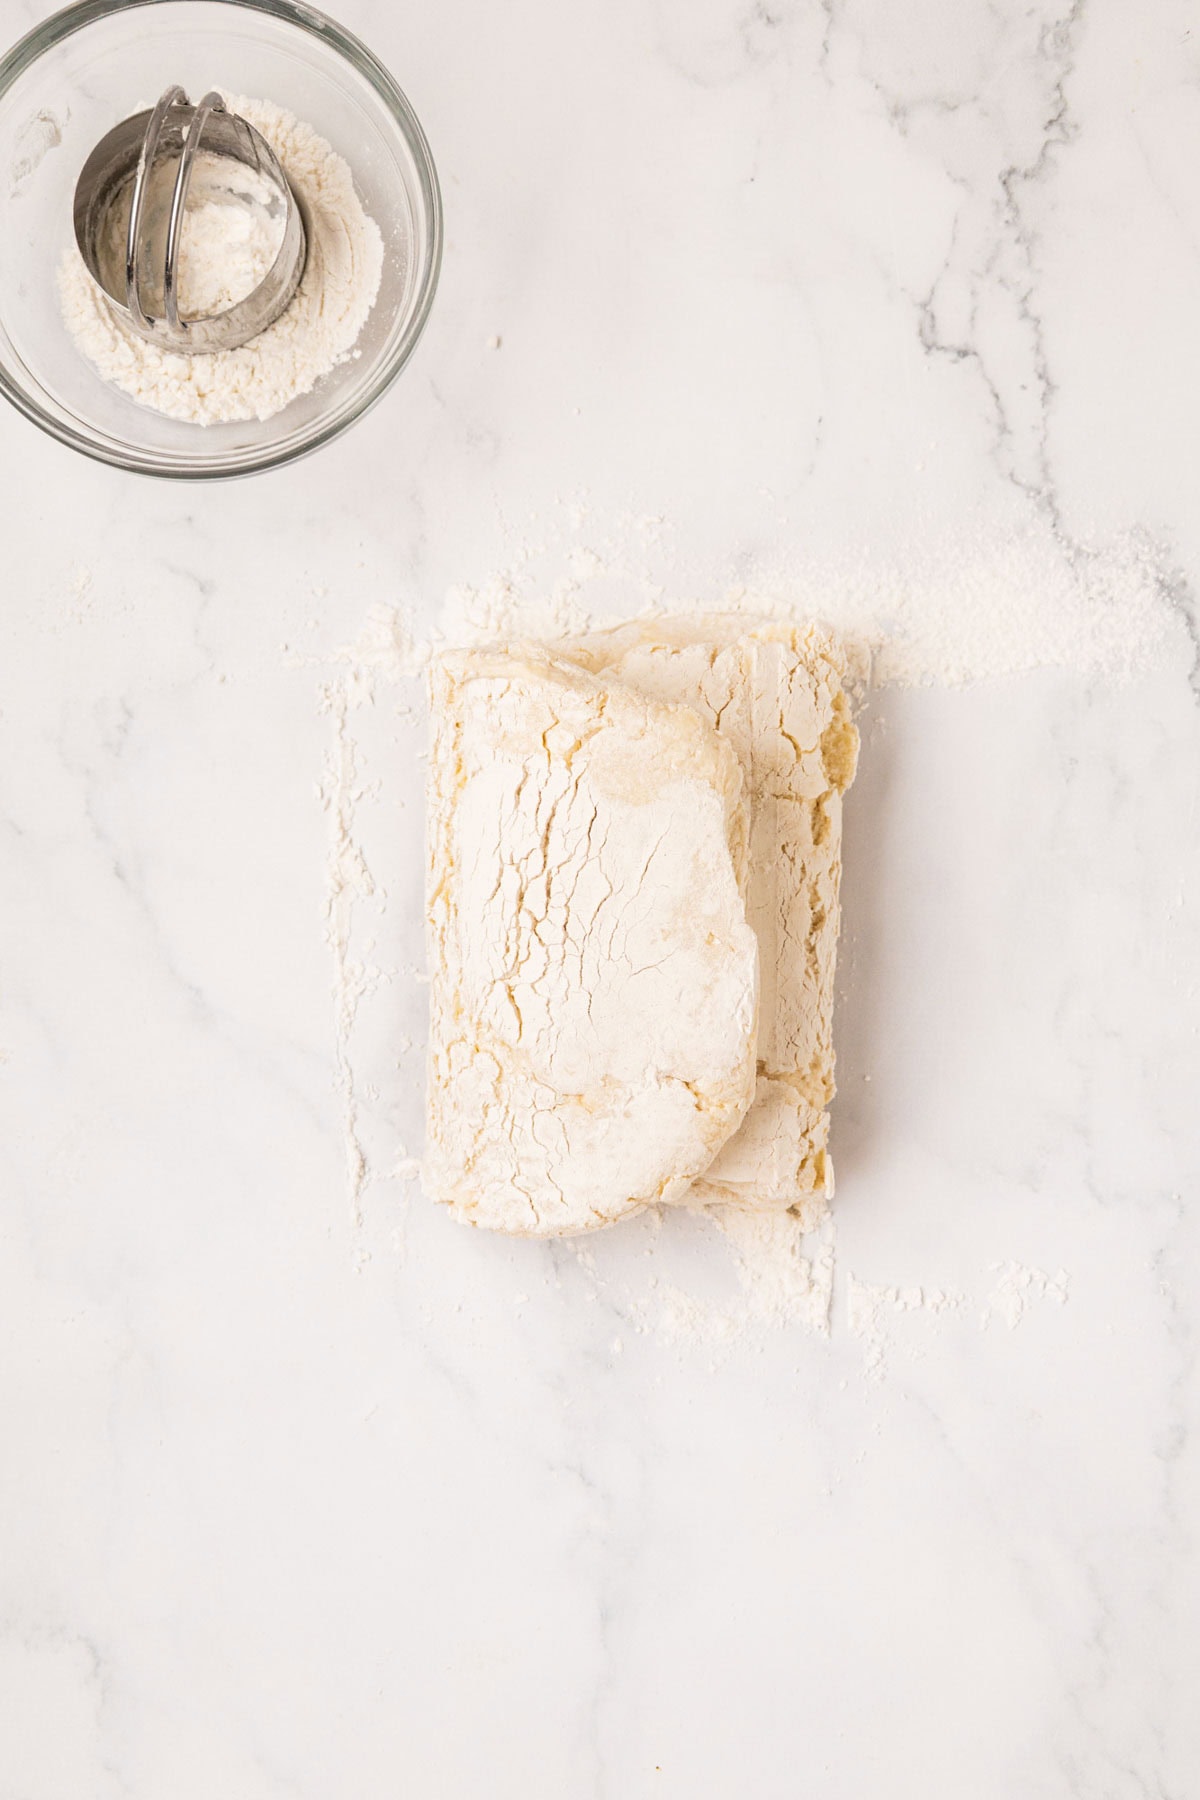
Give it a quarter turn, flatten it back out, and fold the same way again.
Repeat one more time for a total of three folds. Dust the surface lightly with flour as you go to keep things from sticking.
Each fold stacks more layers of butter and dough on top of each other. When that butter hits the oven heat, it creates steam, and that steam is what pushes those layers apart and gives you a biscuit you can actually pull open.
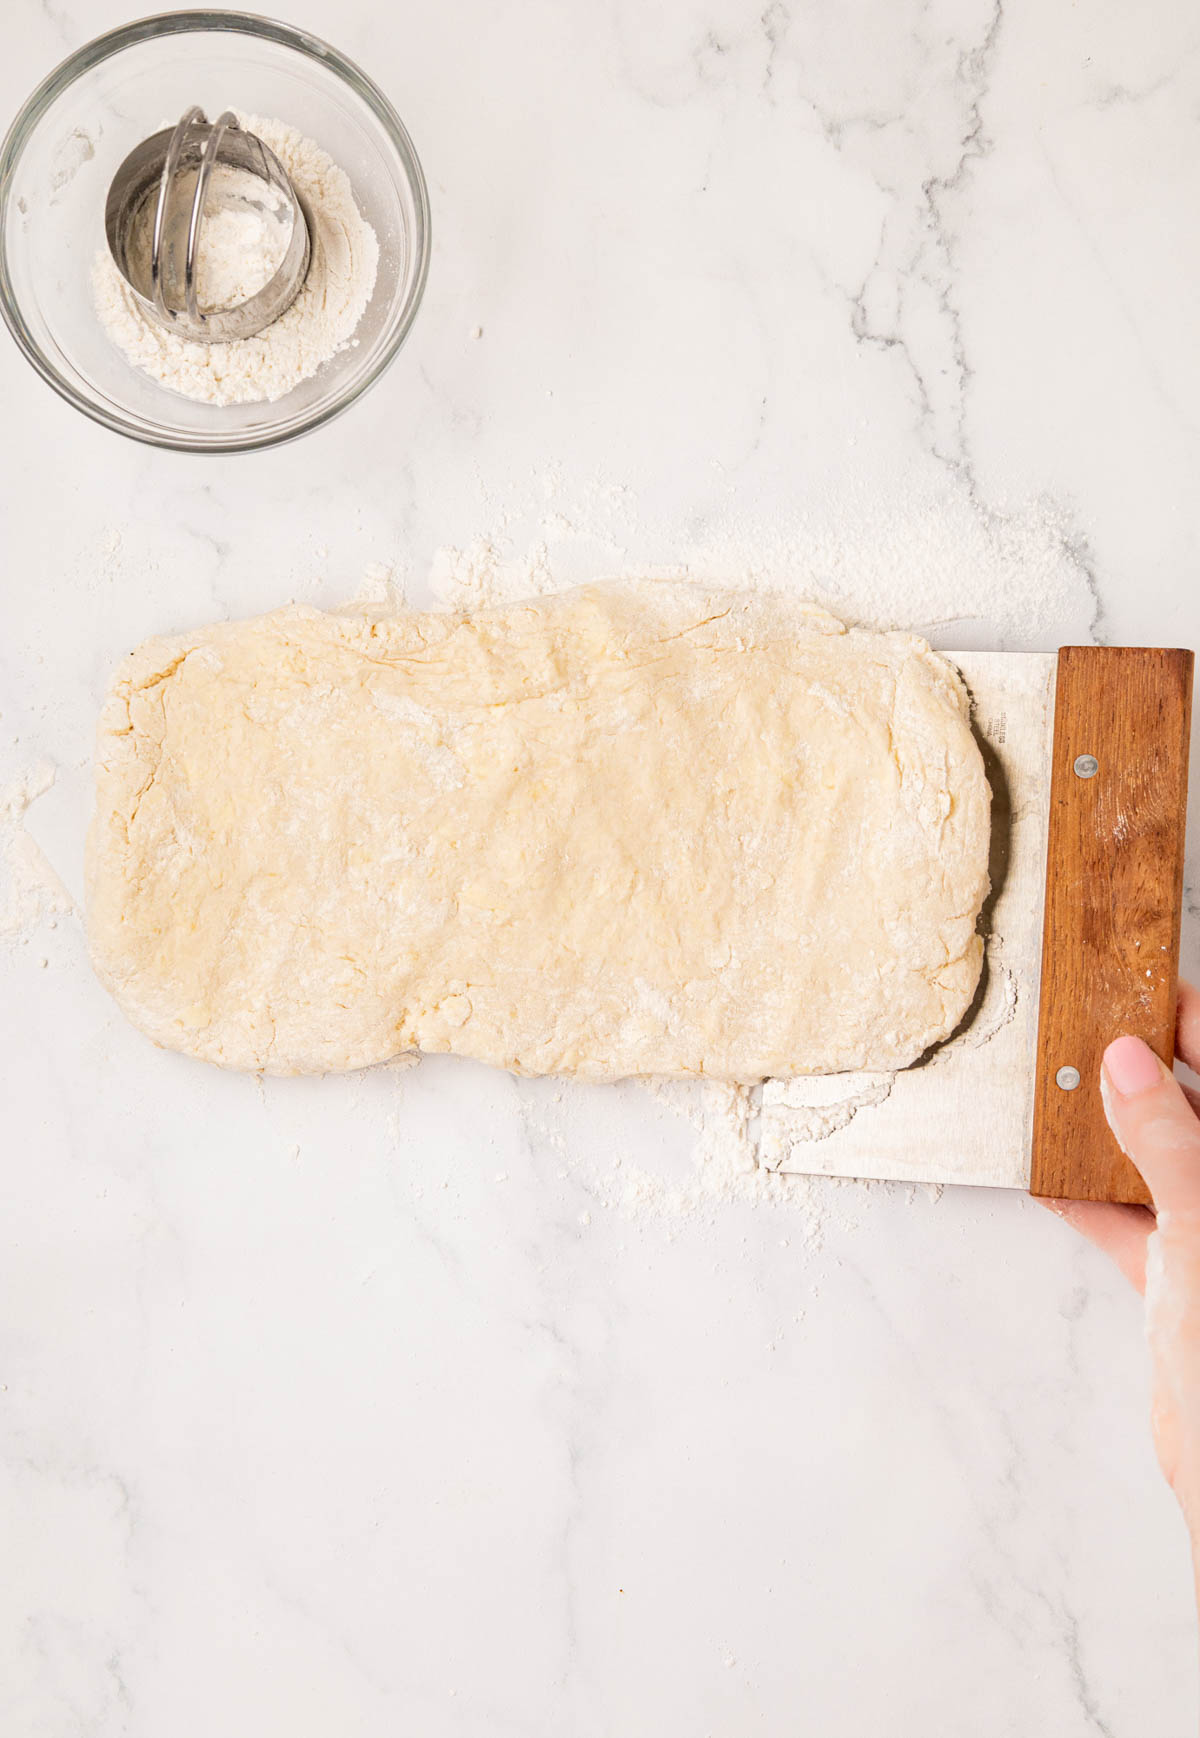
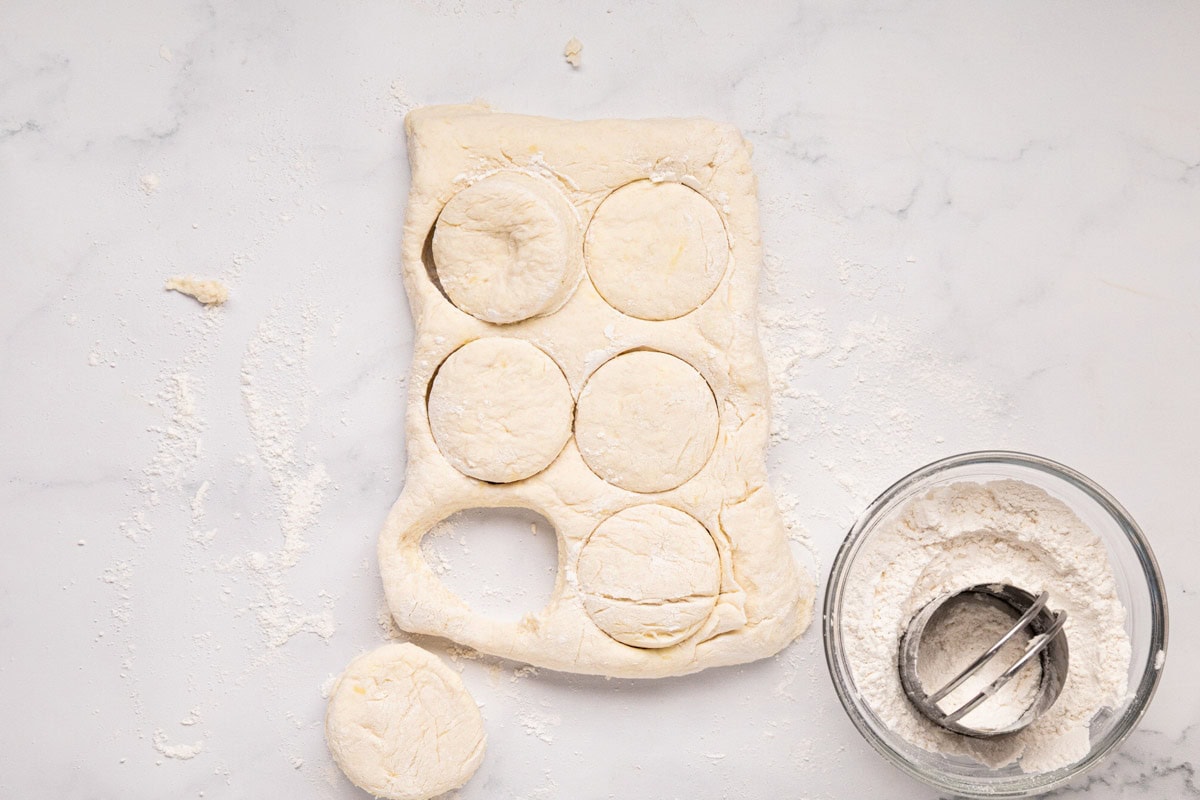
Step 6 | Cut the Biscuits
Flatten the dough to ¾ to 1 inch thick.
Dip a 2 to 2½-inch biscuit cutter in flour and press it straight down into the dough, then pull it straight back up without twisting. Twisting seals the edges and keeps your biscuits from rising the way they should.
Gather the scraps, press them together gently, and cut the remaining biscuits. You should get 10 to 12 total.
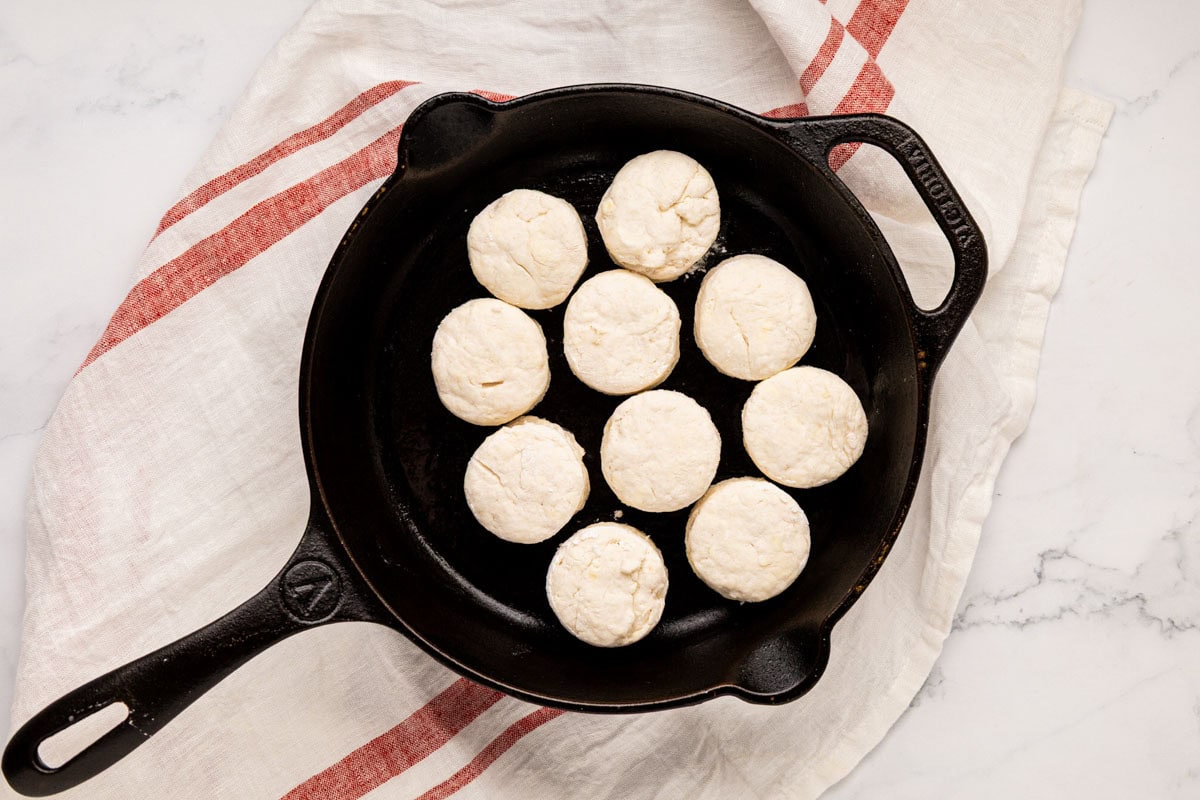
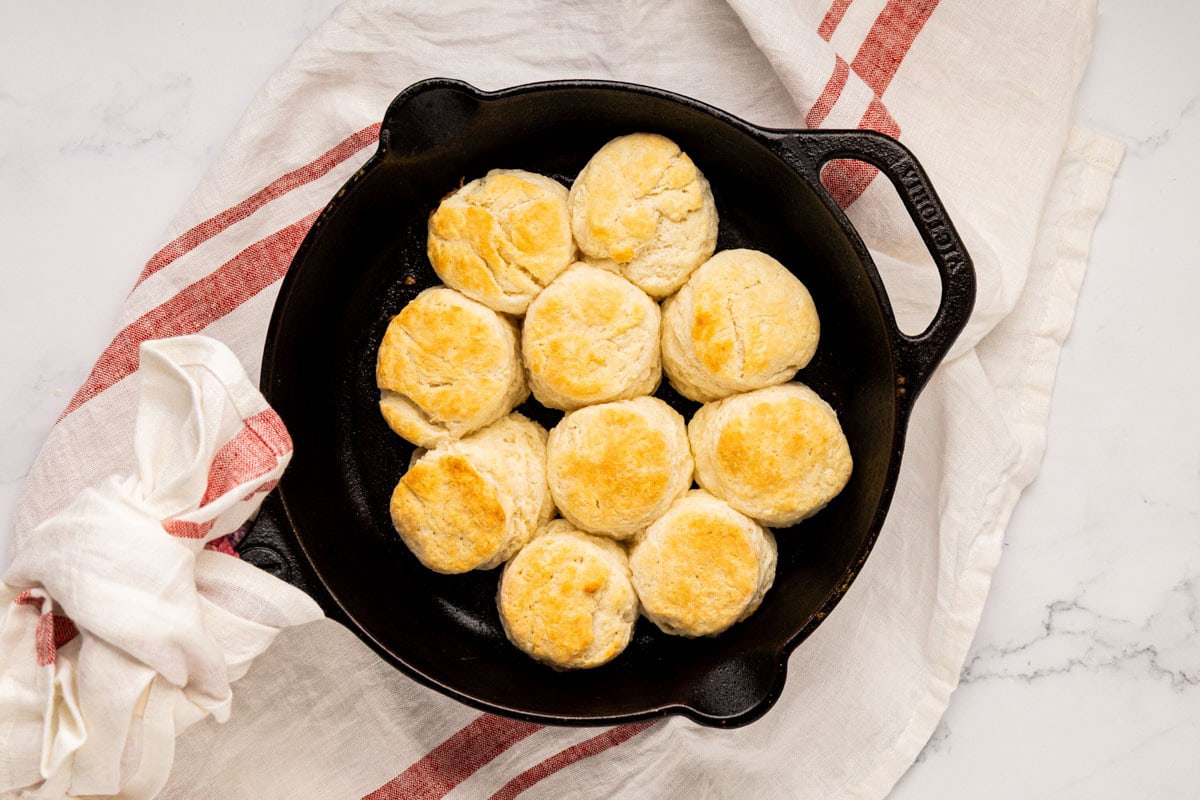
Step 7 | Arrange, Brush, and Bake
Place the biscuits on your prepared pan.
For soft sides and more lift, place them nearly touching.
For crispier edges, space them a couple of inches apart.
Brush the tops with melted butter and bake for 15 to 18 minutes until the tops are golden brown.
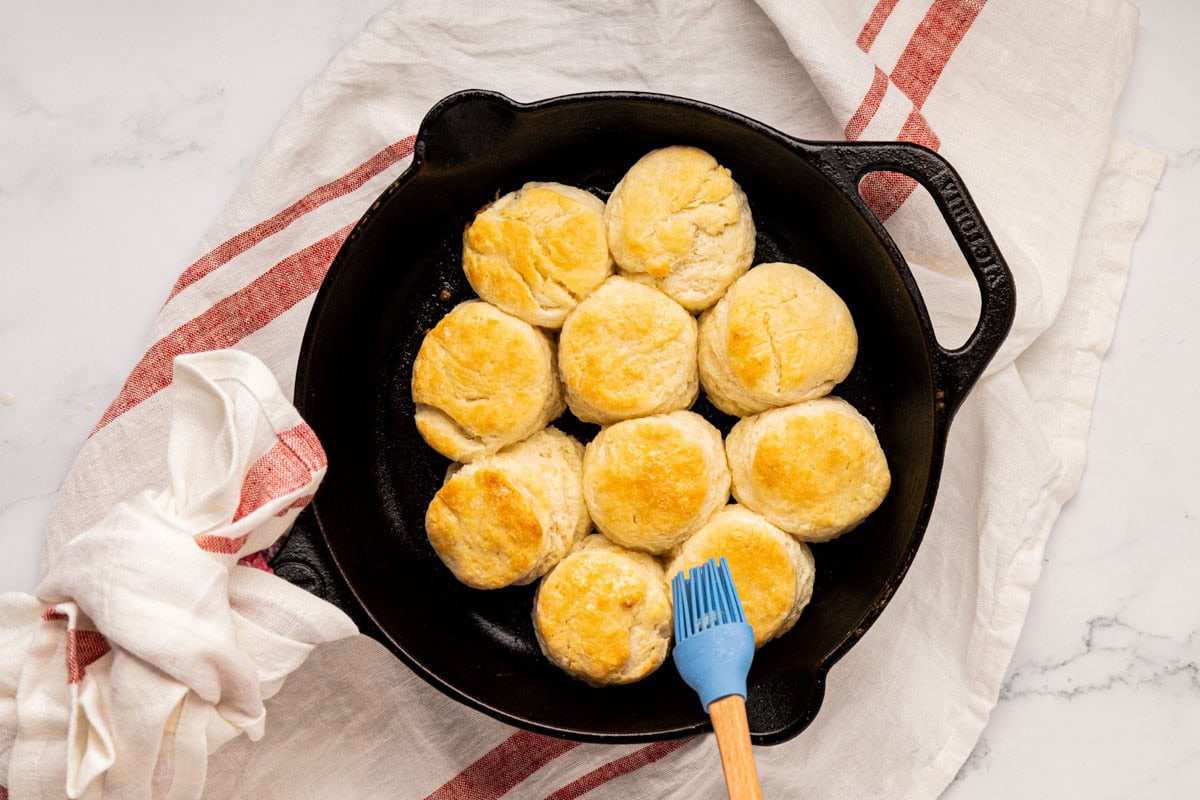
Brush with a little more melted butter when they come out if you like.
Easy Buttermilk Biscuit Variations & Substitutions
- Make it cheesy: Stir in 1/2 to 3/4 cup of shredded sharp cheddar before adding the buttermilk for a savory twist that pairs especially well with soup or eggs.
- Add herbs: A tablespoon of fresh chives or rosemary mixed into the dough adds a nice savory note with no extra work.
- Shortening swap: You can use shortening, but butter gives you both the flaky layers and the flavor. If you want to split the difference, use half butter and half shortening for a tender biscuit with more flavor than shortening alone.
Shortcuts & Time Savers
Grate the butter ahead: Grate your butter directly onto a small plate the night before, cover with foil, and keep it in the freezer. It will be perfectly cold and ready to go when you need it.
Cut and refrigerate: Cut the biscuits up to 2 days ahead, cover them on the pan, and refrigerate until you are ready to bake. They go straight from the fridge into the oven.
Tips for Making Tall, Flaky Buttermilk Biscuits
- Keep everything cold. Cold butter is non-negotiable. When those pieces hit the hot oven, they create steam, and that steam is what gives you flaky layers. If your kitchen runs warm, pop the grated butter back in the freezer for a few minutes before mixing.
- Do not overwork the dough. Stir just until things come together and keep your folds gentle. Overworking develops gluten, and that leads to tough, flat biscuits. The less you handle it, the better.
- Do not twist the cutter. Press straight down and pull straight up. Twisting seals the edges and prevents a good rise. This is one of the most common reasons biscuits come out flat, and it is an easy fix.
- Pat to the right thickness. For tall biscuits, you want the dough to be ¾ to 1 inch thick before you cut. Too thin and you will not have enough height to work with, no matter how well everything else goes.
- Give your oven time to fully preheat. Wait 10 to 15 minutes after the preheat signal before you bake. The intense heat in those first few minutes is what makes biscuits spring up, and a partially preheated oven cannot deliver that.
- How you place the biscuits matters. Biscuits placed nearly touching will rise higher and have softer sides. Spaced further apart gives you crunchier edges and a little less lift. Neither is wrong, just depends on what you are after.
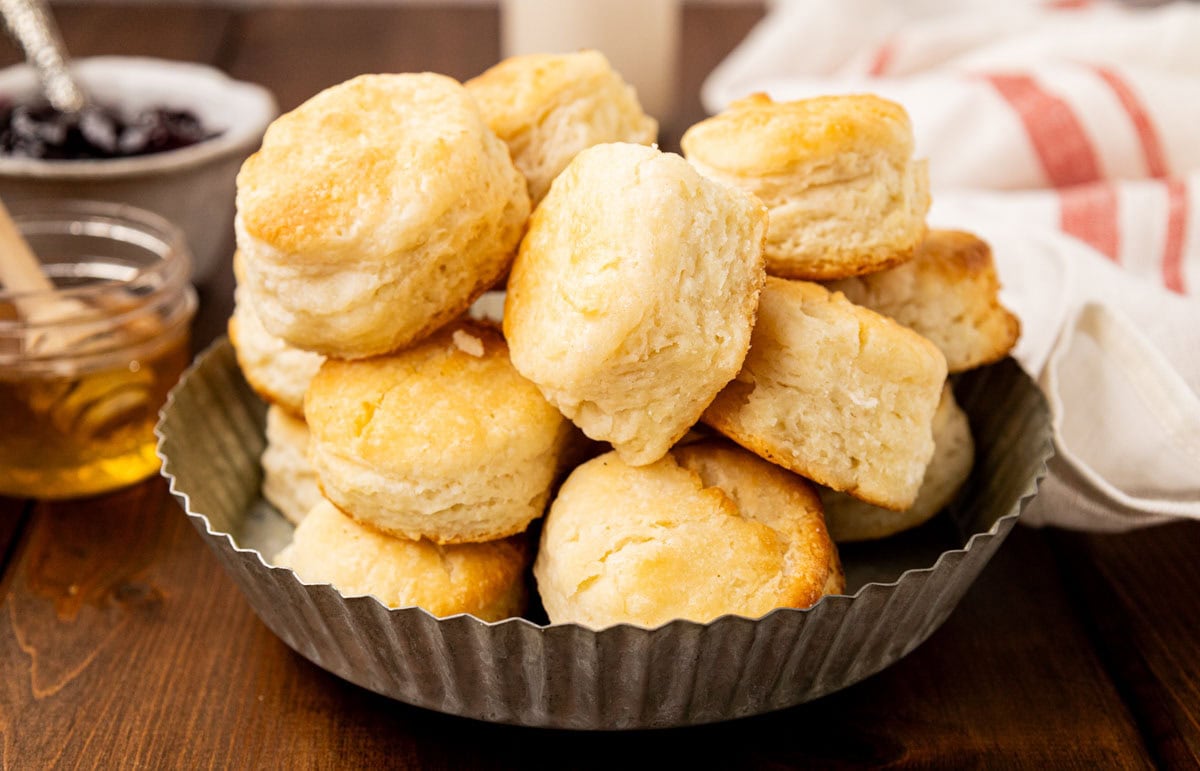
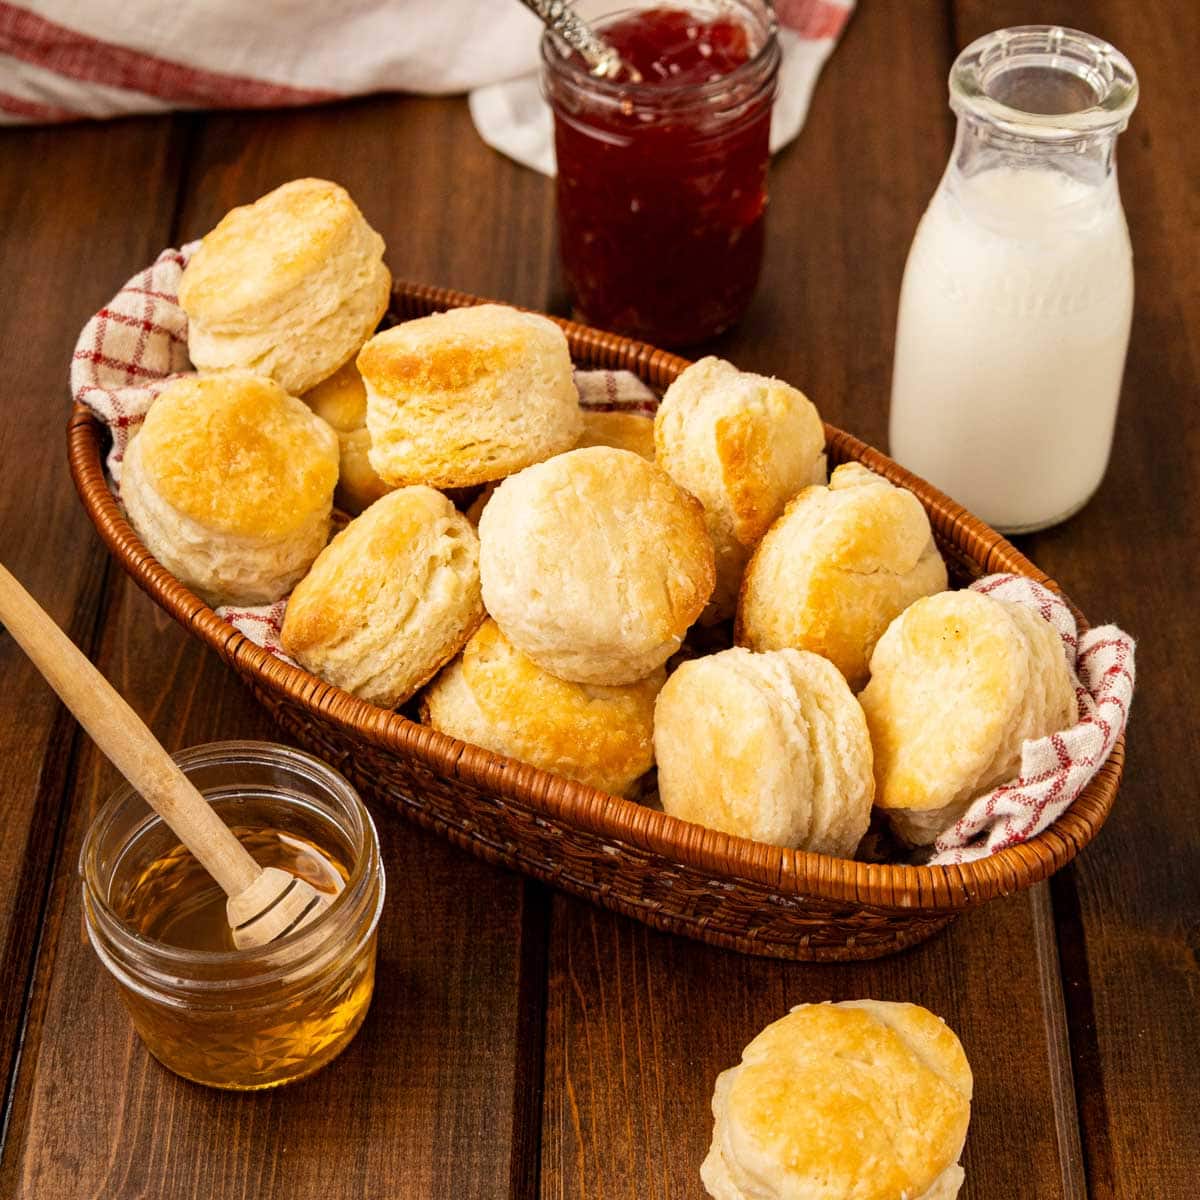
What to Serve With Easy Buttermilk Biscuits
A warm biscuit straight from the oven with a pat of butter and a spoonful of strawberry jam or cherry jam is hard to beat. Apple butter or pumpkin butter is another favorite around here, and if you have never tried chocolate gravy spooned over a fresh biscuit, that is something worth making time for.
For a full breakfast, these biscuits were made for biscuits and gravy! Try them with sausage gravy or chipped beef gravy. Add a side of eggs and a bowl of grits, and you have the kind of breakfast that makes people linger at the table a little longer.
These are just as welcome at dinner as they are in the morning. I love to serve them with slow cooker chicken gravy or creamed hamburger gravy. They are great served on top of the biscuits or as a side with the meals.
Whatever is on the table, a good biscuit fits right in and makes the whole meal feel a little more complete.
How to Store, Freeze, and Make Ahead Southern Buttermilk Biscuits
Storage: Keep leftover biscuits in an airtight container at room temperature for up to 2 days. To refresh them, warm in a 300°F oven for 5 to 8 minutes.
Make Ahead: Cut the biscuits, place on a parchment-lined baking sheet, and cover tightly. Refrigerate up to 2 days and bake straight from the fridge in a fully preheated 450°F oven.
Freeze unbaked biscuits flat on a lined baking sheet for about 1 hour, then transfer to a freezer-safe bag for up to 3 months. Bake from frozen at 400°F for 15 to 22 minutes, no thawing needed.
Recipe FAQs
The most common culprits are a twisted biscuit cutter, which seals the edges, or an oven that was not fully preheated. Press straight down with the cutter and give your oven a full 15 minutes after the preheat beep. Also, make sure your flour is in date,
Yes. Add 1 tablespoon of white vinegar or lemon juice to a measuring cup, fill to the ¾ cup line with milk, stir, and let it sit for 5 minutes before using.
Buttermilk dough is naturally a little tacky. Dust your hands and surface lightly with flour and work quickly. If it is truly too wet to handle, add flour one tablespoon at a time.
Absolutely. A sharp knife, bench scraper, or pizza cutter works fine. Cut the dough into squares or rectangles, and you will not lose any dough to scraps either.
You do not have to, but White Lily makes a noticeable difference. It is a softer flour that keeps biscuits tender. Another self-rising flour works, or see the all-purpose conversion above. The biscuits will still be good, just slightly different in texture. Personally, I think White Lily biscuits are the best, and if you can find it I highly recommend giving it a try!
Hungry for more easy, home-cooked, delicious recipes?
Sign up for my free recipe club to get family-friendly recipes in your inbox each week! Find me sharing daily meal-time inspiration on Pinterest, Facebook, and Instagram.
Homemade Buttermilk Biscuits
Click Stars To Rate
Equipment
Ingredients
- 2 cups White Lily self-rising flour
- ½ cup unsalted butter - frozen and grated (or very cold, cut into small pieces)
- ¾ cup buttermilk - cold
- 2 tablespoons unsalted butter - melted (for brushing)
Instructions
- Preheat the oven to 450°F. Line a baking sheet with a silicone baking mat or parchment paper, or use a well-seasoned cast-iron skillet brushed with butter or oil.
- Measure the flour by fluffing the flour with a fork, so it is not packed down. Then spoon it into a dry measuring cup and level it off with the flat edge of a knife. Do not scoop directly from the bag.
- Grate the frozen butter directly into the flour using the large holes of a box grater and stir to coat. If your butter is not frozen, use a pastry blender to cut cold butter into the flour until the pieces are about the size of a small pea.
- Pour in the buttermilk and stir just until the dough comes together. It should look thick, similar to mashed potatoes. If it feels too sticky, add a little more flour. If it is not holding together, add a small splash more buttermilk.
- Turn the dough out onto a lightly floured surface. If it needs a little help coming together, give it a few gentle kneads. Then flatten it into a rough rectangle, about 1/2 inch thick. Fold it like a letter going into an envelope (tri-fold method), bringing the left third to the center, then folding the right third over the top. You now have three layers of dough stacked together. Give it a quarter turn, flatten it back out into a rectangle, and fold it the same way again. Repeat one more time for three folds total. Dust the surface and dough lightly with flour as you go to keep things from sticking. These folds are what build those layers in the finished biscuit.
- Flatten the dough to 3/4 to 1 inch thick. Press a floured 2 to 2 1/2-inch biscuit cutter straight down, and pull straight up without twisting. Gather scraps, press together, and cut remaining biscuits. You should get about 10 biscuits.
- Place biscuits on the prepared pan, nearly touching for soft sides and more lift, or spaced apart for crispier edges. Brush tops with melted butter and bake for 15 to 18 minutes until golden brown.Tip: Placing the biscuits close together (almost touching) will give you softer edges and more lift. If they are further apart, you will get crunchier edges and less lift or rise to the biscuits
- Brush with additional melted butter when they come out if desired.