


This post may contain affiliate links. Please read our disclosure policy.
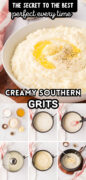
Ready to make the kind of Southern grits people rave about? This go-to recipe turns out smooth, creamy, and full of flavor every time—and I’m here to walk you through exactly how to get them just right. Whether it’s breakfast or dinner, these grits are always a hit.
What Makes This The Best Grits Recipe
Perfect Grits = Simple Ingredients, the Right Technique, and a Bit of Southern Know-How. Let Me Show You How It’s Done!
Grits are a staple you grow up on in the South. They’re served at breakfast tables, Sunday dinners, and everything in between. But let’s be honest—if you’ve tried grits and didn’t love them, chances are they weren’t cooked right. Undersalted, bland, and watery grits just won’t do.
I perfected my grits recipe when I first got married (because my mom always made instant grits). And over the years, it’s become one of those dishes people remember. Every time I serve them, someone says, “These aren’t like any grits I’ve had before.” And that’s because they’re not. My blend is full of flavor, ultra creamy, and anything but boring.
What Are Grits?
Grits are made from ground corn—usually white or yellow—and cooked with liquid until smooth and creamy; some say they are similar to a porridge. They’re a staple in Southern cooking and can be served plain or dressed up with butter, cheese, or savory toppings. Depending on how they’re processed, grits can have a coarse, hearty texture or be smooth and mild. They’re a simple comfort food and go with just about anything—perfect for breakfast or a side dish any time of day.
Creamy Grits Ingredients
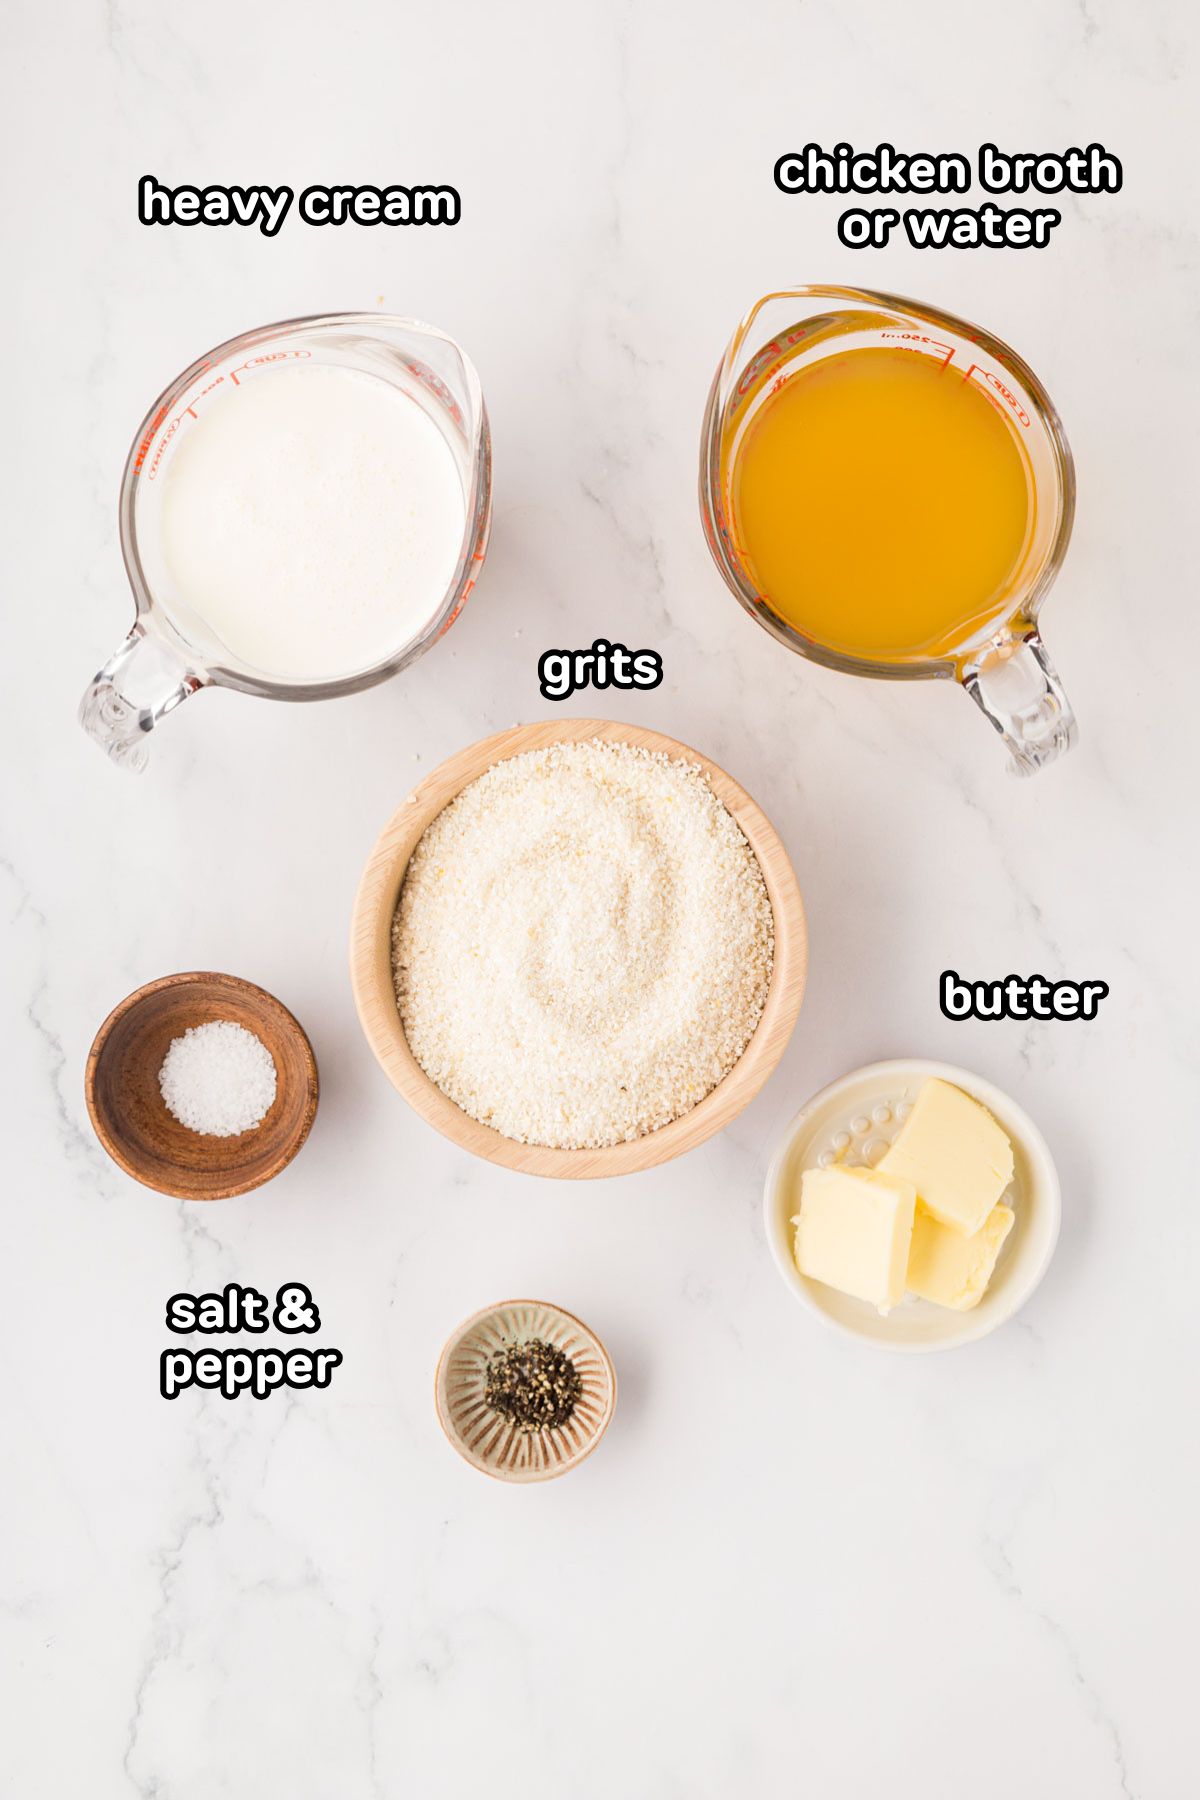
- Grits: This recipe uses regular grits, which are easy to find and cook in about 15 to 20 minutes. You’ll also see cook times listed for other types of grits, in case you want to try stone-ground or another variety. Just keep in mind that each type cooks a little differently.
- Chicken Broth: Using broth instead of water adds a lot of flavor. You can use low-sodium or regular, or swap in water if needed.
- Heavy Cream: This makes your grits extra creamy and rich. You can also use half-and-half or whole milk if you prefer a lighter option.
- Salt: Start with less and season to taste, especially if your broth or butter is already salted.
- Butter: Use real butter for the best taste. Salted or unsalted works—just adjust the added salt accordingly.
- Black Pepper: Freshly cracked adds a nice finish and a little bite right before serving.
How To Cook Grits
✱ Be sure to see the recipe card below for exact ingredients and full recipe instructions!
Step 1 | Bring Liquid to a Boil
In a heavy-bottomed saucepan over medium-high heat, add the chicken broth (or water), heavy cream, and salt. Bring it to a gentle boil.
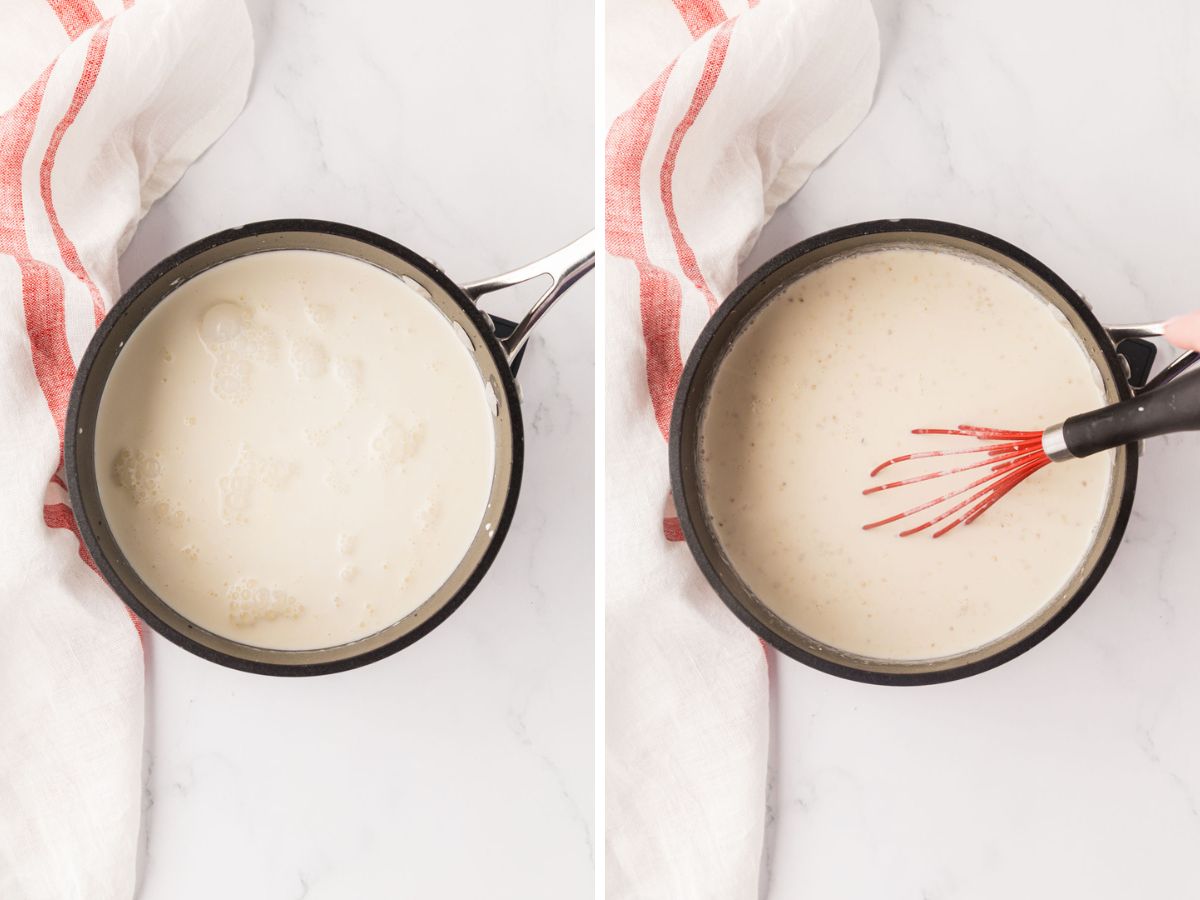
Step 2 | Whisk in the Grits
Slowly whisk in the grits while stirring constantly to prevent any lumps from forming. A steady whisk here makes all the difference.
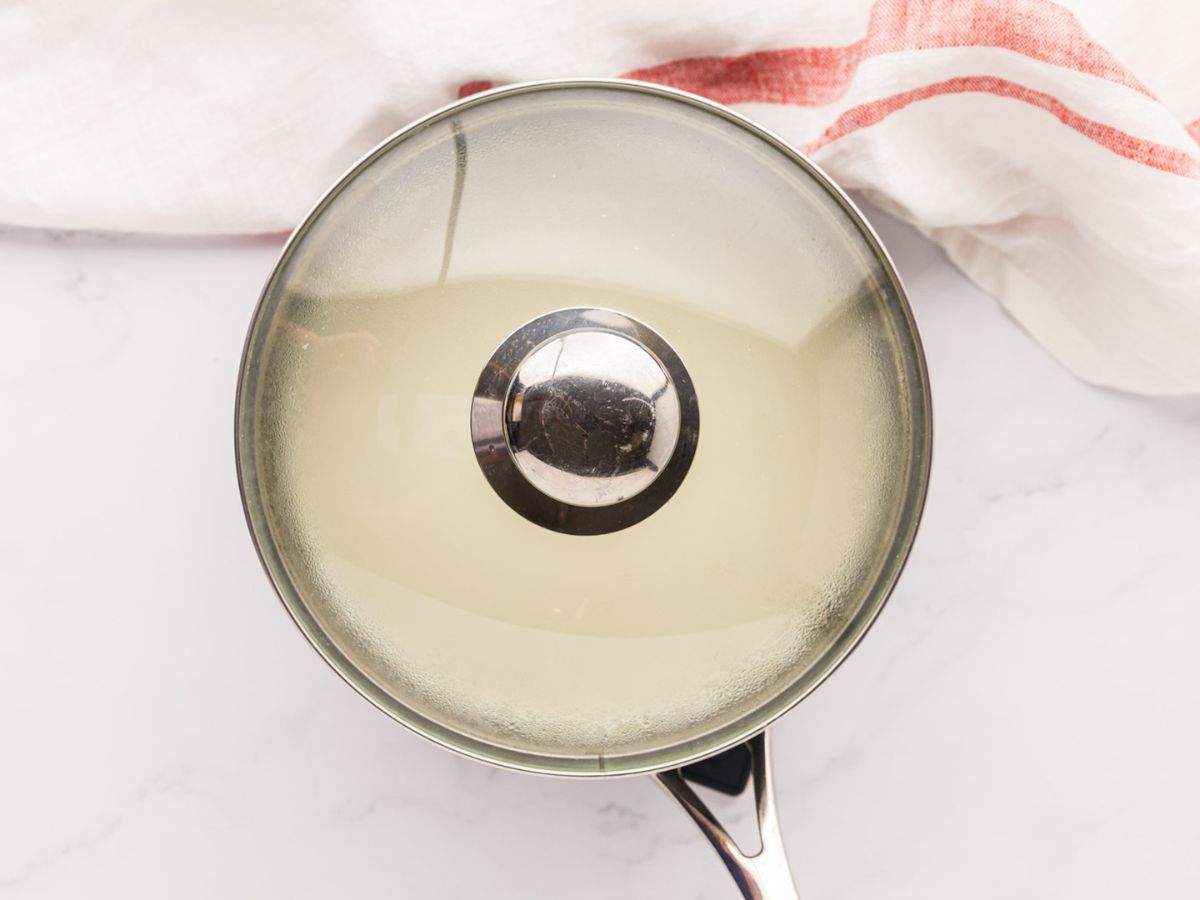
Step 3 | Simmer Low and Slow
Reduce the heat to medium-low. Cover with a lid, slightly cracked, and let the grits simmer for 15 to 20 minutes. Stir every 5 to 8 minutes, scraping the bottom of the pan to keep them from sticking or burning.
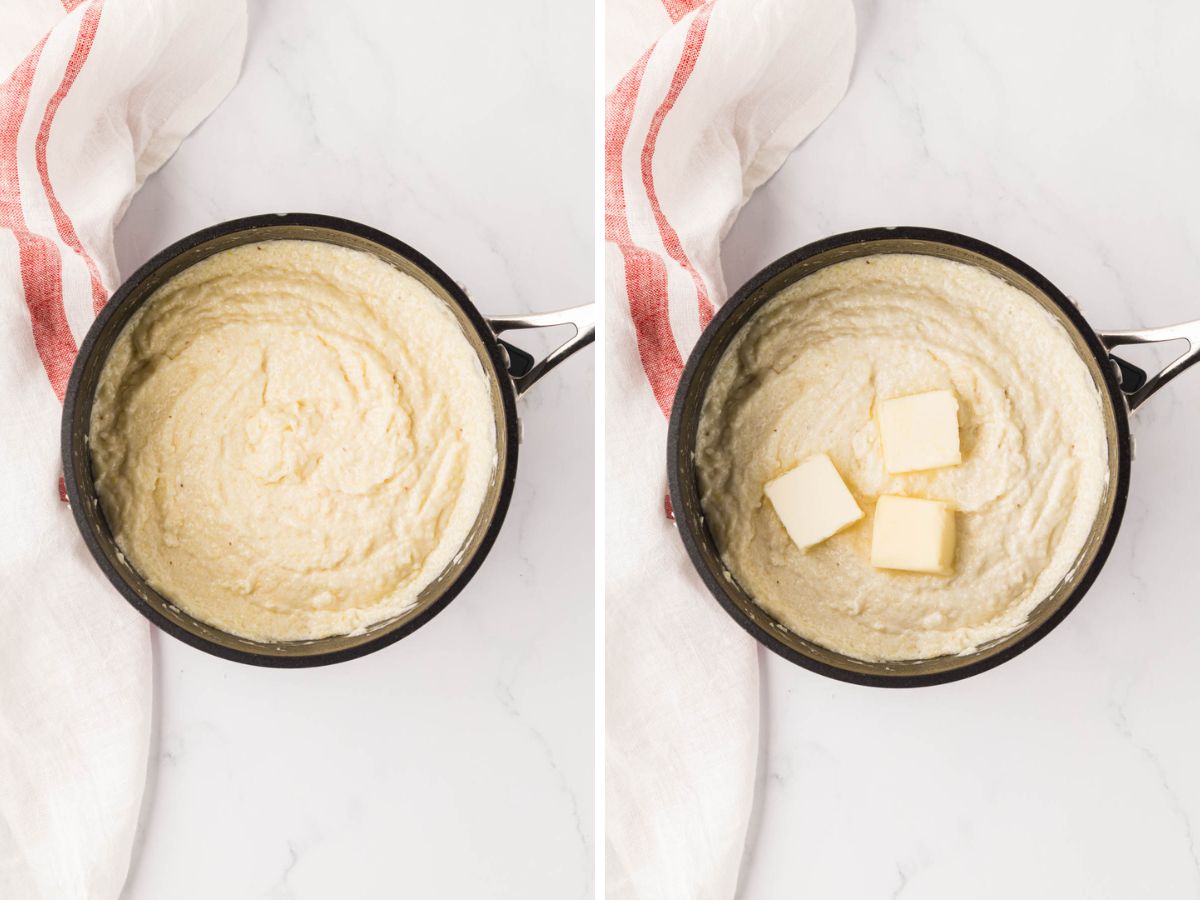
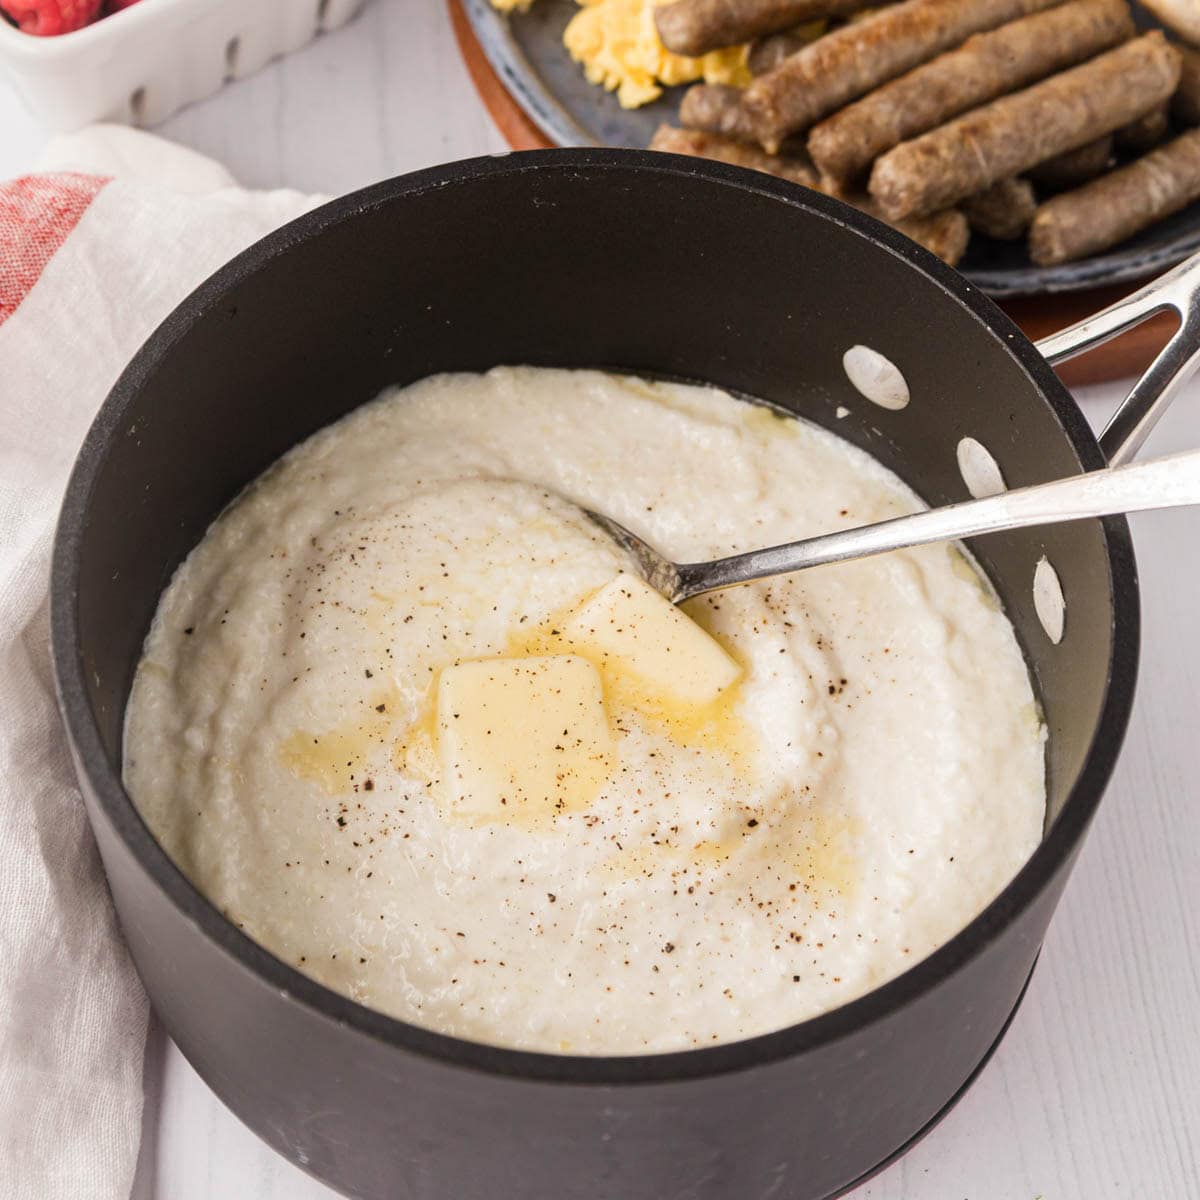
Step 4 | Finish with Butter
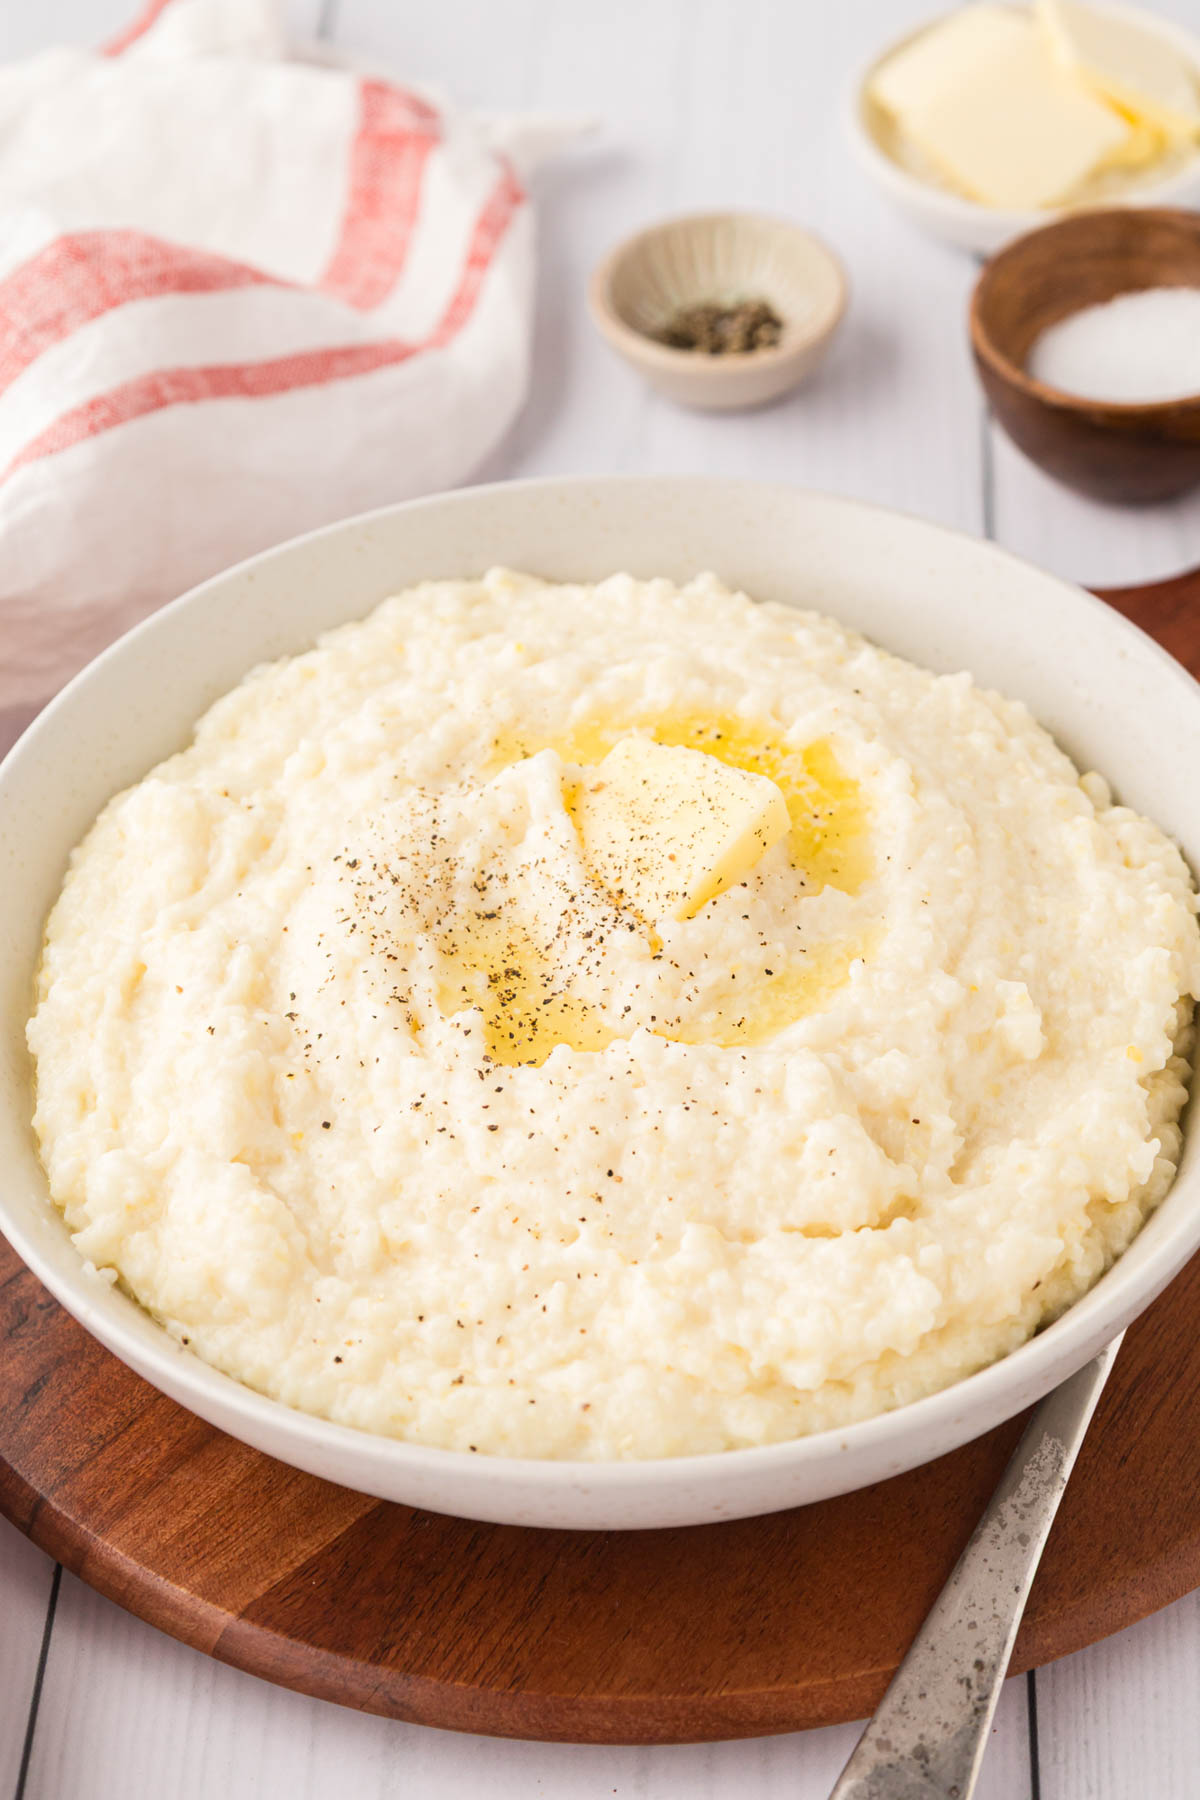
Once the grits are thick and creamy, remove from heat. Stir in the butter until melted and combined.
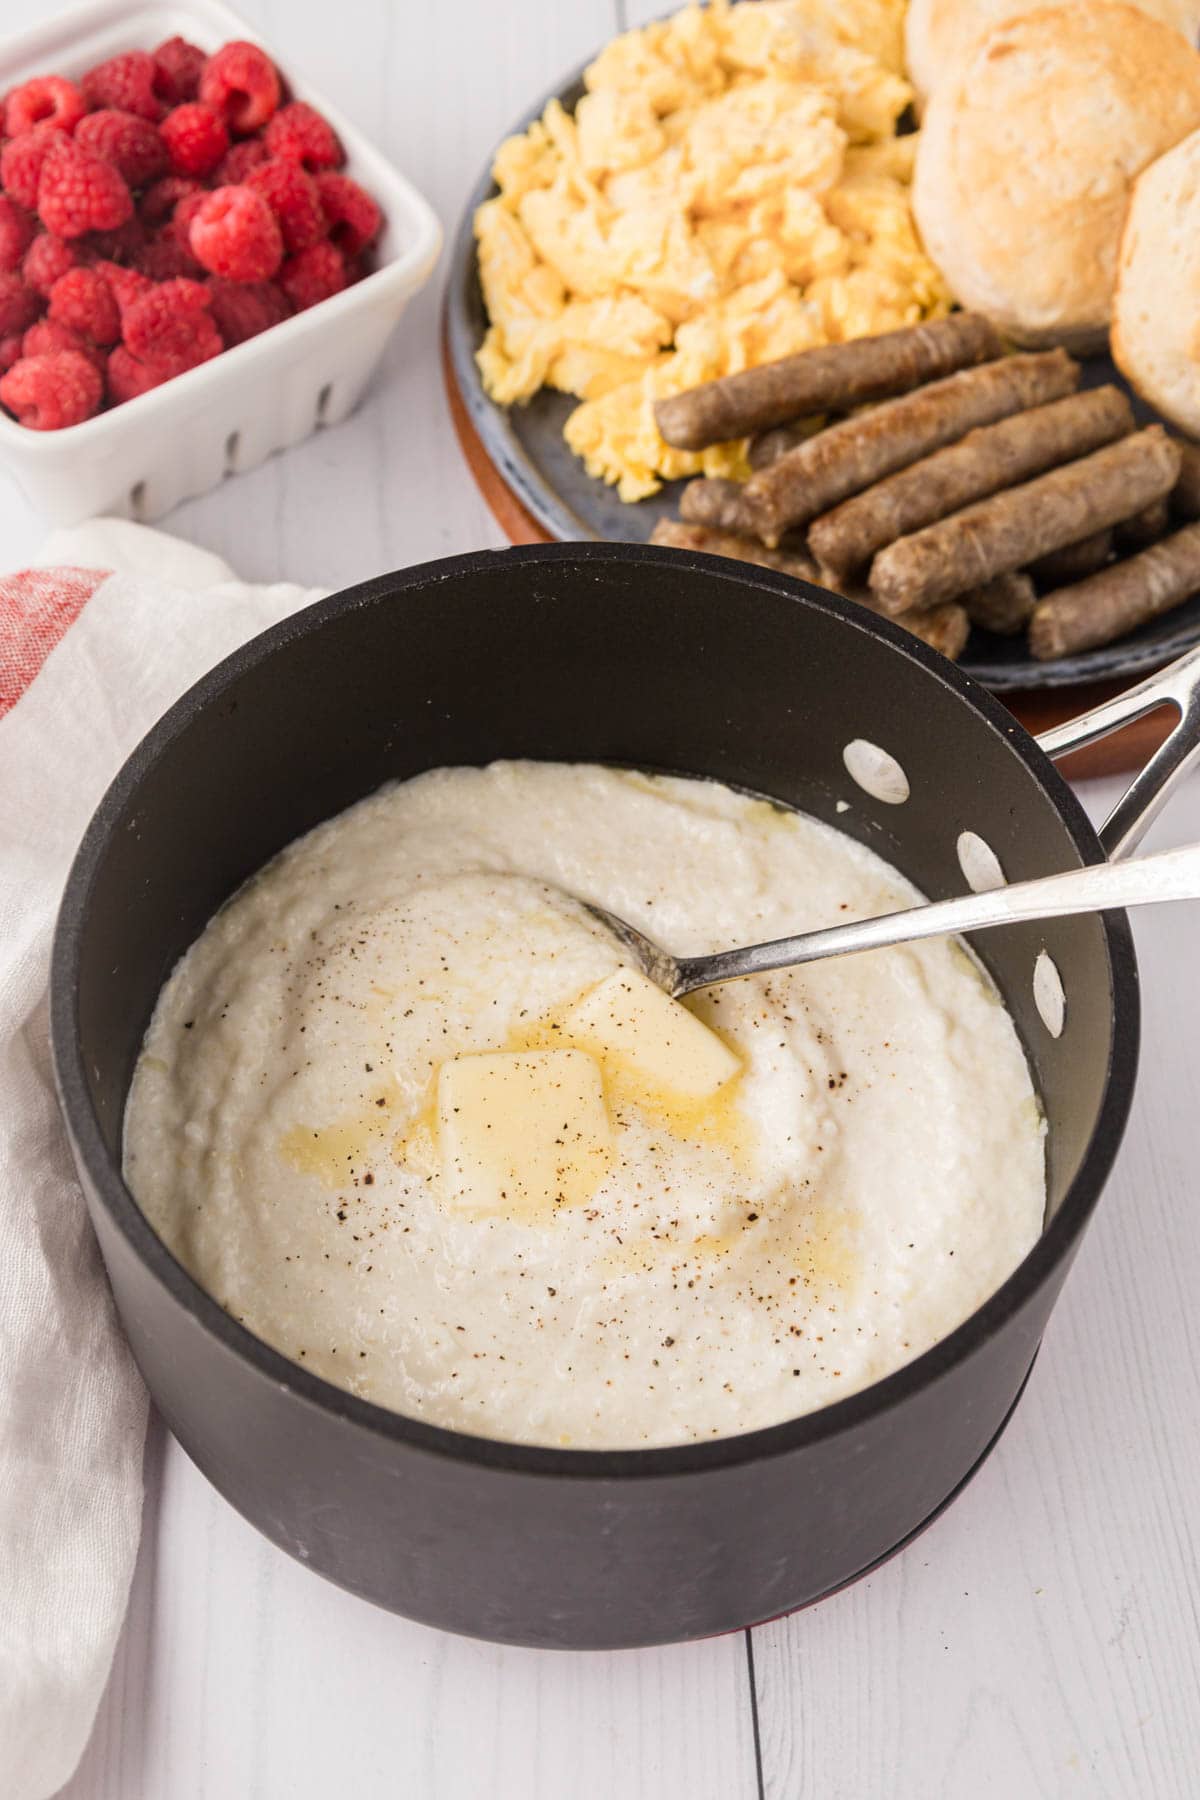
Step 5 | Season and Serve
Taste and adjust salt if needed. Top with freshly cracked black pepper, and serve warm.
How To Make Cheese Grits
Once your grits are fully cooked, slowly stir in your favorite cheese. Start with 1 cup of shredded or grated cheese, taste, and add more if desired.
Cheddar, Parmesan, American, or Gouda are all great choices depending on the flavor you’re going for—but honestly, any cheese you love will work.
Types of Grits and Cooking Times
Old-Fashioned Grits (Regular Grits): These are the most common type of grits. They’re medium-ground with the hull and germ removed, leaving mostly the starchy endosperm. This gives them a smoother texture and a shorter cook time—about 15 to 20 minutes—making them a reliable choice when you want classic grits without the long wait.
Stone-Ground Grits: They’re coarsely ground and still have the germ intact, which gives them that rich, earthy corn flavor we all love. You can find them in both white and yellow varieties, but traditionally, white grits are what you’ll see served up at breakfast. The cooking time depends on the variety of the corn and how coarse the grind is—plan on about 30 – 60 minutes. Stone-ground grits are less processed, which makes them more perishable, so store them in the freezer, not the pantry.
Hominy Grits: Made from corn that has been treated through nixtamalization—a process using an alkaline solution to remove the hull and germ. This gives hominy grits a smoother texture and a slightly nutty, distinctive flavor. They’re available in both white, yellow, and blue. It’s recommended to store these in the freezer for a longer shelf life.
Quick Grits: Ground finer than regular grits, these cook in about 5 to 7 minutes. They’re convenient and easy to prepare, though they have a milder flavor and smoother texture than stone-ground or old-fashioned grits.
Instant Grits: These are precooked and dehydrated, so they only need hot water or milk to prepare. They cook the fastest—just stir and they’re ready—but they have the least texture and flavor. Best for when you need something quick and easy.
Tips for the Best Southern Grits
- Whisk While Adding Grits: Slowly whisk grits into the boiling liquid to prevent lumps. A steady whisk at the start makes for smooth, creamy grits.
- Stir Occasionally While Simmering: Grits can stick to the bottom of the pot if left too long without stirring. Give them a good whisk or stir every 5 to 8 minutes to loosen any that may be settling. Take your time—rushing can lead to burned grits on the bottom.
- Cook Low and Slow: Once the grits are in and the pot returns to a simmer, lower the heat. Gentle, slow cooking gives you the best texture.
- Thickness: Grits will thicken up very quickly. At the end, add more broth/water or cream/milk to get the consistency to your liking.
- For Less Creamy Grits: Want a lighter texture? Use 3 cups of broth or water and 1 cup of cream or milk. Or go with all broth/water and finish with a splash of cream for richness.
- Salt to Taste: Start with less salt and adjust at the end. For my family, 1 teaspoon of kosher salt with 3 tablespoons of real salted butter is just right, but everyone’s palate is different.
- Adding Cheese: Cut back on the salt at first. Cheese adds its own saltiness, so season after stirring it in.
Variations and Substitutions
- Cheese Grits: Stir in shredded cheddar, Gouda, or Parmesan after cooking for a rich, savory twist. Start with 1 cup and adjust to your taste.
- Garlic Butter Grits: Add sautéed garlic and an extra tablespoon of butter for more depth of flavor.
- Spicy Grits: Mix in diced jalapeños, hot sauce, or red pepper flakes for a little kick
- Herbed Grits: Stir in fresh chopped herbs like parsley, chives, or thyme at the end of cooking.
- Sweet Grits: Swap the broth for water or milk, reduce the salt, and stir in sugar, cinnamon, and a pat of butter.
Add Meats
- Bacon or Sausage: Crumbled and stirred in or served on top.
- Shrimp and Grits: Classic Southern pairing—sauté shrimp in butter, garlic, and spices, then spoon over grits.
- Pulled Pork or BBQ Chicken: Serve over grits for a hearty meal.
- Ham: Diced ham works great mixed in, or a sliced ham on the side for a breakfast-style plate.
Recipe FAQs
White grits are made from white corn and tend to have a milder flavor, commonly used for breakfast. Yellow grits are made from yellow corn and have a slightly stronger, more pronounced corn taste. Either will work!
Lumps happen when grits are added too quickly to hot liquid. Always whisk them in slowly and keep stirring during cooking to maintain a smooth texture.
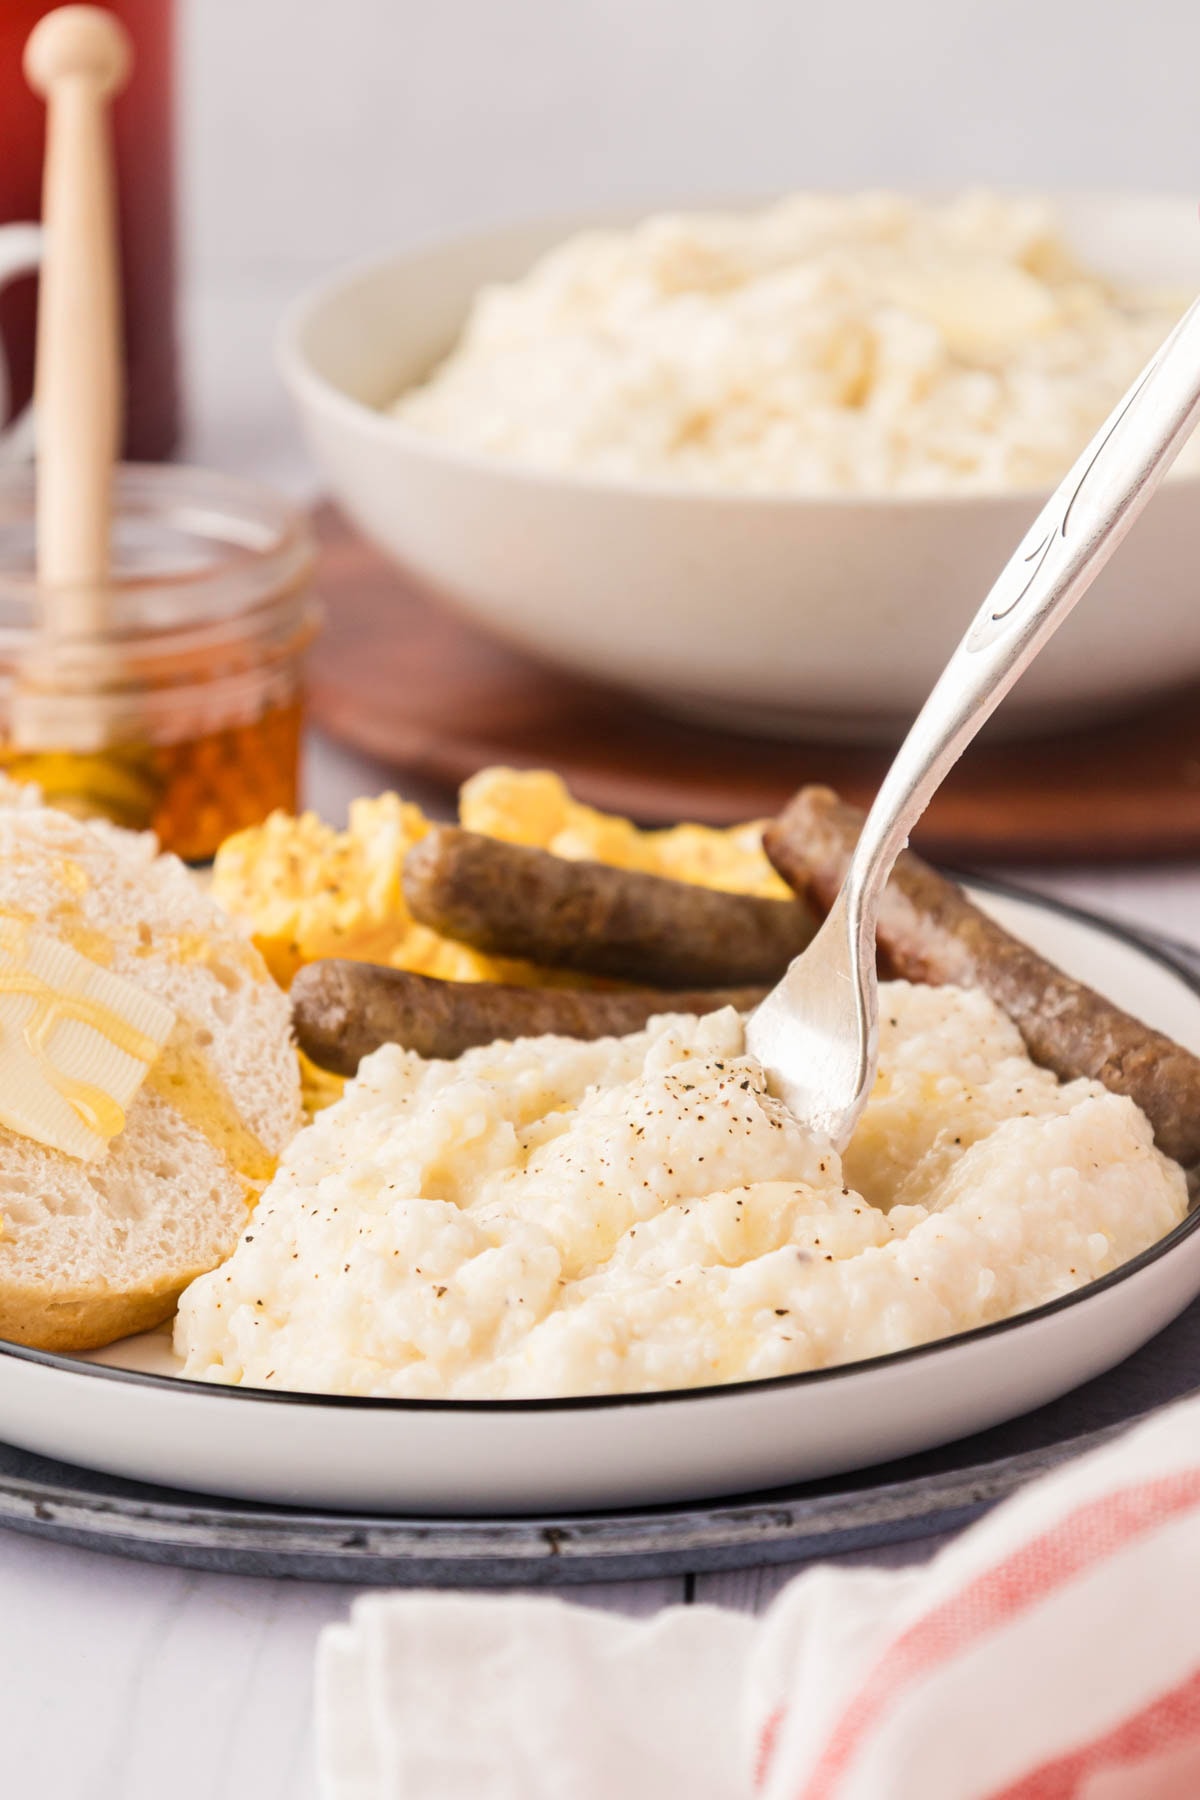
How to Serve Breakfast Grits
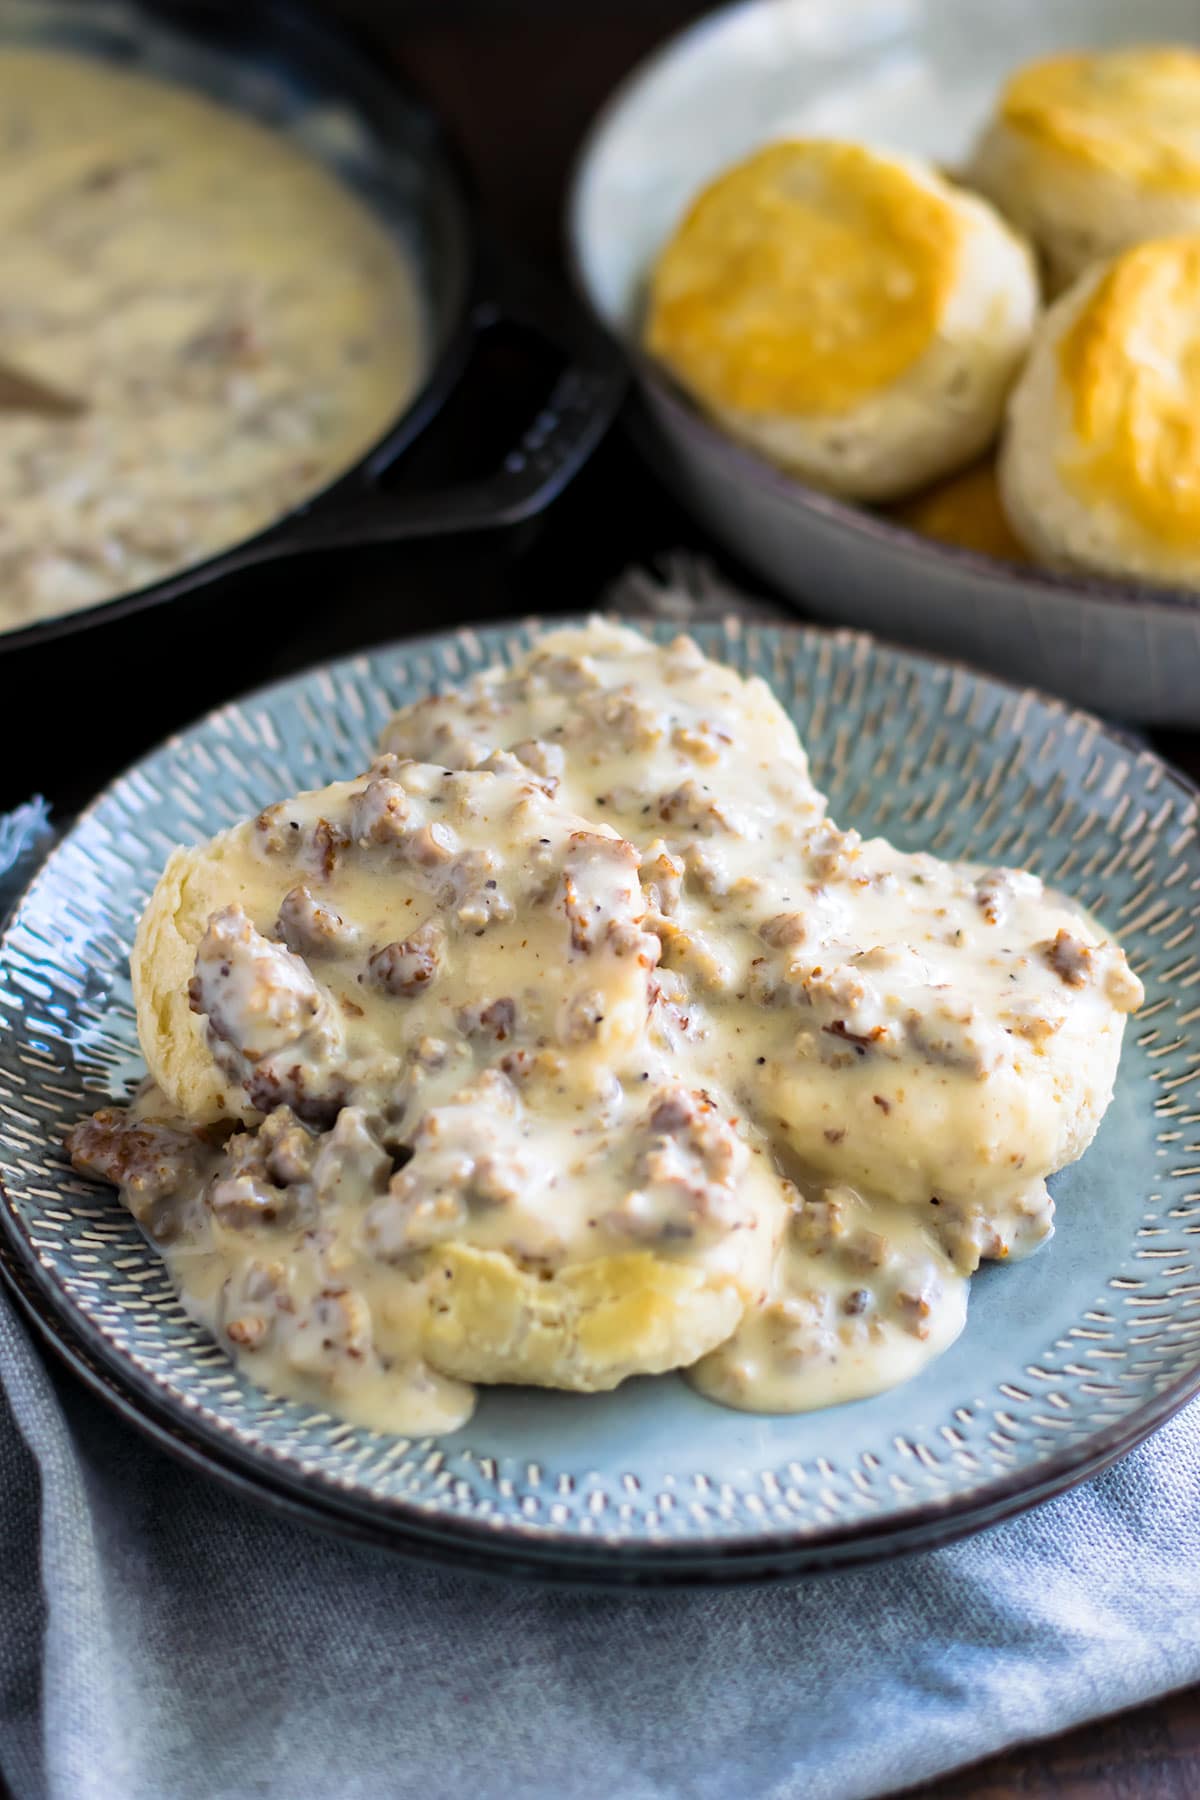
Grits are one of those dishes that just go with everything. For breakfast or brunch, I love them served up with eggs—fried or scrambled. We always mixed grits with scrambled eggs growing up. Don’t forget some crispy bacon, sausage links, or a nice slice of country ham. And sausage gravy over grits is a must-try!
A biscuit on the side and a little fresh fruit make it feel like a full, Southern-style morning meal.
TIP for a Crowd: Make a double or triple batch for a crowd and serve on the warm setting in a crock pot. This is perfect for breakfast, brunch, or dinner. Have it as a side dish, or serve it with various toppings so that everyone can build their favorites. This is always a hit.
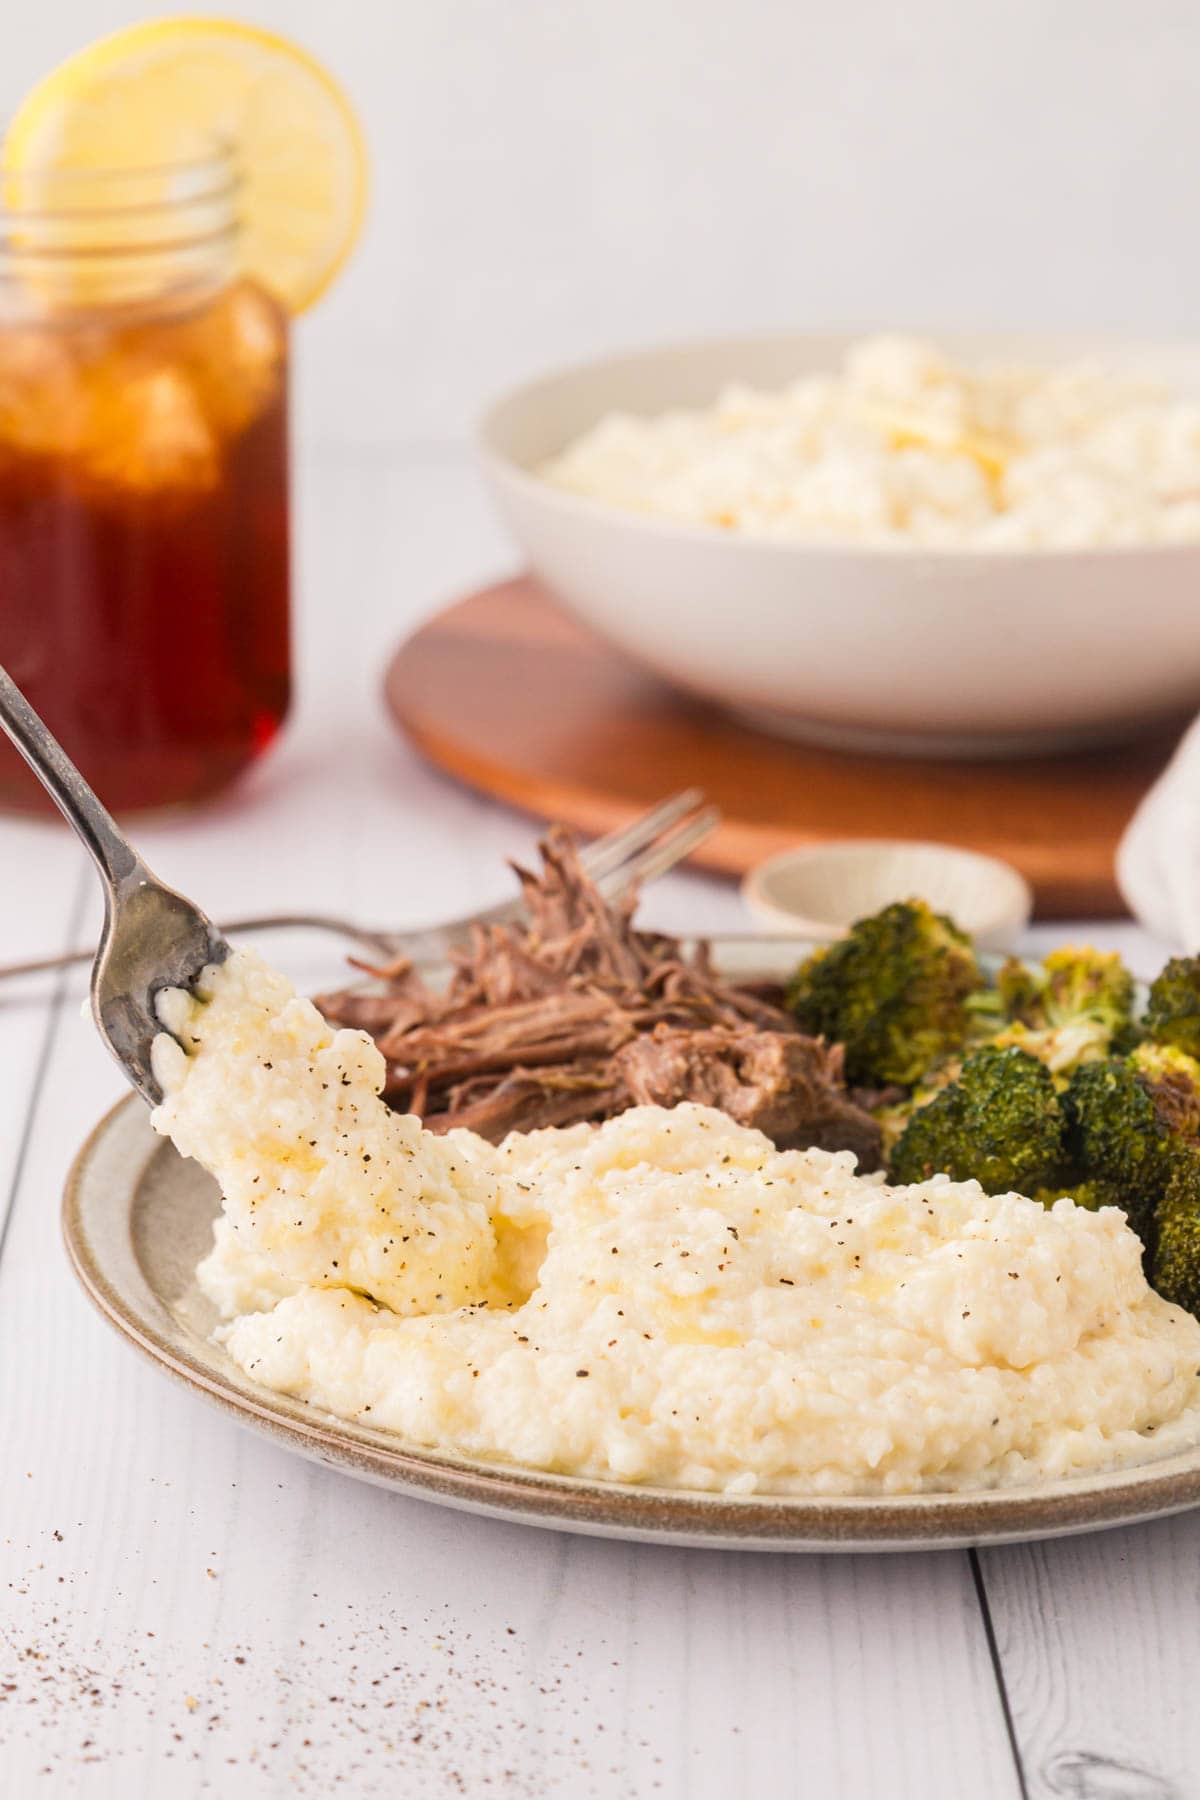
Savory Grits
For something heartier, grits make the perfect base for savory dishes like shrimp and grits (a classic!) or fried catfish. They also pair wonderfully with pulled pork, BBQ chicken, or a good slow-cooked pot roast. Add in some roasted veggies or stewed tomatoes, and you’ve got yourself a comfort food plate that hits all the right notes.
And if you want to go all-in on the Southern goodness, serve them with a side of collard greens, fried green tomatoes, or a hunk of cornbread. I even like to throw on a little pickled okra or chow chow for some extra zing.
How to Store Creamy Grits
To Store: Let the grits cool completely, then transfer them to an airtight container. Store in the refrigerator for up to 4 to 5 days.
To Reheat: Grits thicken as they sit, so add a splash of water, milk, or broth before reheating. Warm them gently on the stovetop over low heat, stirring often until smooth and creamy. You can also reheat them in the microwave—heat in short intervals, stirring in between and adding liquid as needed.
More Delicious Breakfast Recipes


Hungry for more easy, home-cooked, delicious recipes?
Sign up for my free recipe club to get family-friendly recipes in your inbox each week! Find me sharing daily meal-time inspiration on Pinterest, Facebook, and Instagram.
Ingredients
- 1 cup of old fashioned grits
- 2 cups chicken broth - or water (I highly recommend broth)
- 2 cup heavy cream - (can sub half & half or whole milk) Heavy cream makes them extra creamy
- ½ to 1 teaspoon kosher salt - or to taste
- 3 tablespoons butter - or to taste
- Garnish with cracked black pepper
Instructions
- In a heavy bottom saucepan, over medium-high heat, add chicken broth (or water), heavy cream and salt. Bring to a boil.
- Slowly add in grits while whisking to avoid lumps.
- Reduce to a simmer over medium-low heat, and whisk to stir. Add a lid and cook for 15-20, whisking occasionally to keep the grits from clumping.
- Remove from the heat and stir in butter. Taste and then season with additional salt and pepper, if you like. Adjust thickness to your liking by adding in a little more broth/water or cream/milk.
Notes
-
- Whisk While Adding Grits: Slowly whisk grits into the boiling liquid to prevent lumps. A steady whisk at the start makes for smooth, creamy grits.
- Stir Occasionally While Simmering: Grits can stick to the bottom of the pot if left too long without stirring. Give them a good whisk or stir every 5 to 8 minutes to loosen any that may be settling. Take your time—rushing can lead to burned grits on the bottom.
- Cook Low and Slow: Once the grits are in and the pot returns to a simmer, lower the heat. Gentle, slow cooking gives you the best texture.
- Thickness: Grits will thicken up very quickly. At the end add more broth/water or cream/milk to get the consistency to your liking.
- For Less Creamy Grits: Prefer a lighter texture? Use 3 cups of broth or water and 1 cup of cream or milk. Or go with all broth/water and finish with a splash of cream for richness.
- Salt to Taste: Start with less salt and adjust at the end. For my family, 1 teaspoon of kosher salt with 3 tablespoons of real salted butter is just right, but everyone’s palate is different.
- Adding Cheese: Cut back on the salt at first. Cheese adds its own saltiness, so season after stirring it in.
Want to Save this Recipe?
By submitting this form, you consent to receive emails from Soulfully Made.