


This post may contain affiliate links. Please read our disclosure policy.
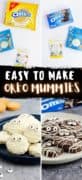
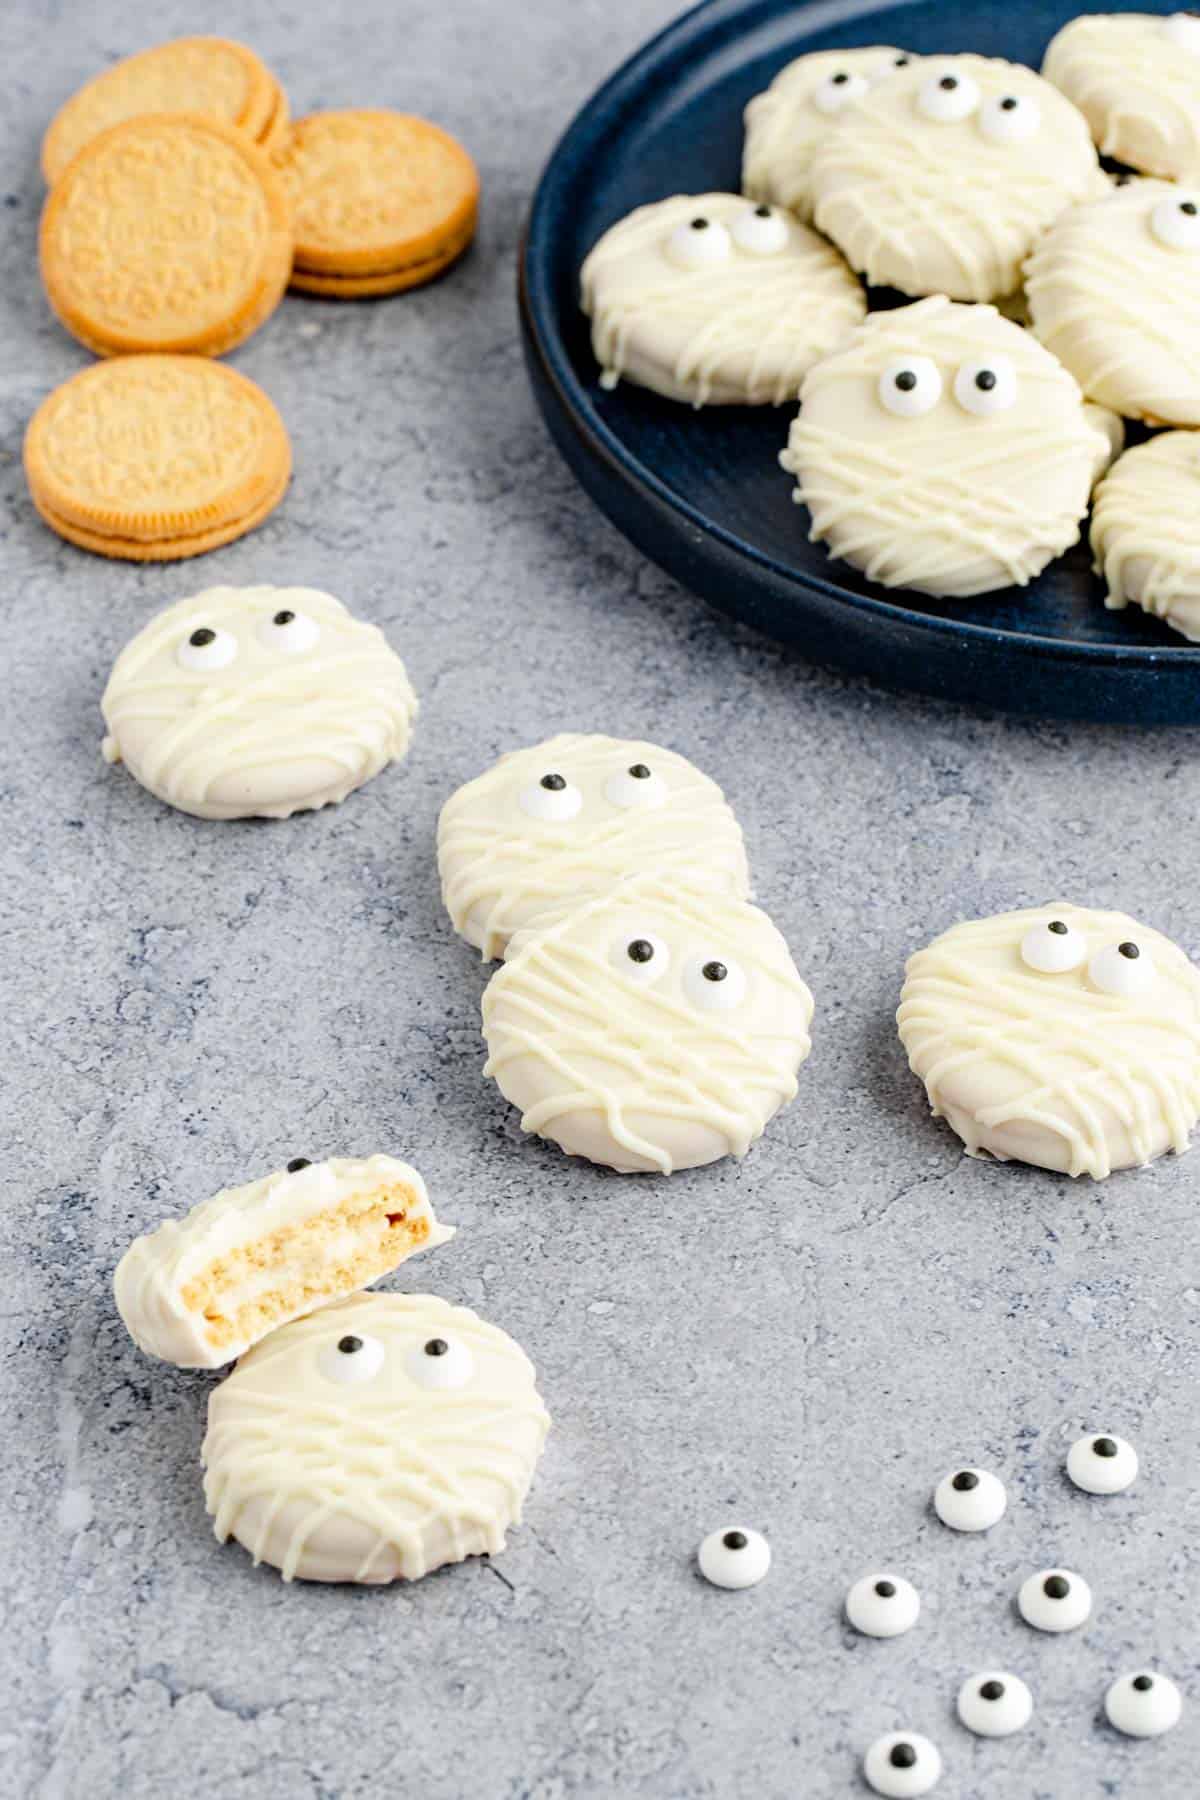
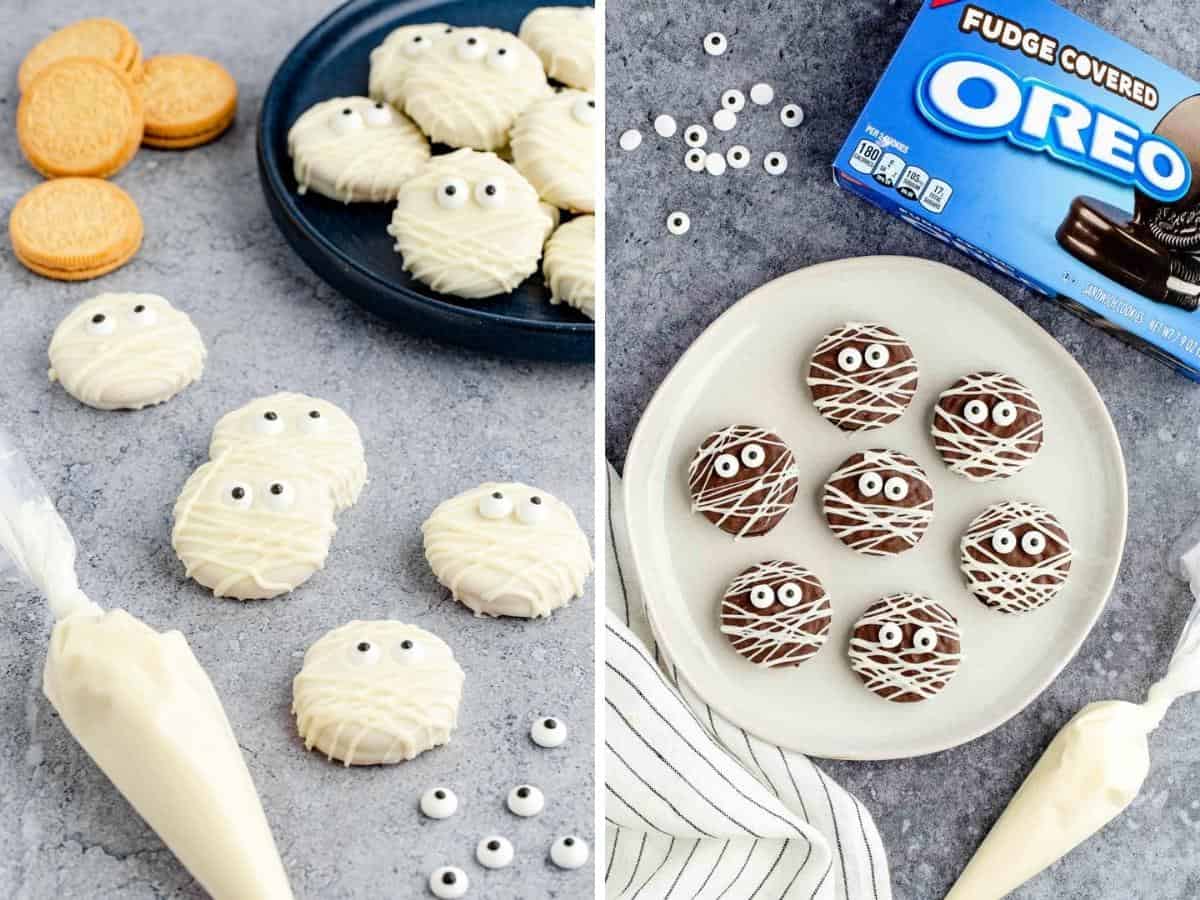
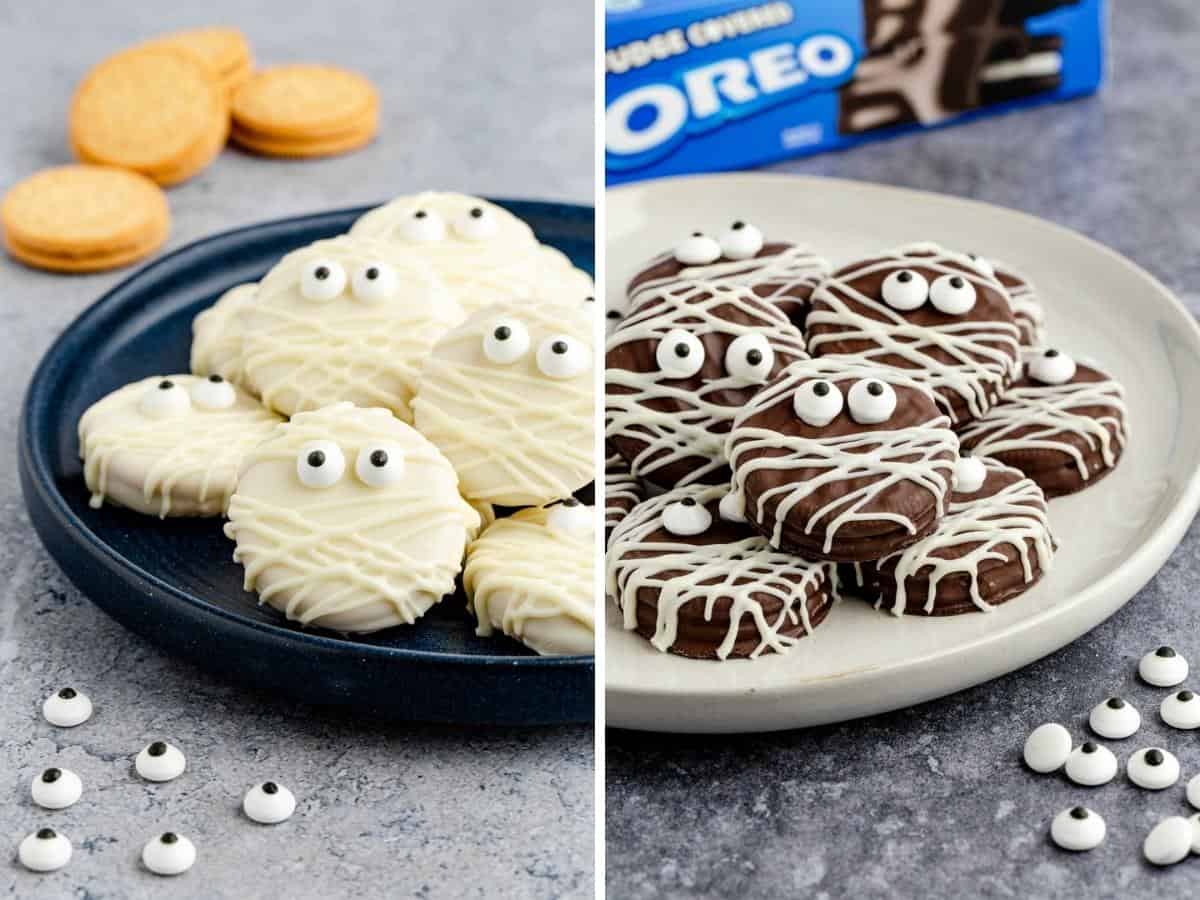
Only three ingredients go into these not-so-scary Oreo Mummy Cookies! Dip Oreo Cookies in melted chocolate, attach candy eyes and drizzle with white chocolate for the mummy bandage effect.
These cookies make for a really easy, super fun, and very delicious treat for your Halloween party or even a themed monster party!!
If you love Halloween treats try our Gummy Work Dirt Cupcakes or Monster Munch Popcorn.
Why We Love These Mummy Oreo Cookies!
- Easy Halloween Cookie: Just Dip and Decorate!
- Fun Halloween Treats for the whole family: This is one the kiddos can help make! And both adults and kids alike love the taste! Who doesn’t love Oreos?
- Versatile: You can use a variety of cookie flavors and use chocolate or white chocolate (or both) to make a delicious mummy cookie.
At Halloween, it is always fun to have cute treats for the little ones (or young at heart) around. And that doesn’t mean they have to be hard or elaborate to make.
These Halloween cookies are the best of both worlds. You only need three simple ingredients to put these Oreo Mummy Cookies together. They are really tasty and just so much fun to make.
Here’s what you need!
Ingredient Notes

How to Make Oreo Mummy Cookies
✱ Be sure to see the recipe card below for exact ingredients and full recipe instructions!
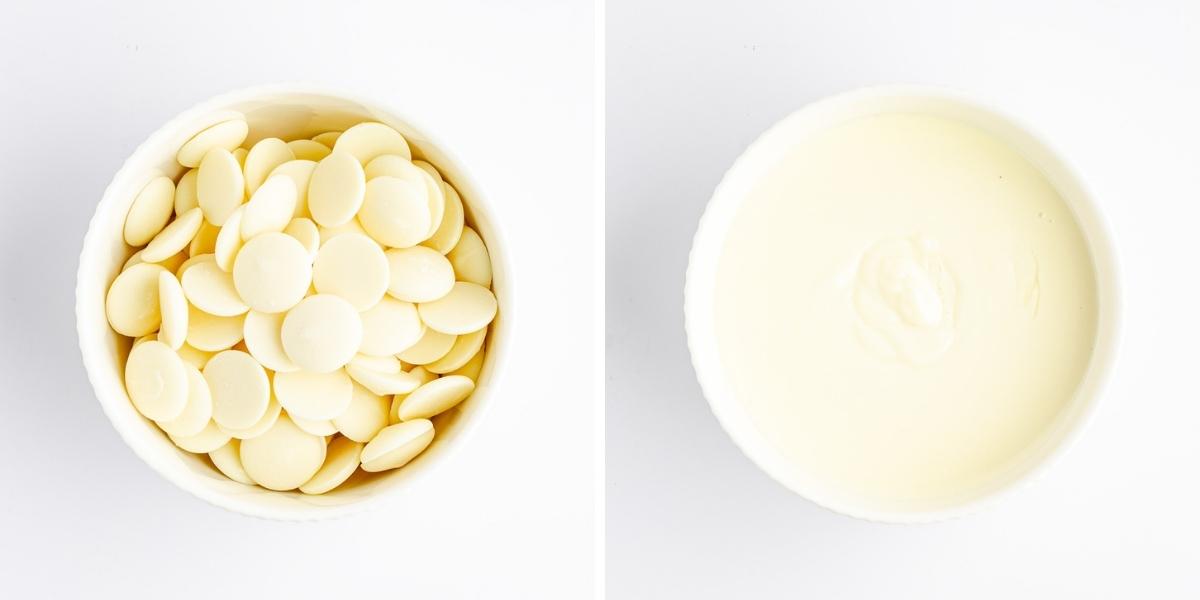
Step 1 | Preparation & Melting of White Chocolate Wafers
Line a baking tray with parchment paper and set it aside. If making the whole package of non-dipped Oreos line a couple of trays (Or just set parchment or wax paper out on the counter, if you aren’t planning to refrigerate or freeze them).
Microwave: Place the white chocolate melts in a microwave-safe bowl and microwave on low or half power for 30 seconds (or to package instructions). Then stir and if it’s still not melted, microwave again for 15 seconds. Continue to microwave in 15-second increments (stirring after each increment) until fully melted and smooth. Do not overheat as the chocolate will seize up.
Double boiler: This is a great way to heat wafers or melting chocolate because the coating can stay warm without it burning. If you do not have a double boiler then you can make one using a saucepan and a metal bowl. Add 2 inches of water to the saucepan, place the metal bowl on top of the saucepan, add the candy coating to the bowl and bring the water to a boil. Once boiling you can turn down the heat to medium-low heat. Stir until the coating is smooth.
Candy Wafer Melting Pot: You can also use a candy wafer and chocolate melting pot to melt the chocolate.
Step 2 | Dip the Cookie
If you are using already dipped cookies you can skip this step.

REGULAR OREO COOKIE (Non-Dipped:) Place the Oreos on a fork or dipping utensil one at a time and dip them into the melted chocolate until fully submerged. Then remove and lightly tap the fork onto the edge of the bowl to remove the excess chocolate.
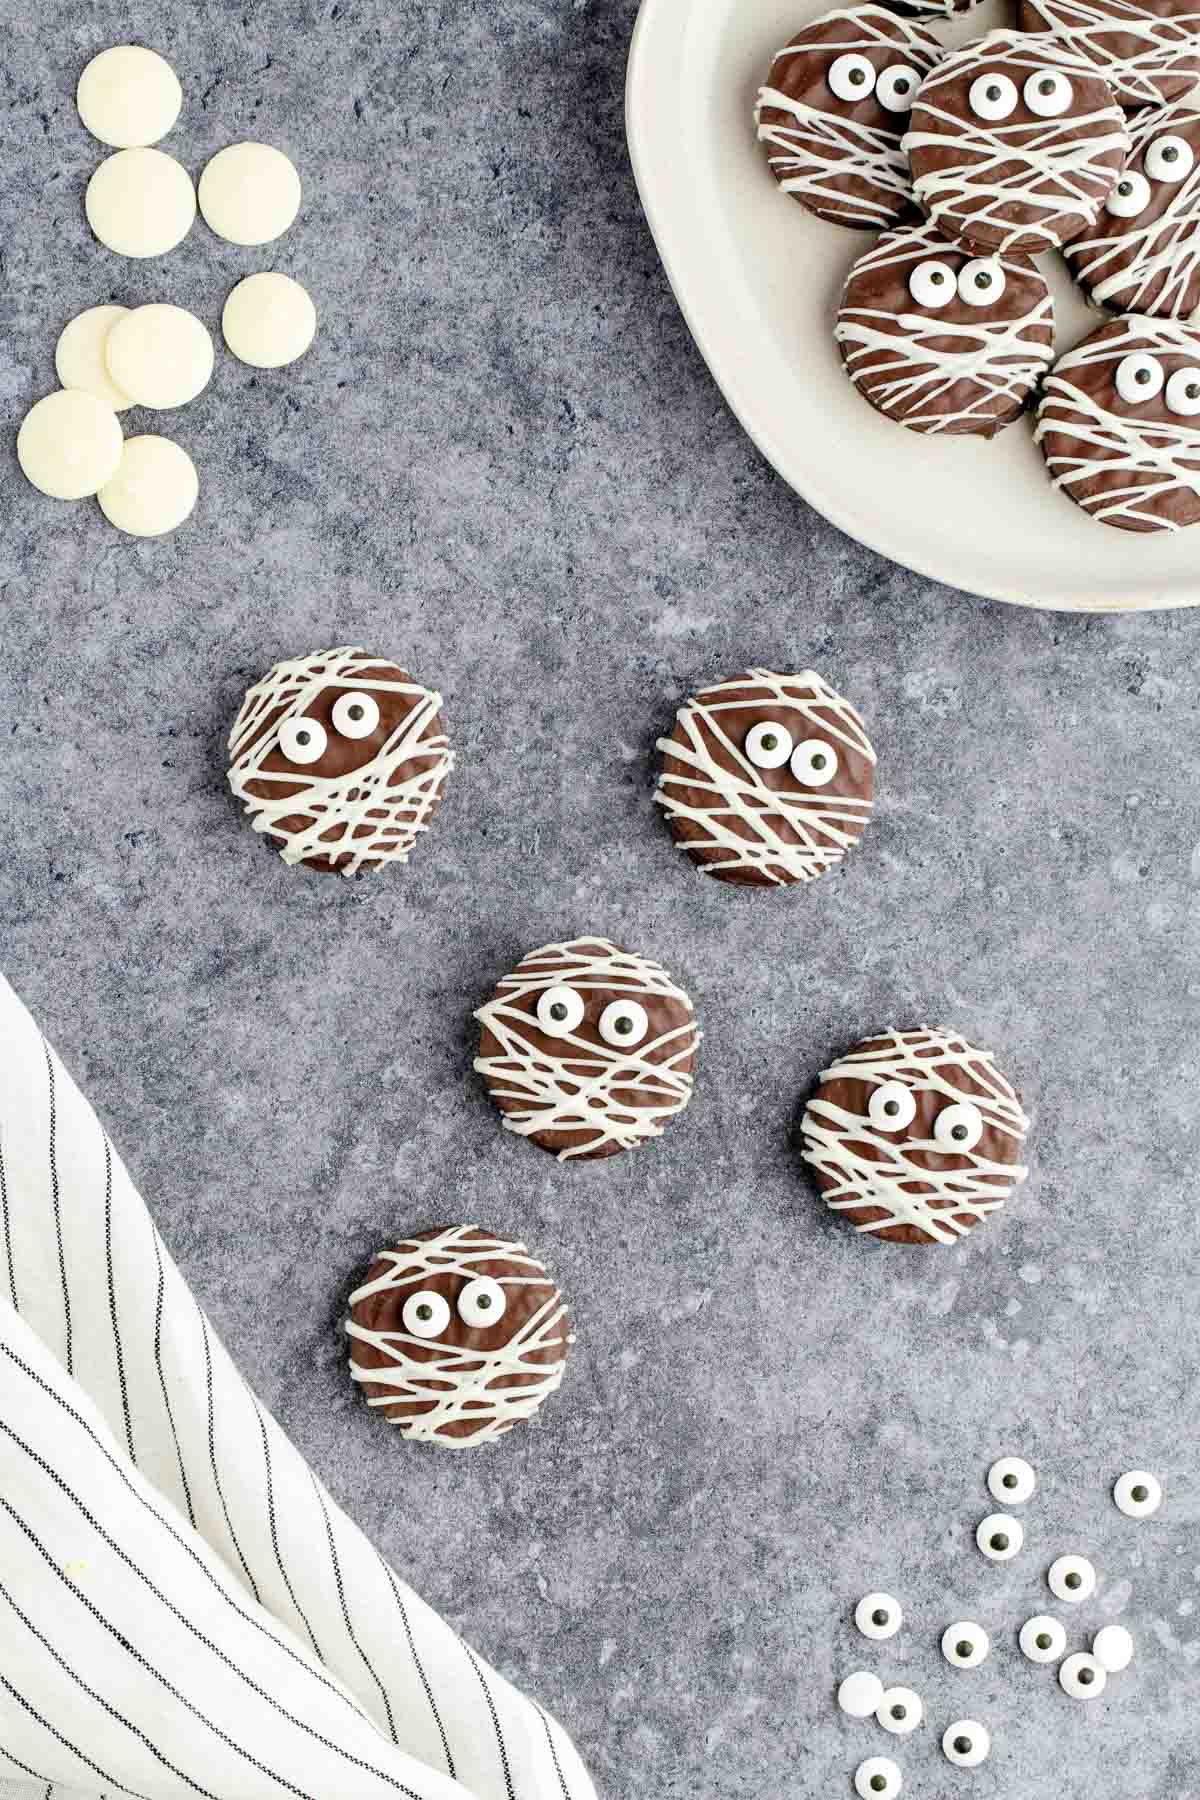
Remember – You can use chocolate or white chocolate for these. So if you want to dip in chocolate buy a bag of milk or dark wafers, and then a bag of white wafers for the mummy bandages.
Next place dipped cookies onto the lined baking tray and space them about 2 inches apart. Repeat until all Oreos are coated. You’ll want to work quickly as the chocolate hardens fast.
PRO TIP: If the chocolate in the bowl hardens, place it back in the microwave and heat for 15 seconds and stir.
Shortcut for the eyes (If you are dipping your cookies in melted chocolate rather than using already dipped Oreos): Before the chocolate on the cookie sets, put on the candy eyes. If the chocolate on the cookie has hardened, then the eyes will not stick. (You can also do this in the next step by putting a dab of chocolate on the back of the eyes)
Step 2 | Decorating Mummy Cookies: Add Eyes and Mummy Wrapping
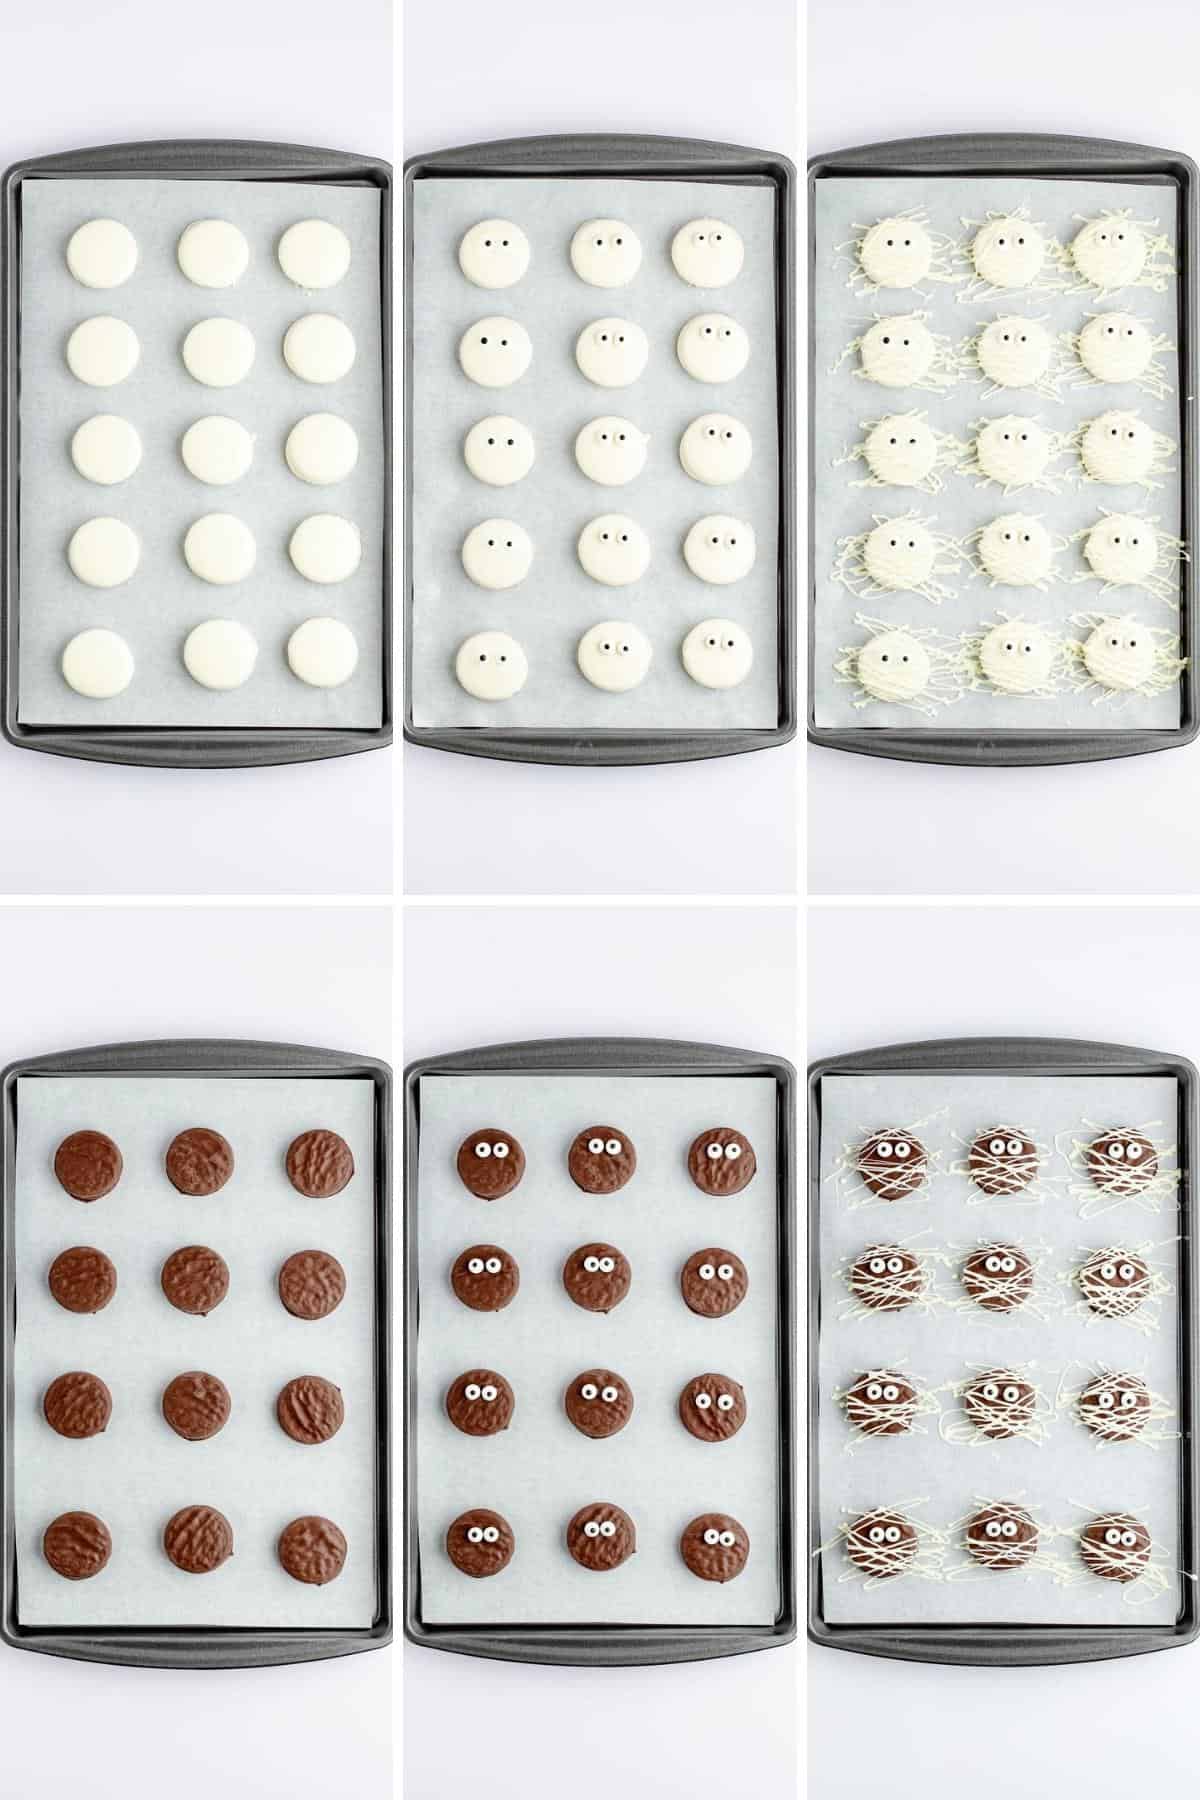
If you are using precoated cookies: You will need to dab the back of the eyes in the melted chocolate before placing them on top of the cookie.
To make the mummy bandages: Pour the leftover melted chocolate into a piping bag and twist the top tightly.
Let this cool down just a bit (if coming right out of the microwave really hot it will melt into the other chocolate rather than making a line).
PRO TIP: You really do not need a lot of melted candy for the stripes. So you don’t need to fill up a whole piping bag. Start with the leftover candy from dipping and then add more if needed. Or use 1 cup if using prepackaged Fudge Oreos.
Then, using scissors, just slightly snip the tip of the piping bag. Make sure to do a practice squeeze on a plate or paper towel to see if it comes out ok. If needed, slightly snip a little more until the chocolate comes out to desired thickness.
PRO TIP: You don’t want to cut off too much otherwise the bandages will be too thick when decorating.
Then hold the piping bag firmly then squeeze it to decorate the top of the cookie to look more like mummies. Go in multiple directions to make the mummy bandages, avoiding the eyes.

Step 3 | Let Set & Enjoy
Let mummy bandages set up at room temperature (30 minutes) or fridge (10 minutes) to speed it up. Then enjoy these cute Oreo Mummy Cookies!
Tips
- Candy eyes can smear fairly easily so use clean dry hands. Mini tongs or tweezers can also be used to help prevent touching the eyeball candy. If you do get something on the front you can use a slightly damp Q-tip to clean it off.
- Don’t have a piping bag? If you don’t have a piping bag to put the mummy stripes on, you can also place the melted chocolate in a zip bag, a squirt bottle, or use a spoon or drizzle spoon. They even make ready-made drizzle bags with the white chocolate already in them (I have seen them at Michaels).
- I recommend getting two bags of candy melts if you are dipping the oreo cookies, as it will depend on how thick you coat them as to how much candy you will end up using.
Frequently Asked Questions
Yes. Use high-quality white chocolate chips for an even more chocolatey flavor. I like to add 1/2 tablespoon of vegetable oil or coconut oil for every cup of chocolate chips to thin it out and help stick to the cookie better.
Variations and Substitutions
Storage
Storage: Store the Halloween Mummies, once the coating has hardened, in an airtight container for up to 2 weeks
Freeze: To freeze these cookies, let them harden before you place them in an airtight freezer-safe container or freezer Zip bag in the freezer for up to 3 months. Let them thaw to room temperature before eating.
Other Delicious Desserts Recipes to Try
Hungry for more easy, home-cooked, delicious recipes?
Sign up for my free recipe club to get family-friendly recipes in your inbox each week! Find me sharing daily meal-time inspiration on Pinterest, Facebook, and Instagram.

Oreo Mummy Cookies
Click Stars To Rate
Ingredients
- 15 Oreo Cookies - you can also use already dipped Fudge Oreos
- 2 cups white chocolate candy wafers - if using dipped Oreos you will need about 1 cup of candy melts
- 1 package candy eyes
Instructions
- PREP: Line a baking sheet or countertop with parchment paper.
- MELT WHITE CHOCOLATE: In a small microwave-safe bowl, add the white melting wafers. Microwave for 30 seconds, stir for 15-20 seconds, and microwave for another 15 seconds. Stir until melted or return to the microwave for 10-15 more seconds.
- COAT COOKIES IN WHITE CHOCOLATE: (Work quickly; white chocolate hardens fast!) Using a fork or dipping utensil, one at a time dip Oreo cookies into the melted chocolate until fully covered. Then remove, tap the fork on the edge of the bowl a few times; then scrape the bottom of the cookie on the side of the bowl to remove excess chocolate from the bottom of the cookie.Next place dipped cookies onto the lined baking tray and space them about 2 inches apart. Repeat until all Oreos are coated.Skip this step if using the prepackaged already dipped Fudge Oreos.
- To ADD EYES (2 Candy Eyes per cookie):Shortcut for the eyes: Before the chocolate on the cookie sets, put on the candy eyes. If the chocolate on the cookie has hardened, then the eyes will not stick. If you are using precoated cookies: You will need to dab the back of the eyes in the chocolate before sitting them on the cookie.
- WHITE CHOCOLATE DRIZZLE: Once chocolate coated cookies are completely dry. Make sure the remaining chocolate is still completely melted; if it's hardened at all, melt it for 10-15 seconds in the microwave. Pipe the melted white chocolate over the cookies to form the "bandages" of the mummy (avoiding eyes).
- Let the cookies fully set or harden (at room temperature for 30 minutes to an hour or place in the refrigerator for at least 10-15 minutes) and enjoy!
Notes
- Candy eyes can smear fairly easily so use clean dry hands. Tongs or tweezers can also be used to help prevent touching the eyeball candy. If you do get something on the front you can use a slightly damp Q-tip to clean it off.
- Don’t have a piping bag? If you don’t have a piping bag to put the mummy stripes on, you can also place the melted chocolate in a zip bag, a squirt bottle, or use a spoon or drizzle spoon. They even make ready-made drizzle bags (I have seen them at Michaels).
- I recommend getting two bags of candy melts if you are dipping the oreo cookies, as it will depend on how thick you coat them as to how much candy you will end up using.
- For the Mummy Bandages: Make sure to let the candy melts cool just a bit after melting them. It should still be easy to pipe, but not overly thin. If you pipe it right away when it’s still hot and very runny, it will melt into the cookie rather than make lines.
Want to Save this Recipe?
By submitting this form, you consent to receive emails from Soulfully Made.
Perfect Halloween treat. Thanks for sharing this recipe.
Such a cute and an easy idea for Halloween! I know my daughter would love to help me make these. 🙂
Obsessed with these! Too cute!
How cute are these? Perfect for Halloween and fun to make too.