

This post may contain affiliate links. Please read our disclosure policy.
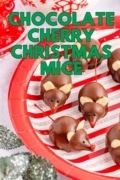
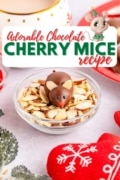
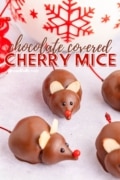
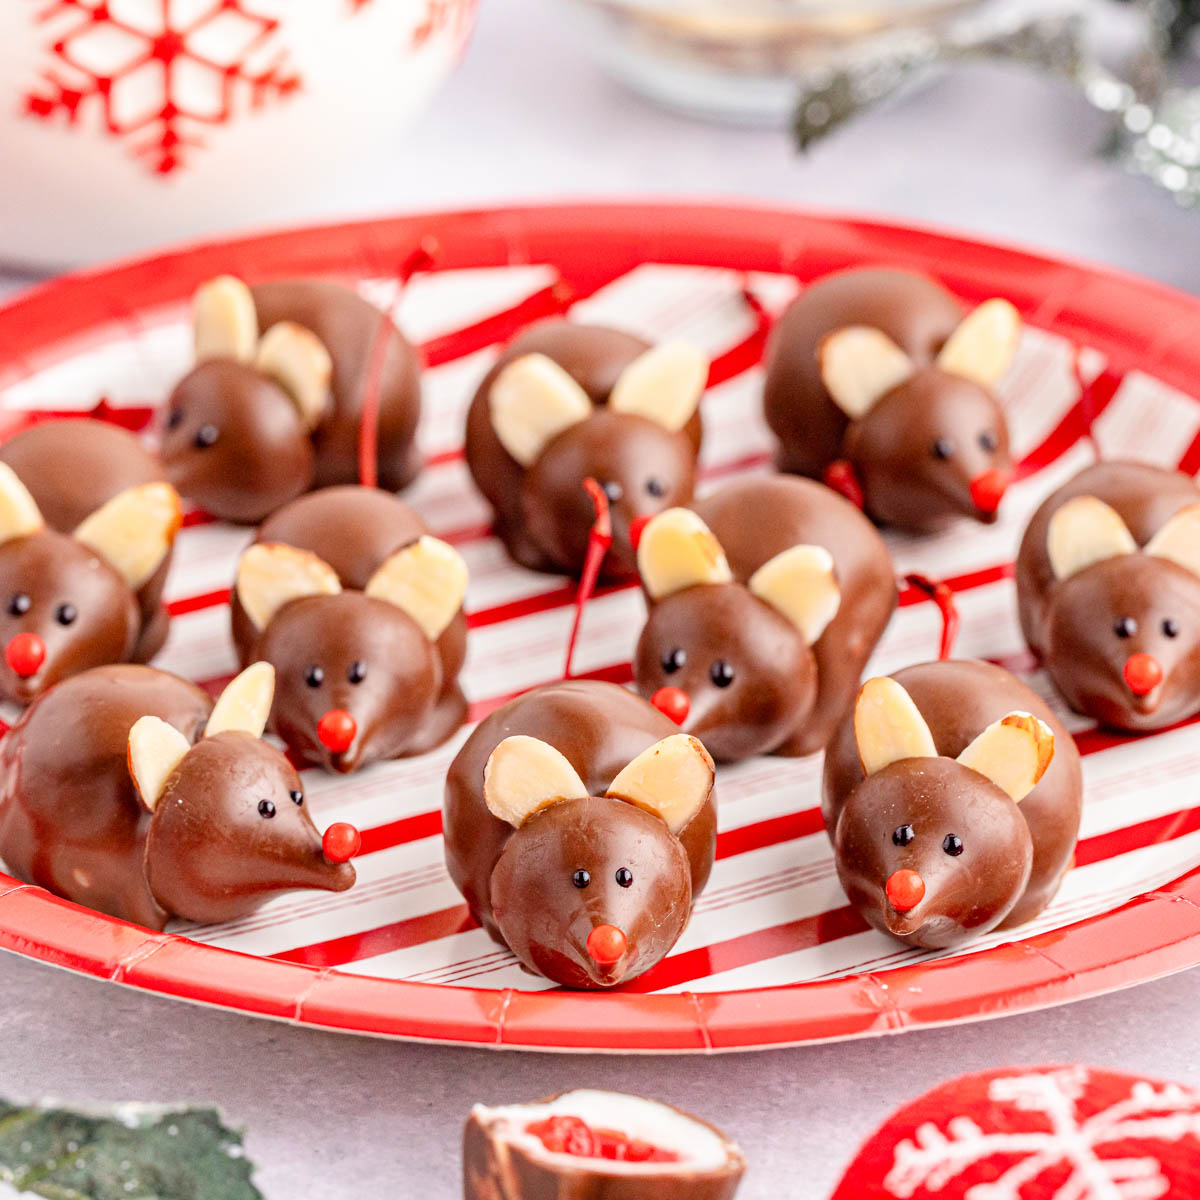
Sweet and fruity Chocolate Covered Cherry Mice Recipe is easy to make, and they are just the most adorable addition to a holiday spread! This recipe is fun and quickly made with simple ingredients, like maraschino cherries, melted chocolate, 4-ingredient candy dough, and a few extras for bringing the mice to life!
Plus, the almond extract, almond Hershey Kisses, and almond slices complement the sweet cherries so well! Here is an idea, get the kids to help you make these cute mice chocolate-covered cherries- absolutely adorable!
Why We Love This Recipe!
- Fun and festive: These cute little chocolate and cherry mice are fun to make and perfect for the holidays.
- Simple Ingredients: Except for a bag of Hershey Kisses and decorative icing, it’s possible most of these ingredients are stocked in your fridge and pantry, ready to be used! There’s nothing fancy needed!
- Creative Treat: One of my favorite parts of this recipe is decorating the faces of the mice. Feel free to add other details to make them extra personal and show off your creative skills!
We are all familiar with the usual holiday treats, such as cookies, cakes, and pies. Let’s make this year special by including something new, like these adorable cherry and chocolate mice! The kids in your crew will love this addition to your spread.
For even more unique holiday recipes, try this salty and sweet Christmas White Trash Popcorn with fresh popcorn, crunchy pretzels, red and green M&Ms, and mini marshmallows, or these bright green Grinch Cookies with little red heart candies. And for a sweet, sharable treat, dip cookies and crackers into this White Chocolate Peppermint Cheesecake Ball.
Ingredient Notes
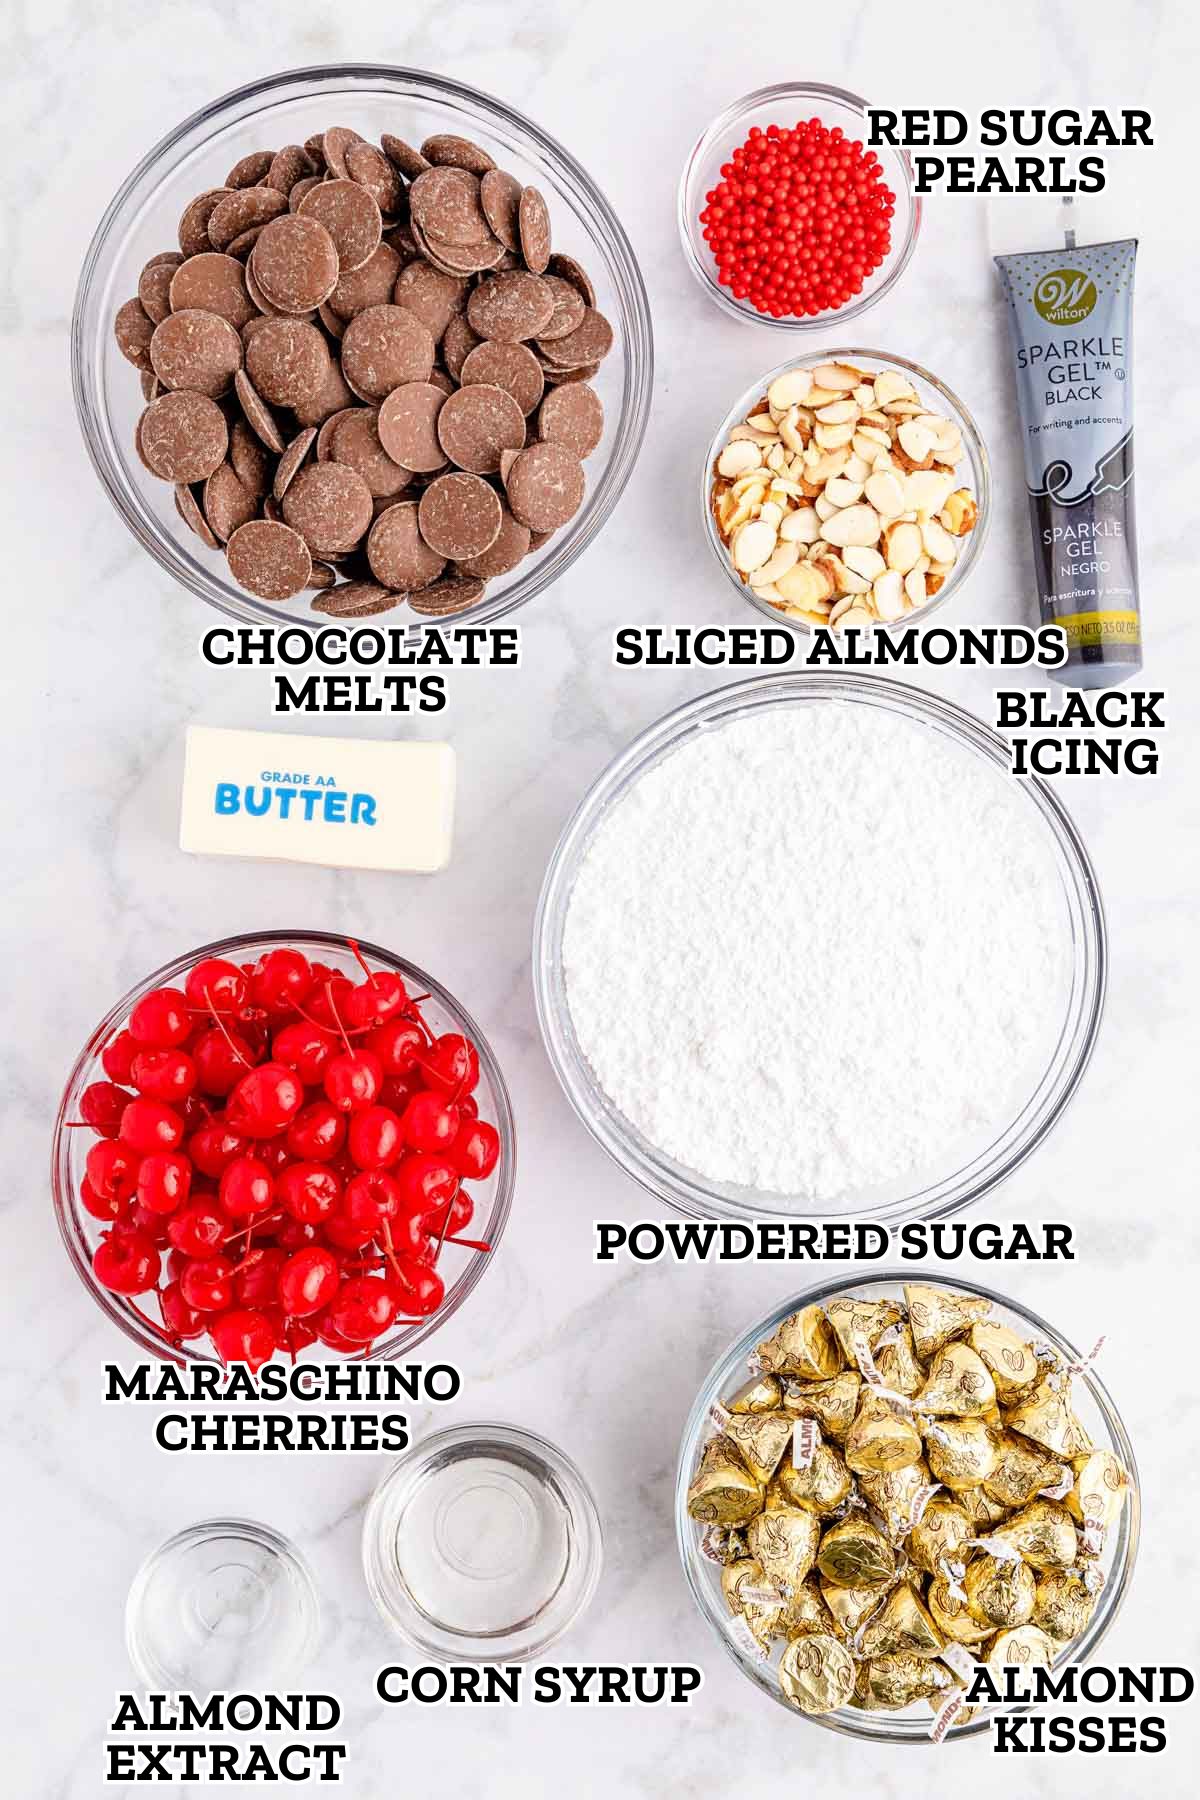
To Form the Ears and Face
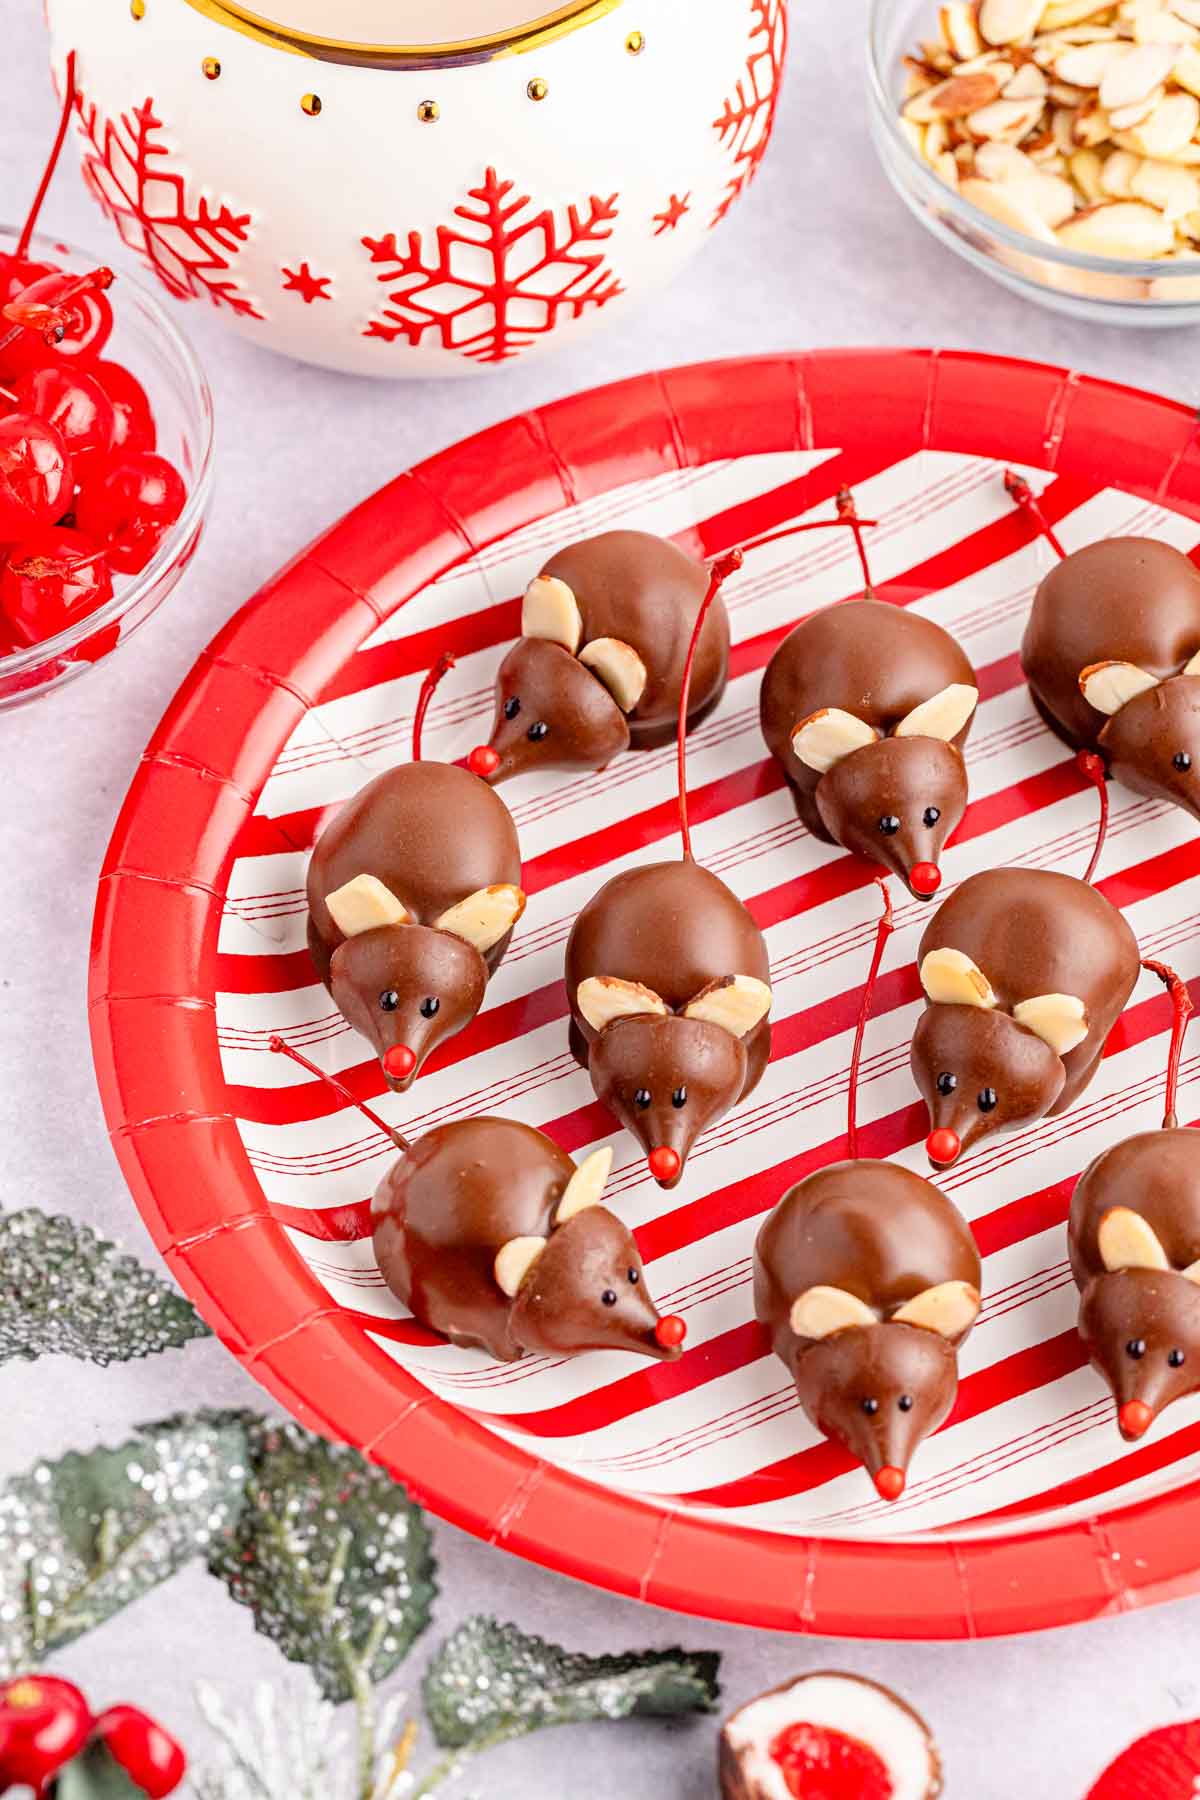
- Hershey’s Kisses: Use milk chocolate Hershey’s Kisses for the head. I like to use the almond ones to bring out the other almond elements of the recipe.
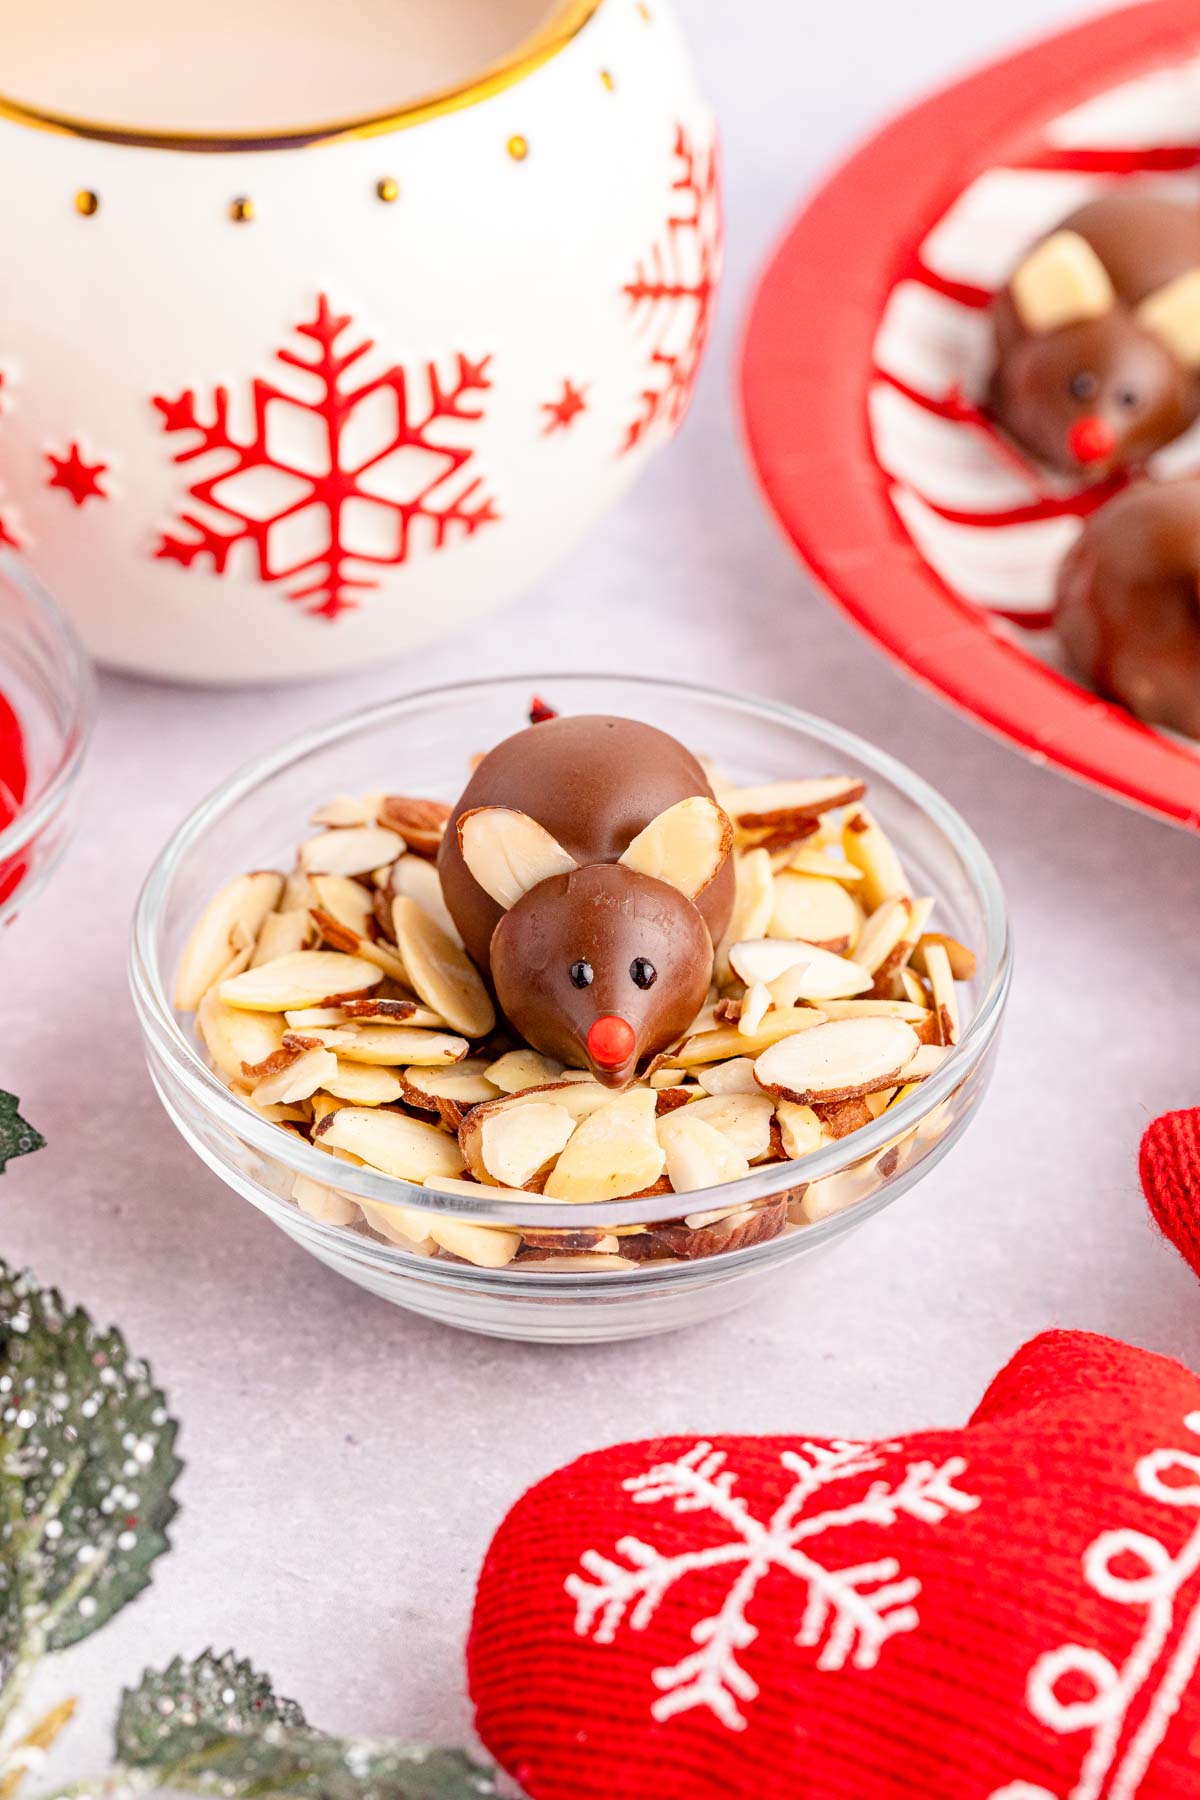
- Almonds: Sliced almonds are perfect for thin and delicate mouse ears.
- Black icing: For small dots, use black decorative icing to make the eyes.
- Red sugar pearls: Attach tiny red sugar pearls to the tip of the Hershey’s Kiss face as the nose.
How to Make Chocolate-Covered Cherry Candy Mice
✱ Below shows step-by-step photos and instructions. For the complete recipe, along with ingredient amounts, scroll down to the recipe card.
Step 1 | Prep
Let’s get started with two baking trays. Line them with wax or parchment paper and set them aside for later.
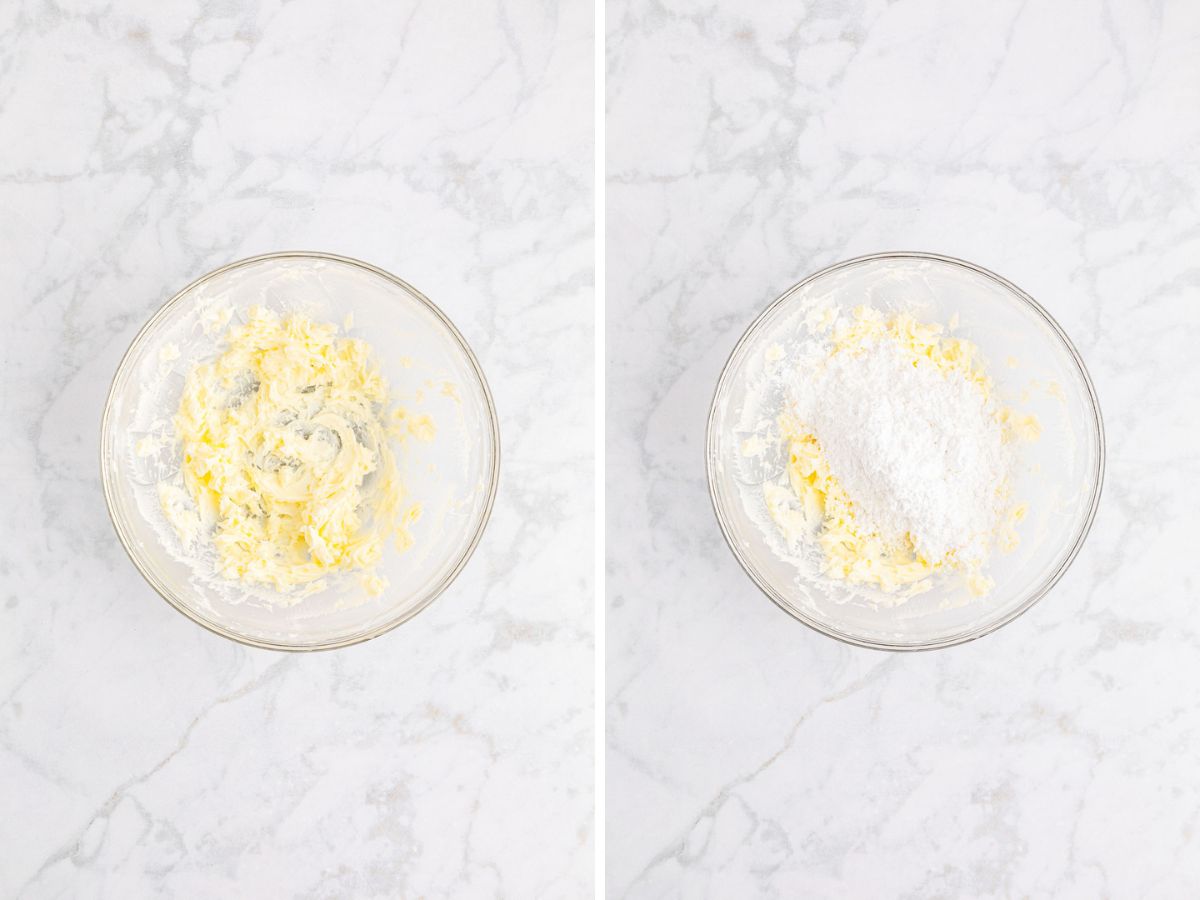
Step 2 | Make the Candy Dough
To make the tasty candy dough, mix the butter, corn syrup, and almond extract until they are smooth and evenly combined.
Next, slowly add the powdered sugar, kneading the ingredients together to form a soft dough.
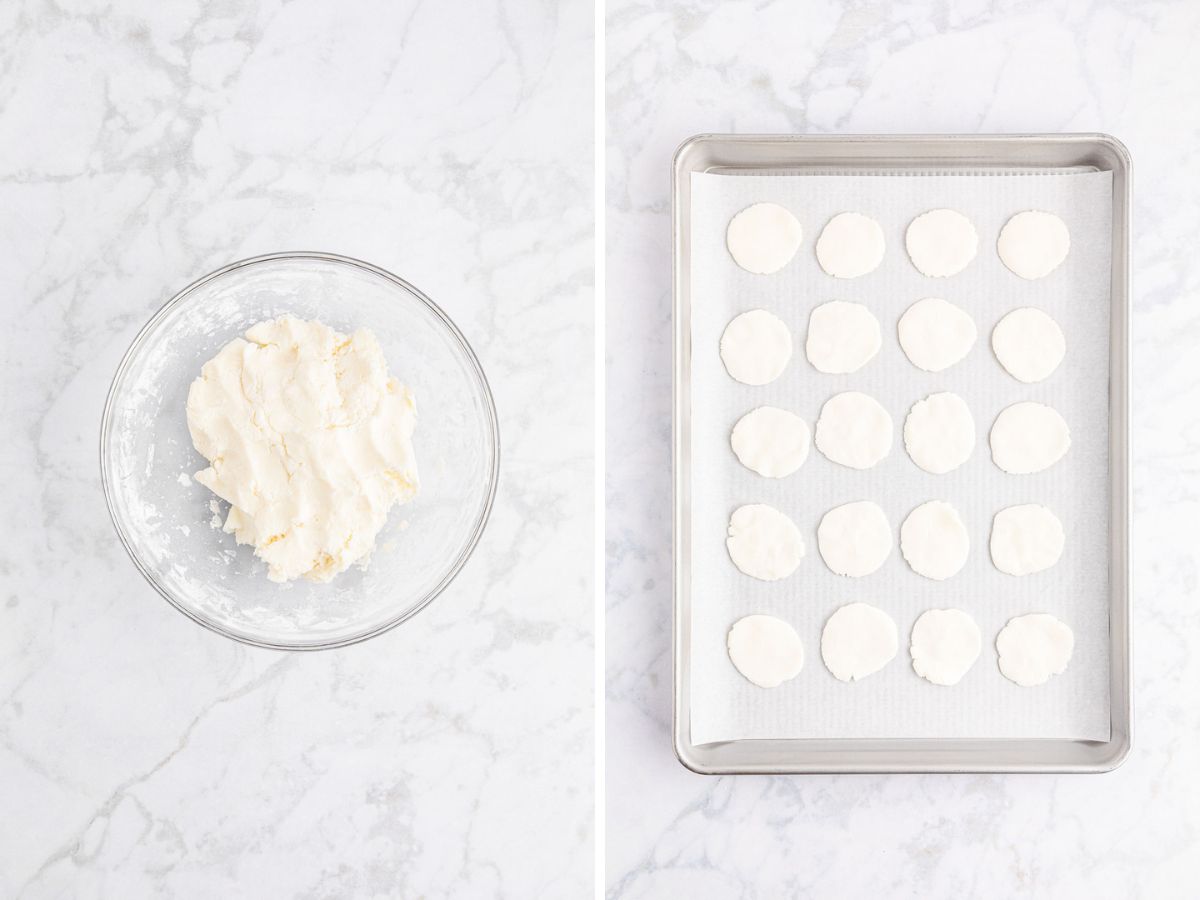
Pinch off a small piece of dough, about half of a tablespoon, roll it into a ball, and flatten it into a round disk. Continue this process with the remaining dough.
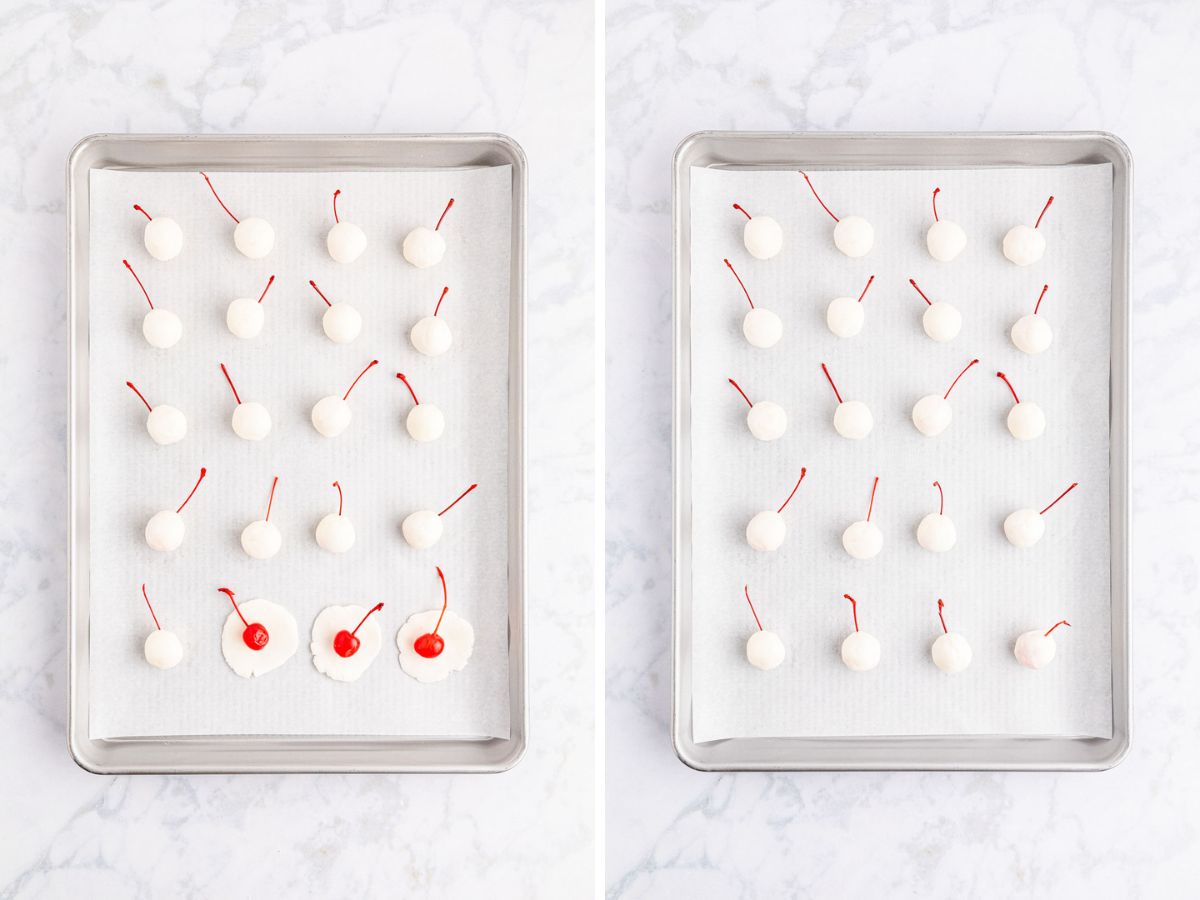
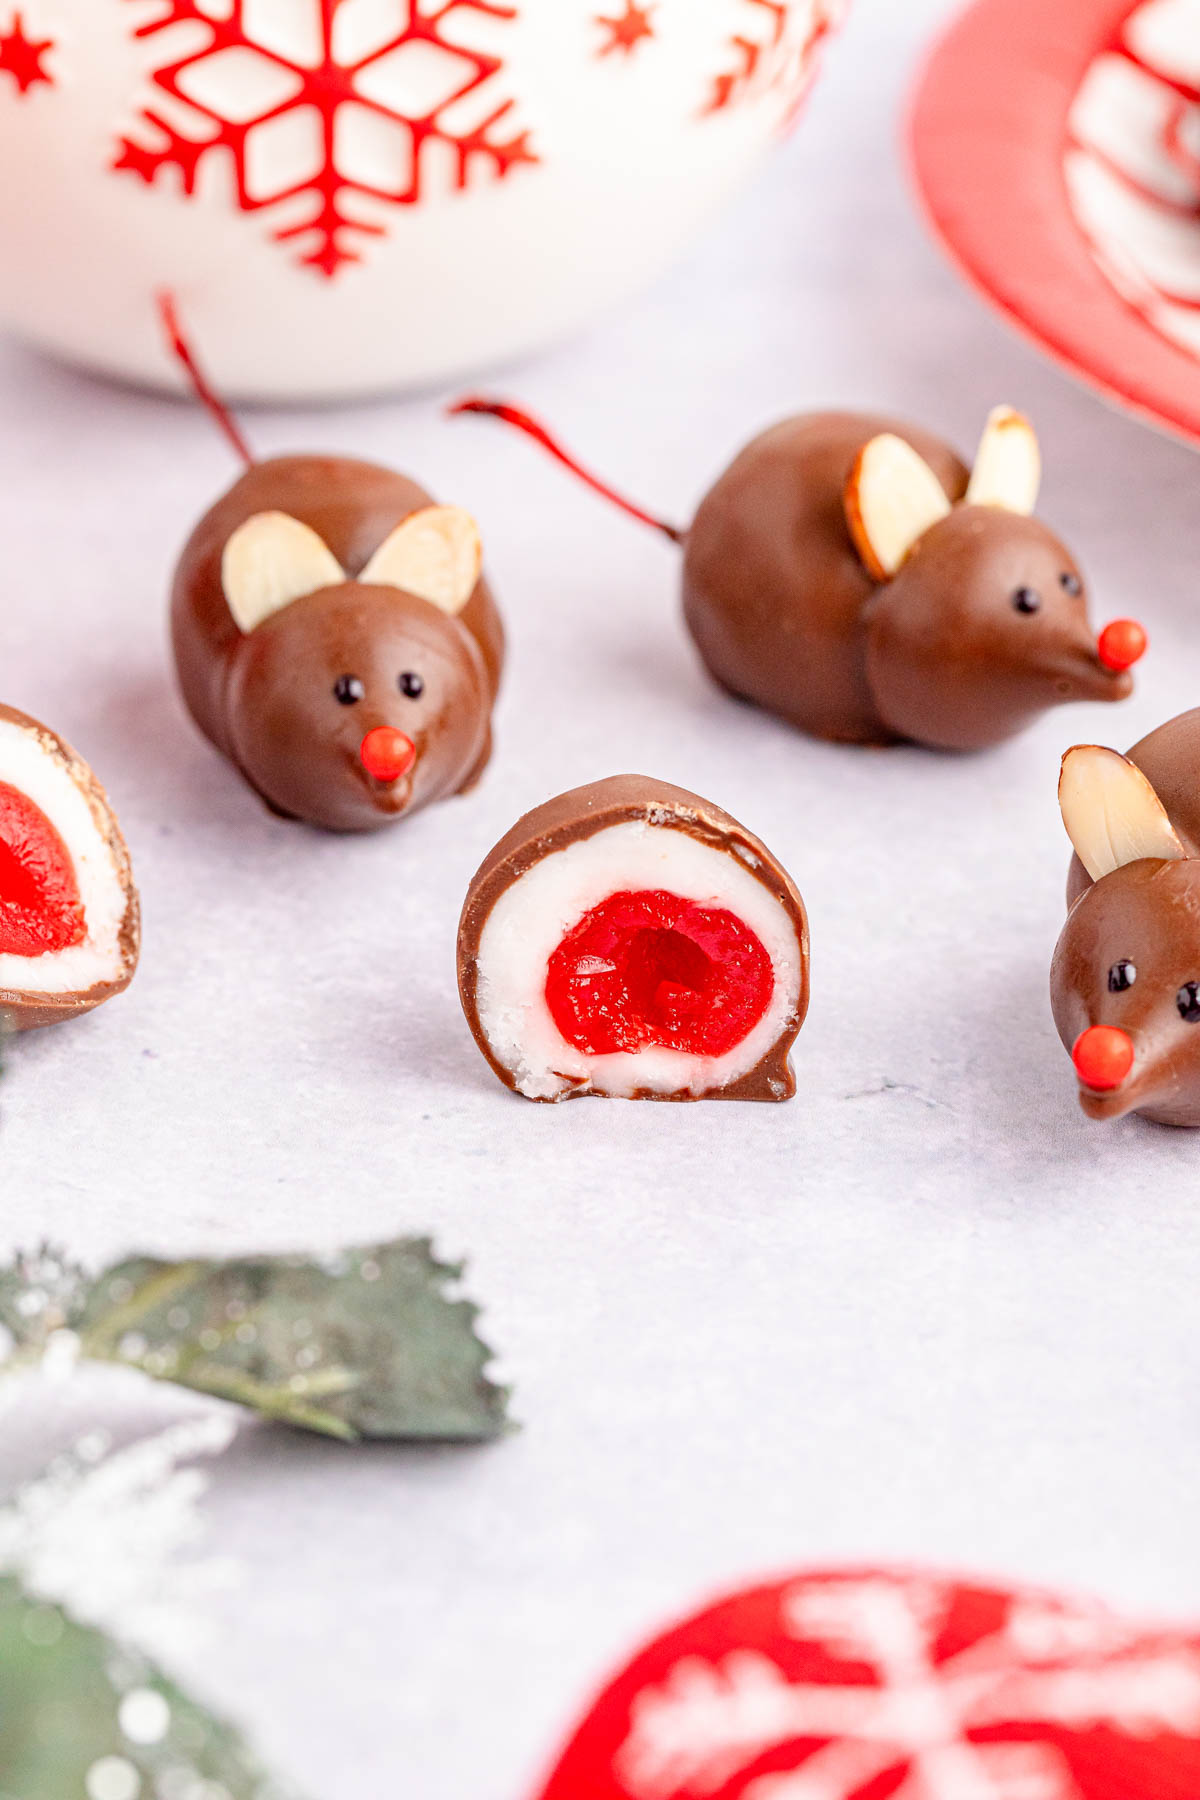
Then, wrap each disk of dough around a maraschino cherry, exposing the stem as the mouse tail. Roll each ball into a smooth shape, careful not to break the stems off.
Continue with the rest of the cherries and dough, then refrigerate them for two to four hours until they are firm.
This step can be omitted if you want to skip it. I love the flavor this adds to the cherry mice. They taste like cordial cherries. However, you can skip it and go straight to dipping in chocolate.
Step 3 | Dip in Chocolate and Form Mice Head and Ears
When the dough-covered cherries are firm, melt the chocolate wafers in a double boiler or melting pot over low heat, stirring occasionally to heat evenly.
Next, grab one of the candy-covered cherries and hold the mice tails (or cherry stem) to dip it into the chocolate. If you would like, use a fork or candy lifting tool to lift the cherry out of the melted chocolate to avoid breaking the stem.
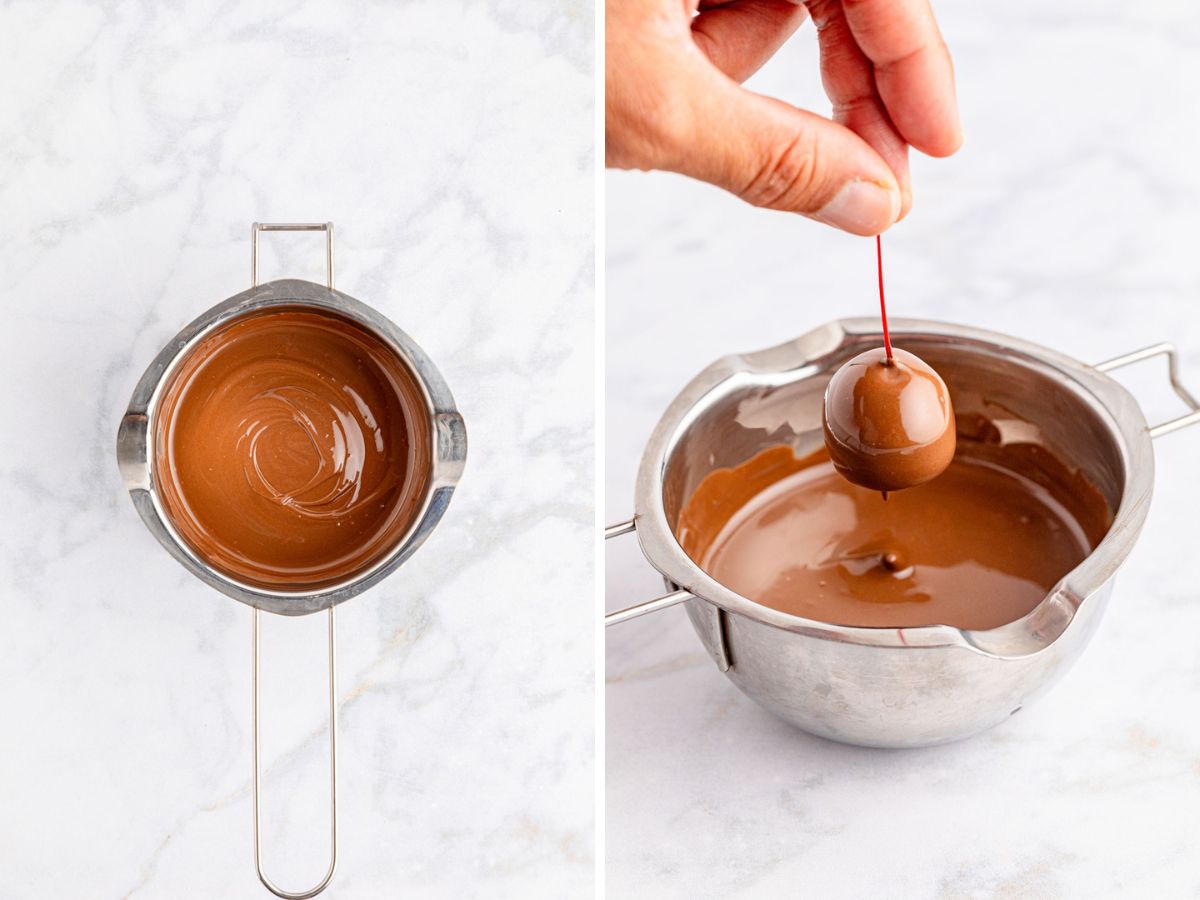
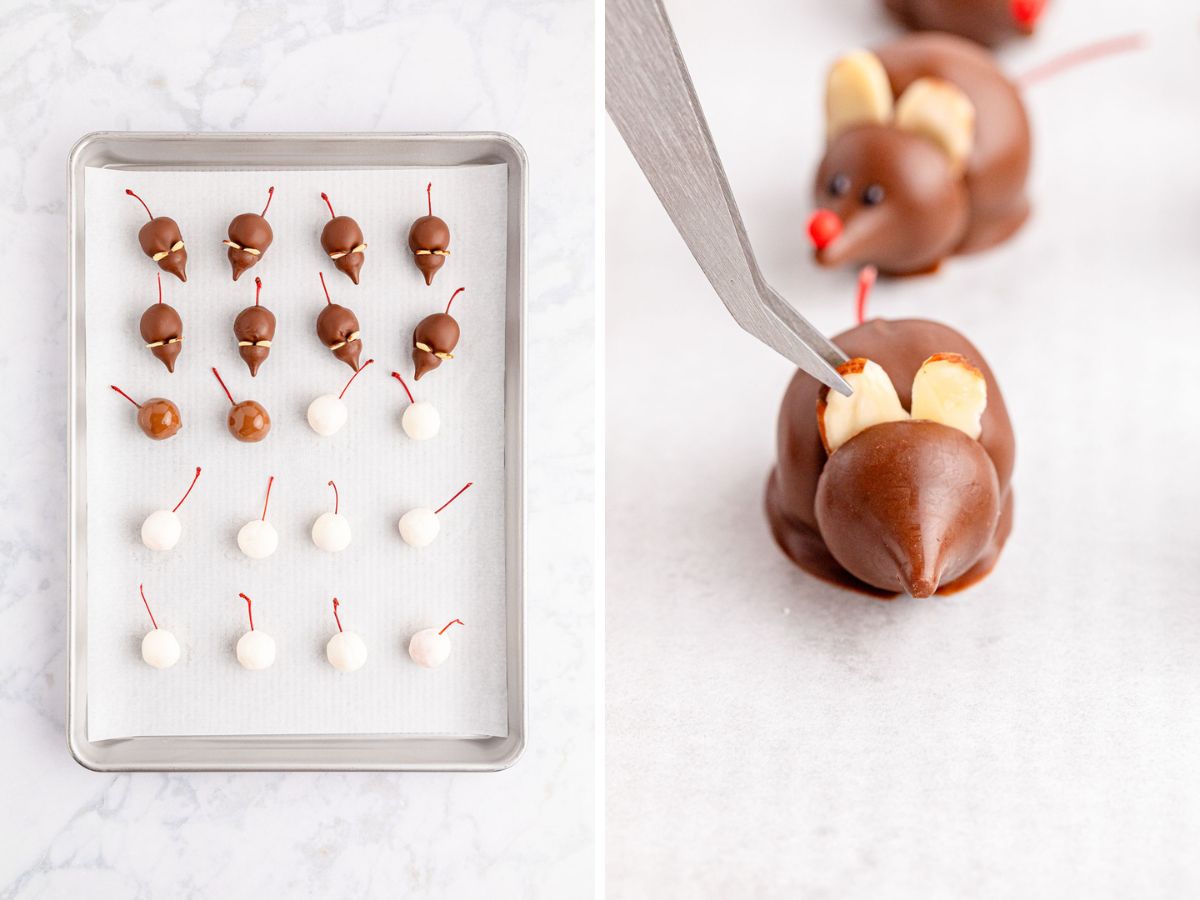
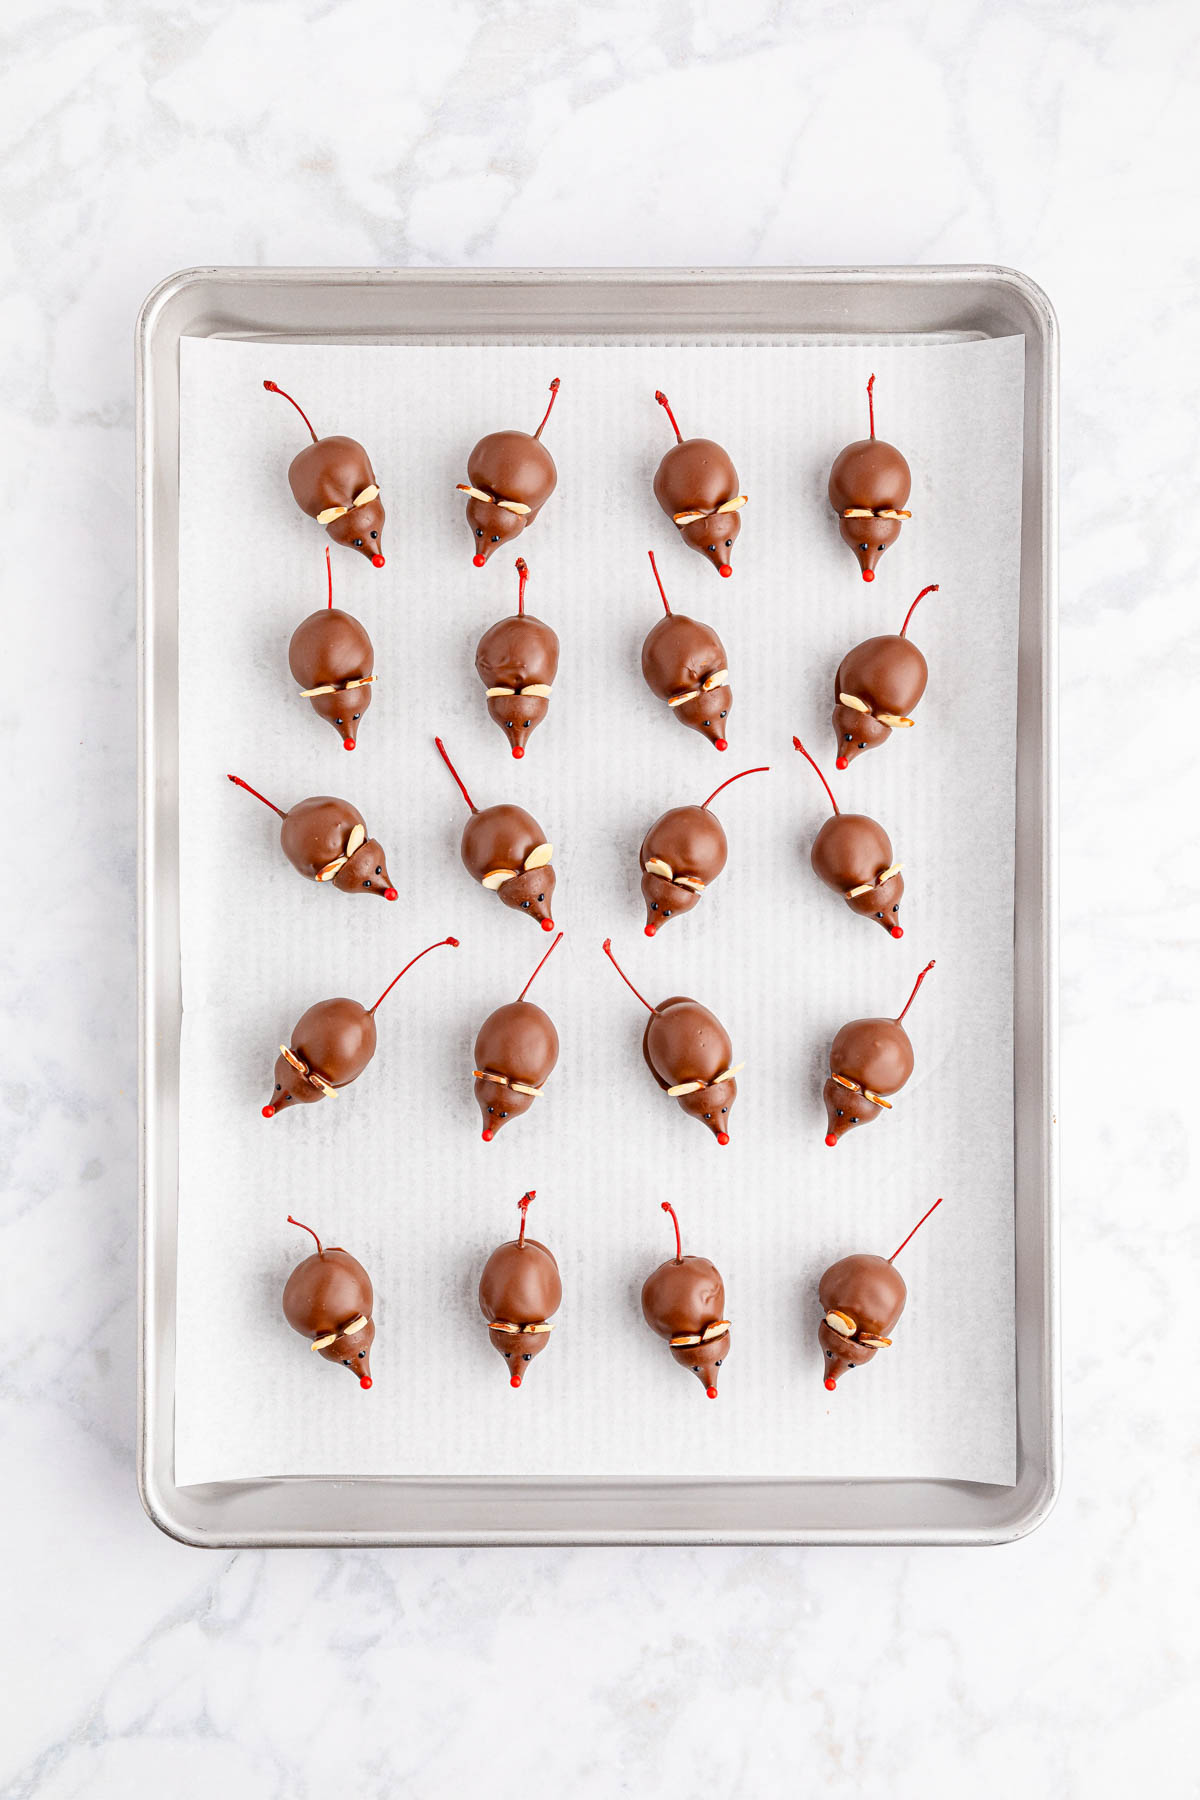
As you go, place each chocolate-dipped cherry back onto the baking sheet, with the cherry stem sticking out like a mouse tail. (I usually do 1 or 2 at a time)
Press the bottom of an unwrapped Hershey’s Kiss onto the opposite side to become the mouse head.
Then, stick a couple of almond slices between the body and head of the chocolate mouse, repeating with all other cherries.
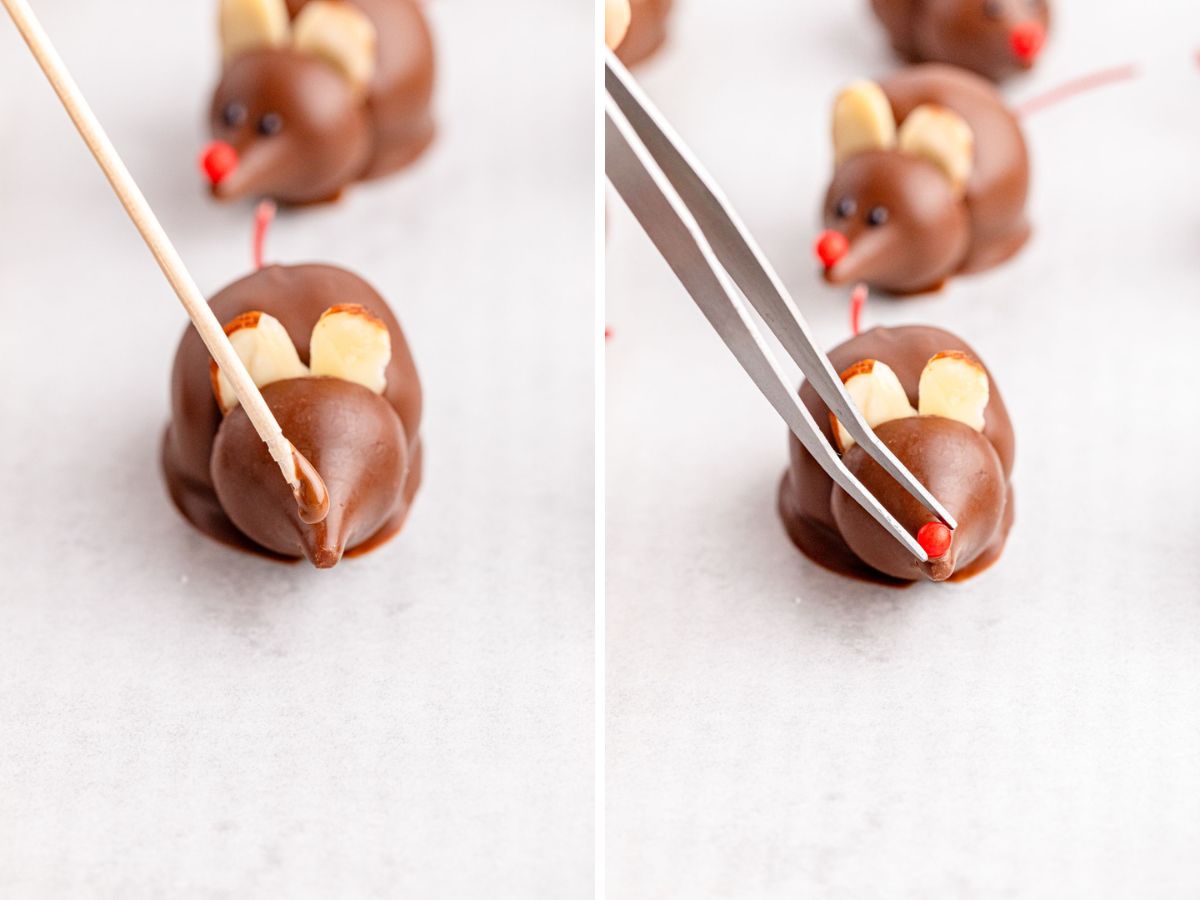
Step 4 | Decorate Mice Faces
It’s time to decorate the faces and really bring these chocolate mice to life! Use a toothpick or skewer to collect a tiny bit of melted chocolate and transfer it to the tip of the Kiss.
Then, place a red sugar pearl to form the nose. I love to use these angeled plating tweezers to help.
Hold the candy for a few seconds to prevent it from falling off. Then, repeat with the rest of the candy mice.
Make the eyes with two small dots of the black decorative icing.
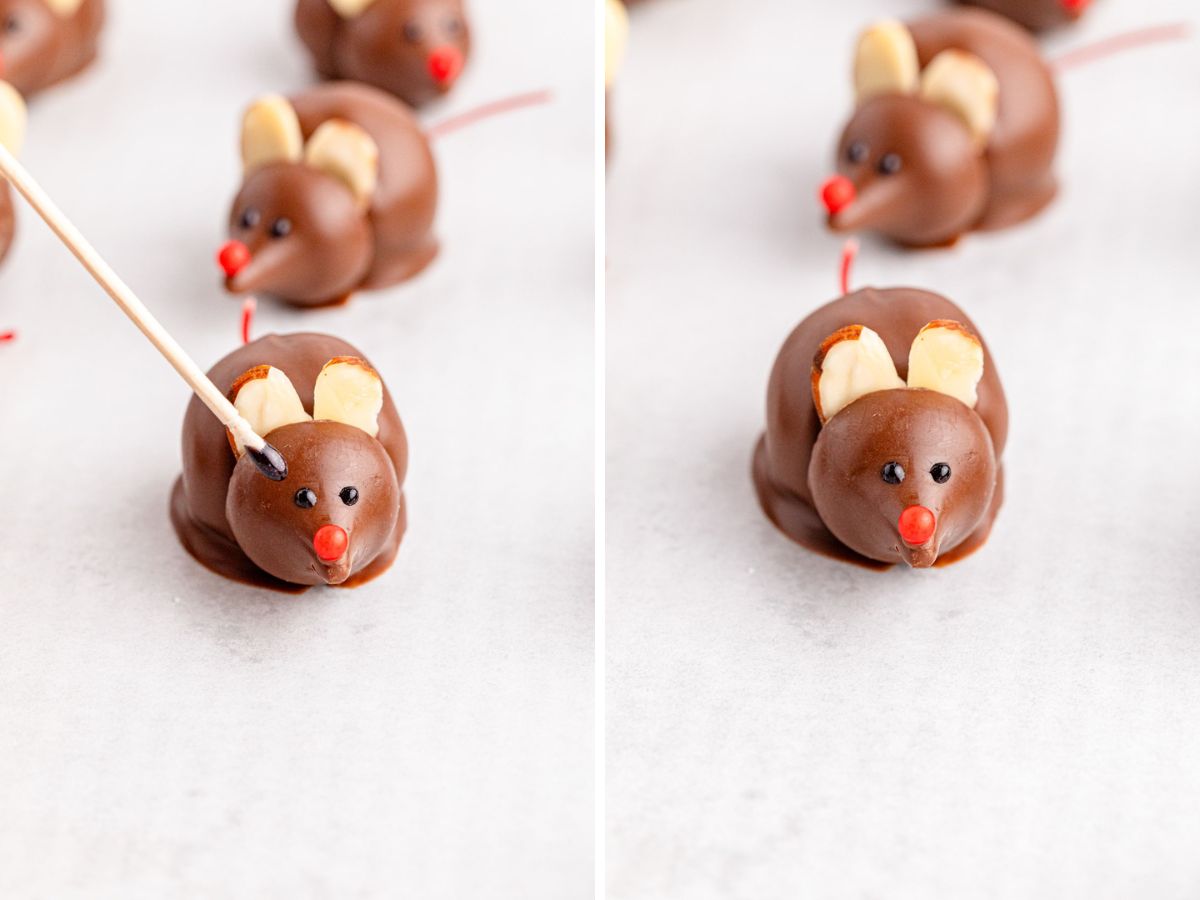
Then, repeat with the remaining mice and refrigerate until ready to serve. Enjoy!
- Dry Cherries- Pat the cherries dry before wrapping them so you do not get red juice on the white wrapping and to help it stick better.
- Without Candy Dough– Make this recipe even quicker without the candy dough. It’s a delightful touch, but you can still make an adorable treat without it if preferred. Use a little more chocolate to make a ticker layer around the cherries.
- Dough Texture– If the dough is a bit too wet, rather than soft and pliable, knead it for longer in more powdered sugar until it becomes shapeable. If necessary, chill the dough for about 15 minutes to make it easier to shape.
- Use Your Tools- For mice that come out perfect each time, use tools like toothpicks and tweezers for the tiny details.
- Get the Perfect Mouse Eyes– Before adding the black icing eyes, practice the tiny dots on a piece of parchment paper or a paper towel. This will help you get used to how the decorative icing works. Sometimes, it’s a bit runny. To make this work for the recipe, use a toothpick to collect a tiny amount and add it to the mouse face.
Tips
Variations and Substitutions
Christmas Mice For Holiday Neighbor Gifts
What a great idea! You can turn these little Christmas fun treats into a gift for your neighbors and friends.
Ensure the chocolate is totally dry and hardened before you plate them, cover them with plastic wrap, or place them in a Christmas tin.
Then, before you deliver these edible gifts, attach a note that says: “T’was the night before Christmas and all through the house, not a creature was stirring, not even a mouse.”
Recipe FAQs
There are endless ways to bring life to these chocolate mice. For the eyes, you can use candy eyes (usually found near the sprinkles at the store). However, these are sometimes too large unless you can locate tiny ones. Otherwise, a dot of black or white icing works well! The nose can be made with any little red candy, like red hots, candy pearls, or small heart candy. Icing also works well for this feature– Just drop a tiny dot of pink, white, black, or red icing at the tip of the Kiss for an adorable nose!
It’s best if they do, after all, the stem makes the tail of the mouse, which really brings the look together. If you have difficulty finding cherries with stems, use another ingredient for the tail, like licorice lace or another string-like candy.
Maraschino cherries are preserved real cherries. They are sweeter, almost like candy, from being soaked in a solution of sugar, oil, and other preservatives. Marschino cherries are commonly found on top of Sundays, in cocktails, and in other recipes.
Storage
Refrigerate Leftover Chocolate Mice: If you have leftovers or make them ahead of time for an upcoming holiday celebration, store them in an airtight container in the fridge for up to three weeks!
Keep Them on the Countertop: The candy mice will last for about two weeks at room temperature on the kitchen counter. Just be sure to keep it in an airtight container out of direct sunlight and heat.
What to Serve What to Serve with Chocolate Cherry Christmas Mice
Enjoy the candy-coated cherry mice with a scoop – or two – of homemade Nutty Buddy Ice Cream, made easily with a no-churn process. Top the dessert with fluffy and sweet from-scratch Whipped Cream. The chocolate and cherry mice also make an excellent topper for these cute Air Fryer Cherry Hand Pies.
And if you love the mice theme try the adorable Christmas Mouse Cookies.
More Sweet Holiday Treats with a Creative Touch
- Grinch Punch Recipe
- Chocolate-Covered Pretzel Pumpkins
- Yummy Mummy Meatball Crescent Bites
- Christmas Muddy Buddies Chex Mix
- Polar Bear Paw Cookies
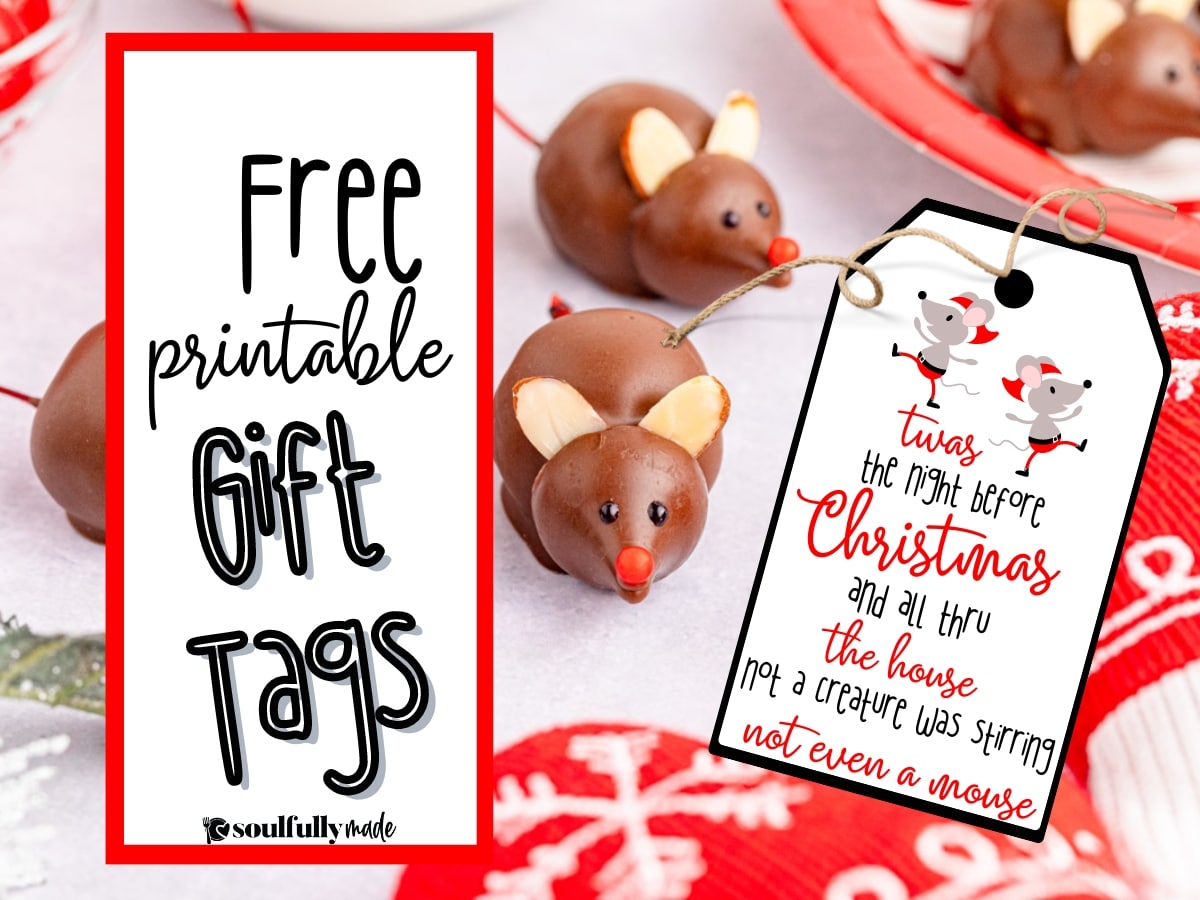
Download Mice Gift Tags
Enter your name + email for immediate access to this printable! We’ll add you to our newsletter list and send you our weekly meal plans, printables, and MORE!
Hungry for more easy, home-cooked, delicious recipes?
Sign up for my free recipe club to get family-friendly recipes in your inbox each week! Find me sharing daily meal-time inspiration on Pinterest, Facebook, and Instagram.
Chocolate Covered Cherry Mice
Click Stars To Rate
Equipment
Ingredients
- 2 10-ounce jars maraschino cherries with stems - well drained and dried
- 10 ounce Ghirardelli milkchocolate melting wafers
- (we love the taste and touch this adds, but can be made without dough and only using chocolate)
- 2 ½ cups powdered sugar - sifted
- ¼ cup unsalted butter - softened to room temperature
- 3 tablespoons corn syrup
- 1 teaspoon almond extract
- 30 milk chocolate almond Hersey's Kisses - for the head
- 60 almond slices - for the ears
- black decorative icing - for the eyes
- 30 red sugar pears - for the nose
Instructions
- Line two baking trays with wax paper or parchment paper and set aside.
- In a large bowl, mix the butter, corn syrup, and almond extract together until smooth and well combined.
- Slowly add the powdered sugar into the bowl and knead together it forms a soft dough.
- Pinch off ½ tablespoonsized pieces of dough, roll into a ball, then flatten the balls into round discs.
- Wrap each dough round around a maraschino cherry, keeping the stems exposed. Use your hands to carefully roll each ball into shape. Be careful not to break the stems off as they will be tail for each mouse. Repeat with the rest of the cherries and dough. Refrigerate for 2-4 hours, until firm.
- Once firm, melt the milkchocolate wafers in a double boiler or candy melting pot over low heat. Stir occasionally to ensure it is heating evenly.
- Take each cherry one at a time and gently hold it by the stem and dip it into the melts. You can use a fork if needed to lift the cherry out without breaking the stem off. (working one at a time so that the chocolate does set before forming body and ears)
- Place each dipped cherry back onto the prepared baking tray and lay it on the side. The cherry stem will be the tail.
- Press the bottom of a Hershey’s Kiss onto the opposite side of the stem. This will be for the mouse head.
- Stick two almond slices (similar in size) for mouse ears between the cherry body and the Hershey’s Kiss head. Repeat with the rest of the cherries.
- Once the head, body, and ears are all attached, decorate the face. Using a toothpick or skewer, dab atiny amount of melted chocolate onto the top part of the tip of the Hershey’s Kiss and place a red sugar pearl for the mouse nose. Hold it in place for a fewseconds to ensure it does not fall off. Repeat with the rest of the candy mice.
- To form eyes, dab two dots of black decorative icing onto the Hershey’s Kiss face. You can do practice rounds onto a piece of parchment paper or napkin to see how the icing comes out of the tube. If the icing is coming out of the tube too quickly, use a toothpick or skewer to dab a small amount on. Repeat with the rest of the mice and then refrigerate until ready to serve.
Notes
- Without Candy Dough– Make this recipe even quicker without the candy dough. It’s a delightful touch, but you can still make an adorable treat without it if preferred. Use a little more chocolate to make a ticker layer around the cherries.
- Dough Texture– If the dough is a bit too wet, rather than soft and pliable, knead it for longer in more powdered sugar until it becomes shapeable. If necessary, chill the dough for about 15 minutes to make it easier to shape.
- Get the Perfect Mouse Eyes– Before adding the black icing eyes, practice the tiny dots on a piece of parchment paper or a paper towel. This will help you get used to how the decorative icing works. Sometimes, it’s a bit runny. To make this work for the recipe, use a toothpick to collect a tiny amount and add it to the mouse face.
Want to Save this Recipe?
By submitting this form, you consent to receive emails from Soulfully Made.
I made these with the kids over the weekend and they were so fun! Not to mention delicious!
I love this got the family together in the kitchen! Thank you so much for sharing, Tayler!
Adorable! These are perfect for the holidays!
Thank you, Mackenzie!
These are incredibly cute and so delicious. They didn’t last very long at our home!
Thank you, Shelby!
These are SO delicious and almost too cute to eat! Emphasis on almost, because the certainly got eaten, haha.
Ha Ha, Dana! So true. Once you get started it’s hard to stop.
These are so stinkin’ cute! (and yummy!)
Thank you, Ashley! I love snacking on this sweet treat!