


This post may contain affiliate links. Please read our disclosure policy.
Taco Tuesday just got a whole lot easier. This is the kind of meal that works on the nights when you need something fast, filling, and that everyone at the table will actually eat without complaint.
There is nothing fancy going on here, and that is exactly the point. You brown the beef, layer everything in the pot, and let the Instant Pot do the rest. Dinner is on the table before anyone has a chance to ask what’s for dinner.
Why You’ll Love This Instant Pot Cheesy Taco Pasta
This recipe checks all the boxes for a real-life weeknight meal. It is hearty and flavorful, and it comes together with ingredients you probably already have.
Ingredients
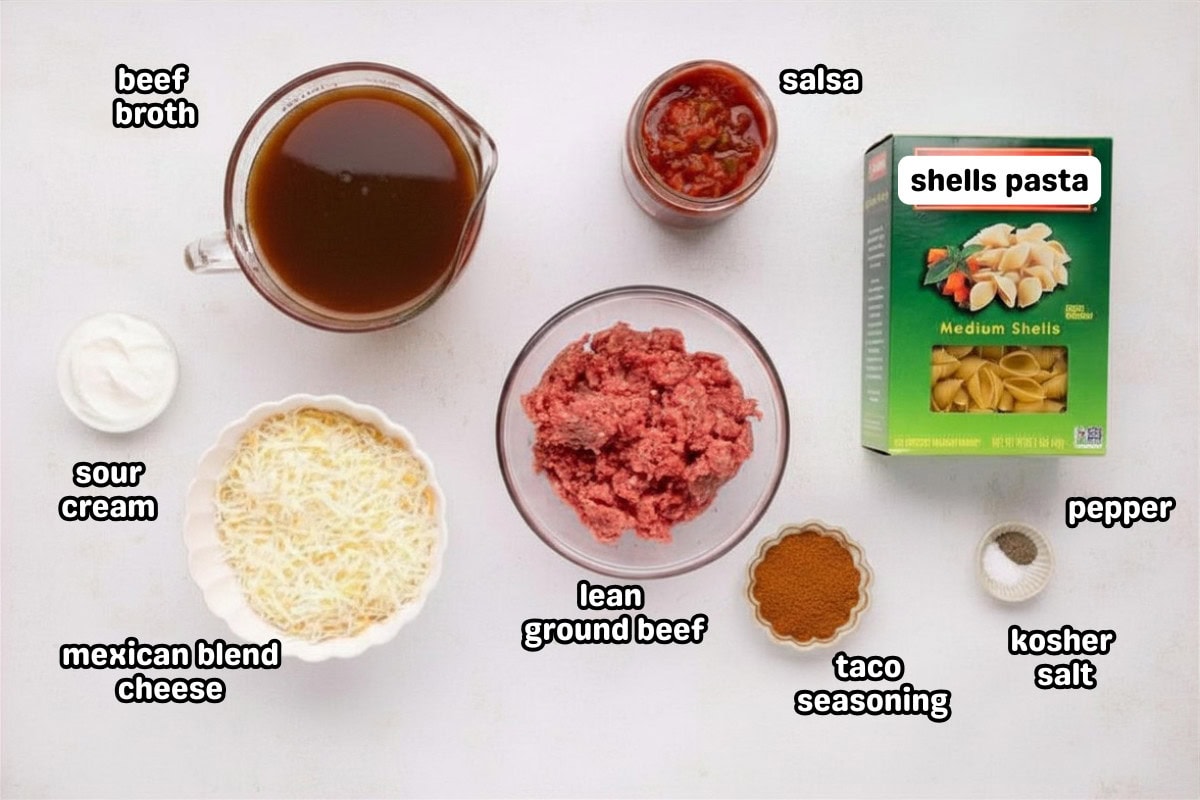
- Lean ground beef is the base of this dish. Lean keeps it from being greasy, but you can use whatever ground beef you have on hand. Just drain any excess fat before adding your seasonings.
- Taco seasoning packet is what pulls everything together. One packet is just the right amount for a pound of pasta and a pound and a half of beef.
- Salsa is doing a lot of work here. It adds tomatoes, onions, and peppers all at once, which means built-in flavor without any extra prep. Use your favorite jar, mild or spicy.
- Beef broth adds depth and is what cooks the pasta. Chicken broth or water both work if that is what you have.
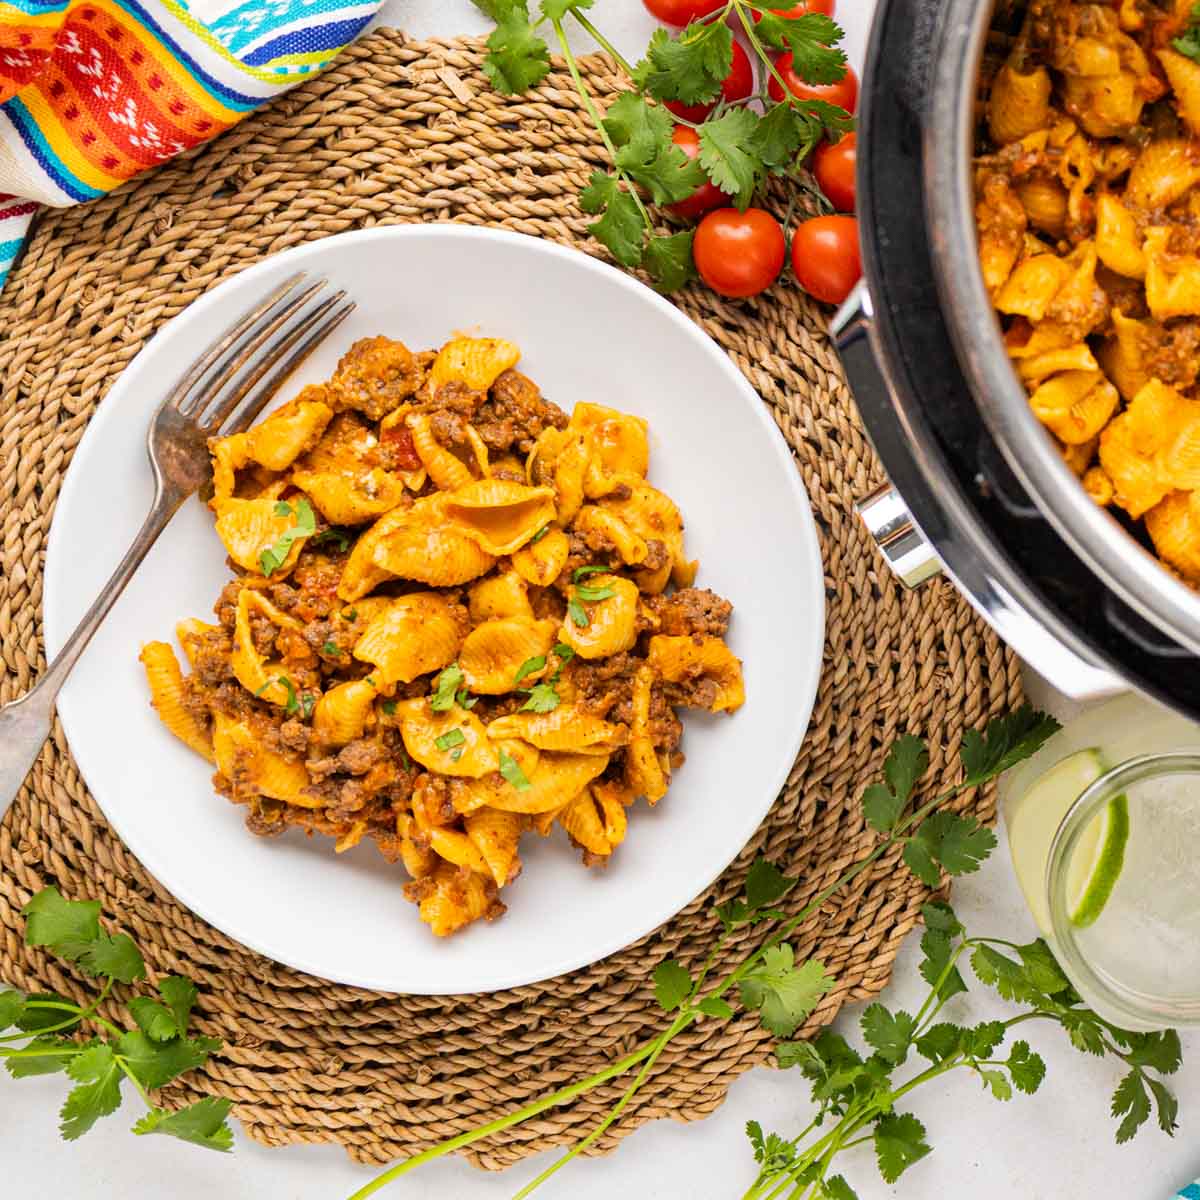
- Medium pasta shells hold onto all that cheesy, seasoned sauce in the best way. Any short pasta works, but shells are the favorite here for good reason.
- Mexican or taco blend shredded cheese is what brings it all home. Sargento’s blend melts beautifully and gives you that creamy, pull-apart finish. Pre-shredded works perfectly here.
How to Make Instant Pot Cheesy Taco Pasta (Pressure Cooker Recipe)
✱ Below shows step-by-step photos and instructions. For the complete recipe, along with ingredient amounts, scroll down to the recipe card.
Step 1 | Brown the Beef
Set your 6-quart Instant Pot to Saute. Add the ground beef and cook until no longer pink, breaking it up with a wooden spoon or spatula as it goes.
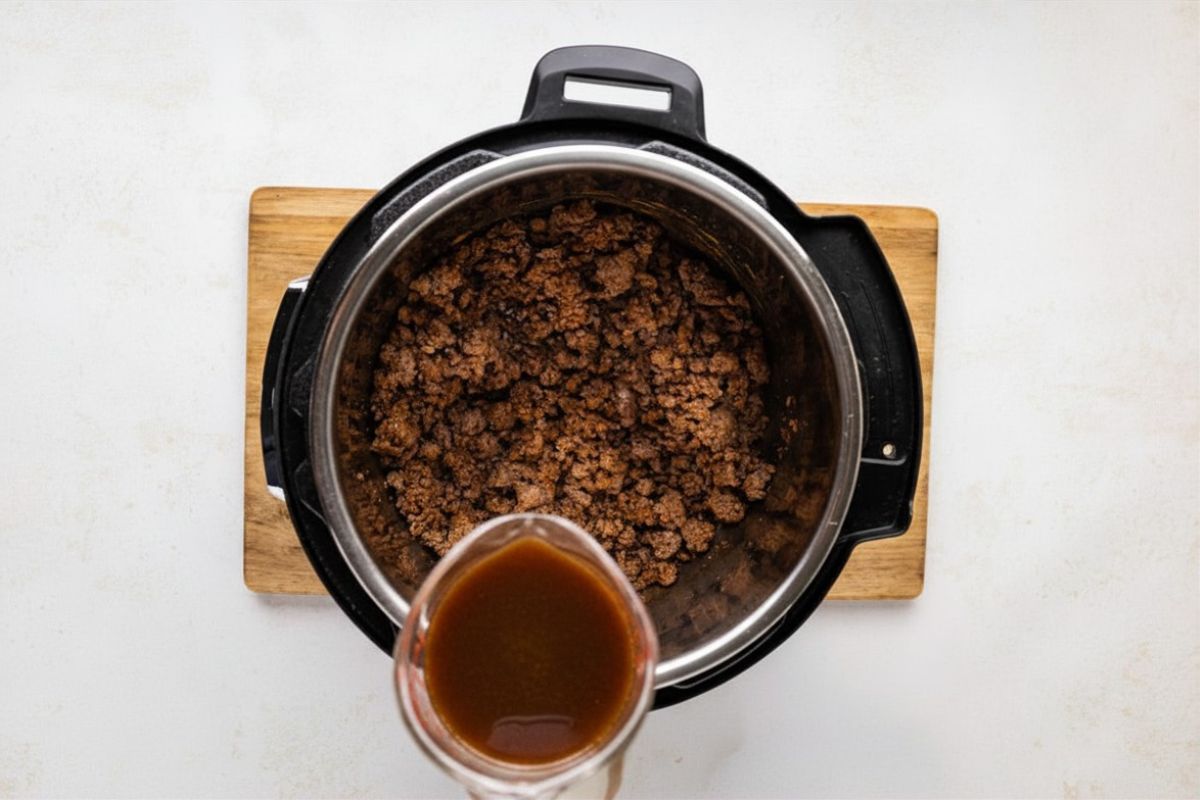
Once cooked, stir in the taco seasoning, salt, and pepper, and mix until the beef is well coated.
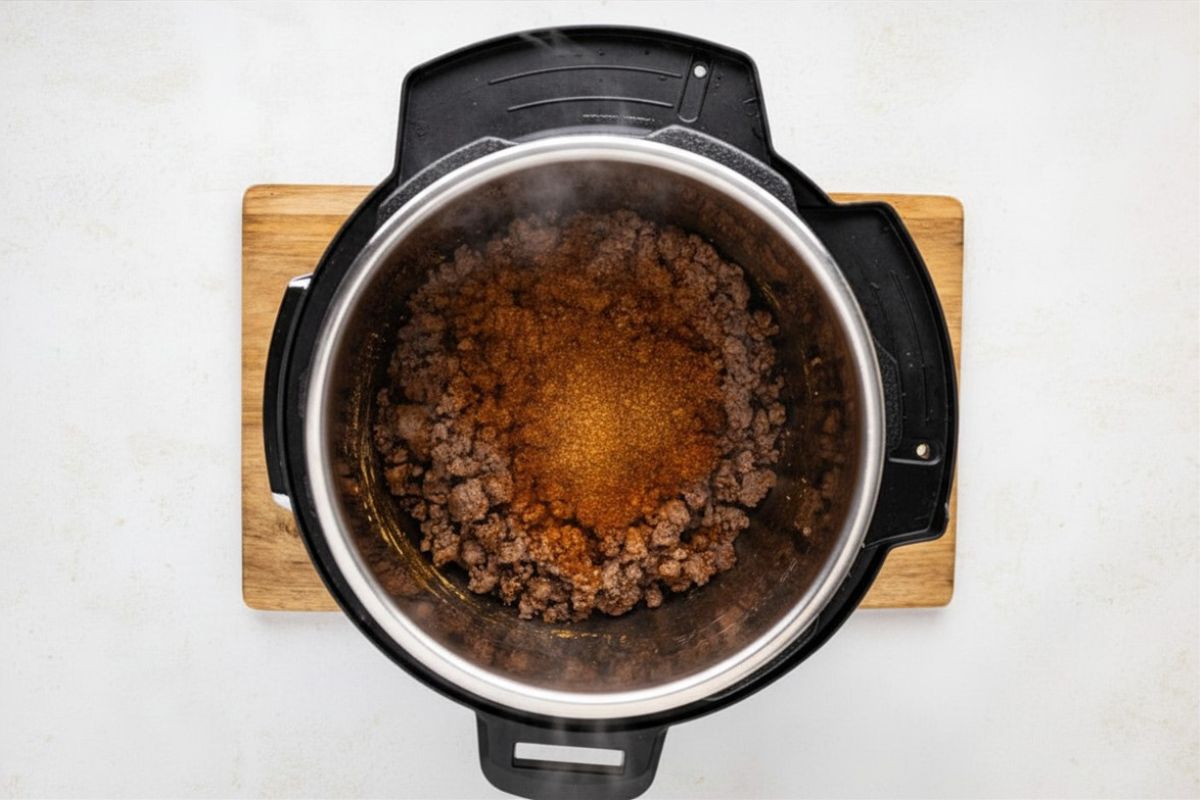
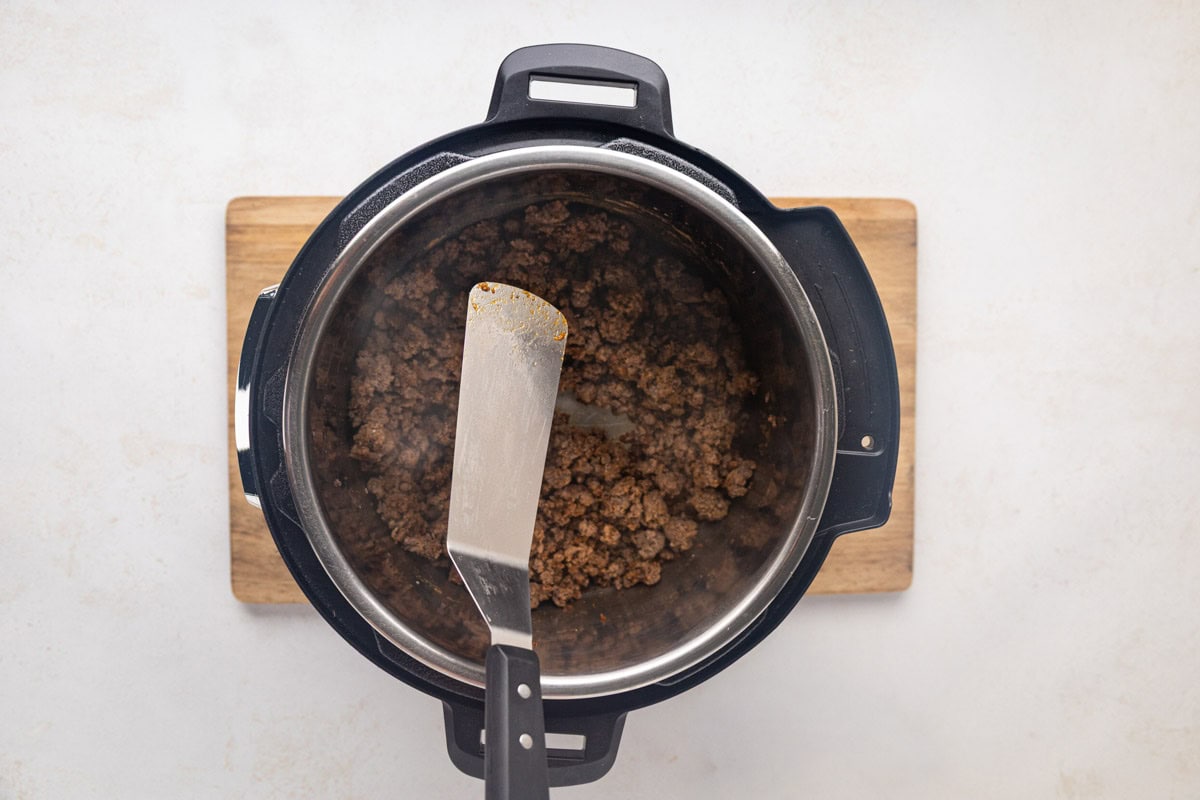
Pour in a little of the broth and deglaze the pan. Being sure all the bits are not stuck to the bottom
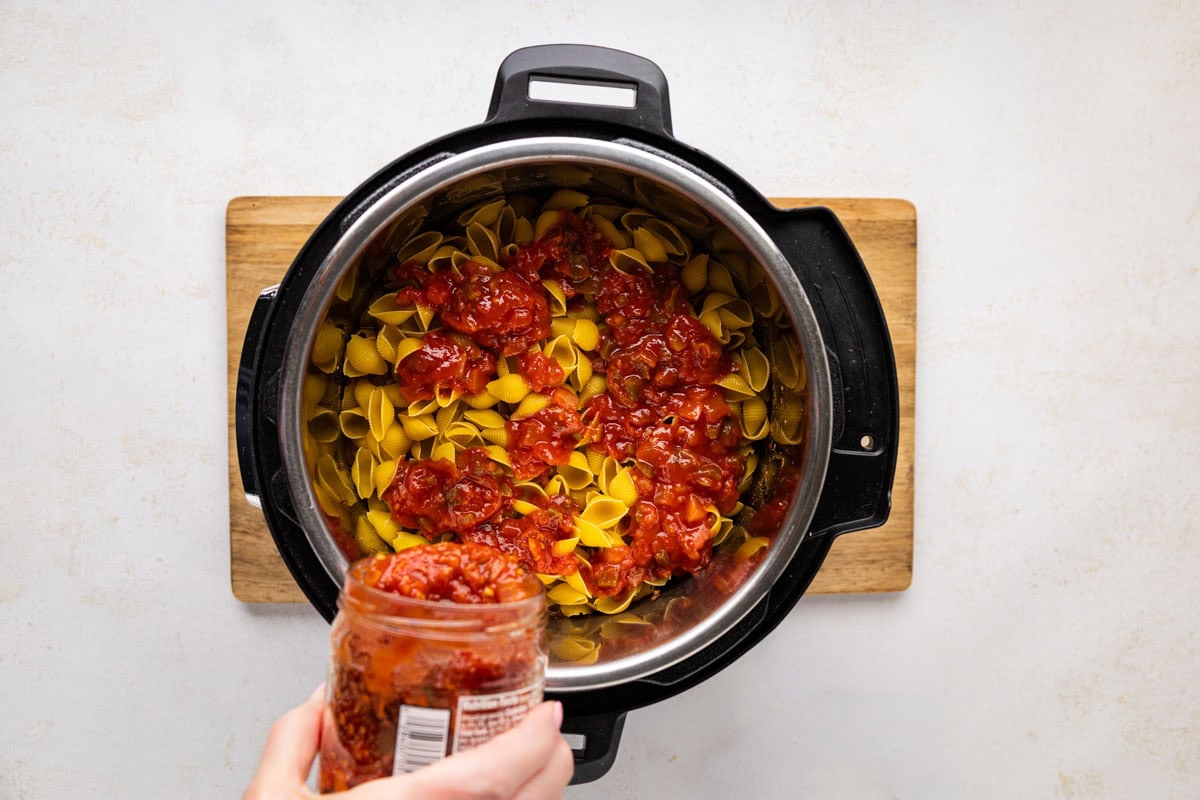
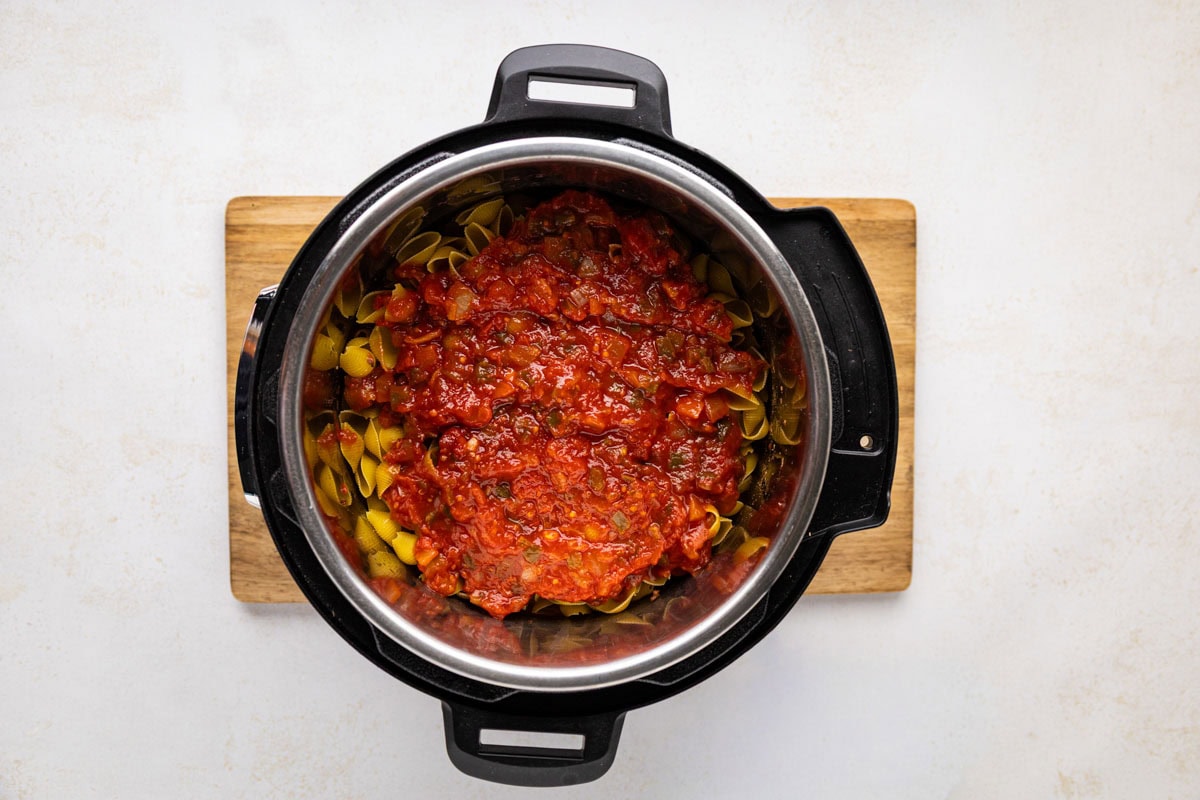
Step 2 | Layer the Pot
Pour in the remaining beef broth. Then add the pasta shells.
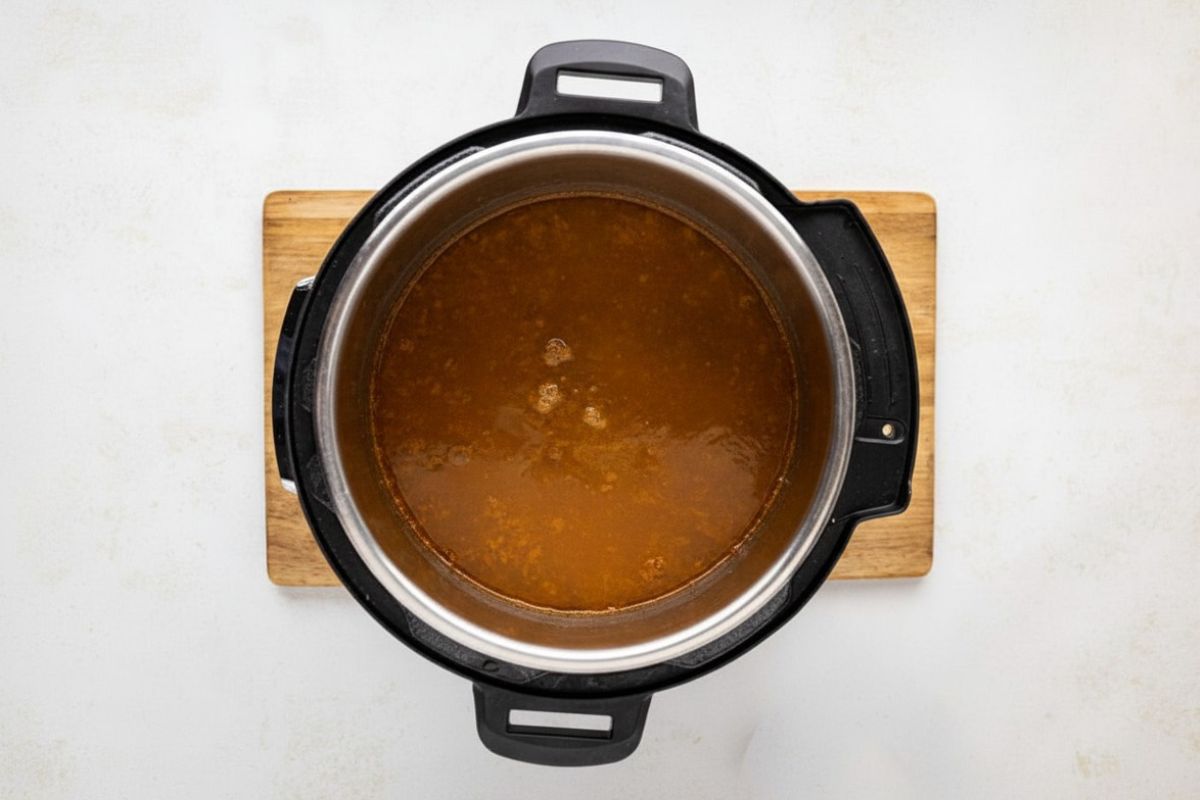
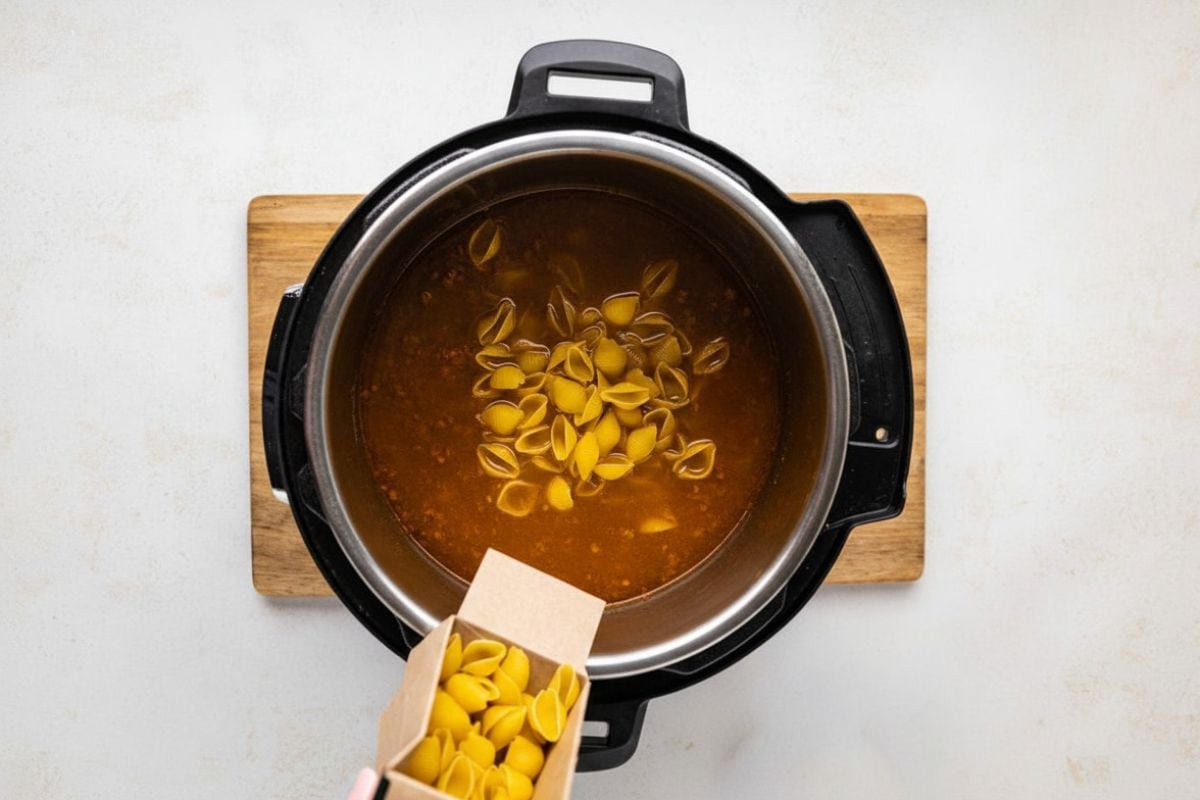
Next, pour the salsa on top.
Do not stir. The liquid needs to stay at the bottom, so the Instant Pot reaches pressure without a burn notice.
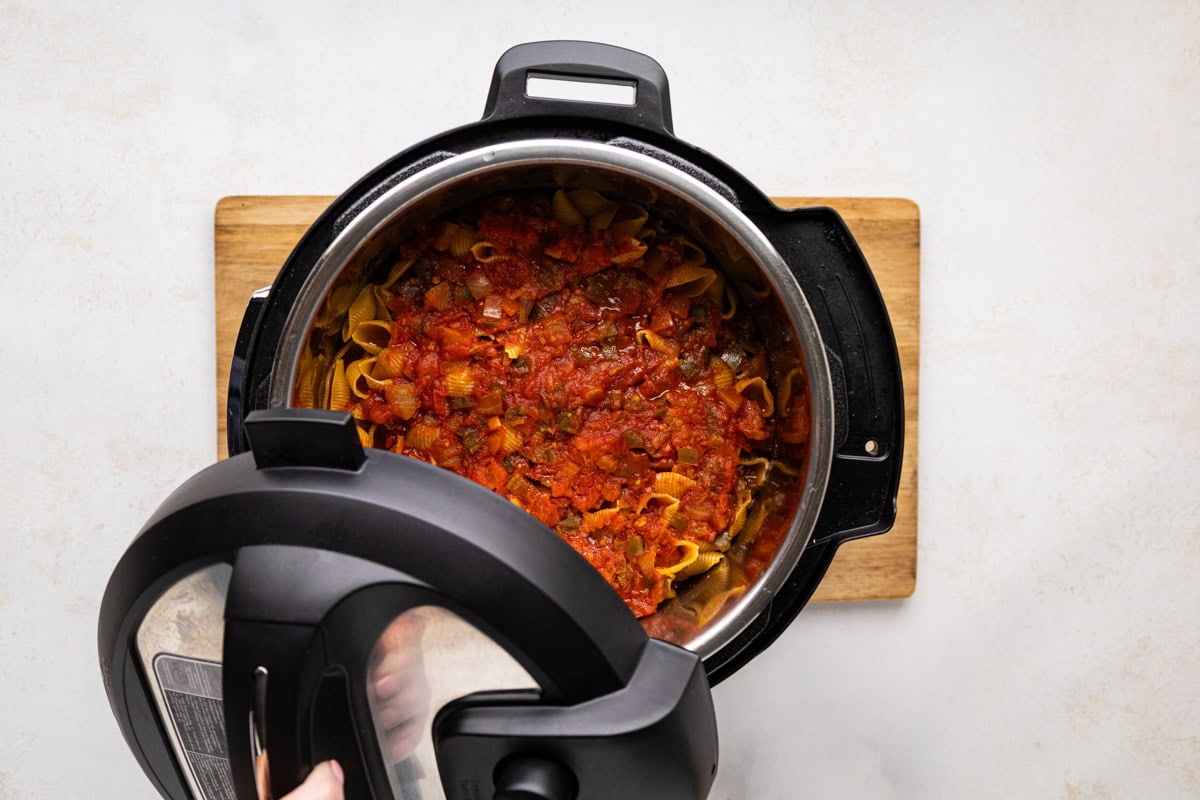
Step 3 | Pressure Cook
Close the lid and make sure the vent is set to sealed. Set the Instant Pot to manual high pressure for 4 minutes. It will take a few minutes for the pressure to build before the countdown starts.
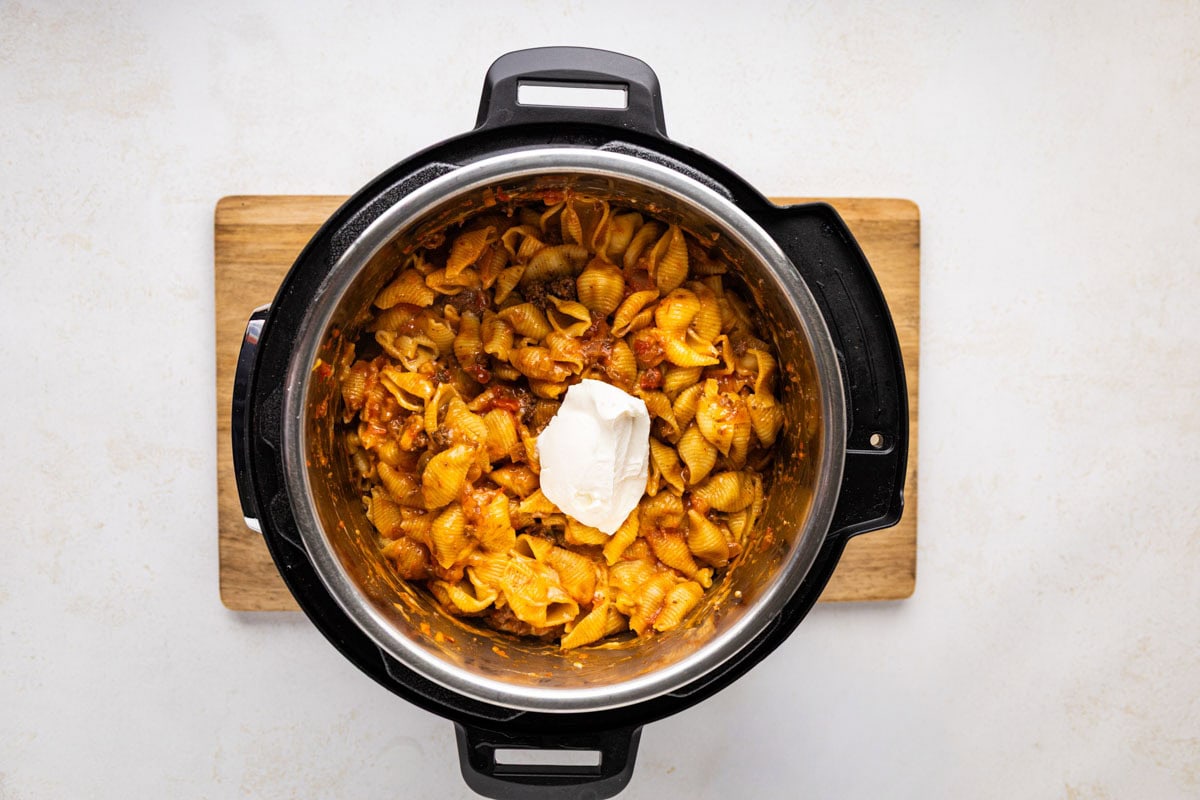
Step 4 | Release and Add Cheese
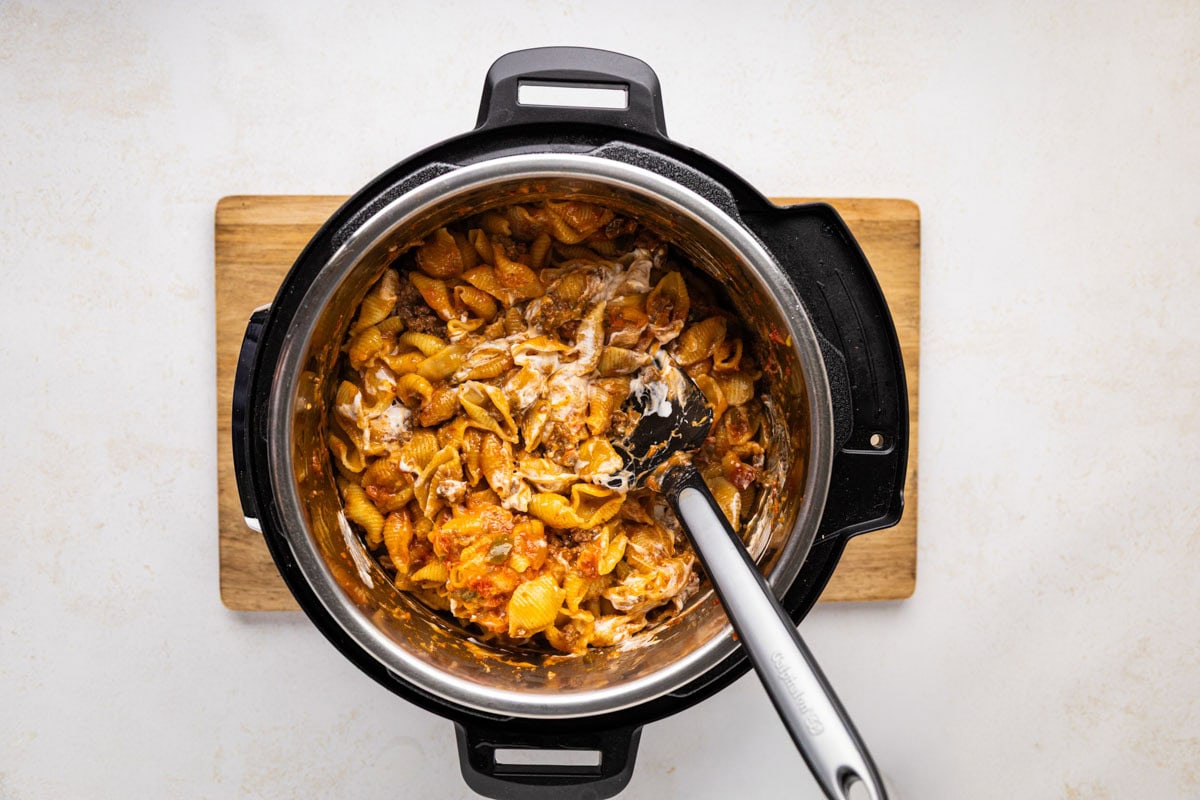
Once the cook time is done, do a manual pressure release. Open the lid carefully and pour in the shredded cheese.
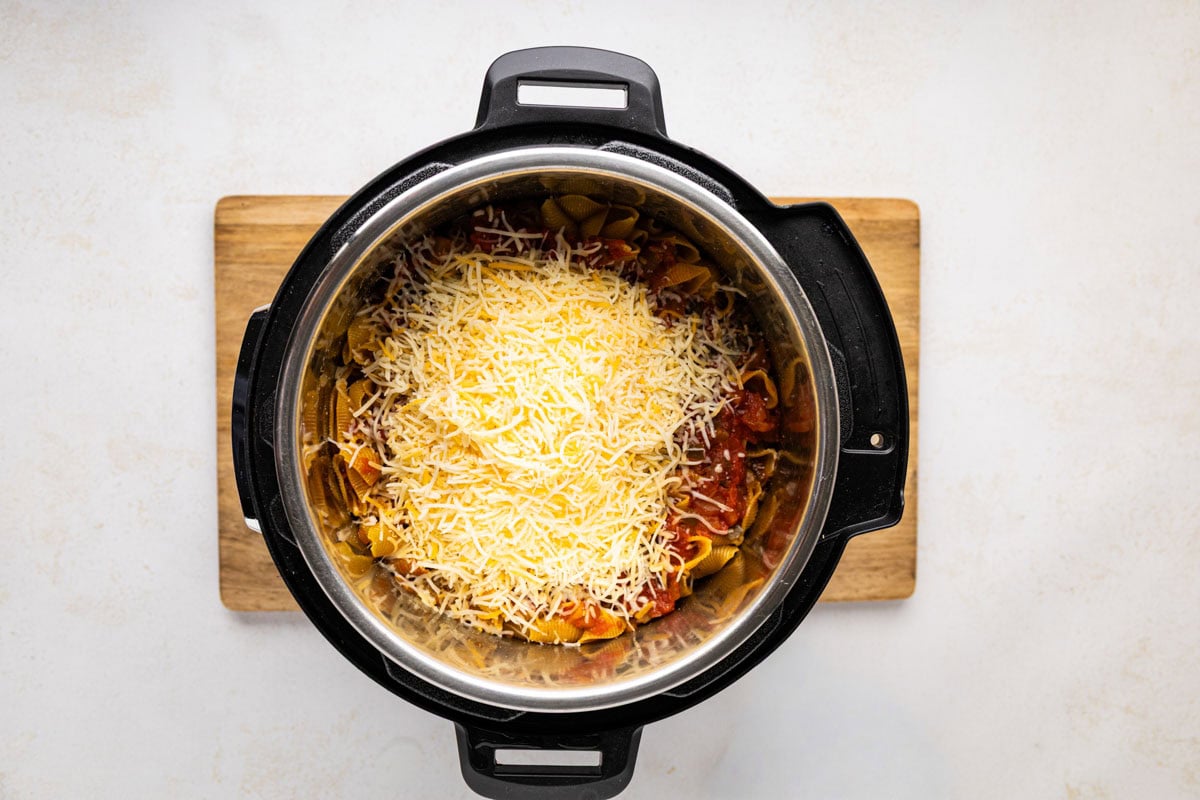
Stir well until the cheese is fully melted and the pasta is coated.
Set the warm and place the lid on, leaving it slightly ajar.
Let the cheese fully melt and combine. Then give it one more stir if needed before serving.
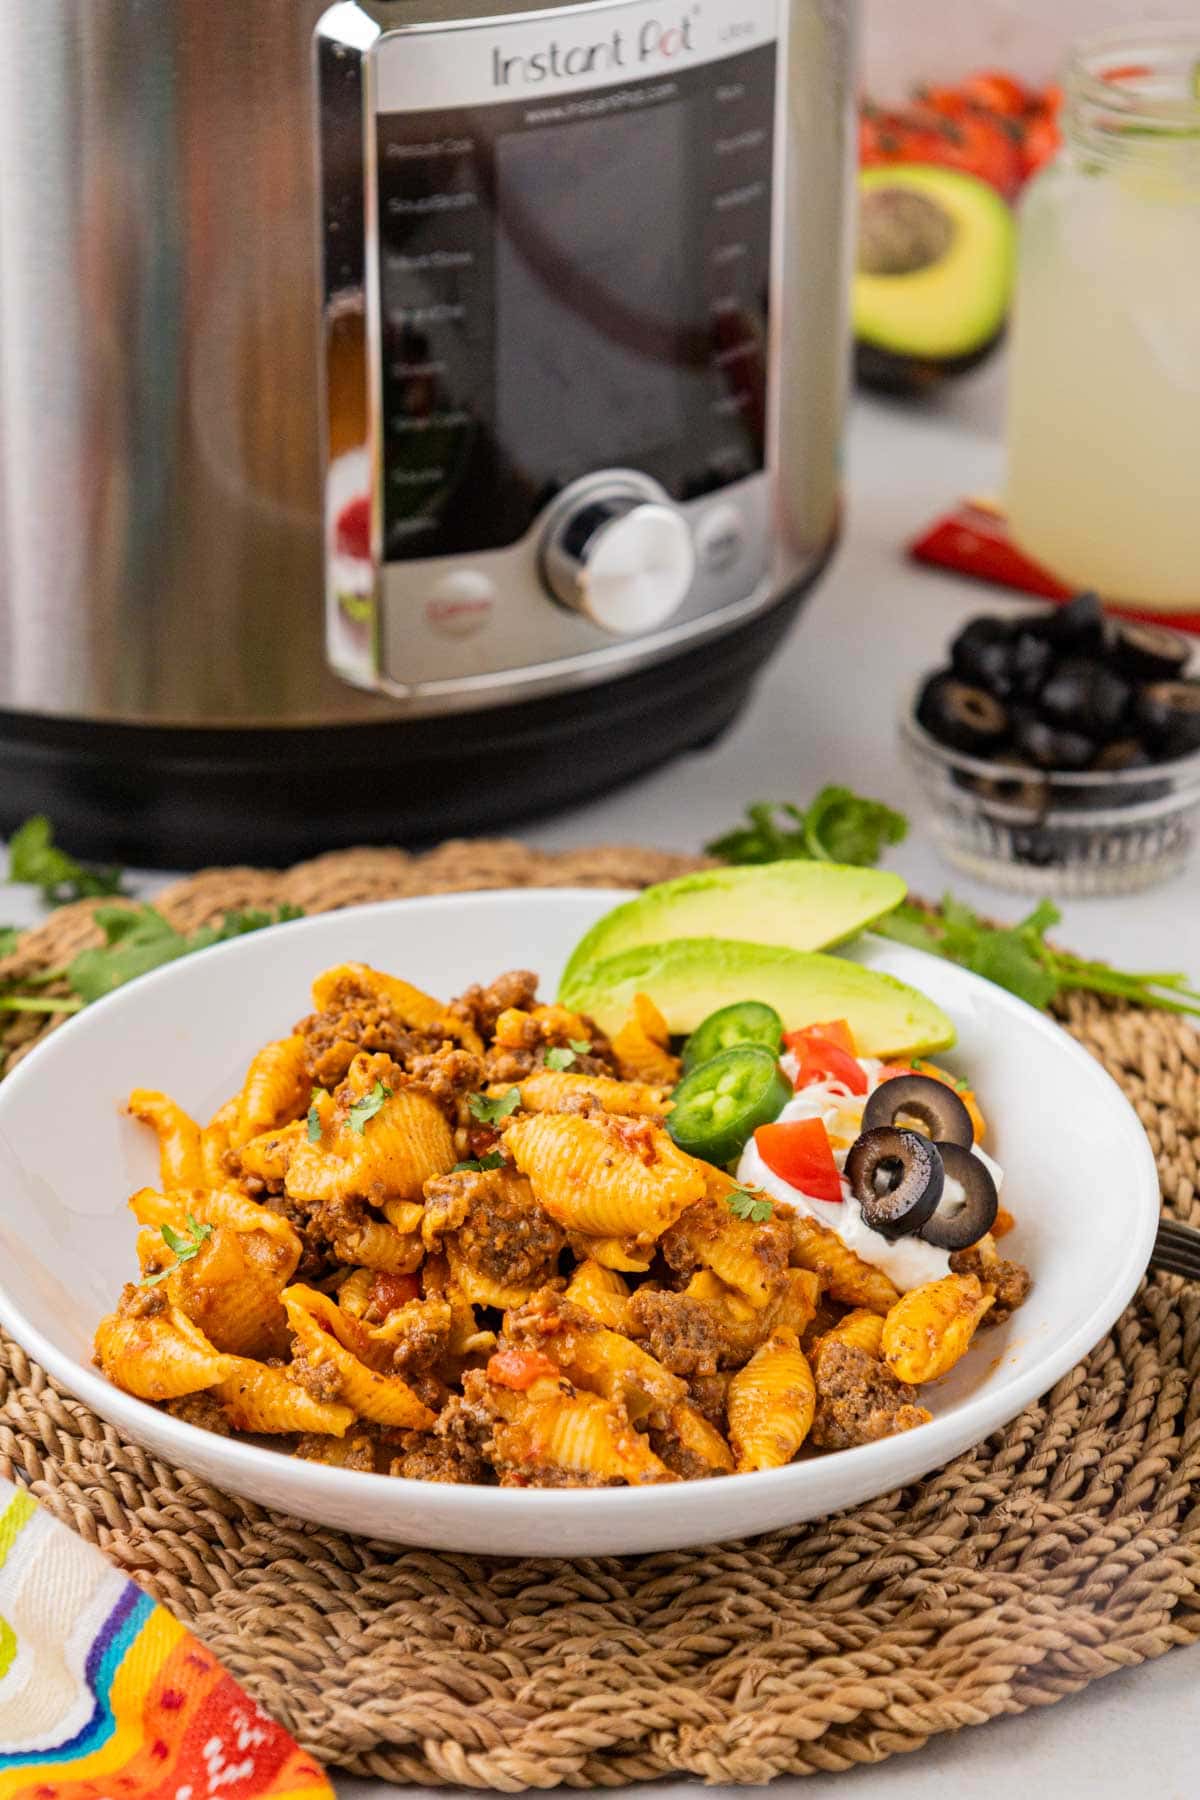
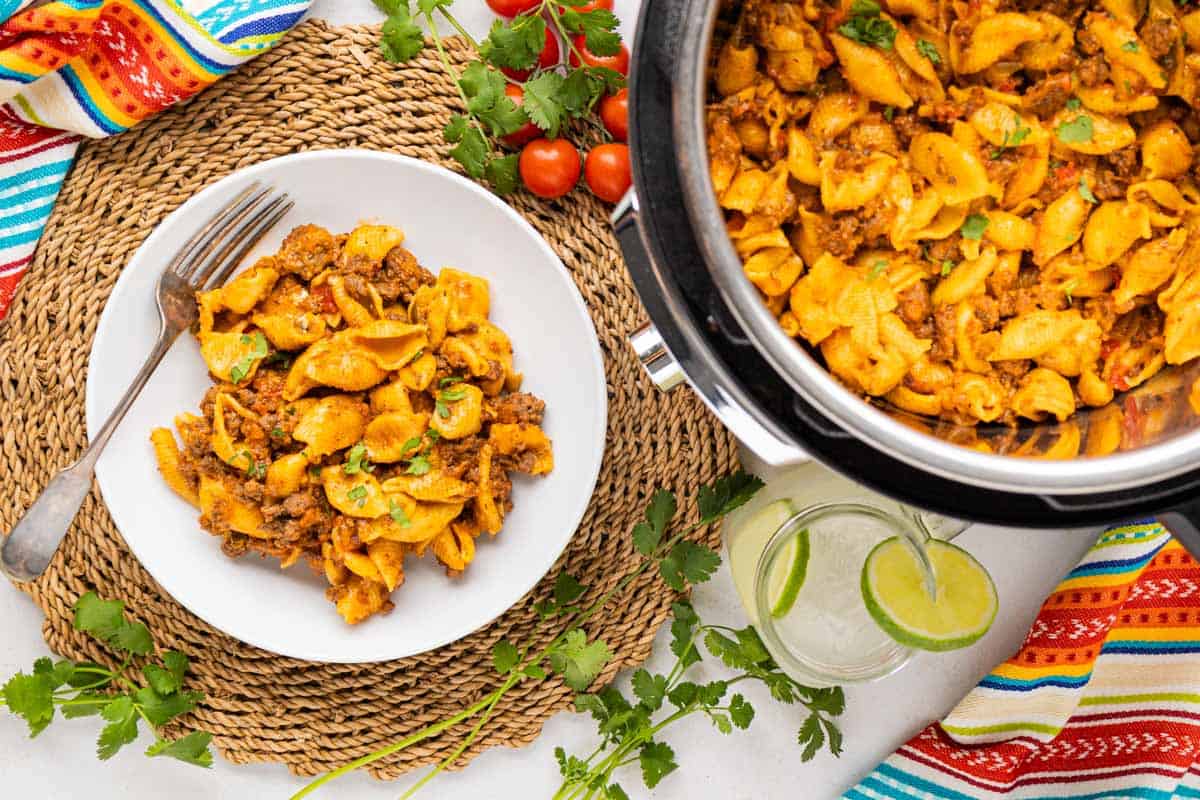
Step 5 | Top and Serve
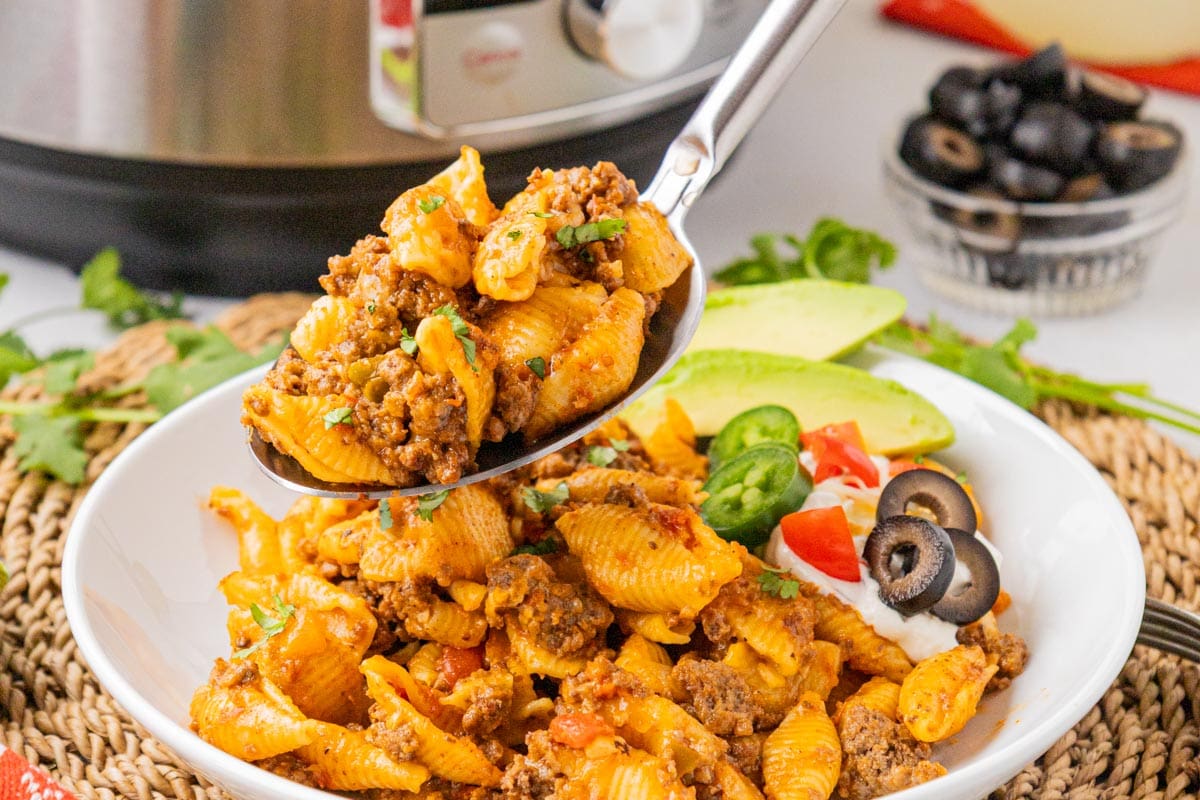
Scoop into bowls and let everyone add their own toppings. Sour cream, jalapeños, diced avocado, or a handful of tortilla chips all work great on top.
Topping Ideas
Half the fun of this dish is loading up your bowl. Set out whatever you have on hand and let everyone build their own. Sour cream, shredded cheese, shredded lettuce, diced avocado, jalapeños, fresh cilantro, pico de gallo, sliced black olives, or a handful of crushed tortilla chips or tortilla strips all work great on top.
Variations & Substitutions
- Ground turkey or chicken can be used in place of beef for a lighter version.
- Spicy salsa is an easy way to add heat without any extra ingredients.
- Add black beans or corn right on top before pressure cooking for a little extra bulk.
- Water can replace the broth in a pinch, though broth adds more flavor.
- Any short pasta like rotini, penne, or elbow macaroni can sub in for the shells.
- Extra Creamy: Stir in a half cup of sour cream with the cheese.
Expert Tips
- Do not stir after layering. This is the most important step. The liquid needs to sit at the bottom of the pot so it can come to pressure properly. Stirring before cooking can cause a burn notice.
- Let the cheese melt fully. Stir it in right after opening the lid while everything is still hot. It melts fast and pulls the whole dish together.
- Use a good salsa. Since it is adding most of the vegetable flavor, pick one you actually like the taste of. Chunky or smooth, both work.
- Shred your own cheese if you have time. Pre-shredded is totally fine and is what this recipe is written for, but freshly shredded melts even more smoothly if you want to take it a step further.
- This recipe doubles well. Just double all the ingredients and keep the cook time exactly the same. Make sure you stay under the max fill line on your Instant Pot.
What to Serve With Instant Pot Cheesy Taco Pasta
A crisp Mexican salad is one of the best things you can put next to this pasta. The cool crunch balances the warm, cheesy bowl perfectly.
Green chile cheese bread is another favorite and gets passed around fast. You can also round things out with Mexican Street Corn Slaw, guacamole, or refried beans.
This pasta holds its own as a complete meal, so keep it simple and enjoy. If you are looking for more ideas, check out all my Mexican-Style dishes.
Storage Instructions
Storage: Store leftovers in an airtight container in the refrigerator for up to 4 days. Reheat with a splash of broth or water to loosen it up.
Make Ahead: This is a great dish to make a day ahead. The flavors actually get better as it sits. Just reheat on the stovetop or in the microwave with a little broth or water, and it comes right back together.
Recipe FAQs
Yes. Cook the pasta separately, brown and season the beef, then combine everything in a skillet with the salsa and about a cup of broth. Stir in the cheese and serve.
A few things can cause this. Make sure the broth goes in first, and do not stir after layering. Also, after browning the beef, scrape up any bits stuck to the bottom of the pot before adding anything else. Those stuck bits are one of the most common reasons for a burn notice.
Yes, as long as you stay under the max fill line. Cook time stays the same.
This is written for a 6-quart. If using an 8-quart pot, add a little extra broth to help it come to pressure.
Nope, it goes in completely dry. The pasta cooks right in the broth and salsa under pressure, which is part of what gives it so much flavor.
Four minutes gives you a nice texture with the shells. If you prefer softer pasta or want to use another short pasta like elbow, add one more minute of cook time.
Other delicious recipes you may want to try!
Instant Pot Ground Beef Taco Pasta
Click Stars To Rate
Ingredients
- 1.5 pounds lean ground beef
- 1 packet taco seasoning
- 4 cups beef broth - can use chicken broth or water
- 1 teaspoon kosher salt - or to taste
- ½ teaspoon black pepper
- 1 pound pasta shells - medium, uncooked
- 15.5 ounces salsa - I use Tostitos brand chunky
- 2 cups Mexican or Taco Blend Cheese - shredded – I use Sargento's brand
- ½ cup sour cream - optional
Instructions
- Cook the ground beef: Set the {6 Quart} Instant Pot to SAUTE. Cook ground beef until no longer pink. Break up with a wooden spatula. Once cooked, add taco seasoning, salt, pepper, and mix well.
- Deglaze: Add a small amount of broth and deglaze the bottom of the insert (using a flat-bottomed spatula, scrape up any brown bits that are stuck). Deglazing helps to prevent a burn warning.
- Layer the remaining ingredients: Pour in the remaining broth. Add the uncooked pasta evenly over the ground beef layer. Then pour the salsa over the pasta. Do not stir or mix up.
- Pressure cook: Close the lid and make sure the vent is closed. Cook on Manual High pressure for 4 minutes. It will take about 10 minutes to come to pressure.
- Release pressure and add cheese: Once cooking finishes, manually do a quick release. (You can let pressure out a bit at a time to reduce splattering.) Remove the lid and pour in the cheese, mixing until well distributed throughout the pasta. For An Extra Creamy Version: Stir in a half cup of sour cream with the cheese.Set to warm and partially place on the lid for 5-10 minutes. Let the cheese melt completely.
- Serve. Scoop into bowls and garnish with your favorite taco toppings if desired.
Notes
Want to Save this Recipe?
By submitting this form, you consent to receive emails from Soulfully Made.
So Good and easy. I’m always looking for different Mexican recipes and this one is perfect.
Can I use chicken breast instead of ground beef?
Absolutely, shredded, cut into bite sized pieces or use a rotisserie and chop up to make it easy.
Is manual release quick release?
Yes it is.
How much water do you need to add as it hasn’t gotten an amount
4 cups are listed on the recipe card. Please let me know if that isn’t showing up for you so that I can let my tech support know.
This is so good plus it’s quick and easy to make. Thank you so much for sharing
Can rigatoni be substituted for the shells?
Yes. You should be able to use any pasta you have. I did test it with shells, but I have made other pastas in the IP and they have all turned out so delicious!