


This post may contain affiliate links. Please read our disclosure policy.
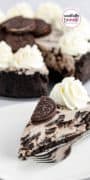
My simple no-bake Oreo Cheesecake Recipe is the answer to your sweet tooth any day of the year. This cheesecake is made with an Oreo crust and filled with a cookie-packed cheesecake filling, then drizzled with chocolate syrup!
This is one of the most delicious no bake cheesecakes I have ever tasted. With just a handful of ingredients, you are ready to make a homemade crisp Oreo crust filled with creamy Oreo Cheesecake filling. What could be better?
I just adore a no-bake dessert, and a no-bake cheesecake recipe is even better. Last July, I made these No-Bake Fireworks Oreo Cheesecake Bars, and they were a total hit!
And then… if you cannot get enough of dreamy chocolatey desserts made with Oreos, I have you covered! Try this recipe for Oreo Brownie Poke Cake, and then make this Oreo Ice Cream Dessert.
Just in time for strawberry season, be sure to try my Strawberry Oreo Cheesecake Cookies! There are plenty of Oreo desserts for you to try on my blog, so hop on over and search Oreo! Go crazy!
Why you’ll love this recipe!
- Simple Ingredients: SImple makes it easier, and we could all use an easy recipe after the holidays.
- No-Bake Oreo Cheesecake Recipe: Again, this is a no-bake recipe! What could be better?
- All Your Favorites: If you are a huge cheesecake fan and an Oreo lover, you are in luck!
Key Ingredient Notes
Equipment
- Food Processor (the one I now use is linked here)
- Springform Pan
- Stand Mixer or an Electric Hand Mixer
Variations and Substitutions
How to make an Easy No-Bake Oreo Cheesecake
✱ Be sure to see the recipe card below for exact ingredients and full recipe instructions!
Step 1 | Make the Oreo Cookie Crust
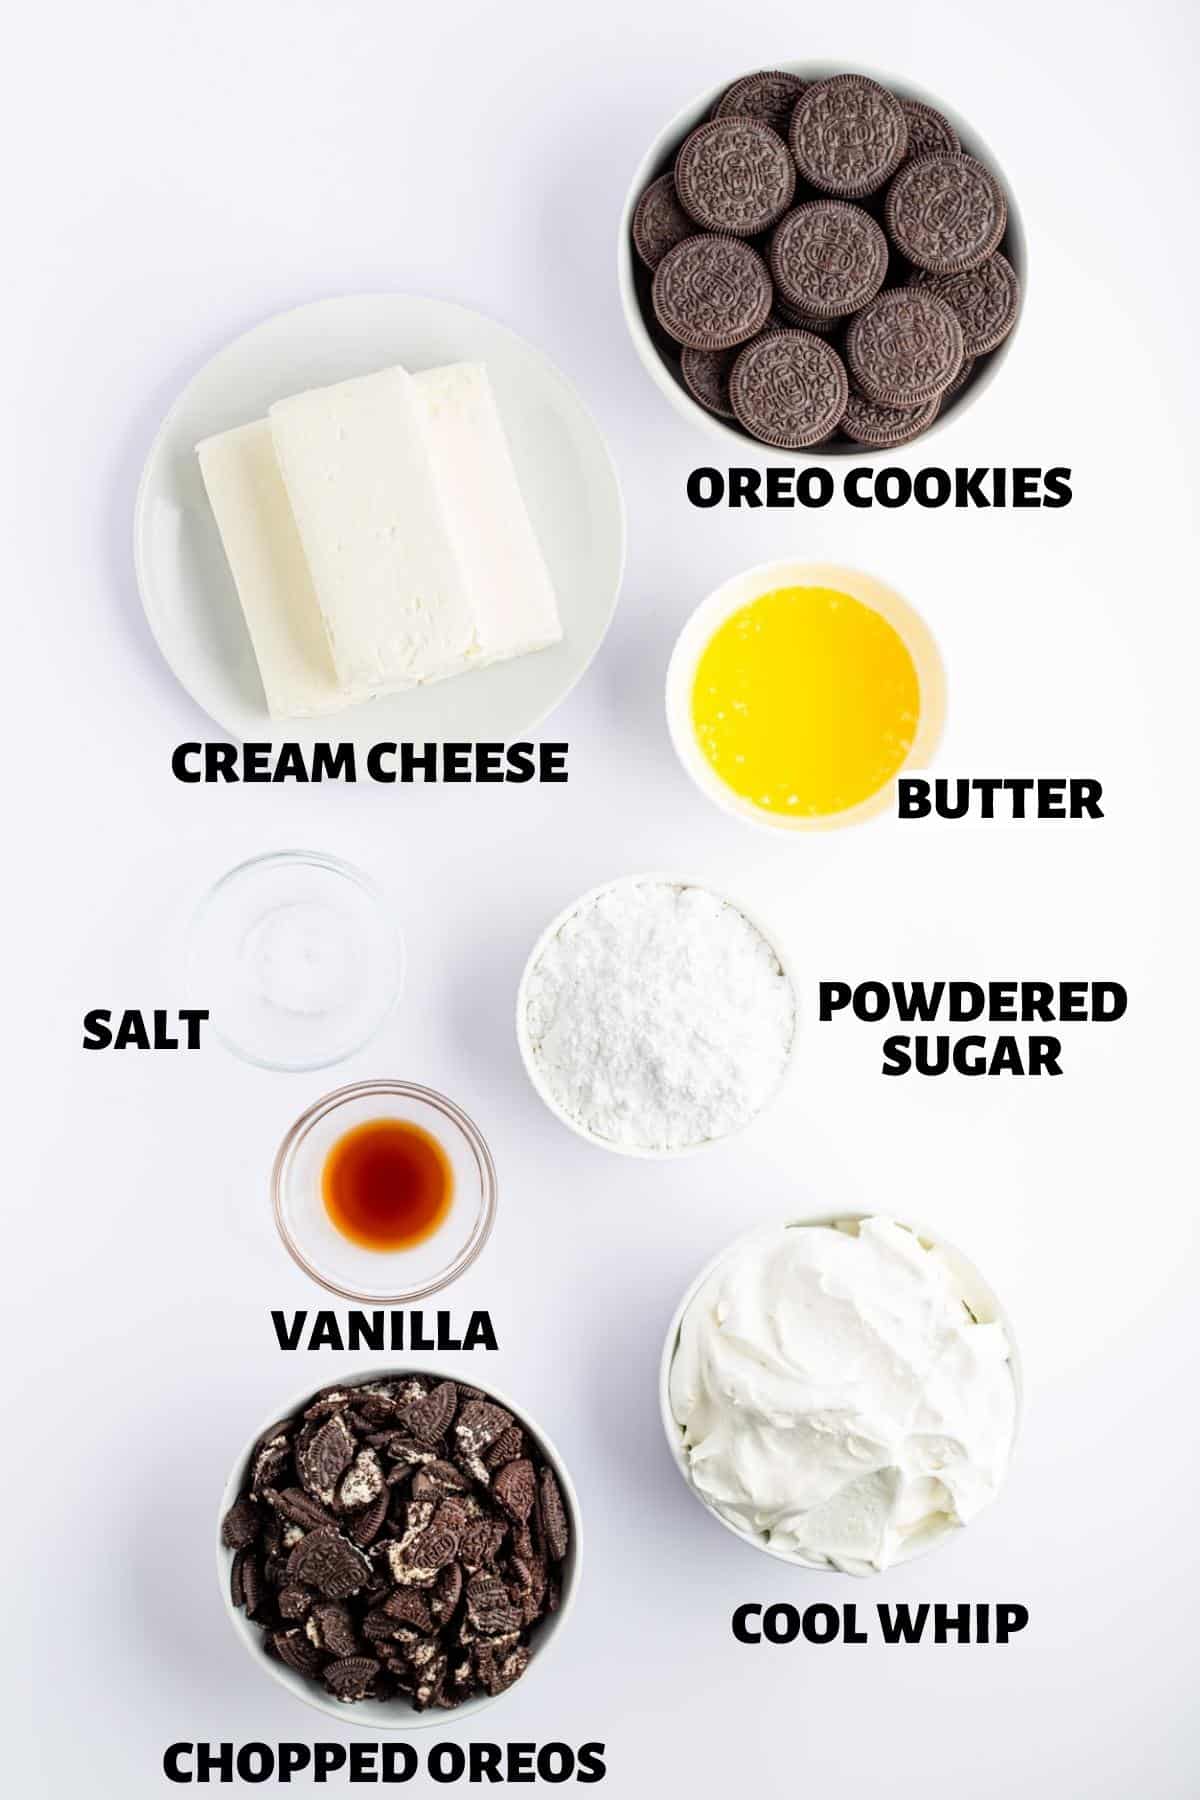
Making the crust couldn’t be easier. First, count out 24 cookies for the crust and set aside the remainder of the cookies to fold into the cheesecake. A standard package of Oreos contains 36 cookies. Then chop the 24 Oreos and get ready to make the crust.
Take out your food processor or blender, pour in the chopped Oreo cookies, and pulse the Oreos until the cookies become like fine crumbs.
Pour melted butter into the fine cookie crumbs, then add the salt, and pulse again to combine with the Oreo crumbs. Alternatively, you can crush the Oreos in a zippered bag using a rolling pin and mix the ingredients by hand.
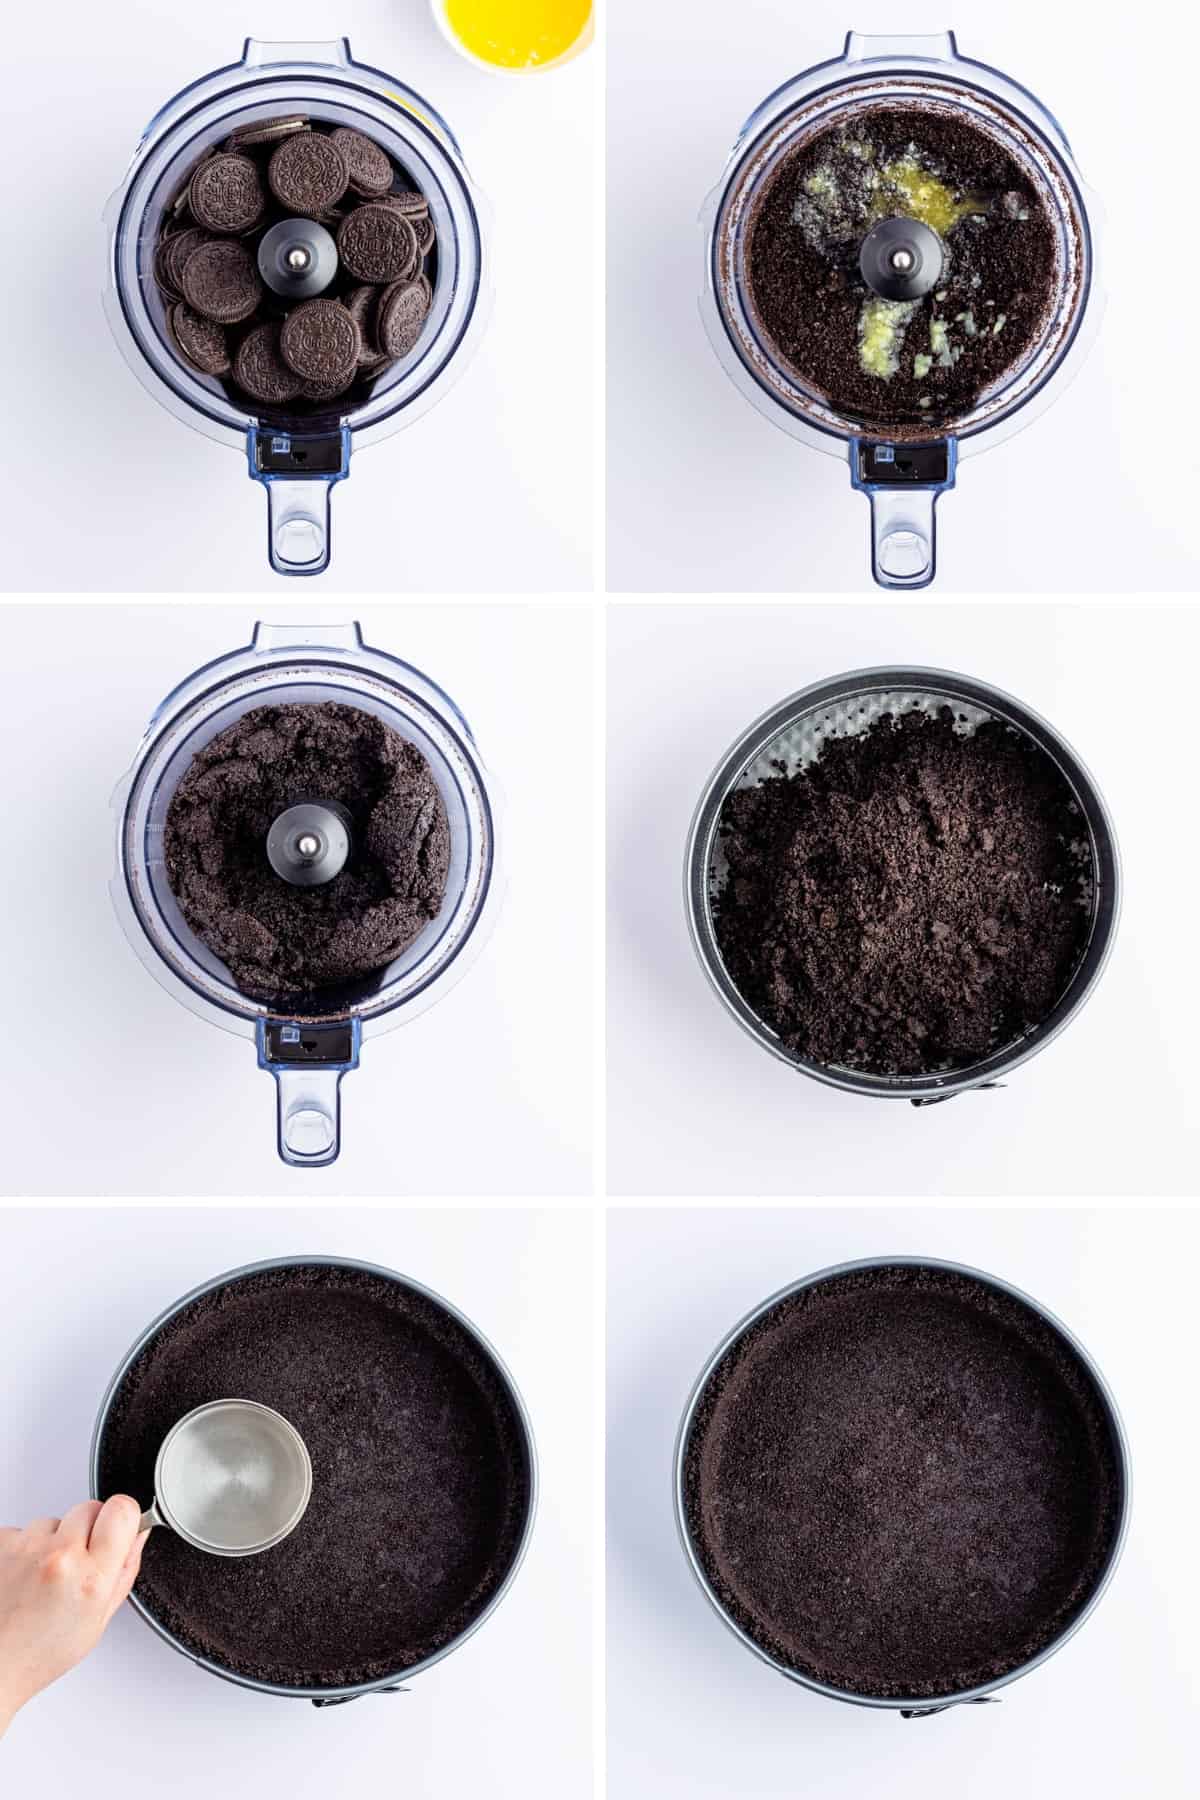
Before you pour in the crust, line the bottom of a spring form pan with parchment paper and lightly spray the sides with cooking spray or butter. Then you can add the Oreo crumbs to the pan and press down firmly to form a crust.
Use the back of a measuring cup or glass to help press the Oreo crust evenly into the pan.
Finally, set the crust in the freezer to firm up while making the filling.
Step 2 | Make the Cheesecake Filling, Spread it into Crust, and Chill
While your crust is chillin’ in the fridge, get your filling started. Pull out your stand mixer or a hand mixer. Mix the softened cream cheese, vanilla extract, and powdered sugar in a large mixing bowl. Mix the cream cheese mixture with a stand mixer or a handheld until smooth and fluffy.
Now, add the whipped topping and fold it into the cheesecake mixture with a rubber spatula until thoroughly combined. Then add the chopped chocolate Oreos and fold again until combined.

Step 3 | Add Toppings and Serve
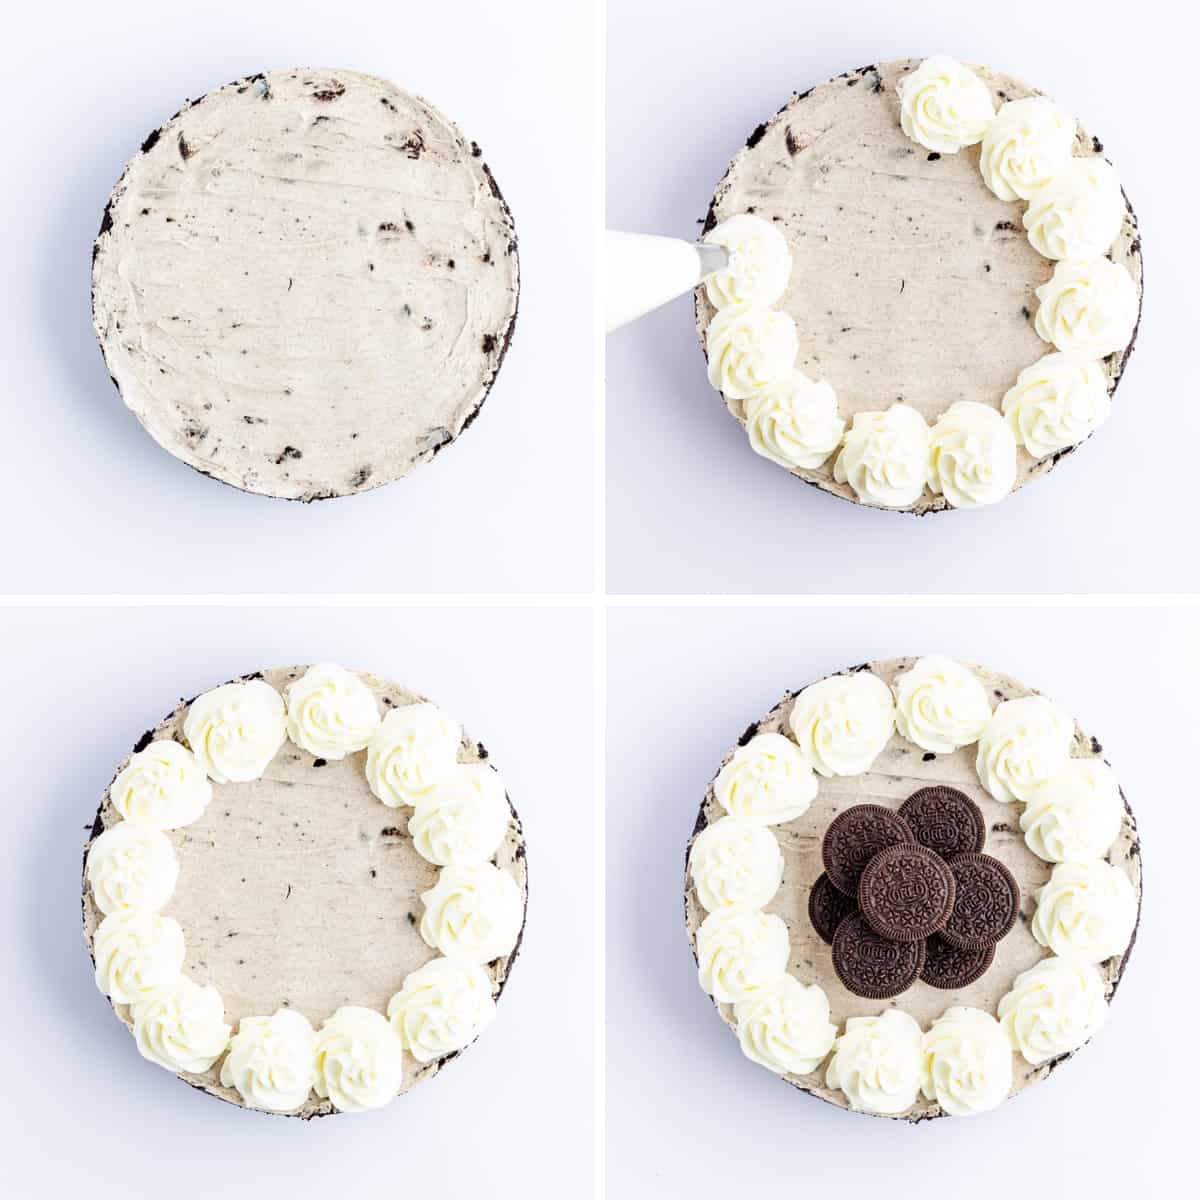
Remove the crust from the refrigerator, pour the large bowl of creamy cheesecake filling on top, and then spread it out into an even layer. Then it goes back into the fridge for at least 6 hours, or overnight, until firm. I know the waiting stinks, but it makes this recipe easy and perfectly sets the cake up.
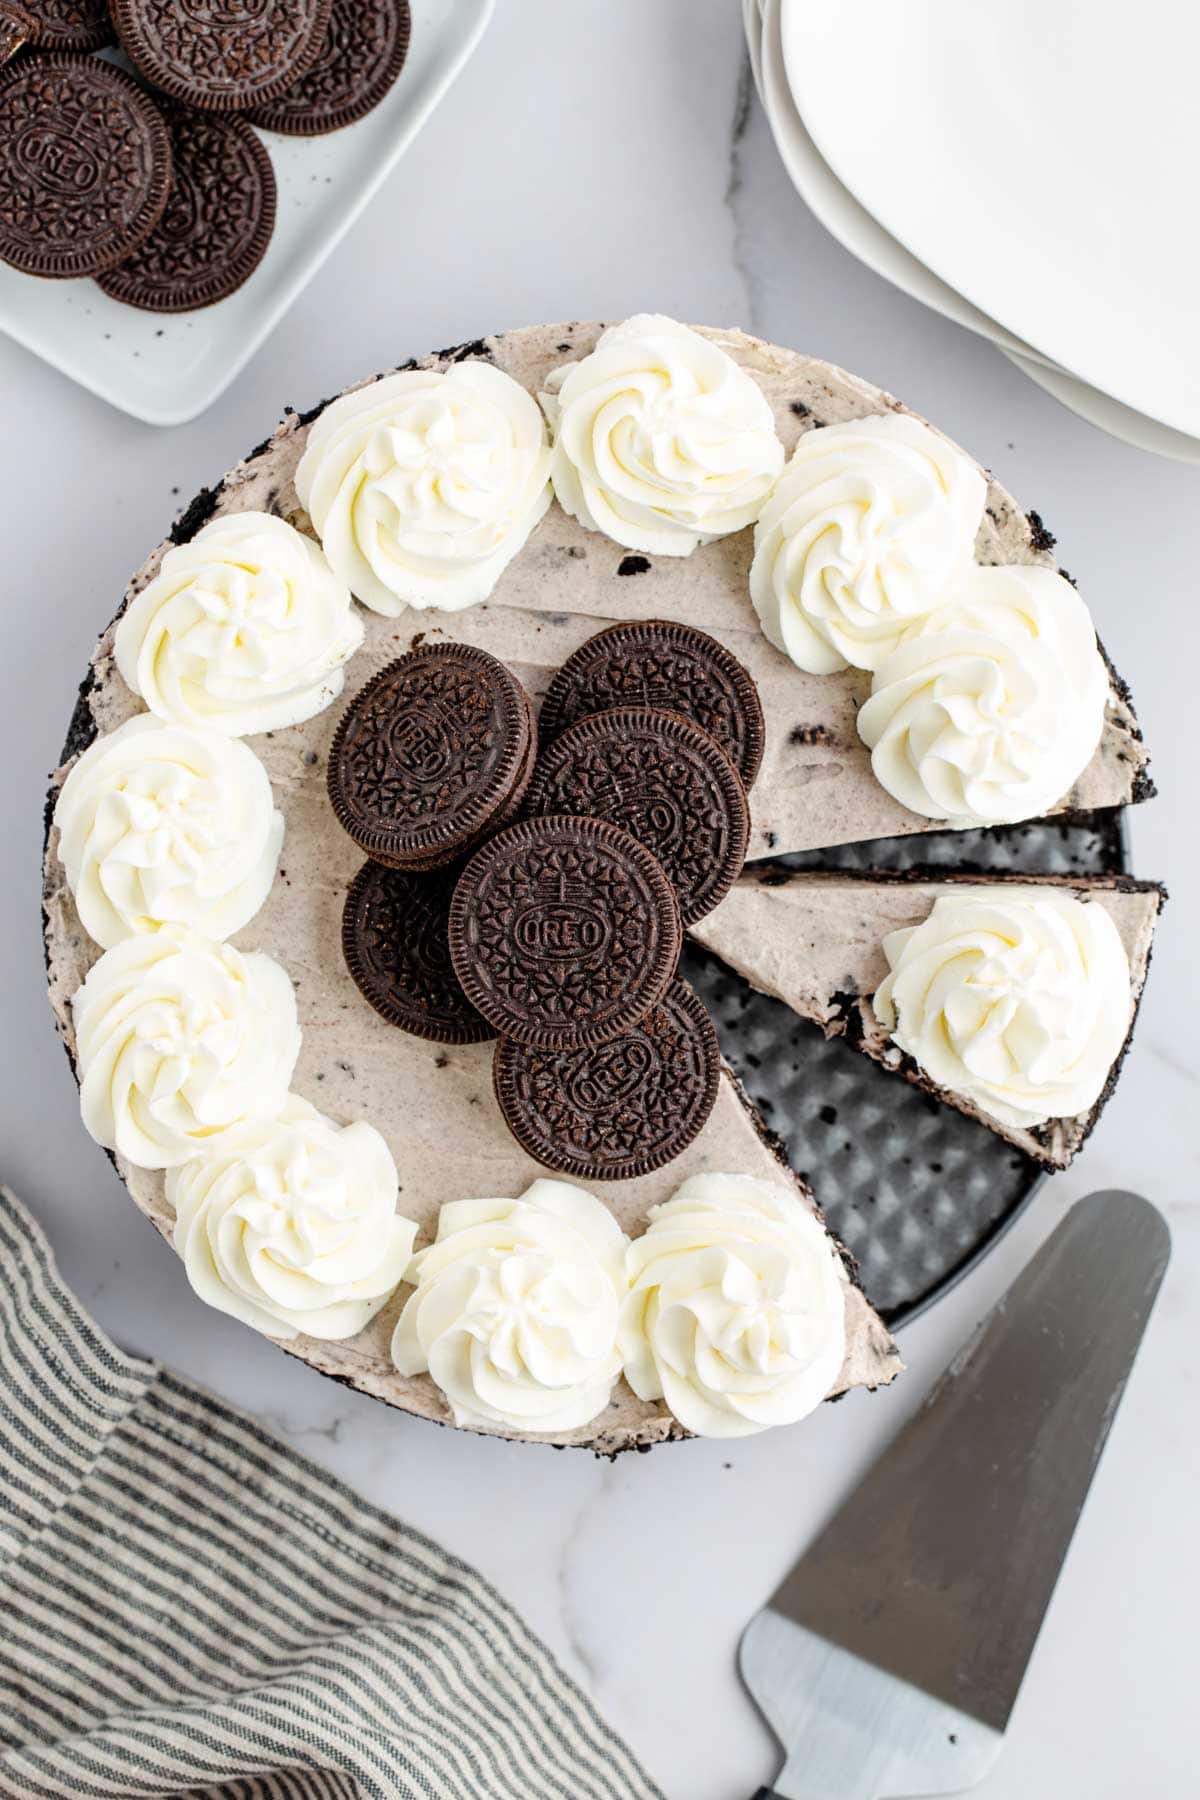
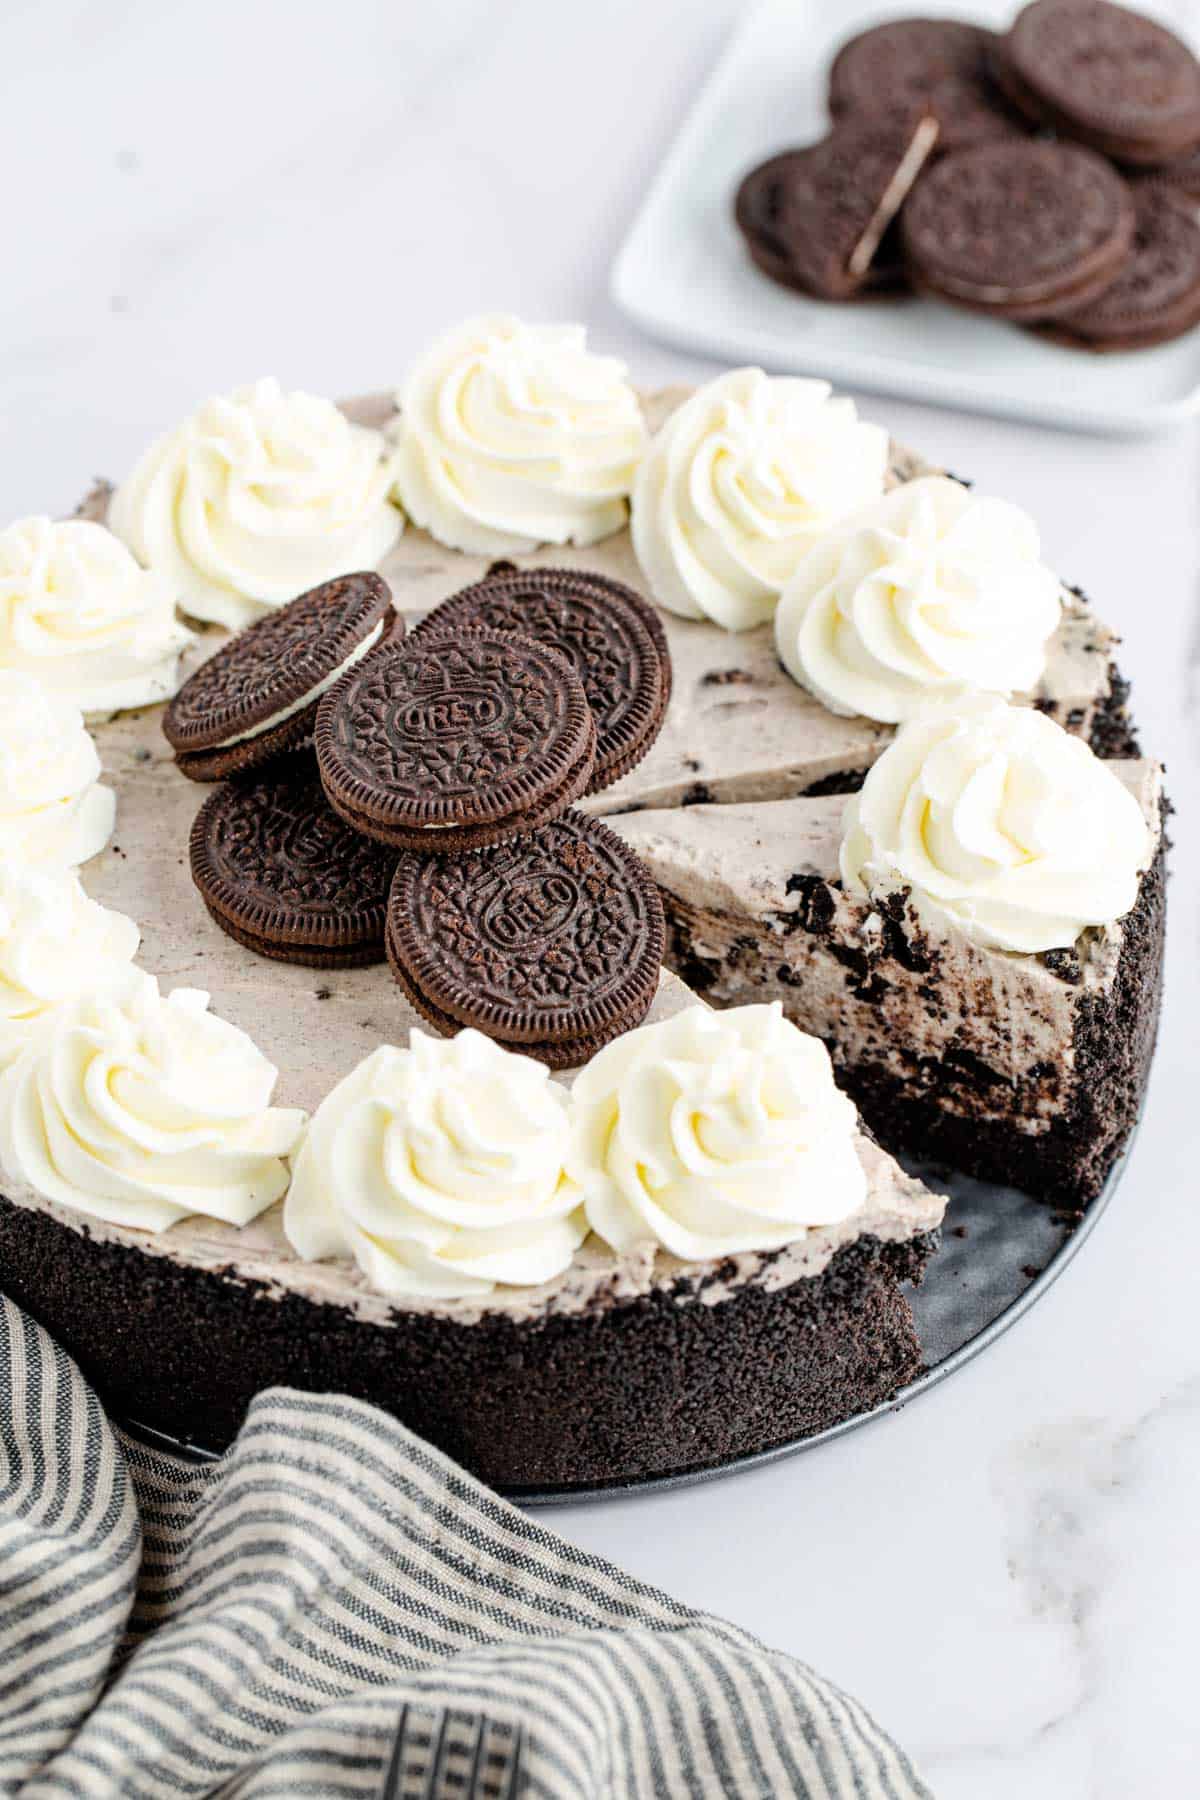
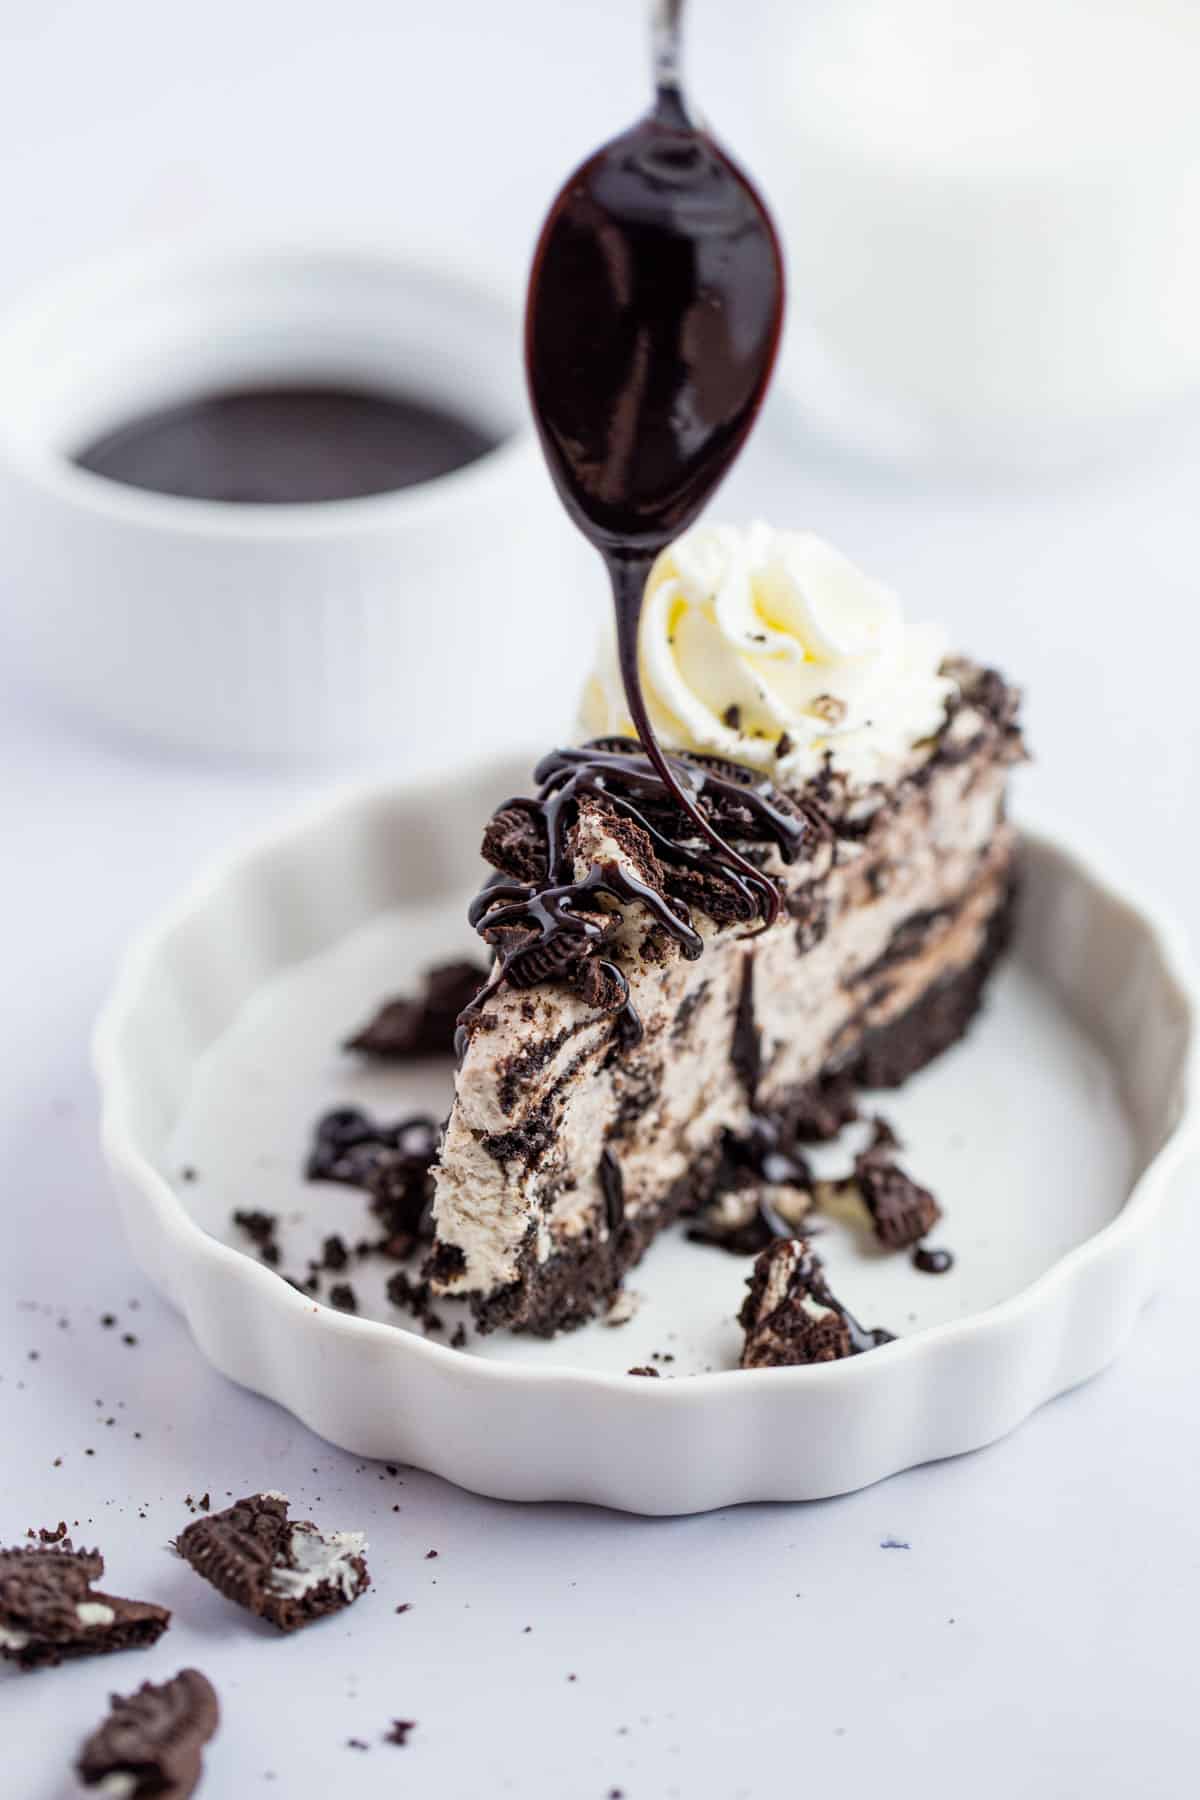
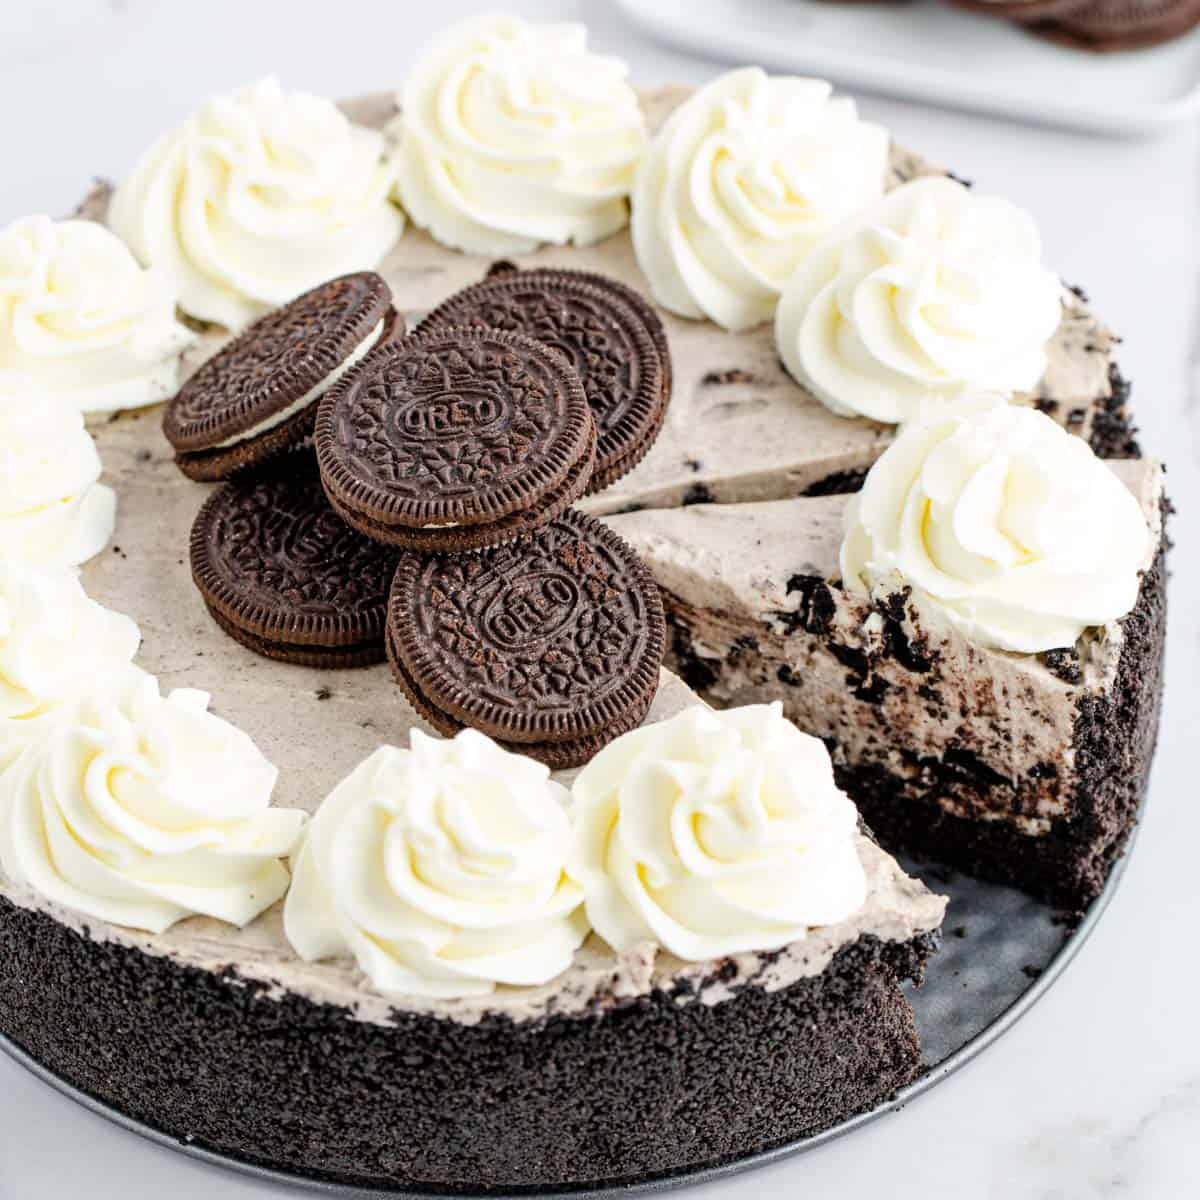
Finally, carefully unlatch the springform pan and remove your delicious cheesecake. Then take out your piping bag and star tip to decorate with more whipped cream. Pipe the designs on the top of the cheesecake around the edge or create your own unique design; then add Oreo cookies (whole or chopped) and a drizzle of chocolate syrup.
Now it is time to cut a slice of this no-bake oreo cheesecake and enjoy your delightfully easy no-bake dessert!!
Tips
- Gently fold in the whipped cream when making the filling and then again when you add the crushed Oreos.
- If you choose to use whipped cream from an aerosol can, add the creamy border right before serving. Redi Whip does not hold its shape for long.
- To smooth the top of the cake beautifully, use an offset spatula.
Frequently Asked Questions
I like to use Cool Whip for convenience and because of its stability. Homemade whipped cream can lose its volume more easily when stored in the refrigerator.
Storage Information
Storage: Cover with plastic wrap or place in an air-tight container and store in the refrigerator for 4 days.
Freeze: You can freeze this cake before putting the whipped topping garnish on. In fact, some prefer it a little frozen! Cover tightly and store for about 2 to 3 months.
Other Oreo Recipes
Can’t get enough? No shame here– I clearly love Oreos! Dive right into these delicious desserts for every holiday.
Hungry for more easy, home-cooked, delicious recipes?
Sign up for my free recipe club to get family-friendly recipes in your inbox each week! Find me sharing daily meal-time inspiration on Pinterest, Facebook, and Instagram.
No Bake Oreo Cheesecake
Click Stars To Rate
Equipment
Ingredients
- 36 Oreo Cookies - (one 14.3 package)
- 6 tablespoons unsalted butter - melted
- ⅛ teaspoon kosher salt
- 3 blocks cream cheese - softened (24 ounces)
- 24 Oreo Cookies - roughly chopped
- 1 ½ cup powdered sugar
- 8 ounces frozen whipped topping (Cool Whip) - thawed
- 2 teaspoons vanilla extract
- whipped cream
- Oreo Cookies - whole or chopped
- chocolate syrup
Instructions
- Using a food processor or blender, pulse the Oreos until the cookies become fine crumbs.
- In the food processor add melted butter and salt then pulse to combine with the Oreo crumbs. (This can also be done in a bowl and mixed by hand).
- Line a 9-inch springform pan with parchment paper and lightly spray the sides with cooking spray or butter.
- Add the Oreo crumbs to the pan and press down firmly to form a crust. Use the back of a measuring cup or glass to help press it evenly into the pan. Set in the freezer to firm up while making the filling.
- In a stand mixer or a large mixing bowl, combine the softened cream cheese, vanilla extract, and powdered sugar. Mix with a stand mixer or a handheld until smooth and fluffy.
- Add the whipped topping and fold it into the cheesecake mixture with a rubber spatula until combined. Then add the chopped Oreos and fold again until combined.
- Pour the filling on top of the crust and spread out into an even layer.
- Refrigerate for at least 6 hours, or overnight, until firm.
- Remove from the pan and decorate with whipped cream, Oreo cookies (whole or chopped), and a drizzle of chocolate syrup. Enjoy!
Want to Save this Recipe?
By submitting this form, you consent to receive emails from Soulfully Made.
So good! We used the gluten free mint Oreos and it was DELISH! Easy to follow and really good. Thank you!
Fantastic!! Seriously, this cheesecake is even better than the one at Cheesecake Factory! YUM!
Made and brought this to a dinner we were invited too — RAVE reviews all around, requesting me to bring to our next meal together! Loved it! Thanks!
This was delicious. Thanks for the tips as well. Made it easier to make. I froze some slices for later. I wanted to save it!
This recipe is in my recipe box under the “danger” category. It was so good and didn’t last long in our house. I’m making it again for Valentine’s Day!
I love a no-bake recipe and I love Oreos even more! Can’t wait to try this recipe.
Man! This is incredibly delicious and I love how easy it is to make. Thanks for a yummy recipe!
I am a big fan of no-bake cheesecakes, And this one turned out so good. A total hit!!
Love no bake cheesecake, and this sounds fantastic. Thanks for sharing
I made this cheesecake over the weekend and it was incredible! It was delicious and I can’t wait to make it again!