

This post may contain affiliate links. Please read our disclosure policy.
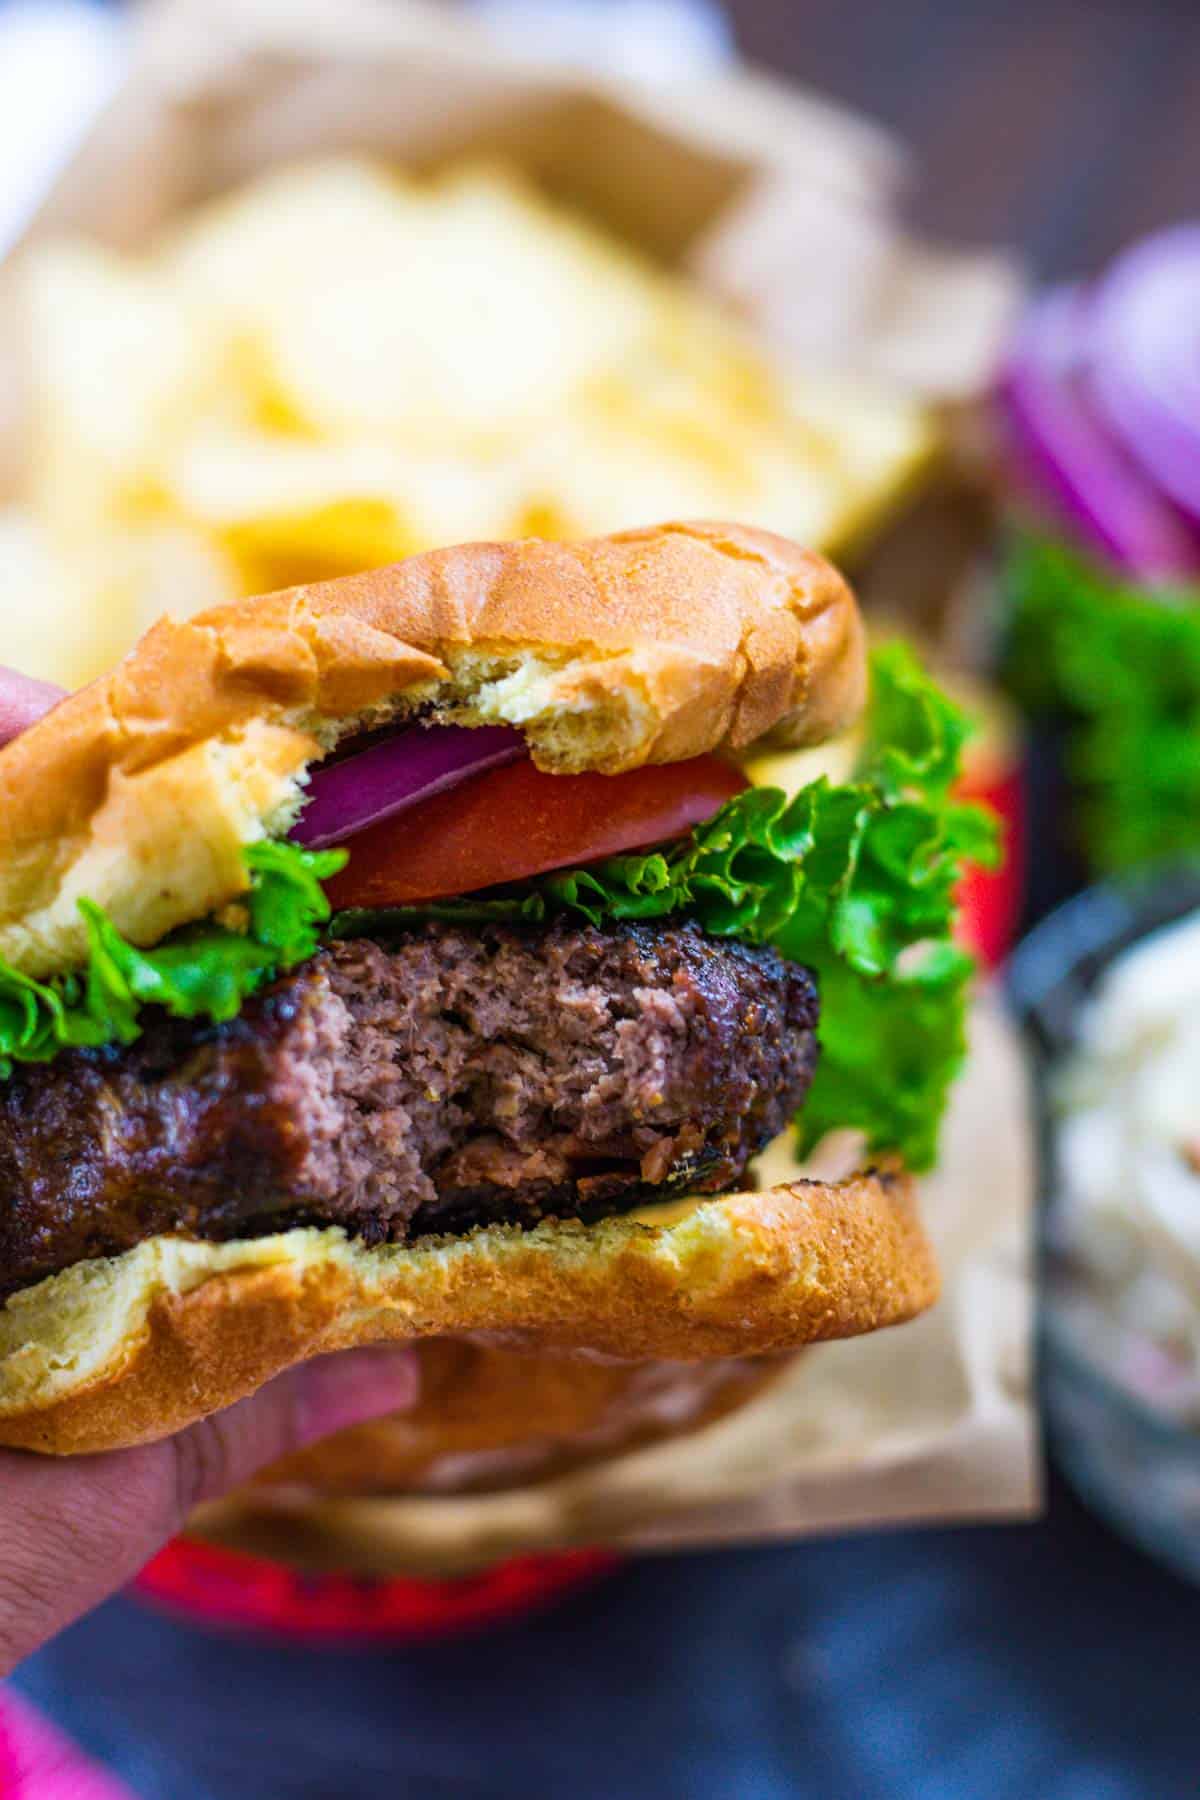
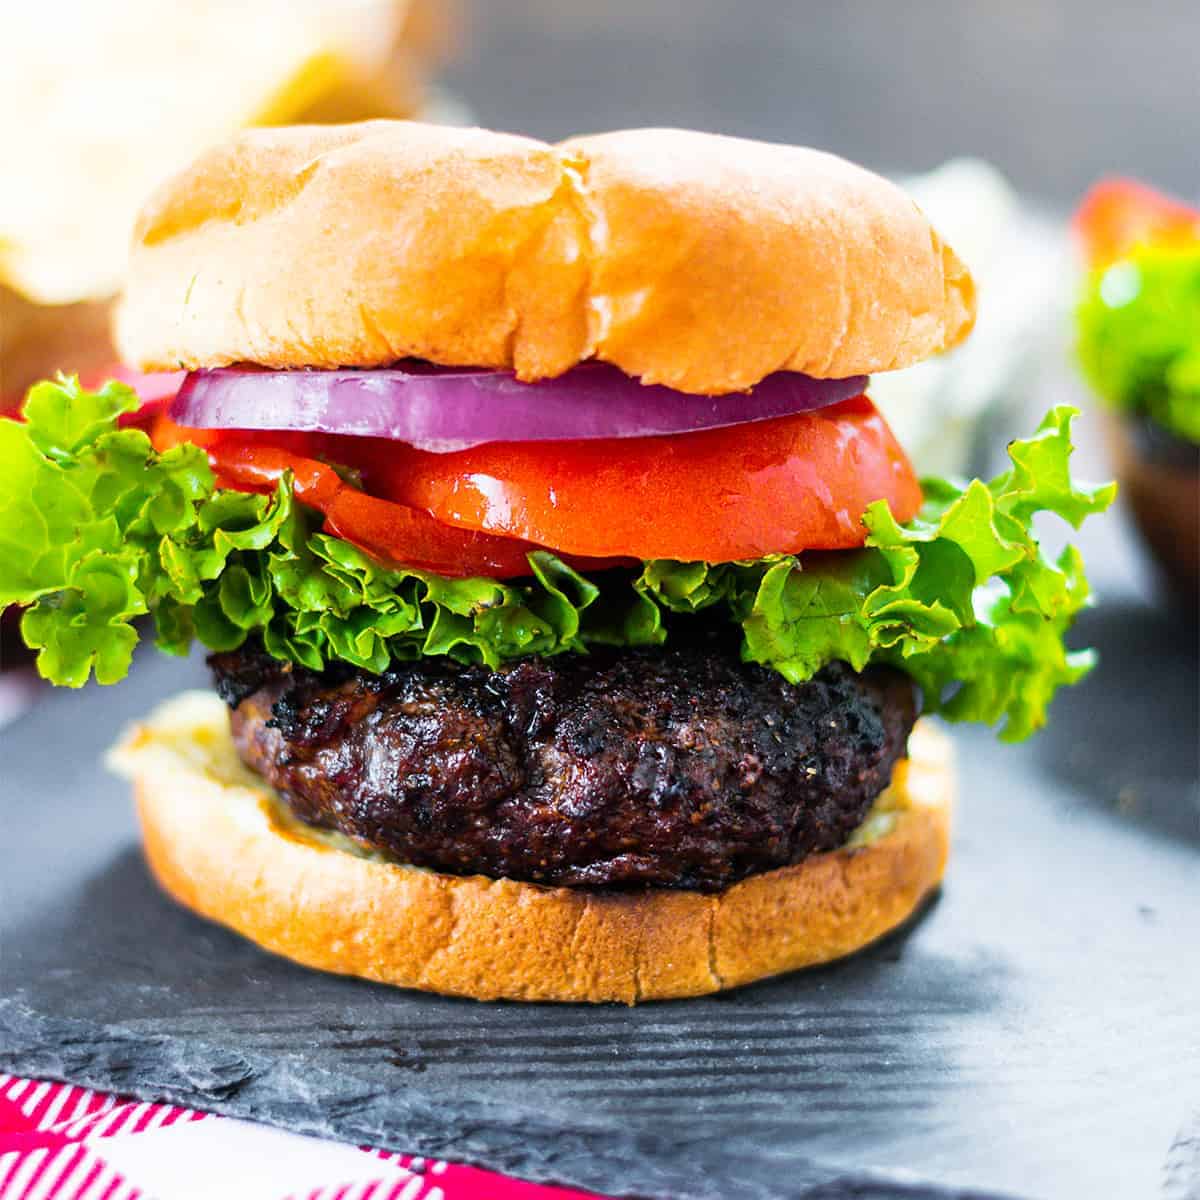
Homemade Stuffed Bacon Cheddar Cheeseburgers are easy to make and grilled to perfection. These super juicy burgers have bacon and cheddar stuffed inside for deliciousness in every bite.
While cooking cheese melts into the burger and the bacon adds extra juiciness and flavor. This is a combination everyone is sure to love!

Why you’ll love this Stuffed Bacon Cheddar Cheeseburgers Recipe!
- Quick: These homemade bacon cheddar burger patties come together in just a couple of minutes before popping them on the grill.
- Simple Ingredients: You only need a few ingredients to make these burgers from scratch.
- Kid Friendly: Really the whole family will love them! The ingredients are packed into the patty and easy to eat.
There’s really nothing better than a juicy burger! And to make things, even more, better you have to try these stuffed bacon cheddar cheeseburgers!
Grilling season is one of the best times of the year! Depending on where you live that may be a little bit different for each of us. Here in Florida, we do this just about year-round.
And while we certainly love our burgers grilled outside on the open fire, if you are craving a burger and that isn’t an option you can certainly do this in a cast-iron pan or on a griddle too.
Whichever way you cook these bacon cheddar cheese burgers up, they are the perfect dinner, game day, or summer party food!
Here’s what you need to get started.
Ingredients
How to make Stuffed Bacon Cheddar Cheeseburgers.
✱ Below shows step-by-step photos and instructions. For the complete recipe, along with ingredient amounts, scroll down to the recipe card.
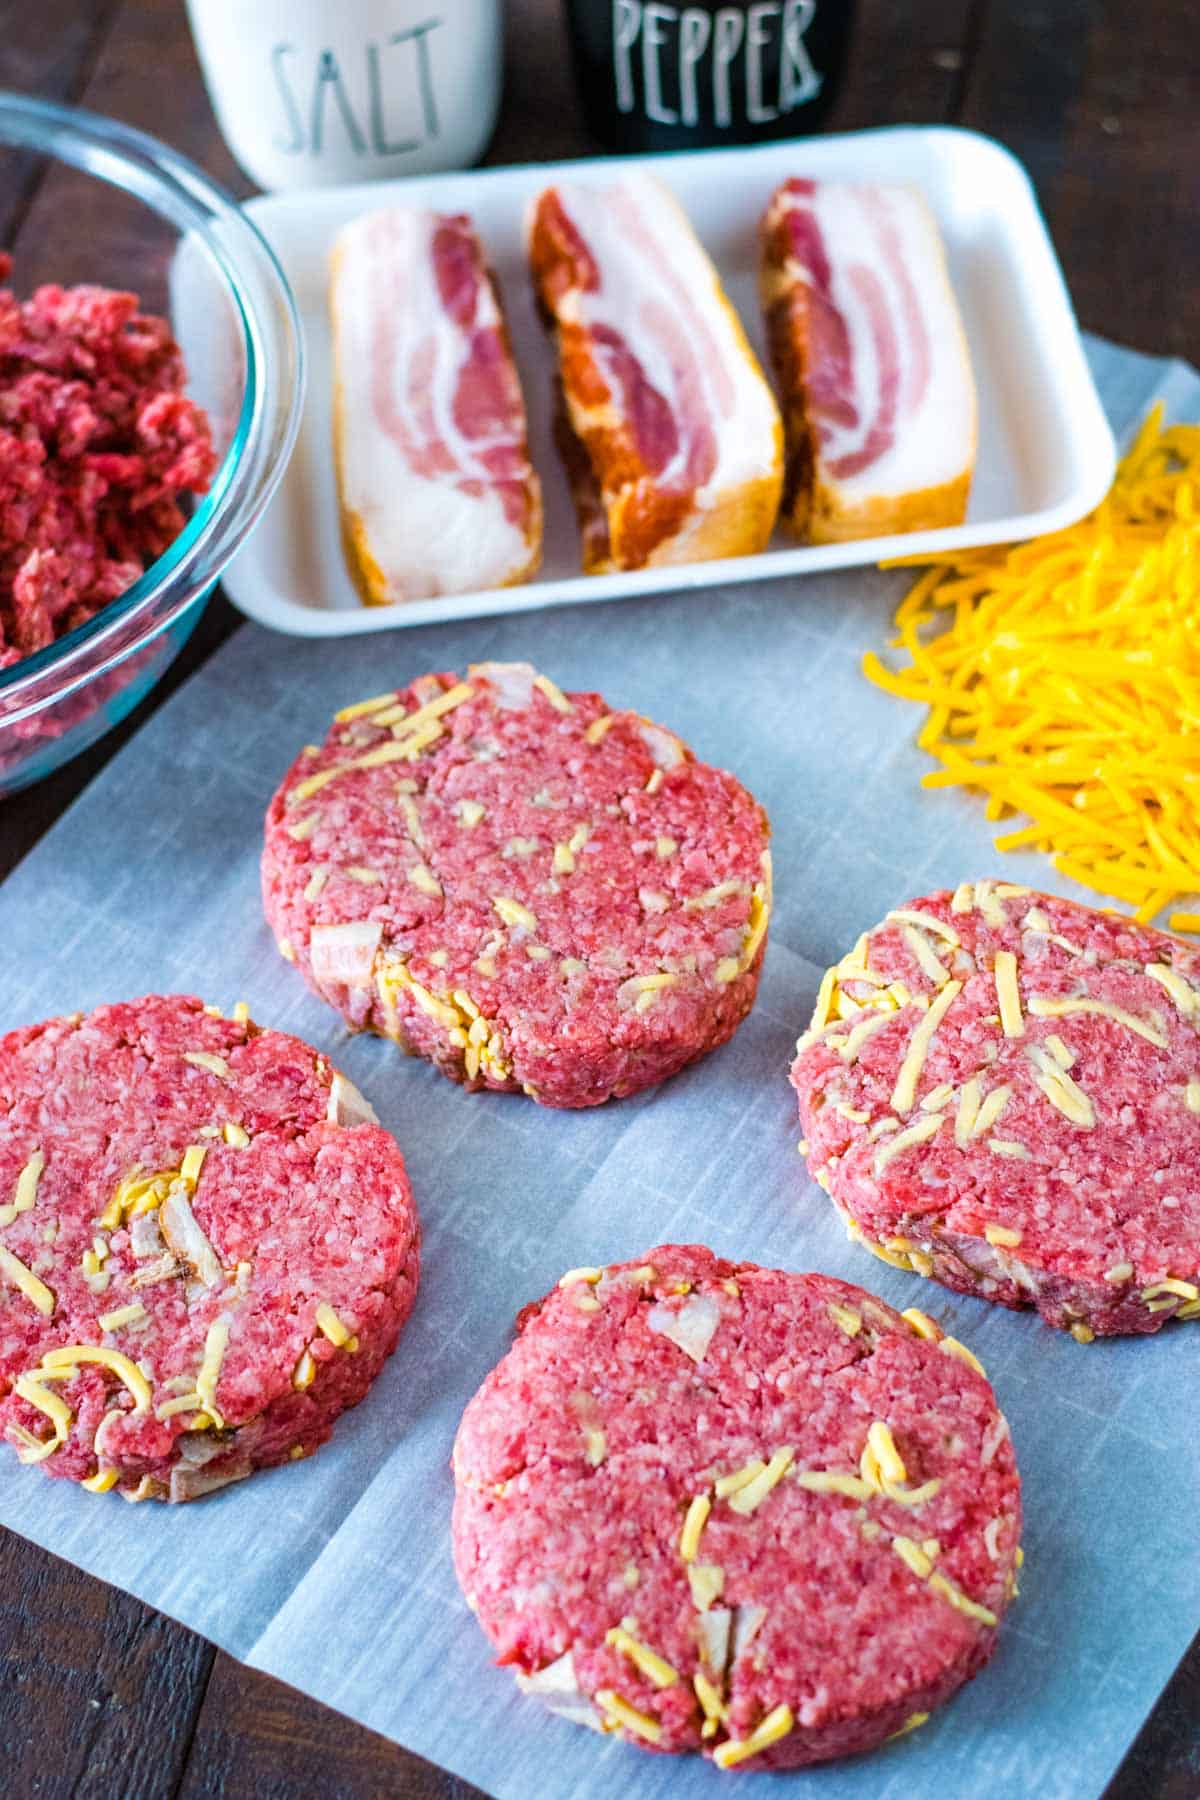
Step 1 | Combine Burger Ingredients
- Pick up your favorite ground beef – ground chuck (80 percent fat / 20 percent lean) is the perfect blend for a juicy burger. Without fat in the burger it will be dry and grainy tasting. Too much fat and it is just too greasy.
- Chop the bacon into bite size pieces.
- Add in preshredded or shred your own cheddar cheese.
- Combine ground beef, bacon, and cheddar cheese in a bowl and mix together. I usually use my hands for this.
- Form the burger patties.
- Remember to salt just before cooking to keep moisture in the burgers.

Step 2 | Grill
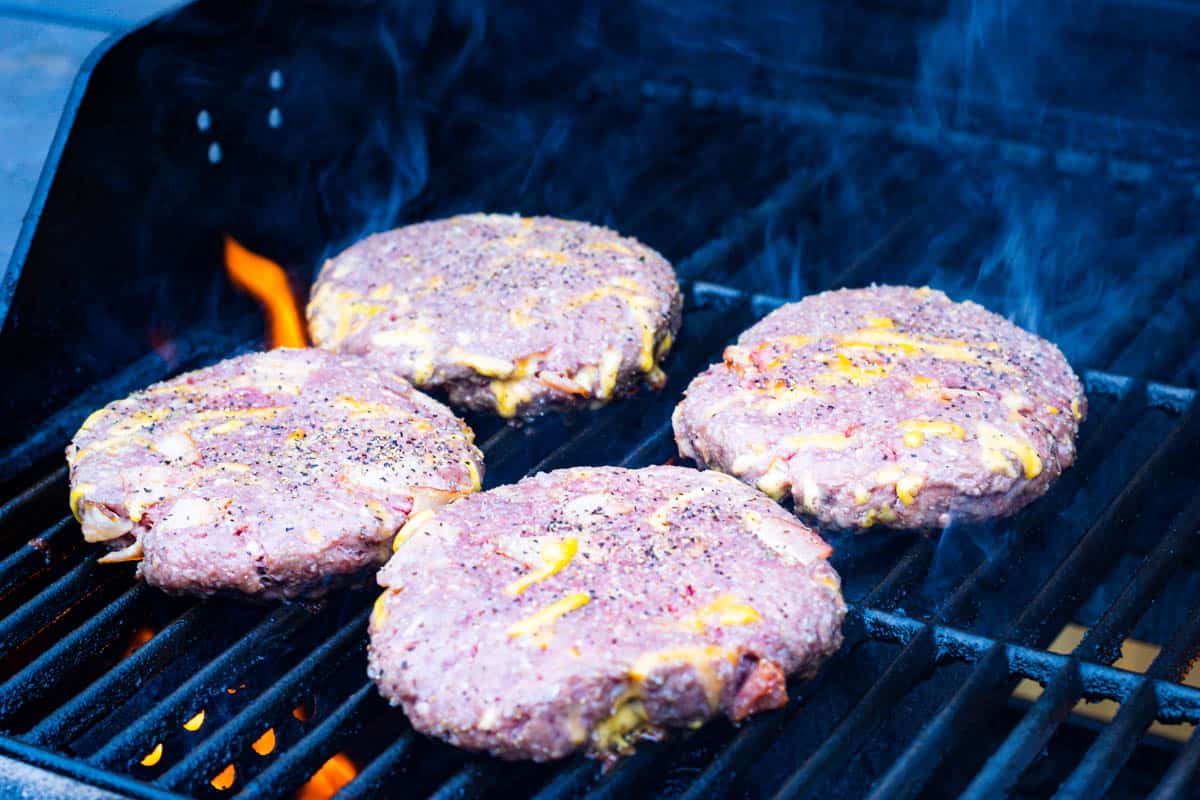
- Grill for 3 to 5 minutes on each side. We fire up our grill to medium heat, so they will be nice and juicy.
- Cook on direct heat to get the outside crispy and then move to indirect heat to finish cooking
- Adjust cooking time to your liking (see cook times below).
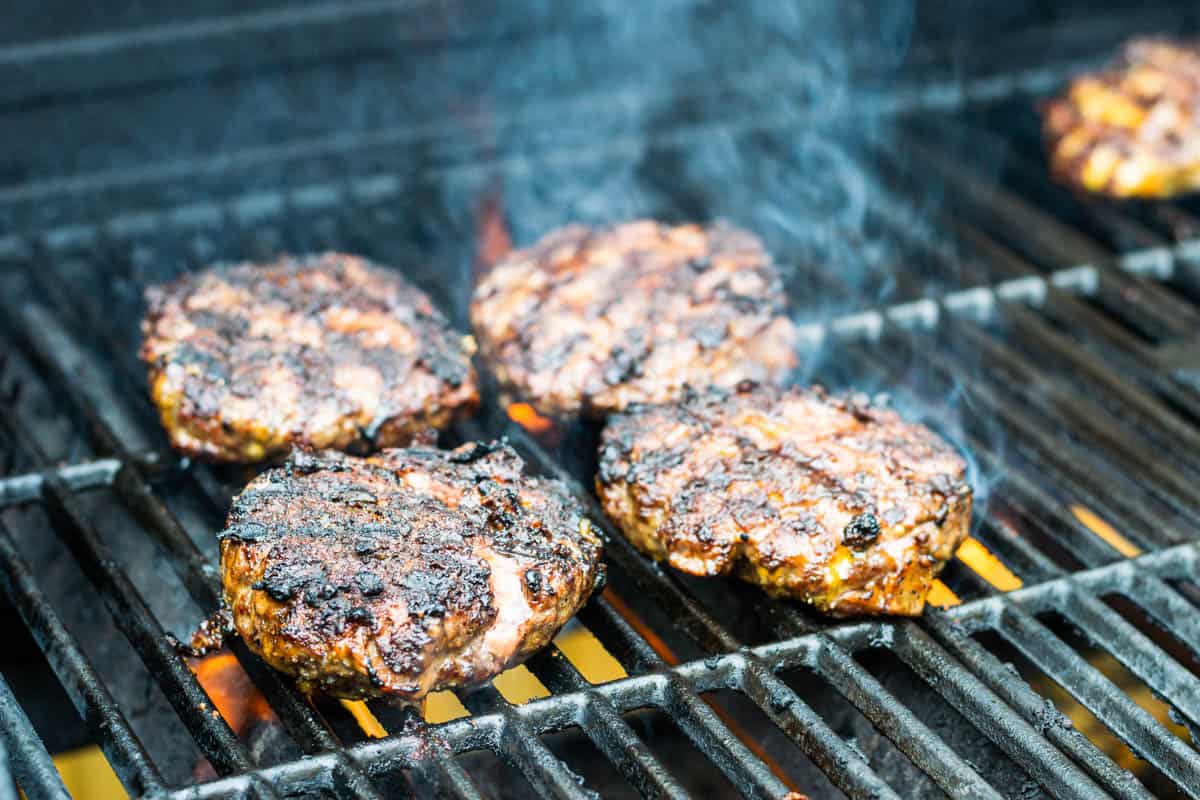
See that one on the front of the grill (pictured below) with extra crunch on the outside. That one is mine. I like mine well-done with a little extra crunch factor. But the inside is still nice and juicy. – SEE TIPS BELOW FOR A JUICY BURGER EVERY TIME
Tips
- Keep the meat cold until ready to form the patties and cook. The cold fat inside the burger will expand while cooking on the heat and make delicious pockets of flavor inside.
- Do not overmix the beef mixture: lightly but thoroughly mix in the ingredients.
- When forming patties, do not overpack. This will create a dense burger. Run cold water over your hands to keep the meat from sticking, form a lightly-packed ball, and then press down to a 1-inch thickness. You can use a burger press or any type of lid. A peanut butter, sour cream, or yogurt lid (when you are done with the product) works nicely. Then lightly smooth out the edges with your thumbs if needed.
- To cook evenly, create an impression or shallow dimple in the middle of the patty when cooking on the grill. If you are cooking inside on a griddle or cast-iron pan, make a deeper depression in the center of the patty to cook at an even rate.
- Indirect heat: Get nice the outside crispy with nice grill marks on each side of the burger on direct heat and then move to the cooler, indirect heat side of the grill. This will give a nice crunch to the outside and a tender juicy inside.
- Don’t press down on the burger patty with a spatula when cooking. This will squeeze out all those tasty juices produced by the fat in the burgers.
- Using a digital thermometer is the best way to know the exact temperature of the burger. This will ensure correct doneness.
Frequently Asked Questions ?
This will depend on a few factors like the thickness of the patty or how large they are and how high your heat is set. A meat thermometer will give you the best gauge. Here is a good rule of thumb:
Medium-rare burgers (warm, red center): 6 minutes total – 130 to 135°F.
Medium burgers (warm, pink-center): 7 to 8 minutes total – 140 to145°F.
Medium-well (hot, slightly pink center): 9 minutes – 150-155°F.
Well-done burgers (brown all the way through): 10 minutes total – 160 to 165°F.
The USDA recommends cooking ground beef to an internal temperature of 160°F (well done).
For the juiciest burger, let them rest for about 5 minutes so the juices will redistribute. To keep them warm tent with foil to keep the heat in. Keep in mind the internal temperature will rise slightly (about 5°) during this rest time.
Storing Leftover Burgers:
Storage:
Refrigerate burgers within 2 hours after cooking, 1 hour if the temperature is above 90°F. Cooked and cooled burgers can be stored in the refrigerator for 3 to 4 days.
Freezing:
Freeze wrapped in freezer-safe plastic, foil, or in a freezer-safe bag for up to 4 months.
Reheating:
When reheating be sure to bring the temperature up to 165°F. Microwave for 1 minute plus additional 30-second intervals until heated through.
What to serve with burgers?
Choose a soft bun:
Enjoy a burger on a soft pillowy bun. A potato bun is one of our favorites. But there are so many options – pretzel buns, sesame seed buns, brioche or plain white bread like my hubby grew up on.
Just make sure it’s a soft bun and not something crusty with a hard exterior. That makes it really hard to bite into the burger. Choose what you love or change it up for so you get a different taste each time.
You can leave the bun soft or grill to add a little crispiness.
For a low carb option, butter lettuce is our favorite “bun”, but iceberg, romaine, or even tomato slices can replace a bun.
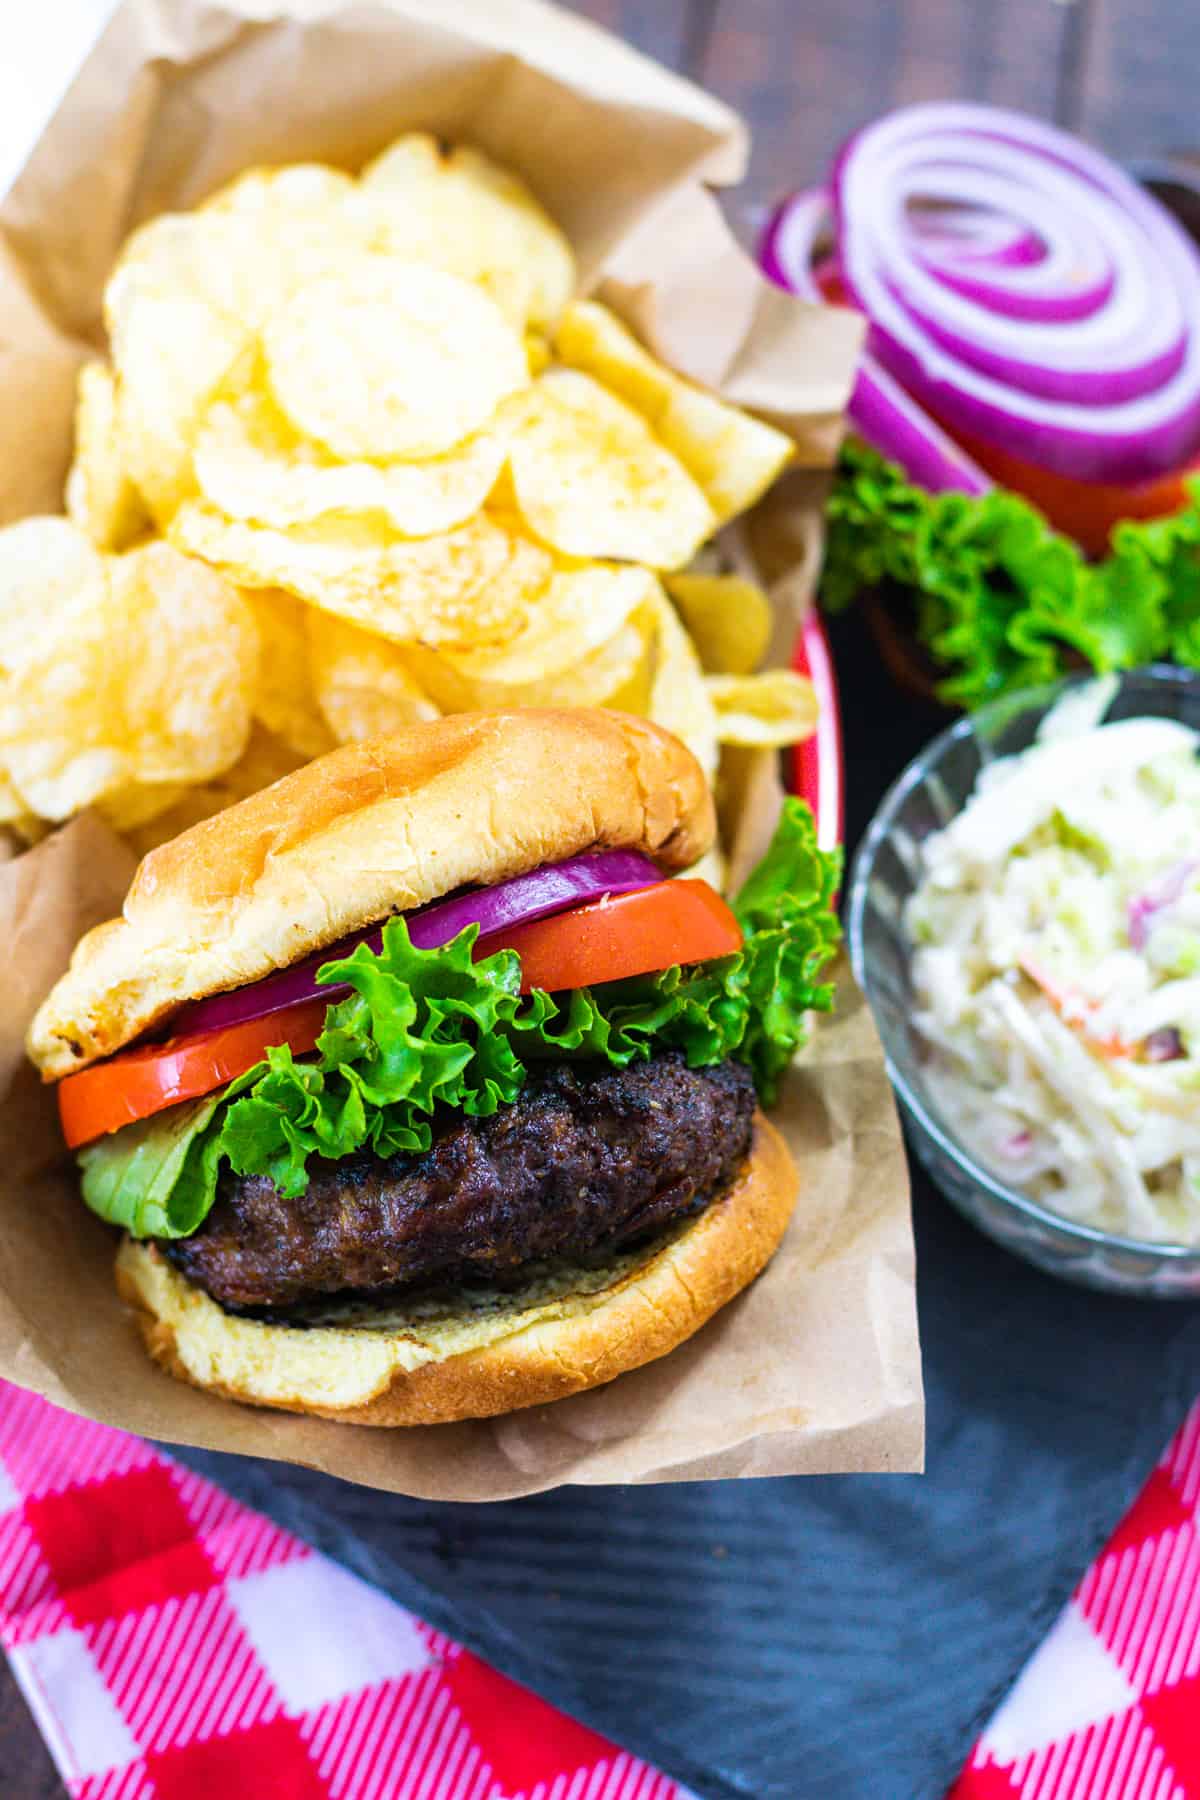
Stuffed Bacon Cheddar Cheeseburgers toppings:
For this burger, the cheese and bacon are packed right inside. Juicy meat, melty cheese, bacon, and you have already picked your favorite bun – now for the toppings. Keep it simple or really go for it. Here are a few options:
- Creamy and cool: avocado, mayo, or an aioli
- Fresh and Crispy: lettuce, tomato, or thinly sliced onion
- Rich: Fried egg and more bacon if you wish.
- Tart and crunchy: Dill or garlic pickles, pickled onion or jalapenos.
The sky is the limit on toppings to create the perfect burger bite!
What do you like to serve with your burgers? We change it up, but a beautiful Chopped Greek Salad, Pasta Salad, or Potato Salad are great options! And don’t forget dessert – Banana Pudding Cheesecake Parfaits will do the trick!
You can totally keep it simple and go for chips or fries, too!
Recipes for great burger sides:
- Spaghetti Pasta Salad
- Creamy Blue Cheese Slaw
- Mexican Fruit Salad
- Cowboy Baked Beans
- Creamy Cucumber and Tomato Salad
Need another cookout or summer recipe to try? My Sheet Pan Shrimp Boil is one of my most loved easy dinners. It’s perfect for entertaining and weeknight meals.
Hungry for more easy, home-cooked, delicious recipes?
Sign up for my free recipe club to get family-friendly recipes in your inbox each week! Find me sharing daily meal-time inspiration on Pinterest, Facebook, and Instagram.
Stuffed Bacon and Cheddar Burgers
Click Stars To Rate
Ingredients
- 1 ½ pounds Ground Chuck
- 1 cup Cheddar Cheese - shredded
- 6 to 8 slices bacon - chopped, (I use kitchen scissors to cut)
- salt - to taste (add just before grilling burgers)
- ½ teaspoon pepper to taste - or to taste
- ½ teaspoon garlic powder - optional (or to taste)
Instructions
- Combine ground chuck, shredded cheese, bacon in a bowl. Form into 1-inch thick patties. Make a slight indention in the middle if desired.
- Garlic, salt, and pepper to taste (make sure not to add salt to the patties until just before grilling)
- Preheat grill to medium heat. Using a two-zone fire configuration (one side direct heat, the other side indirect heat), cover, and preheat for 5 to 10 minutes until the grates are hot. Clean the grates, and grease with oil to prevent the burgers from sticking.
- Place each burger on the direct heat side of the grill. Do not press down on the patties. Cook until golden brown, and the first side has nice grill marks, 3 to 5 minutes. Flip and cook until the desired doneness (see notes) is reached, about 2 to 5 minutes. If a medium-well or well-done burger is desired, transfer to the indirect side after flipping and cook for 2 minutes to finish the cooking process without the burgers drying out.
- Remove from grill to a plate. Let burgers rest for 5 minutes before serving.
- Heat a large skillet, griddle, or cast-iron pan to medium-high heat.
- When the pan is hot, carefully place patties in the skillet (leaving some space between patties). Cook the burgers until nicely seared, browned halfway up the burger (about 4-6 minutes).
- Flip the burgers and continue cooking for about 5-6, until they reach desired doneness.
- Rest for 5 minutes. Serve on toasted rolls or buns.
Notes
- Medium-rare burgers (warm, red center): 6 minutes total (130 to 135°F)
- Medium burgers (warm, pink-center): 7 to 8 minutes total (140 to145°F)
- Medium-well (hot, slightly pink center): 9 minutes (150-155°F)
- Well-done burgers (brown all the way through): 10 minutes total (160 to 165°F)
- Keep the meat cold until ready to form the patties and cook. The cold fat in the burger will expand as it cooks and create delicious pockets of flavor.
- Do not overmix the beef mixture; mix the ingredients lightly but thoroughly.
- When forming patties, do not overpack. This will create a dense burger. Run cold water over your hands to keep the meat from sticking. Form a lightly packed ball, and then press down to a 1-inch thickness. You can use a burger press or any type of lid. A peanut butter, sour cream, or yogurt lid (when you are done with the product) works nicely. Then lightly smooth out the edges with your thumbs if needed.
- To cook evenly, create an impression or shallow dimple in the middle of the patty when cooking on the grill.
- Indirect heat: Get the outside nice and crispy with good grill marks on each side of the burger on direct heat, and then move to the cooler, indirect heat side of the grill. This will give a nice crunch to the outside and a tender, juicy inside, especially if cooking to medium-well or well done.
- Don’t press down on the burger patty with a spatula when cooking. This will squeeze out all those tasty juices produced by the fat in the burgers.
- Using a digital thermometer is the best way to know the exact temperature of the burger. This will ensure correct doneness.
Want to Save this Recipe?
By submitting this form, you consent to receive emails from Soulfully Made.
Those look fantastic!
Thank you! Bacon and Cheese, super yum and so easy!