


This post may contain affiliate links. Please read our disclosure policy.
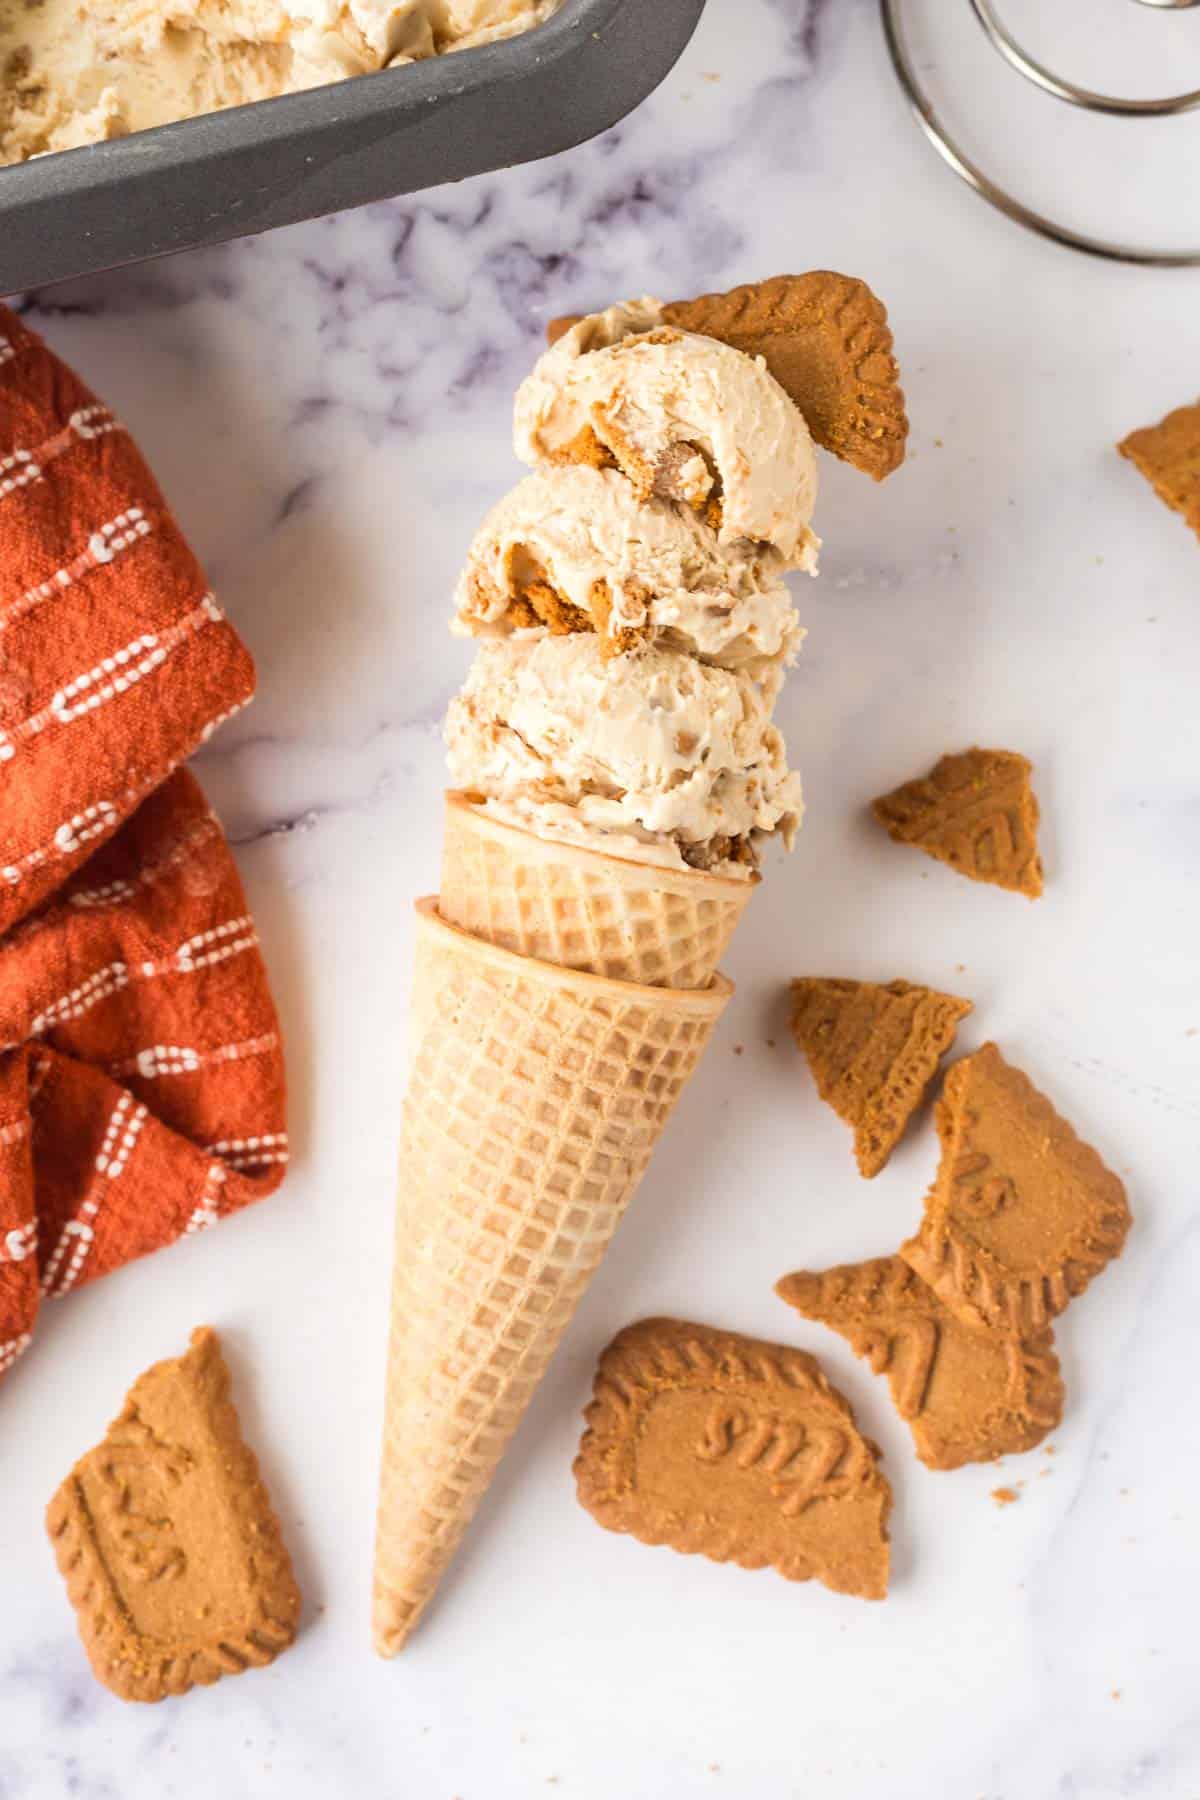
This Biscoff Ice Cream magically comes together without an ice cream maker! The creamy and sweet base is mixed with cookie butter and crumbled Biscoff cookie pieces to make a delicious homemade ice cream with subtle and warm spice. It’s about to be your new favorite ice cream flavor!
Why We Love This Recipe!
- No Ice Cream Maker Needed: How can ice cream be made without a fancy machine or tossing a plastic bag around the kitchen for far too long? Get ready to discover the easiest and best way to make delicious homemade ice cream in minutes!
- Warm Cookie Butter Taste: Not many flavors are as comforting as crunchy Lotus Biscoff cookies with warm and caramelized notes. It is much like gingerbread.
- Simple Ingredients: Even better, you only need four ingredients for this easy ice cream recipe. That is, the two that make up the ice cream base, cookies, and Biscoff spread.
This sweet Cookie Butter ice cream recipe is made as easily as possible with no special machine and four simple ingredients. It’s the perfect way to cool off from the unforgiving summer heat!
If this ice cream form of Biscoff cookies isn’t enough, check out this heavenly Cookie Butter Latte and my delectable Biscoff Cookie Butter Cheesecake Bars!
Ingredient Notes

Variations and Substitutions
How To Make Biscoff Cookies Ice Cream
✱ Below shows step-by-step photos and instructions. For the complete recipe, along with ingredient amounts, scroll down to the recipe card.
Step 1 | Whip the Cream
Begin by setting out your electric hand mixer or stand mixer and pour the heavy whipping cream into a large bowl. Now, set the speed to medium-high and use the whisk attachment to whip the heavy cream until stiff peaks form.
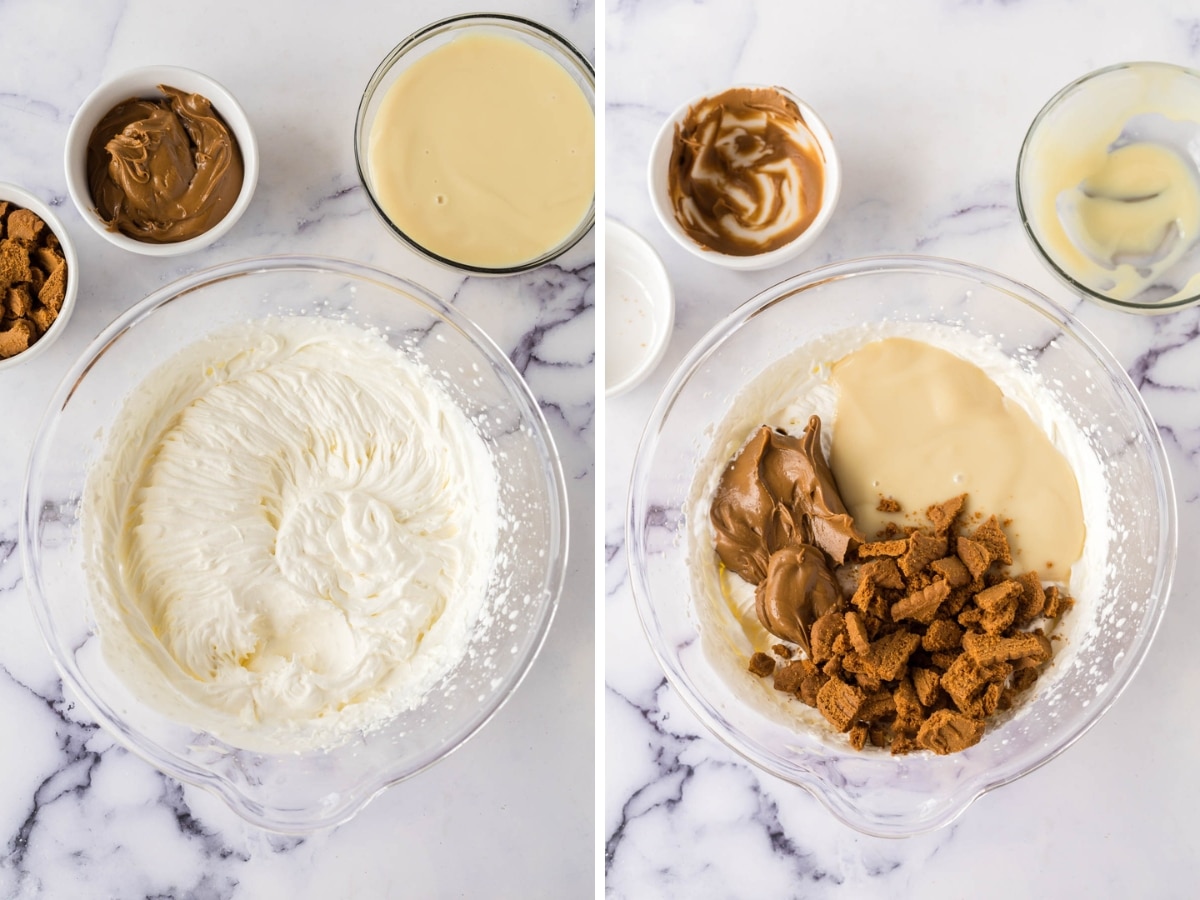
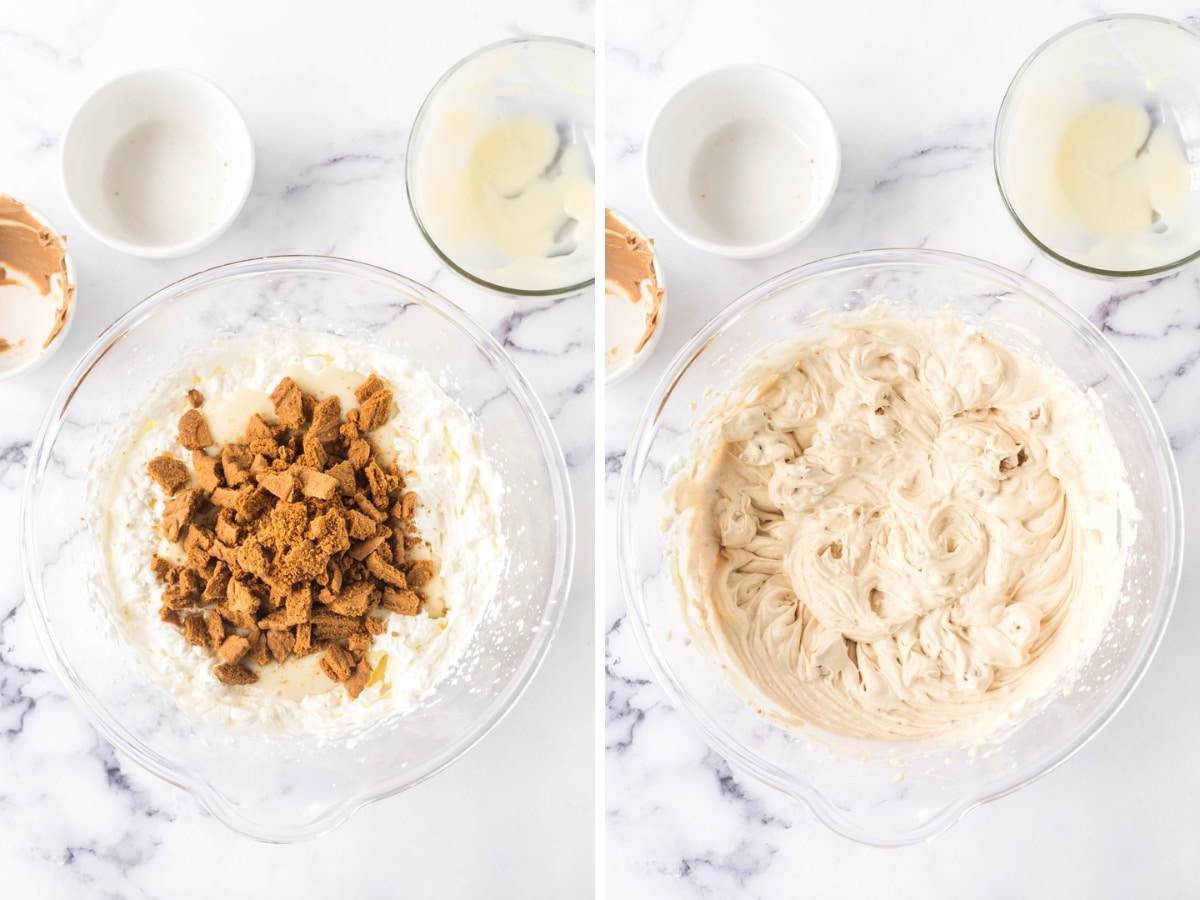
Step 2 | Mix in Other Ingredients
Next, carefully add the condensed milk, sweet cookie butter spread, and crushed cookies. Then, continue mixing the ice cream ingredients just until they are well combined.
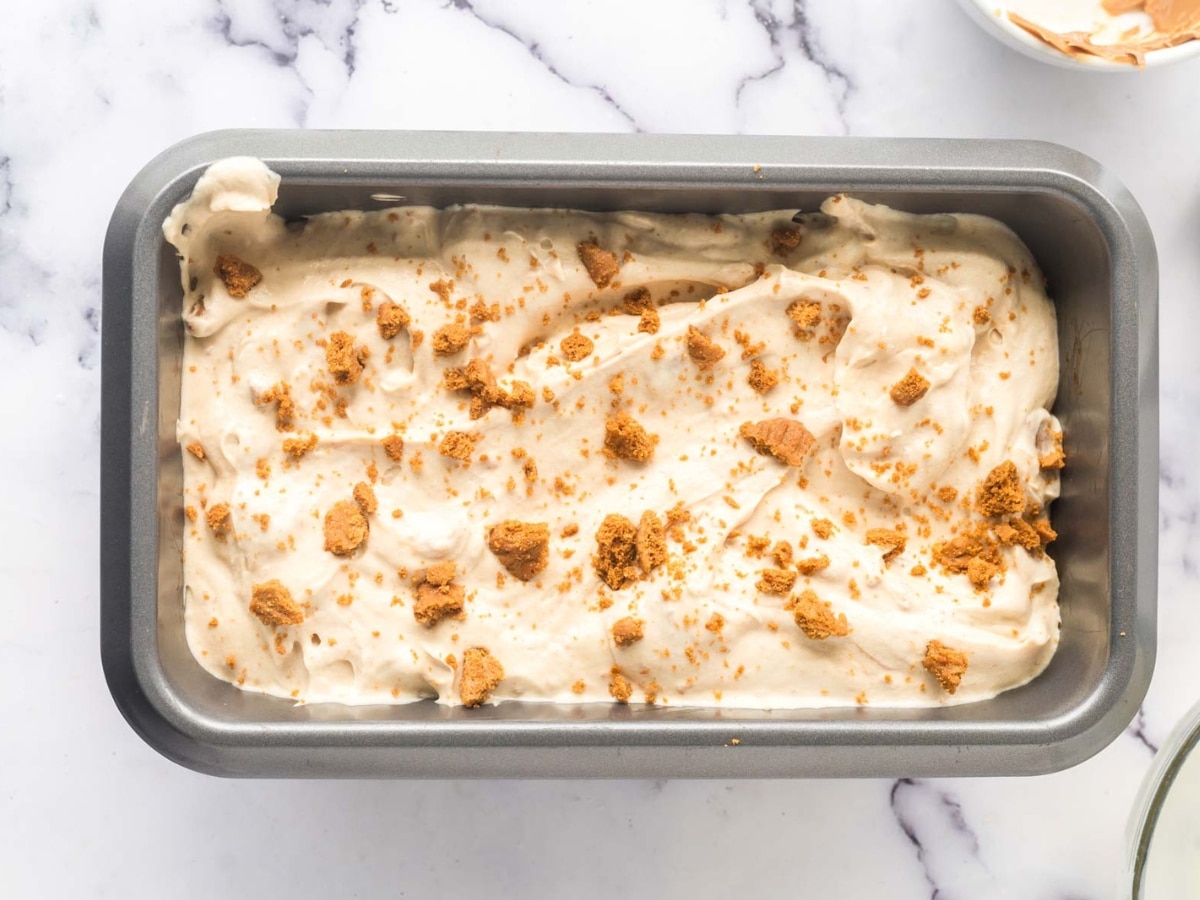
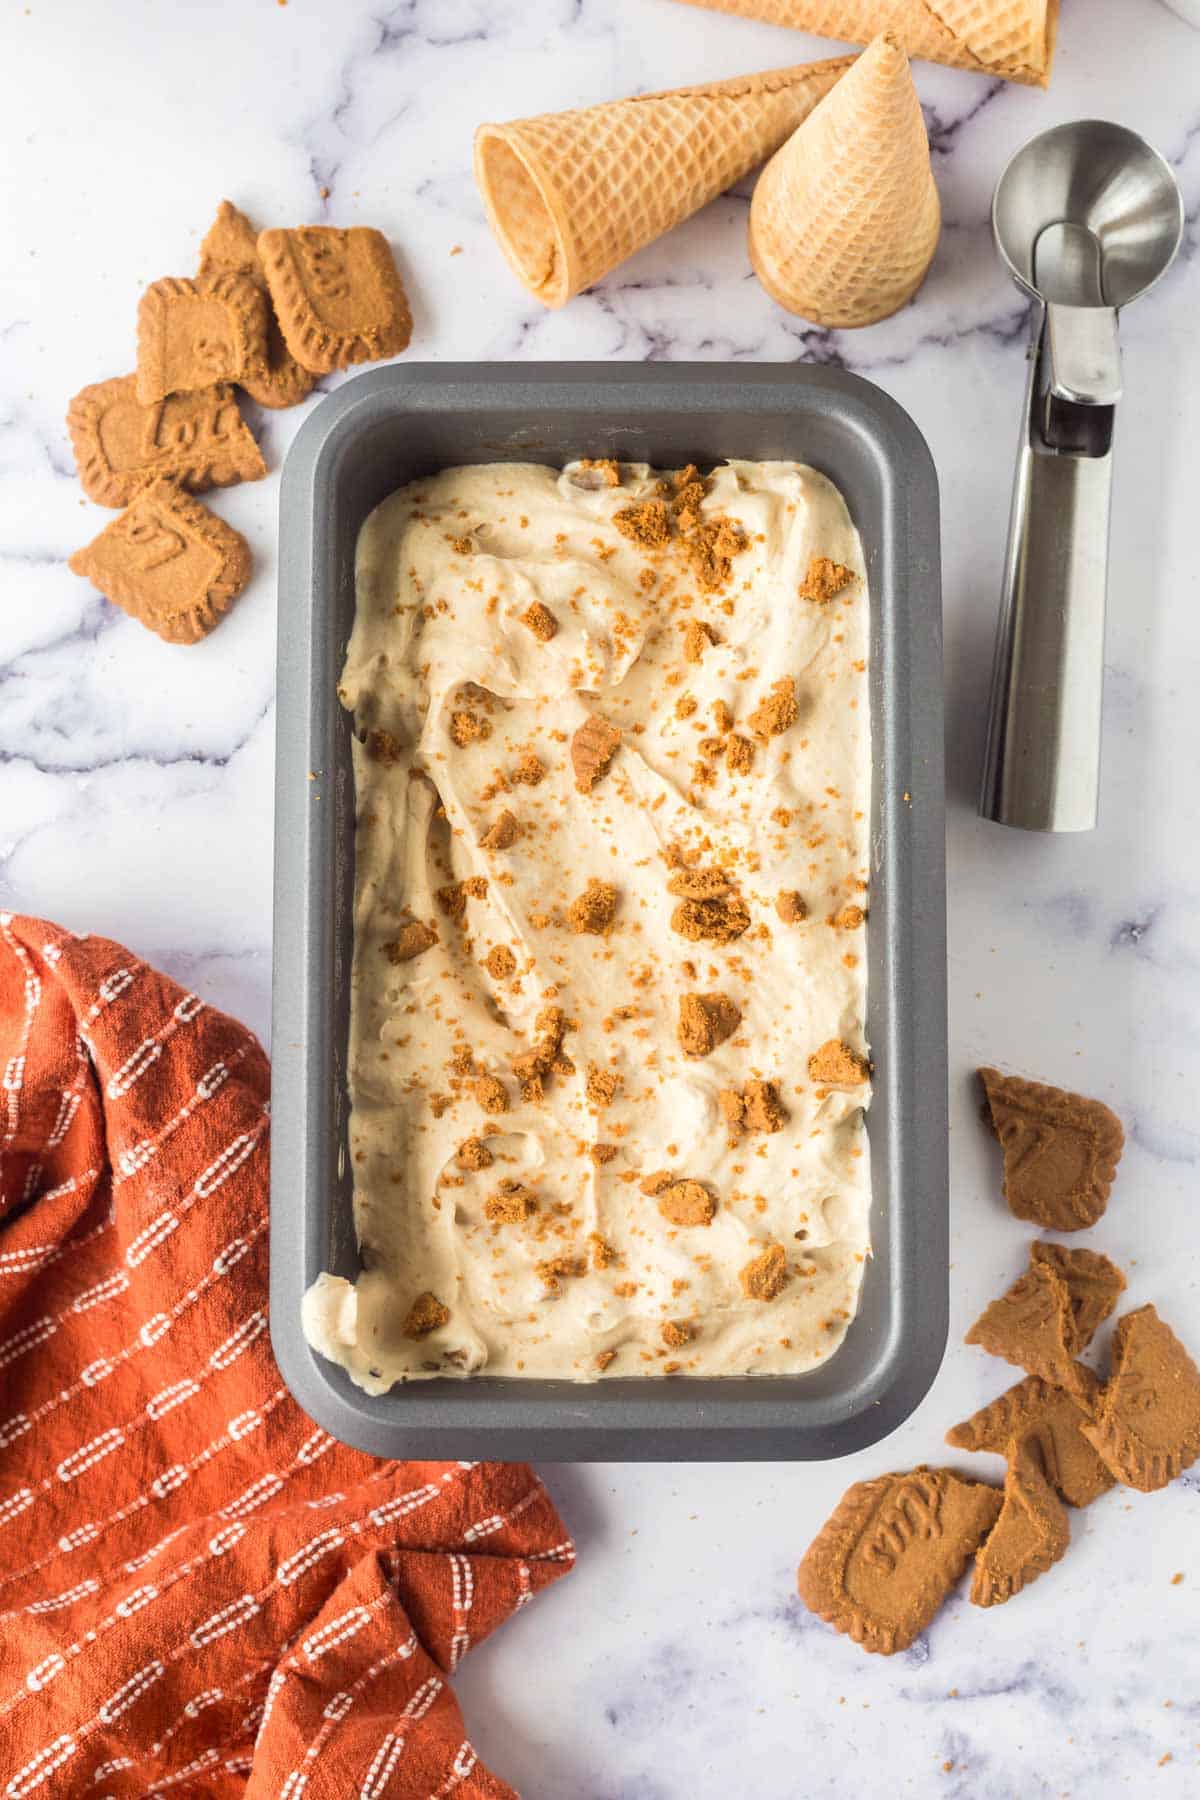
Step 3 | Pour into a Pan, Wrap, and Freeze
We’re almost done! All that’s left to do is pour the ice cream mixture into a 9×5-inch loaf pan or a similar freezer-safe container. Then cover it tightly with plastic wrap, and move it to the freezer.
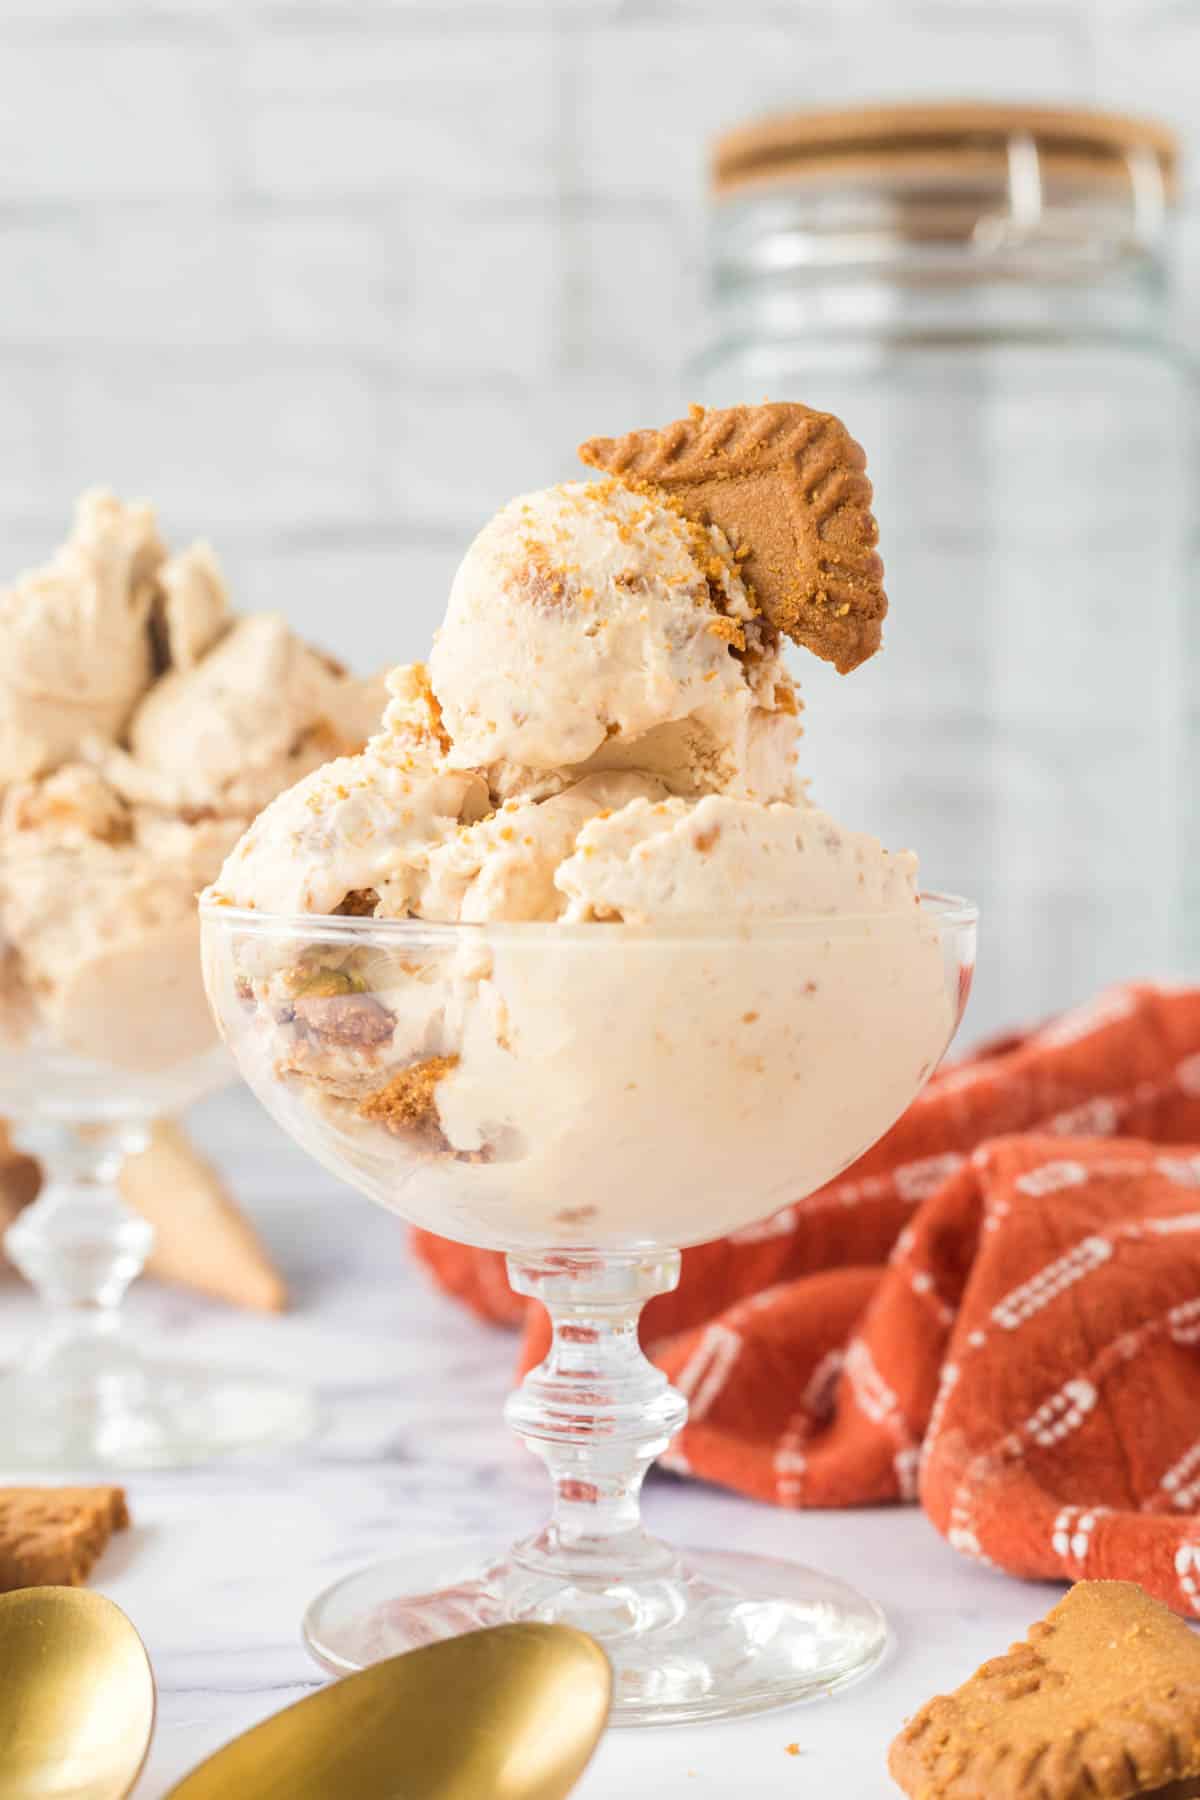
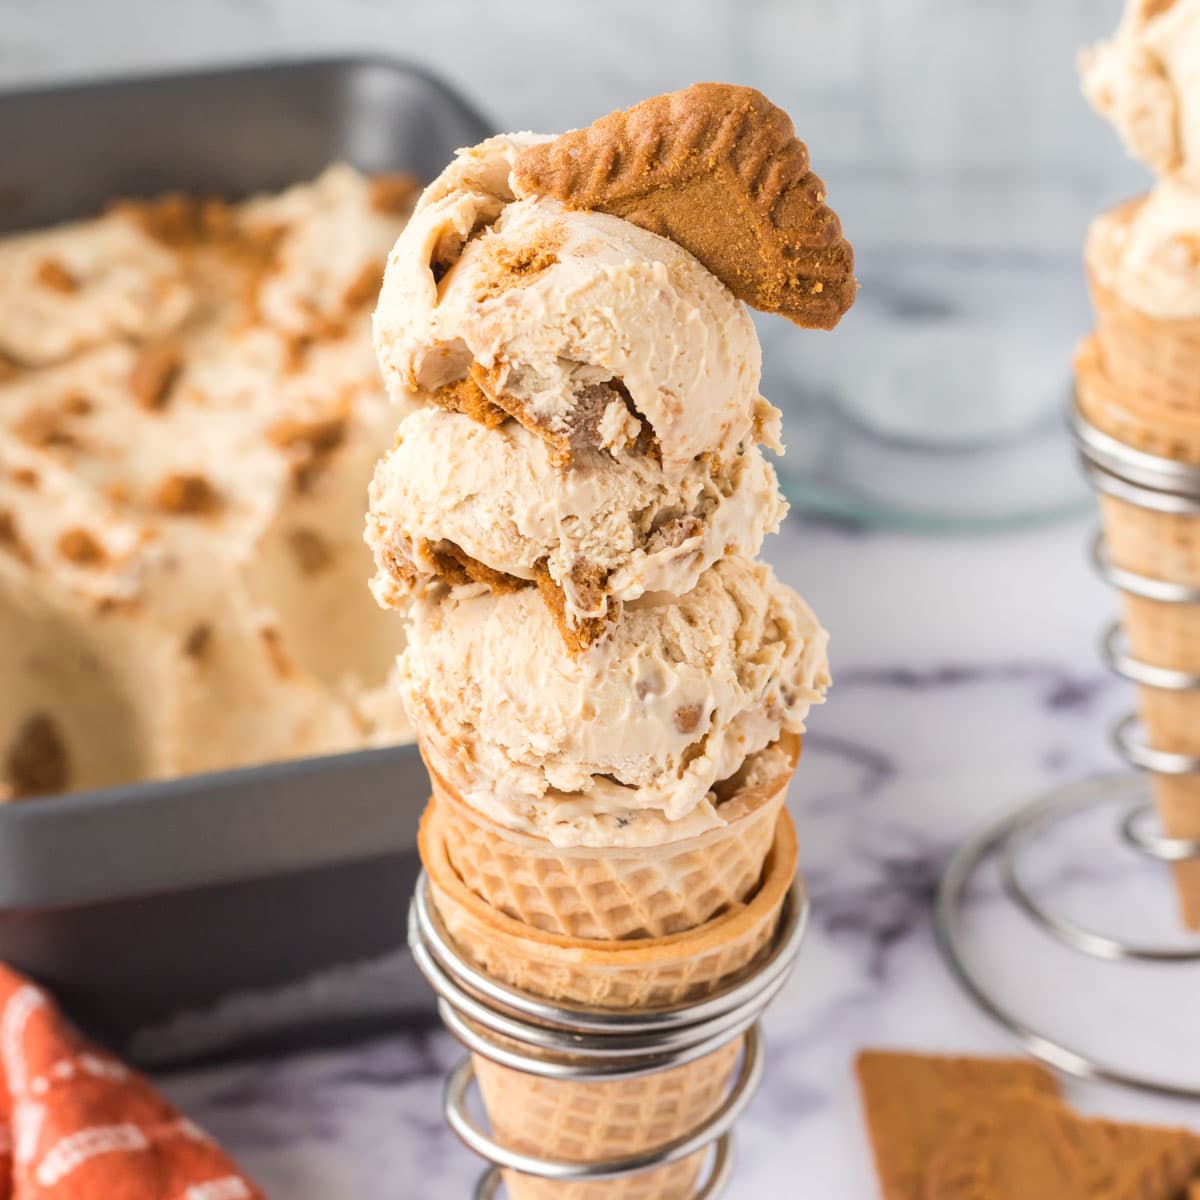
After about five to six hours, it’s time to scoop, serve, and dig into your homemade Biscoff ice cream!
Tips
- Crushing the Cookies– Crumble the cookies by smashing them inside a sealed plastic bag with a rolling pin or something similar. Continue to crush the cookies until they are crumbled to your liking. I prefer larger pieces to get those crunchy bites.
- Cookie Brand– This recipe is made with the popular Biscoff (Lotus) brand of cookies. And with generic brands, like Walmart’s Great Value Speculoos Cookie Butter, there is hardly a difference in flavor.
- Easier Scooping– Effortlessly scoop your ice cream by allowing it to thaw for just a couple of minutes at room temperature before digging in. Additionally, it helps to continuously dip the ice cream scoop into a bowl of hot water, using the heat to cut through the dessert.
- Don’t Overmix– Stop whipping the cream as soon as the peaks form to avoid overmixing the ice cream base, producing an overly dense consistency.
Recipe FAQ’s
This tasteful little cookie and the smooth Lotus cookie butter get their distinctive flavor from the nutmeg, brown sugar, and cinnamon.
Cookie butter is a sweet and spreadable version of Biscoff cookies, giving you all the delectable Biscoff flavor in a soft and creamy spread. You should easily locate the product at most grocery stores, typically where the peanut butter is stocked.
No-churn ice cream is just as it sounds– Homemade ice cream recipes made without churning from an ice cream machine. Instead, it uses simple ingredients, like heavy whipping cream and sweetened condensed milk. That combination creates an ice cream-like soft texture and creamy flavor without egg yolks and other traditional ingredients.
Whip the heavy cream, mix the remaining ingredients. Then, store in the freezer for a few hours, and you’ll have heavenly homemade ice cream!
Storage
Freezing Homemade Ice Cream:
Cover the delicious ice cream in plastic wrap or with a tight-fitting lid and keep it in the freezer for up to 2 months. After a while, it may begin to form ice crystals or become freezer burnt. Of course, it is best enjoyed within the first few weeks.
What to Serve with No Churn Biscoff Ice Cream
Top your creamy and delicious cookie butter ice cream with any number of yummy toppings. Try Air Fryer Roasted Almonds with or without salt, Toasted Pecans, or this fluffy Homemade Whipped Cream!
Want to Try Another No-Churn Ice Cream?
- Easy Chocolate Chip Cookie Ice Cream
- Homemade M&M Ice Cream
- No-Churn Strawberry Cheesecake Ice Cream
- The Best Nutty Buddy Ice Cream
- Homemade S’mores Ice Cream Recipe
- Blueberry Ice Cream
Hungry for more easy, home-cooked, delicious recipes?
Sign up for my free recipe club to get family-friendly recipes in your inbox each week! Find me sharing daily meal-time inspiration on Pinterest, Facebook, and Instagram.
Biscoff Ice Cream (No-Churn)
Click Stars To Rate
Ingredients
- 2 cups heavy whipping cream
- 14 ounces sweetened condensed milk
- ¾ cup Biscoff Cookie Butter
- 1 cup crushed Biscoff Cookies
Instructions
- Whip the heavy cream into stiff peaks using an electric hand mixer.
- Once the whipping cream reaches stiff peaks, add the condensed milk, cookie butter, and crushed Biscoff cookies to your mixing bowl. Mix in the added ingredients using your hand mixer until combined.
- Transfer the ice cream mixture to a 9×5 inch loaf pan and cover it with plastic wrap. Place the loaf pan in the freezer for 5-6 hours.
- Scoop, serve, and enjoy!
Want to Save this Recipe?
By submitting this form, you consent to receive emails from Soulfully Made.
How yummy! I added a few mini chocolate chips and it made it even better!
Yum! I love that addition of a little chocolate.
I love that I don’t need an ice cream maker to make this. So yummy!
I love that I don’t need an ice cream maker for this. Unbelievably good!
Oh my goodness. This ice cream is so good I didn’t want to share!
Thank you, Kim! I don’t blame you there!
Looks easy enough and I’m glad I don’t need any fancy gadgets to make the ice cream!
Thank you, Charla. It really is an easy way to enjoy ice cream!
Truly amazing in taste and flavors in this recipe. Will definitely make again, very good recipe!
Thank you so much!