


This post may contain affiliate links. Please read our disclosure policy.
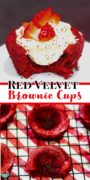
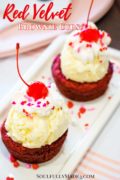
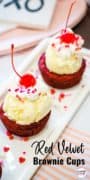
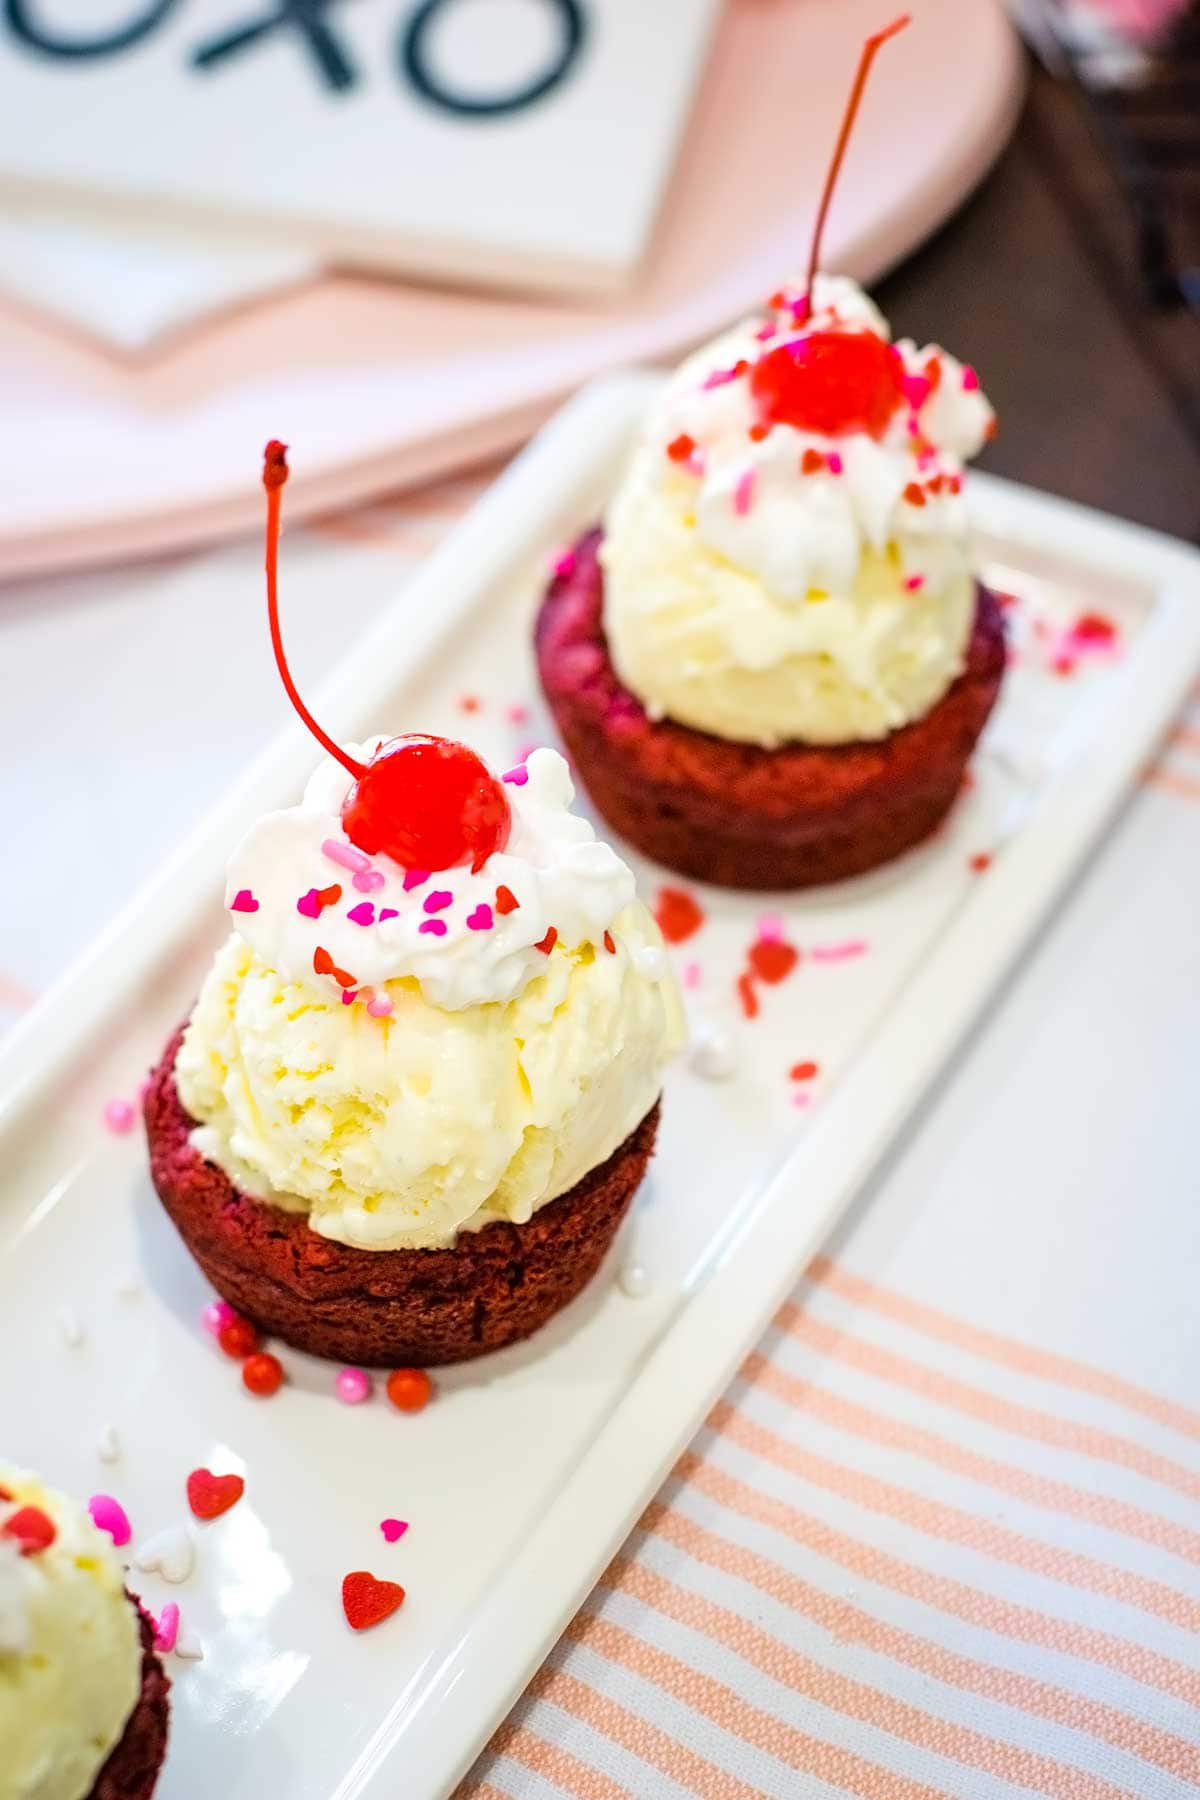
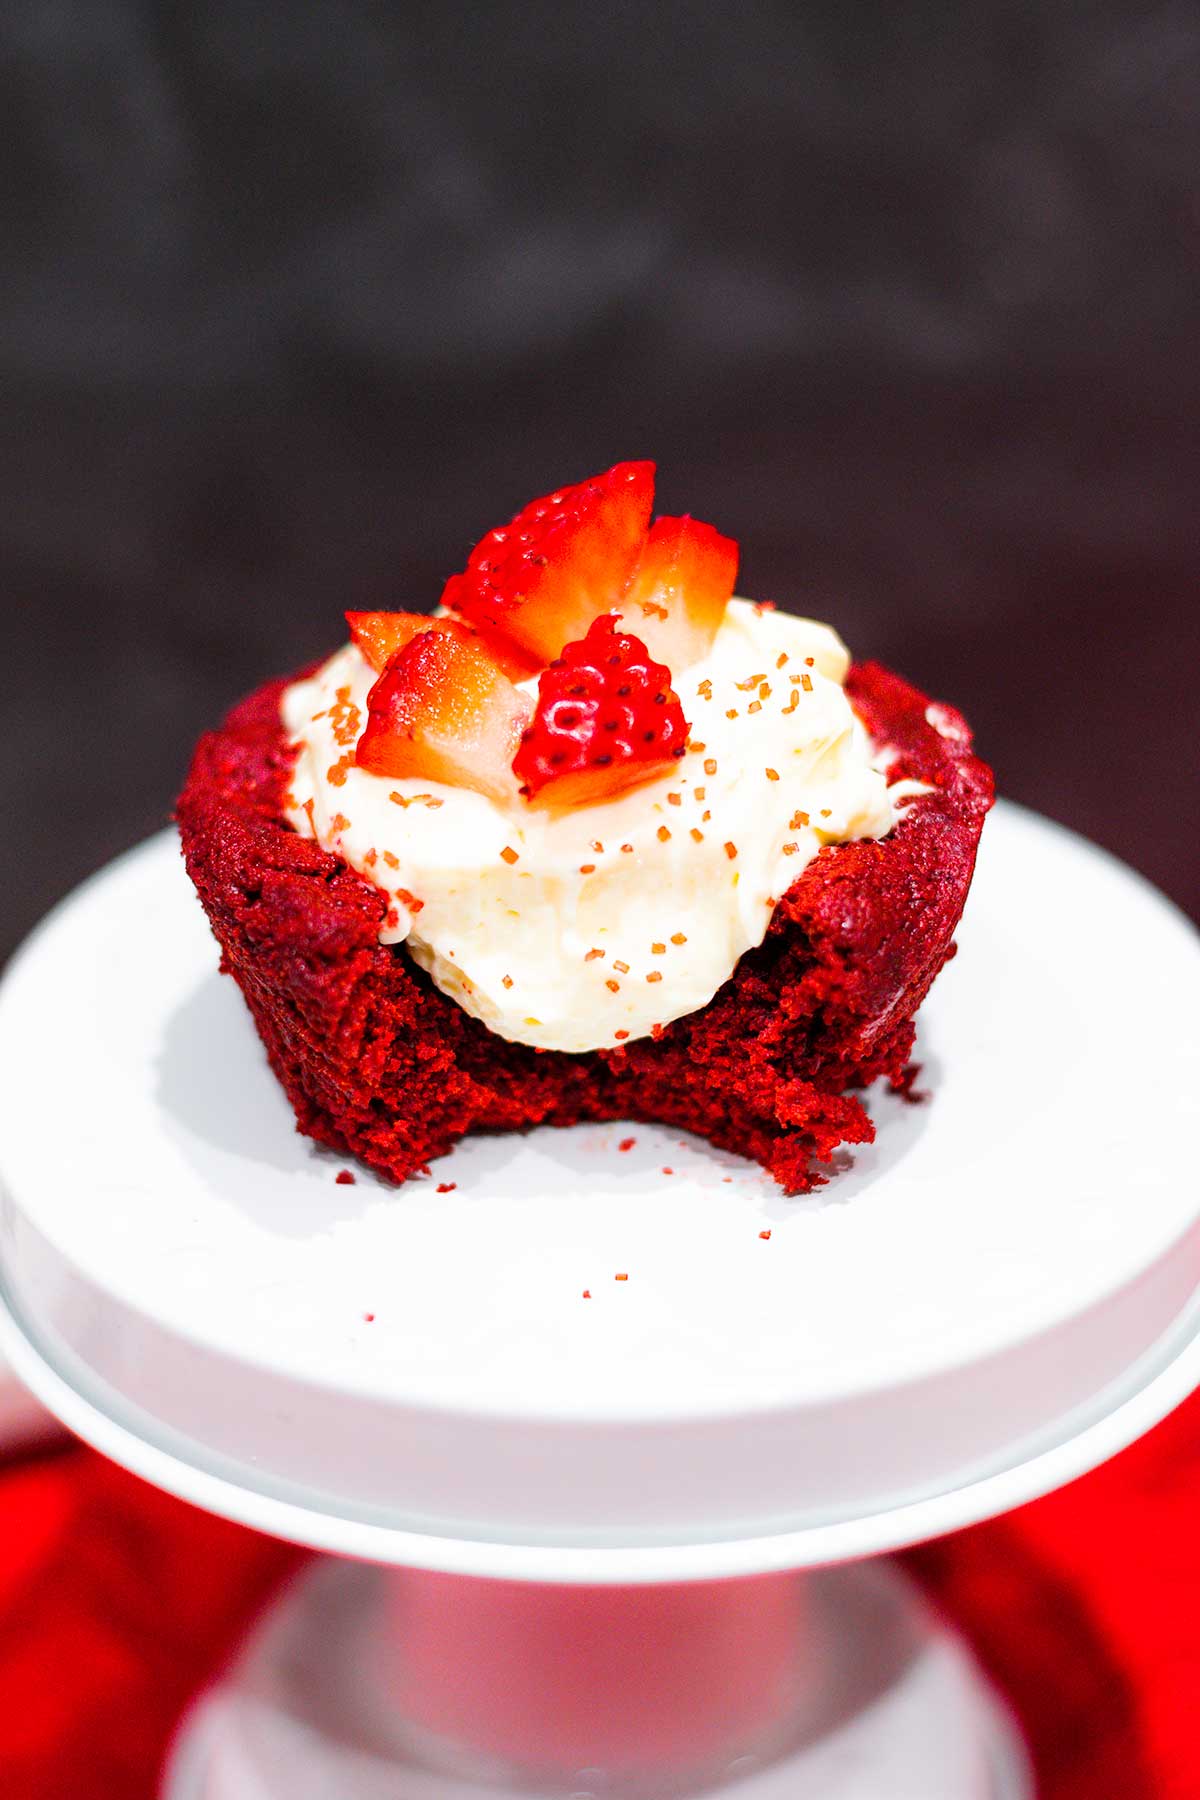
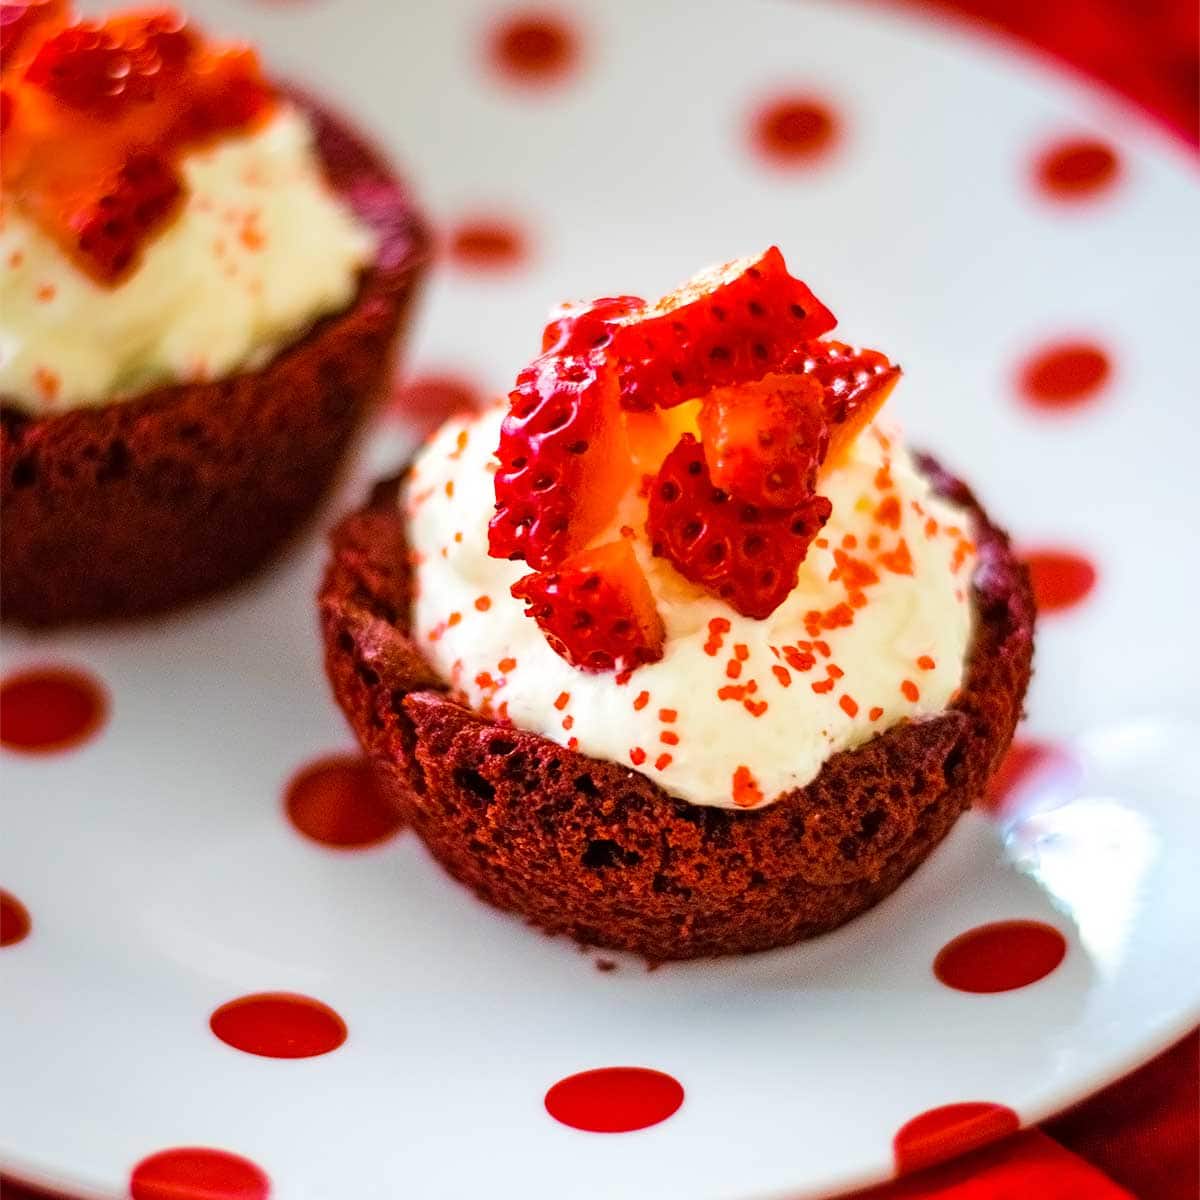
Red Velvet Brownie Cups are a delicious bite-sized dessert for any occasion. Baked in muffin tins create the perfect edible cup waiting to be filled with your favorite toppings like ice cream, cream cheese icing, and fresh whipped cream. Topping choices are endless!
Red Velvet Cake is my specialty, especially during the holidays. It’s a family favorite and a tradition at our house. I guess you can say we are all Red Velvet fans around here.
Plus we LOVE red velvet brownies or any brownies for that matter, and I do not say this lightly. So I set out to make a really easy mini “brownie meets red velvet cake” option. I thought I would give a cake mix a go. It worked making this sweet treat the most perfect, EASY, and I have to say heavenly combination!
Why you’ll love this recipe
- It’s simple – You take a convenience item like a cake mix and add decadent ingredients to make it delicious.
- 5 ingredients – In addition to the cake mix you only need 4 other items to make the brownie cups.
- Versatile – By changing up the toppings you can create so many different combinations of holiday/celebration-themed cups!
- Makes everyone feel special! These scrumptious individual desserts are always a hit and everyone feels so special with a little dessert of their own.
5 Simple Ingredients
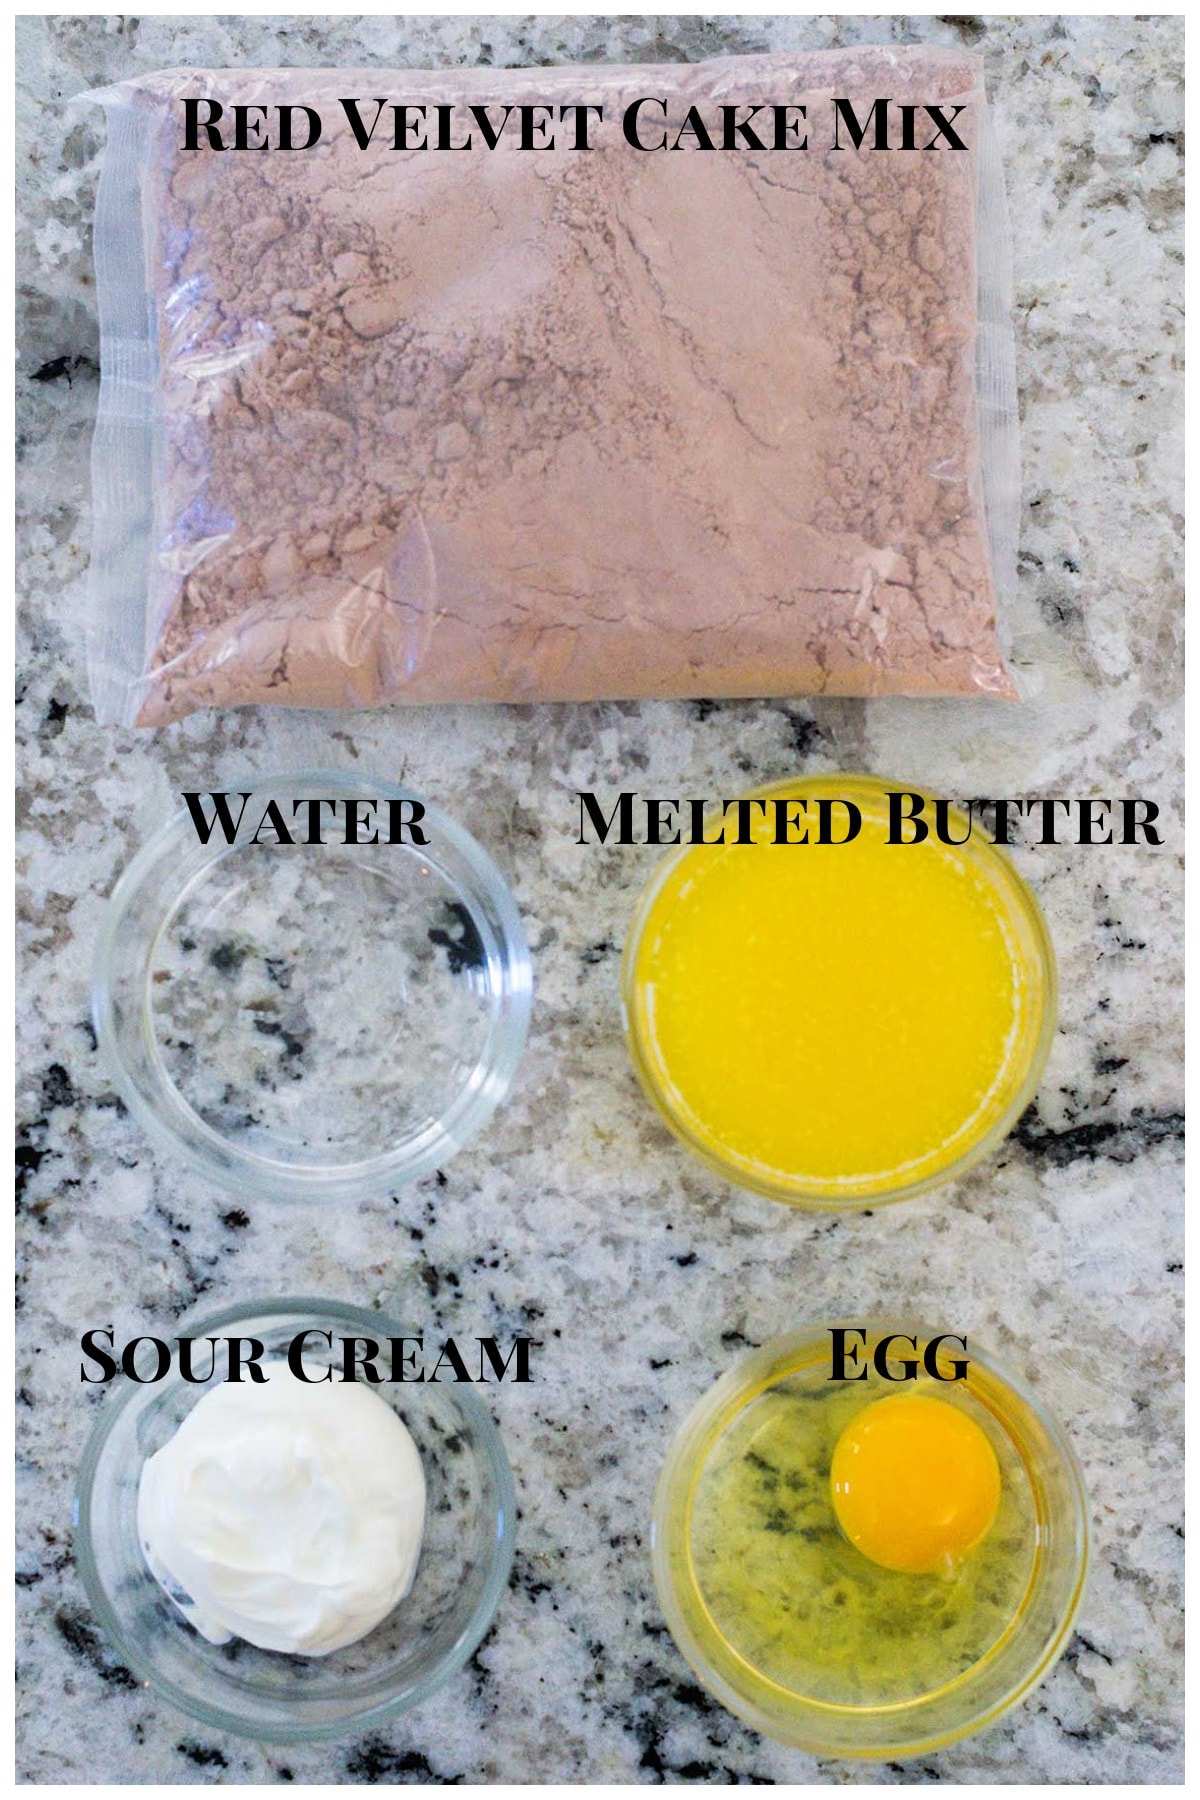
- Red Velvet Cake Dry Mix (I use Duncan Hines Perfectly Moist)
- Water
- Melted Butter
- Sour Cream
- Beaten Egg
How to make red velvet brownie cups
✱ Below shows step-by-step photos and instructions. For the complete recipe, along with ingredient amounts, scroll down to the recipe card.

- All you need is one bowl – add all the ingredients and give it a stir. My favorite way to mix is with a fork. It allows you to easily break up any lumps of dry cake mix. However, you can also use a spatula or a whisk (I love this OXO Whisk.
- Mix until it is just combined. You don’t want to overbeat the batter or it will become tough and it tends to dry out.
- Spray your muffin tin well with baking spray. That is one with flour in it. You can also use paper liners too.
- Bake until just done (when a wooden pick is inserted comes out with a few crumbs on it).
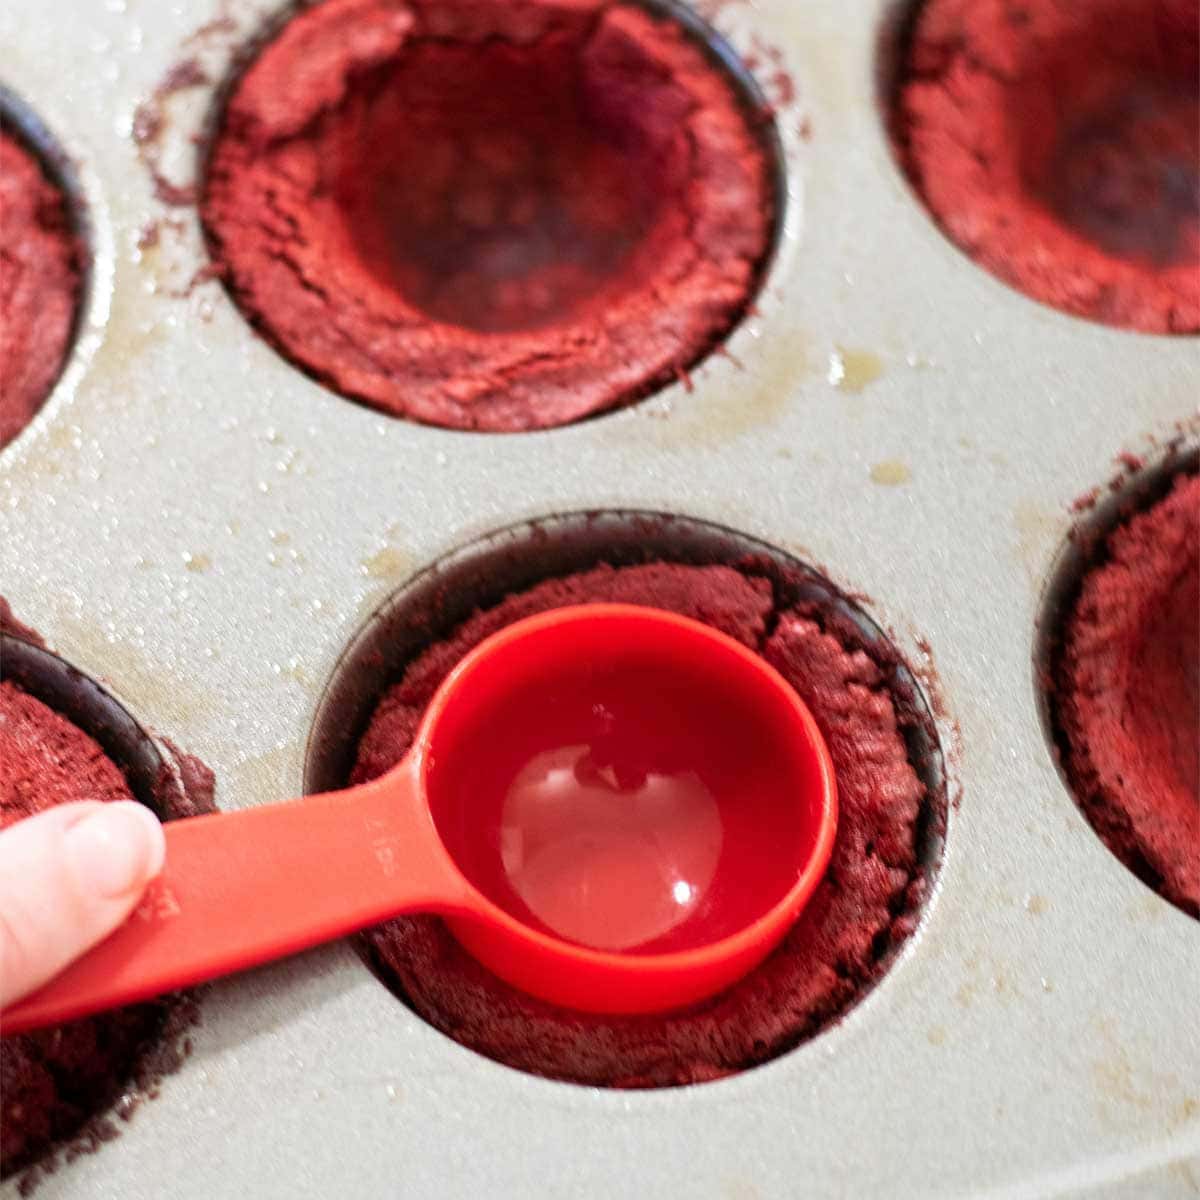
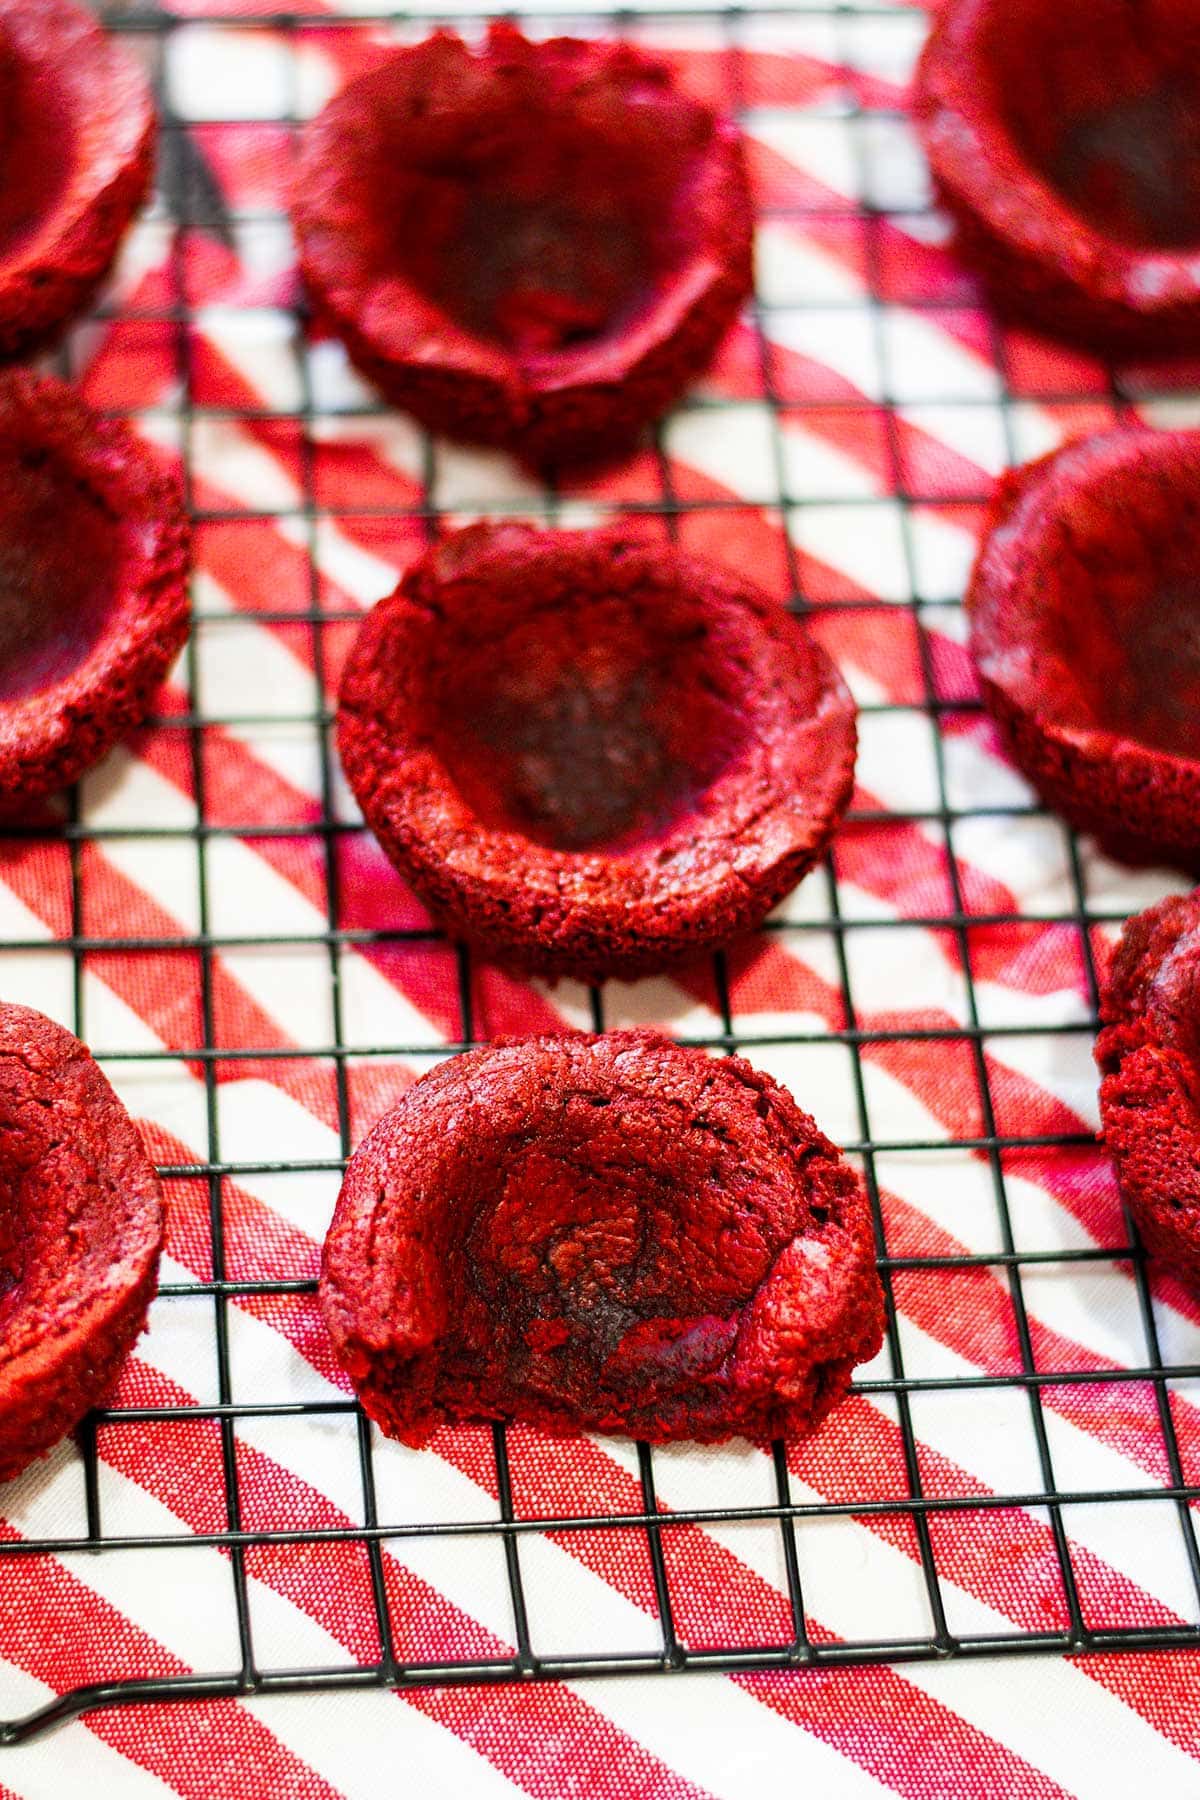
- When you remove it from the oven take a measuring spoon or something like a small pastry rolling pin and press on the brownie while it is warm to make an indention.
- Then let them completely cool in the pan. Once cooled take a knife or offset spatula and go around the edges to loosen. Remove from pan and serve.
Topping variations
Fun toppings add all the festivity and fun to these individual desserts! These are good for all occasions. So just remember you can change up the toppings, sprinkles, and candies to match your holiday or celebration.
- Top with ice cream, fresh whipped cream, and sprinkles or candies.
- Fill with cream cheese icing and a sprinkle of nuts or fruit.
- Chocolate ganache filling would be divine in these!
- A no-bake cheesecake filling would be a delicious add-in. Top with any type of fruit. You can even find it in the premade dairy section of your grocery store if you need a super simple filling. It’s made by Philadelphia Cream Cheese it’s in a tub near refrigerated Jello Pudding in my store.
- Place a mini candy bar, Reese Peanut Butter Cup, and Rolo in the middle while they are warm and they will melt down a little. Then drizzle with caramel or chocolate.
- Add your favorite icing and sprinkle with M & M’s or chocolate chips.
- Decorate these for your Valentine’s Day dessert with all the X’s, O’s, and hearts, or Christmas decked in red and green! For St Patrick’s day use a green velvet cake mix and shamrocks galore.
- You can try any cake mix and make a birthday theme or use pink or blue cake mix for a gender reveal party. The options are endless!
How to serve
- These look beautiful on a single or tiered tray. You can make them all alike or serve them with a variety of toppings.
- It’s fun to make a red velvet brownie cup bar. Serve the cup with bowls, and all the fixings displayed, and let everyone make their own creation.
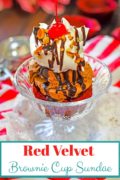
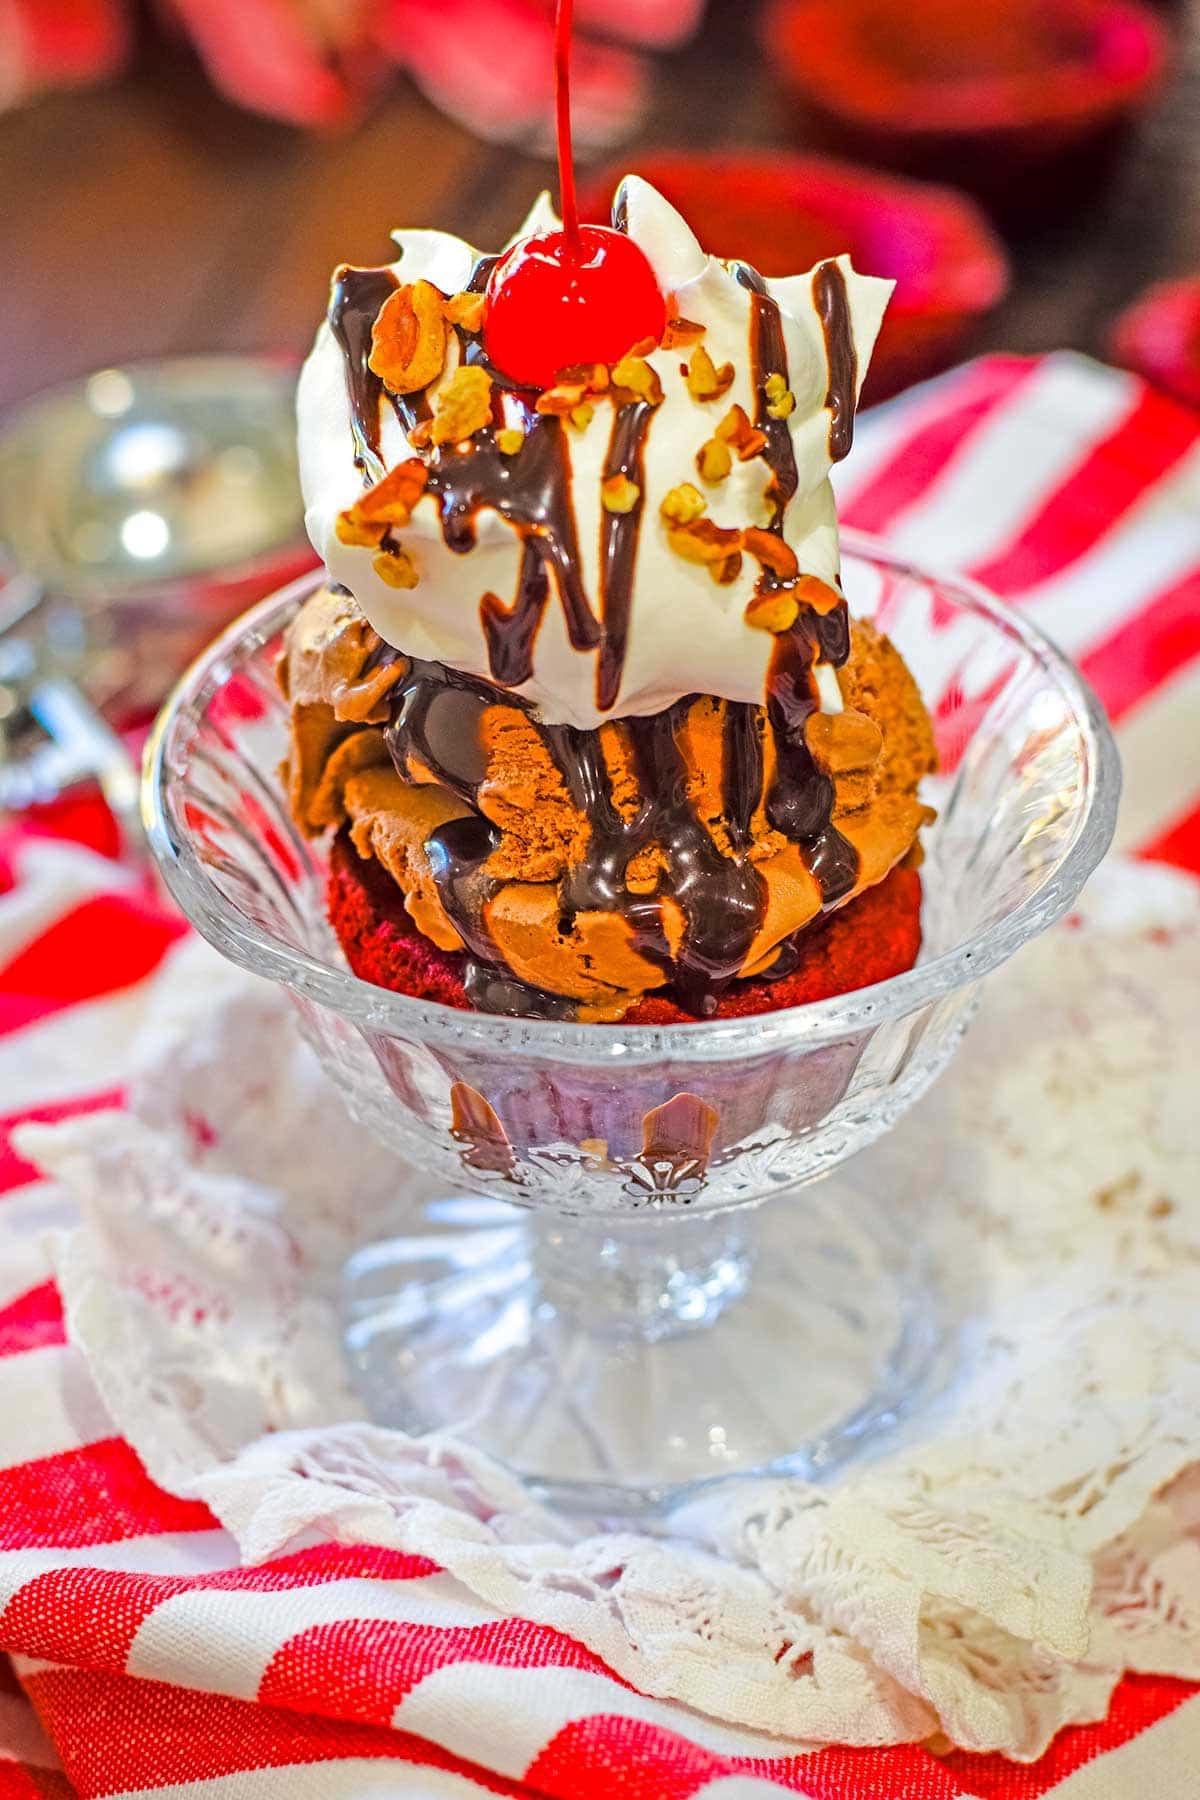
- Serve them in a pretty dish Ice Cream Sundae Style (you can use any ice cream flavor you like) I like mine with chocolate ice cream!
FAQ’s
Yes, these freeze well. Once completely cooled you can place them in a freezer zip bag or freezer-proof container and freeze them for up to 3 months. I like to freeze them on a flat surface for at least 30 minutes. Then arrange them however fits best into your freezer in the ziplock bag or container. Remember to label and date them as well!
To thaw remove from freezer and thaw at room temperature. The nice thing about these individual brownie cups is you can take out as many as you would like at a time.
Store in a Ziplock bag or in an airtight container at room temperature for 3 to 5 days.
Use a nonstick pan.
Use a baking spray that has flour in it to grease your muffin tin.
Make sure they are baked all the way. If the batter is still raw it will be more likely to stick or not come away easily.
Let them cool completely.
Use paper liners if you want a super easy solution to keep them from sticking.
Yes! Just fill mini muffin tins about halfway full and bake for 7 to 10 minutes or until a wooden pick comes out clean. Now you have delicious red velvet brownie bites. They can be enjoyed as is or with icing or whipped cream.
Tips
- Prepare muffin tin – Make sure to spray your muffin tin well with baking spray or line it with paper liners.
- Let cool completely before removing from the pan if not using a paper liner. This will keep it from sticking to the pan.
- Run a knife around the edges to loosen before removing will also help to easily remove from the muffin pan.
- To make cup indention – Just after removing from the oven use a 2-tablespoon measuring spoon or something round to press down the brownie to create your cup. The brownie being hot will help it set.
- Don’t store them in the refrigerator – I don’t recommend storing them in the refrigerator as this may dry them out! Store at room temperature or freeze until ready to use. Once ready to use place toppings on them and enjoy.
- Get creative and have fun with toppings!
More delicious desserts to try
- Strawberry Pizza
- Strawberry Cake Mix Cookies
- Frosted Chocolate Turtle Brownies
- The Best Classic Cheesecake
- Check out all my Dessert Recipes Here
Red Velvet Brownie Cups
Click Stars To Rate
Ingredients
- 1 box red velvet cake mix - dry
- 1 stick butter - melted
- 1 large egg - beaten
- ¼ cup water
- ¼ cup sour cream
Instructions
- Preheat oven to 350° or 325° if using a dark non-stick muffin pan. Prepare the muffin tins by thoroughly spraying with a baking spray (one with flour in it) or line with paper liners.
- In a large bowl mix dry cake mix, melted butter, egg, water and sour cream until combined.
- Pour into prepared pan and bake for 14 to 18 minutes or until wooden pick inserted into the middle comes out with a few crumbs. You don’t want to over bake or they will be dry.
- Remove pan and use the back of a measuring spoon to press into the center of each brownie to create a cup.
- Let brownies cool and then run a knife around the edge to loosen so you can easily remove from pan (if not using paper liners).
- Add desired toppings and enjoy.
Notes
- Prepare muffin tin – Make sure to spray your muffin tin well with baking spray or line it with paper liners.
- Let cool completely before removing from the pan if not using a paper liner. This will keep it from sticking to the pan.
- Run a knife around the edges to loosen before removing will also help to easily remove from the muffin pan.
- To make cup indention – Just after removing from the oven use a 2-tablespoon measuring spoon or something round to press down the brownie to create your cup. The brownie being hot will help it set.
- Don’t store them in the refrigerator – I don’t recommend storing them in the refrigerator as this may dry them out! Store at room temperature or freeze until ready to use. Once ready to use place toppings on them and enjoy.
- Get creative and have fun with toppings!
Want to Save this Recipe?
By submitting this form, you consent to receive emails from Soulfully Made.
These red velvet brownies look delicious! A perfect dessert for Valentine’s Day.
So cute! These will be perfect for Valentine’s Day!
So many great recipes and this one is a keeper! I think I will make it again for Valentine’s Day!
A perfect treat for Valentine’s Day! These look so pretty and who doesn’t love brownies?!
I made these for Valentine’s Day last year and can’t wait to make them again this year! Thanks so much for sharing the recipe!
Making these to send to my son in college, so excited about them — so many ways to top them! Love it!
I hope he is enjoying his time in college. I know care packages from home are the best! Especially from you! You are the best gift giver!
Nikki, I’m in love with these red velvet brownie cups! So fun and festive! Kudos on a great holiday/party idea.