
This post may contain affiliate links. Please read our disclosure policy.
Some days, you need a treat that looks fancy but doesn’t take much effort, right? That’s where my Red Velvet Brownies come in. They’re the perfect blend of fudgy brownies and that unique red velvet flavor everyone loves. They’re easy enough for even your busiest days. I’m talking about a few basic ingredients and a little bit of love, and you’ve got yourself a showstopper dessert!
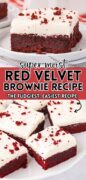
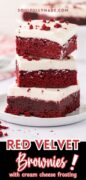
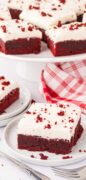
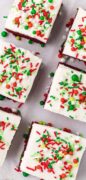
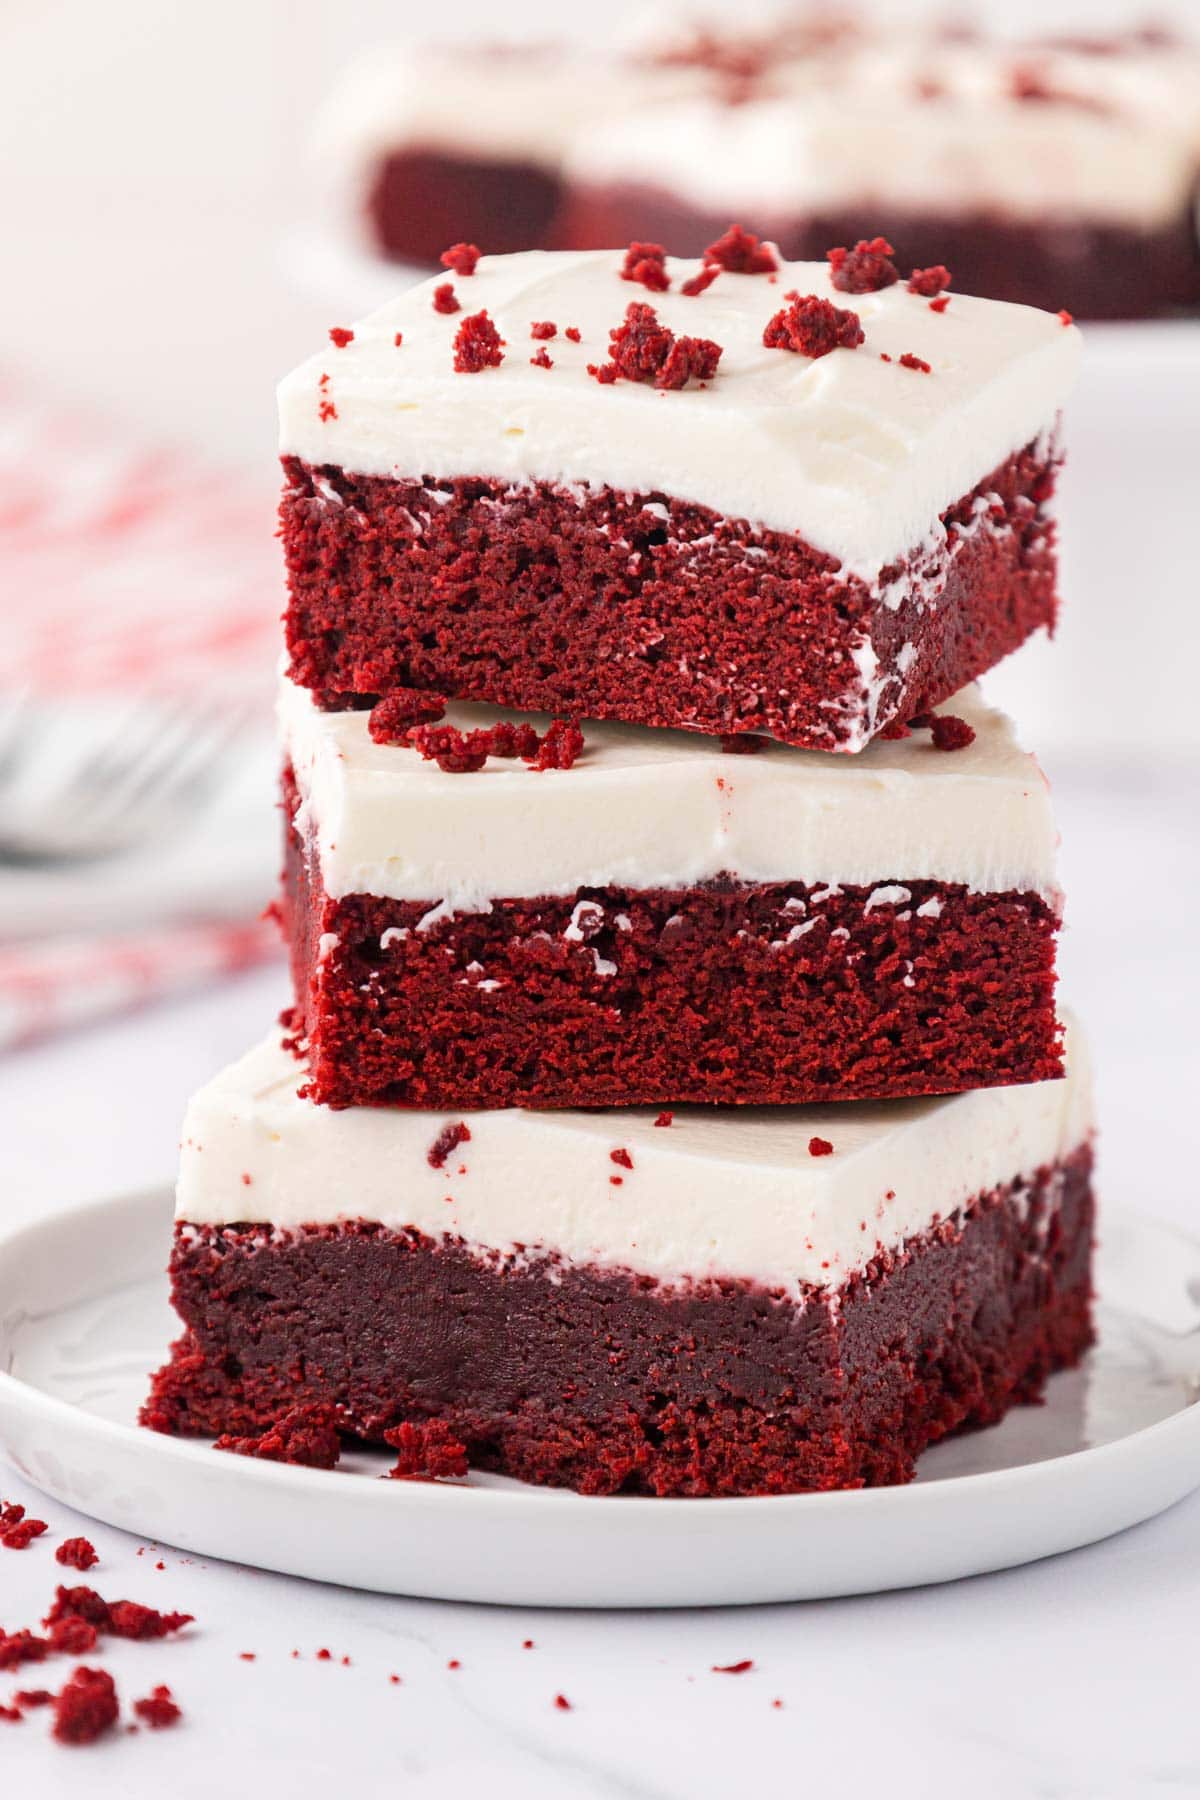
Enjoy these brownies on their own, or top them with decadent cream cheese icing, which is synonymous with the classic red velvet combo!
Even though I’m all about using convenient, easy items when I can, this is one of those recipes where you skip the box mix and go for homemade. Don’t worry—these Red Velvet Brownies are still easy enough to whip together, and trust me, the difference is worth it.
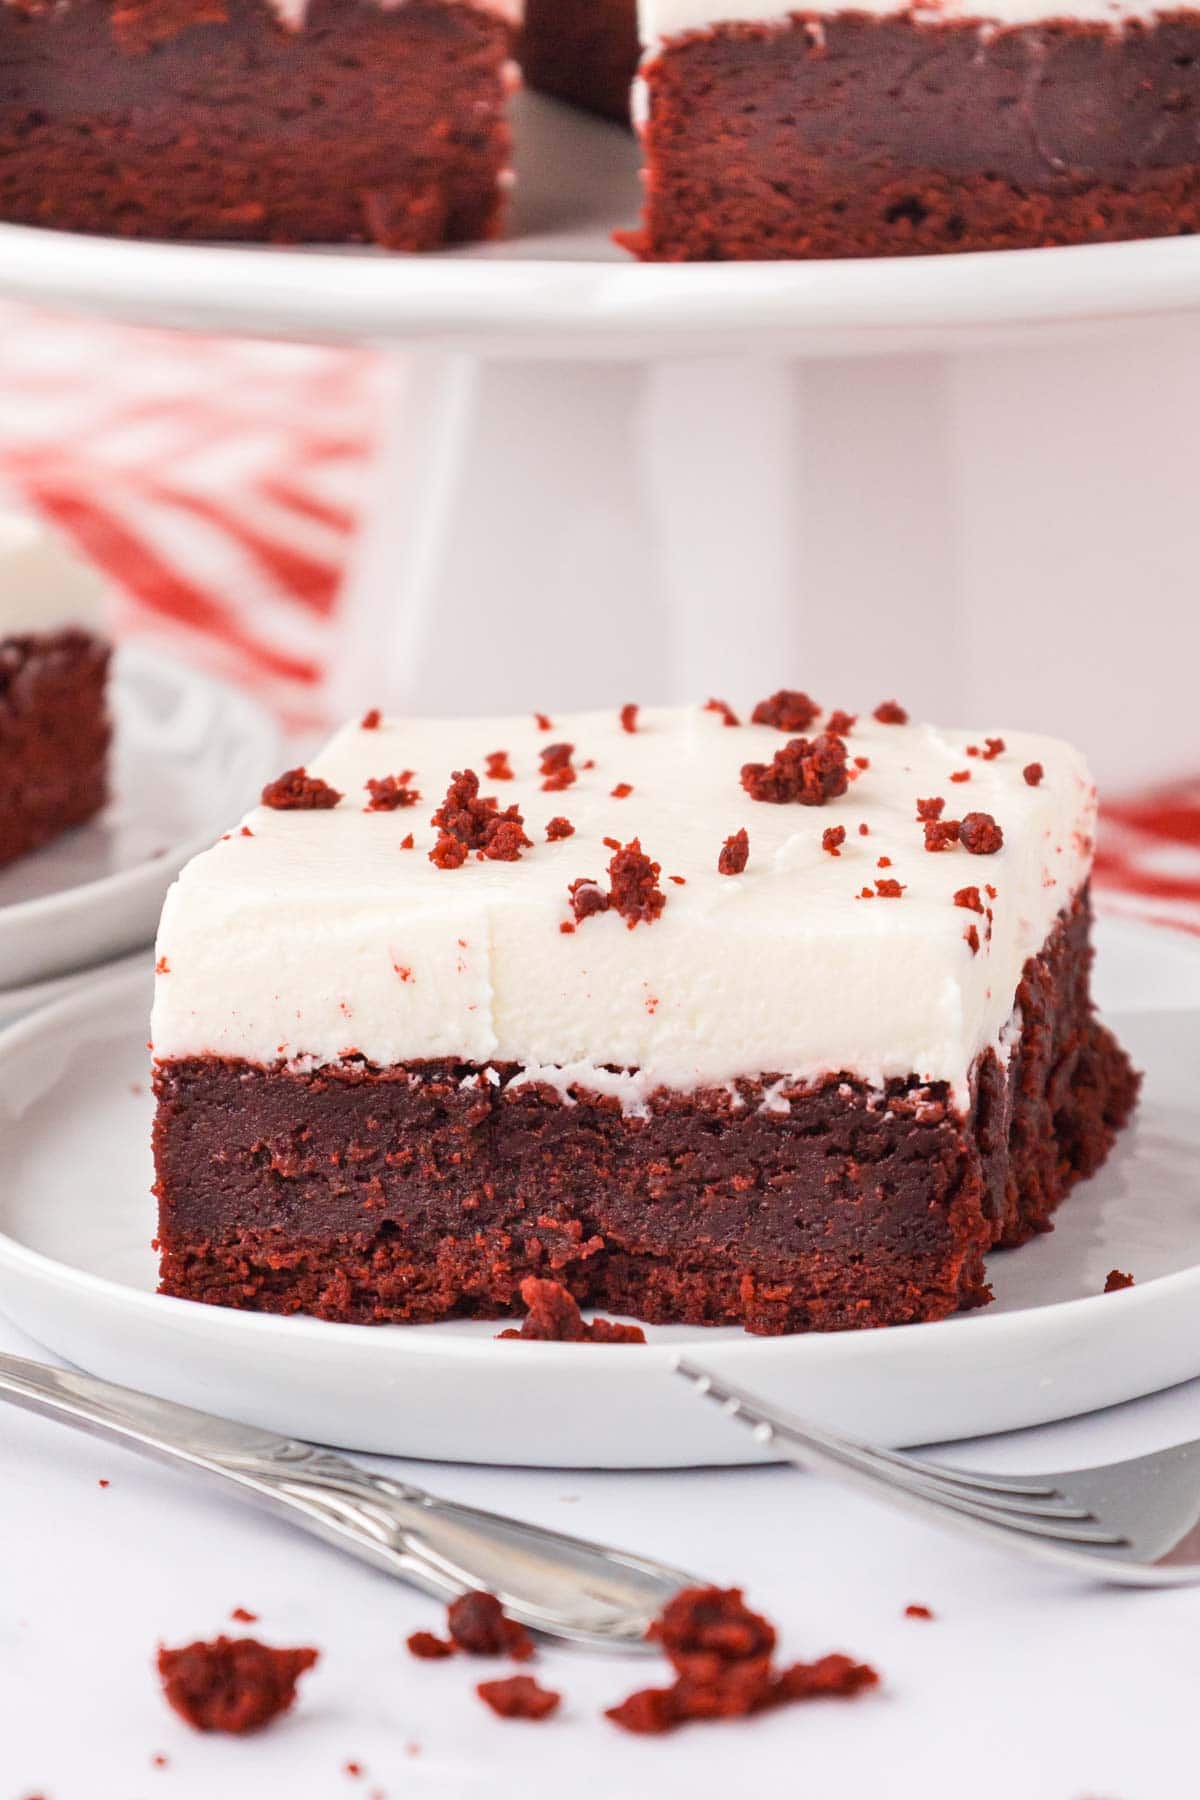
You’ll get that perfect, fudgy brownie texture with just a few simple ingredients. The rich cocoa and the hint of vinegar give them that signature red velvet flavor, while keeping them super moist and decadent.
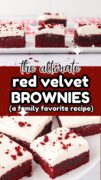
The best part of making them from scratch is the satisfaction of knowing you did it all yourself! These brownies are delicious on their own, but they’re also the perfect base for a little extra flair. I love adding a swirl of homemade cream cheese frosting for that perfect mix of tangy and sweet. They don’t just look impressive; they taste like you’ve spent hours in the kitchen, but we both know they’re actually super simple to whip up!
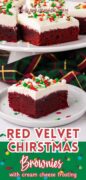
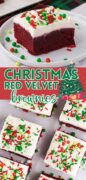
They’re perfect for special occasions like Valentine’s Day or Christmas, with rich flavor and festive red color. But let’s be real—they’re just as amazing when you’re simply craving something indulgent on a regular day. Whether for a holiday or a self-care treat, these brownies will make any moment feel special!
Why you’ll love this Red Velvet Brownie Recipe!
- Simple Recipe – Brownie recipes are pretty straightforward and simple.
- Delicious and Fudgy—This brownie recipe is all that fudgy deliciousness with just the right lift, giving you that red velvet cake flavor.
- Perfect for holidays or a special treat—If you’re Looking for something red for your Valentine or at Christmas, this is just the treat. Although this is so good, you’ll be making it year-round!
Red Velvet Brownies Recipe Ingredients
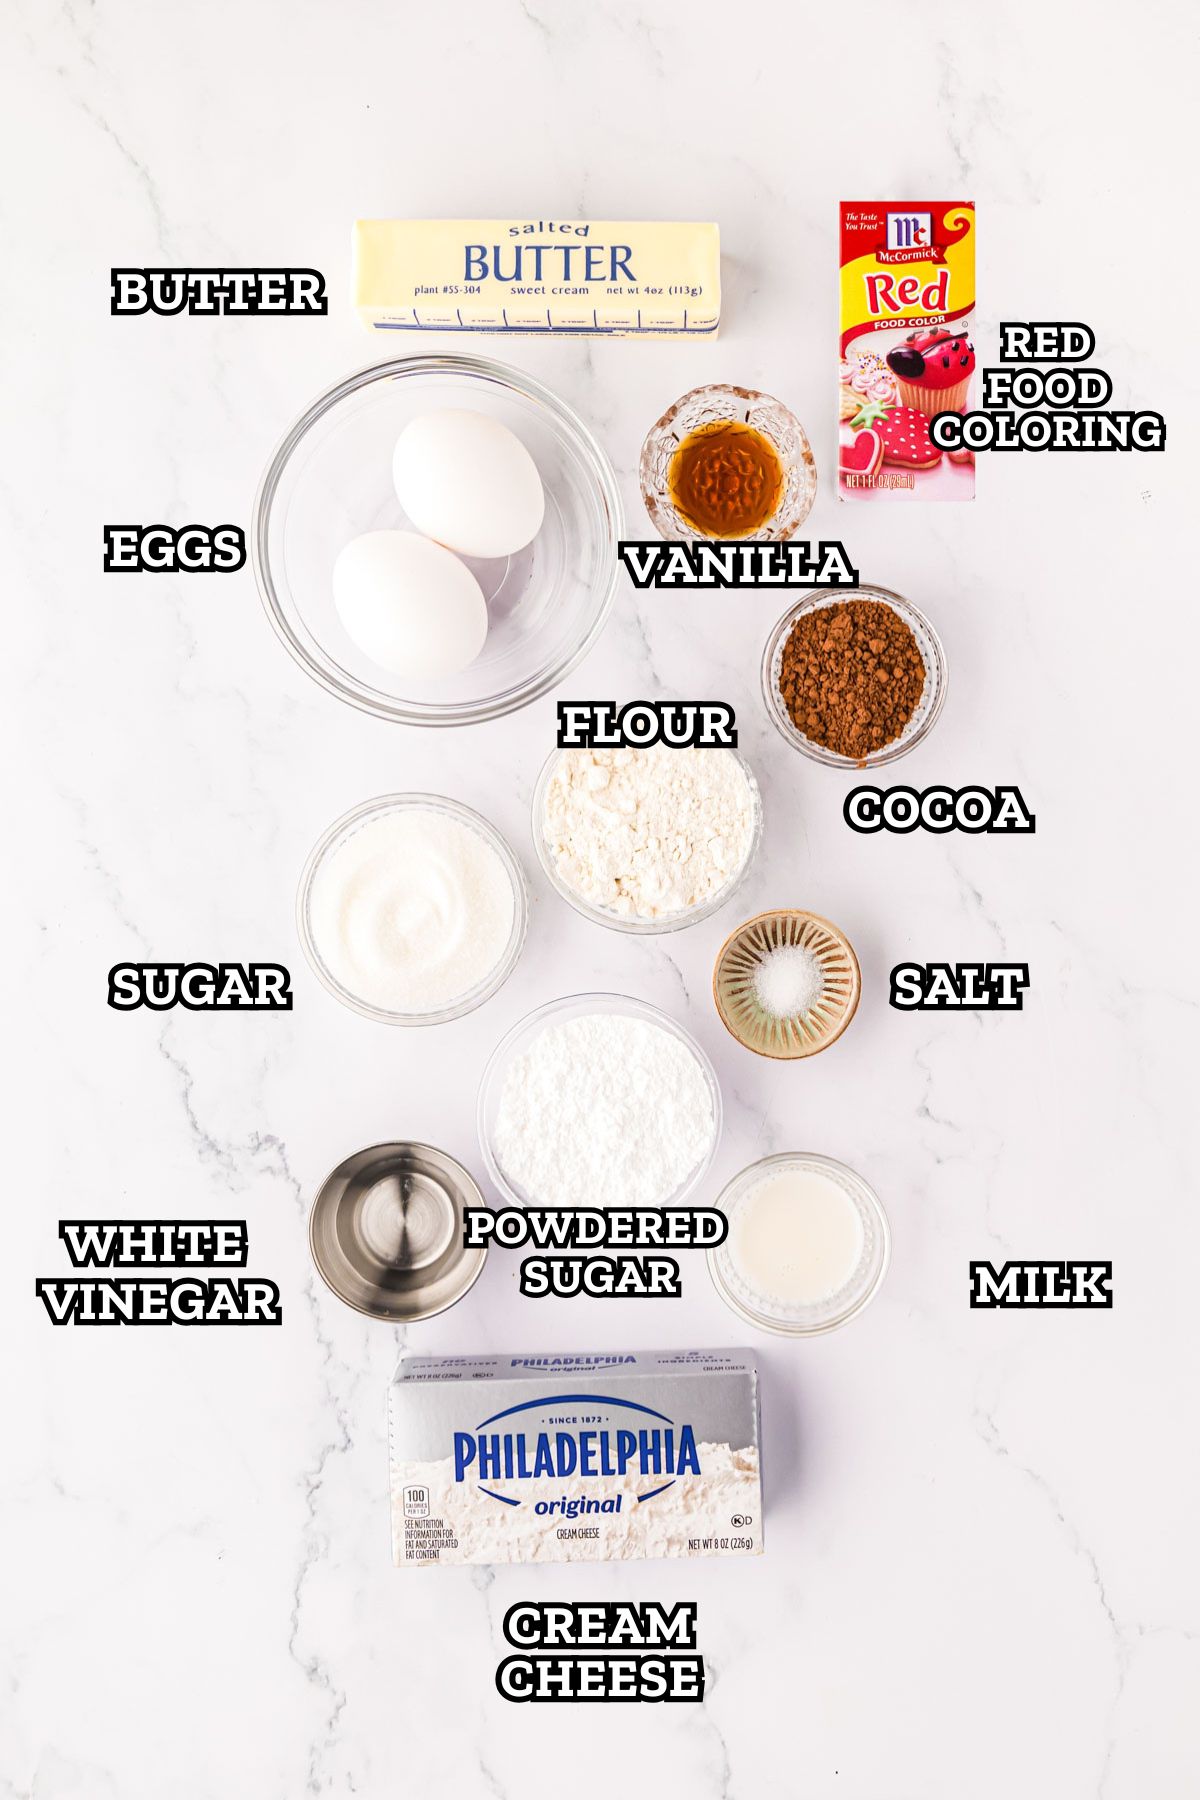
- Butter: Unsalted or salted works fine. Unsalted butter is usually the standard in baking, but I must confess I use salted butter in my brownies. Melting the butter gives a chewier, more fudge-like texture.
- Sugar: Standard white granulated sugar is all you need.
- Cocoa powder: Natural unsweetened or Dutch process with work in this recipe. I usually make it with good old Hershey’s or Ghirardelli Unsweetened Cocoa.
- Vanilla Extract: Pure vanilla extract will give you that vanilla taste in red velvet.
- White distilled vinegar: Just a little for that red velvet magic.
- Red Food Coloring: I keep it simple and use McCormick’s in the bottle. It has no funny taste and really gives you red brownies.
- Salt: I use kosher or sea salt. Just a little to balance the sweet.
- Eggs: Large eggs at room temperature. Let the eggs incorporate evenly.
- Flour: Simple all-purpose flour works great. You don’t need anything fancy. Just make sure to fluff your flour in the container. Then, spoon it into the measuring cup and level it off. Too much flour will result in dry brownies.
Icing Ingredient Notes
This brownie recipe is delicious with or without cream cheese icing. Make this simple frosting to put a classic spin on red velvet.
- Cream Cheese: Block cream cheese at room temperature works best. I like to get a good quality cream cheese, like Philadelphia. However, if your store brand has good quality and isn’t watery, use that. Just don’t get a tub or whipped. It is not the right consistency.
- Butter: I use stick butter at room temperature. Not too soft, though.
- Powdered Sugar: This is also known as confectioners or icing sugar. It makes a smooth icing!
- Vanilla: A good-quality vanilla extract works well. It will slightly tint the icing, and I don’t mind that, so you get a great flavor. However, if you need pure white icing, then go for a clear vanilla flavoring.
How to Make Red Velvet Brownies
✱ Below shows step-by-step photos and instructions. For the complete recipe, along with ingredient amounts, scroll down to the recipe card.
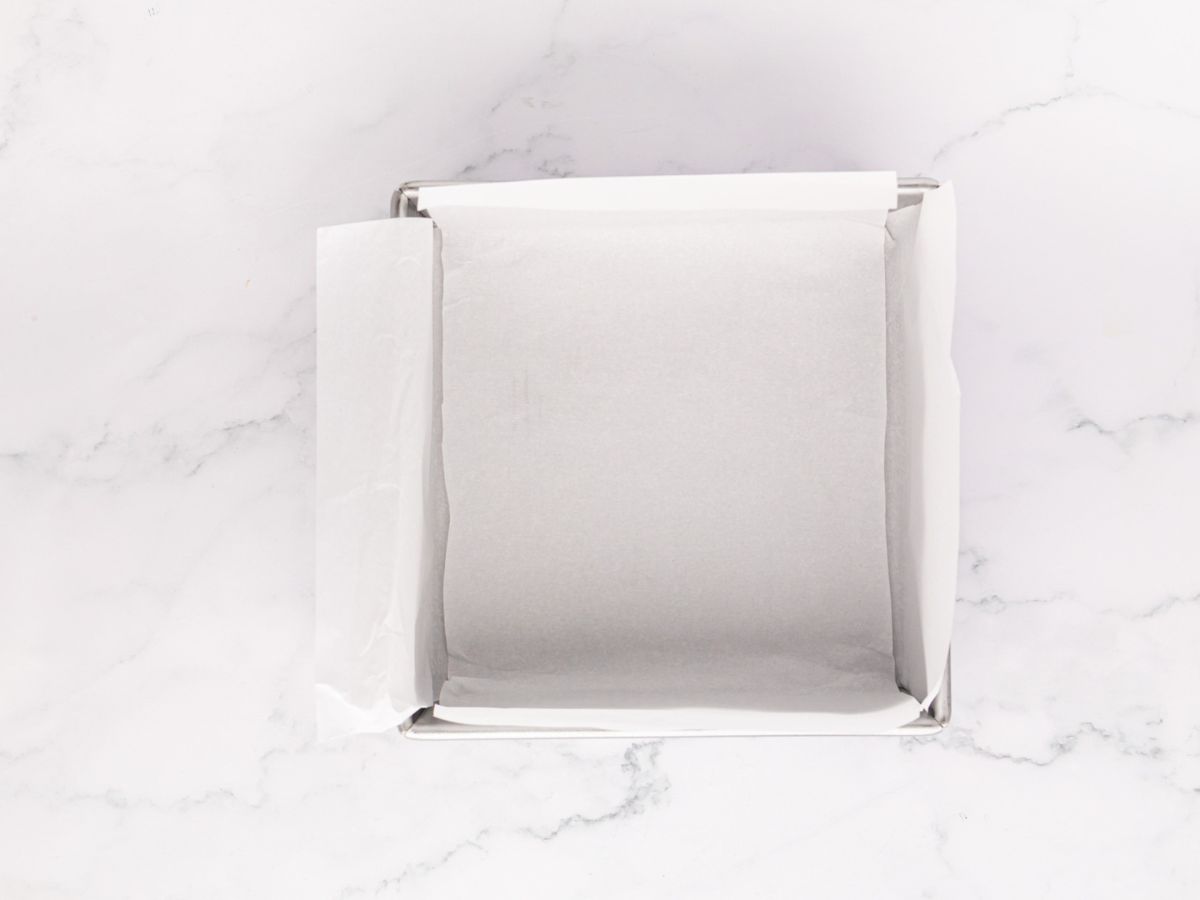
Step 1 | Prepare Pan and Oven
First, preheat your oven to 350°F. Line an 8-inch square cake pan with parchment paper, leaving a bit hanging over the sides so you can easily lift the brownies out later. Trust me, this makes life so much easier when it’s time to slice them!
If you don’t have parchment paper spray the entire pan with baking spray or butter or grease pan.
Step 2 | Mix ingredients
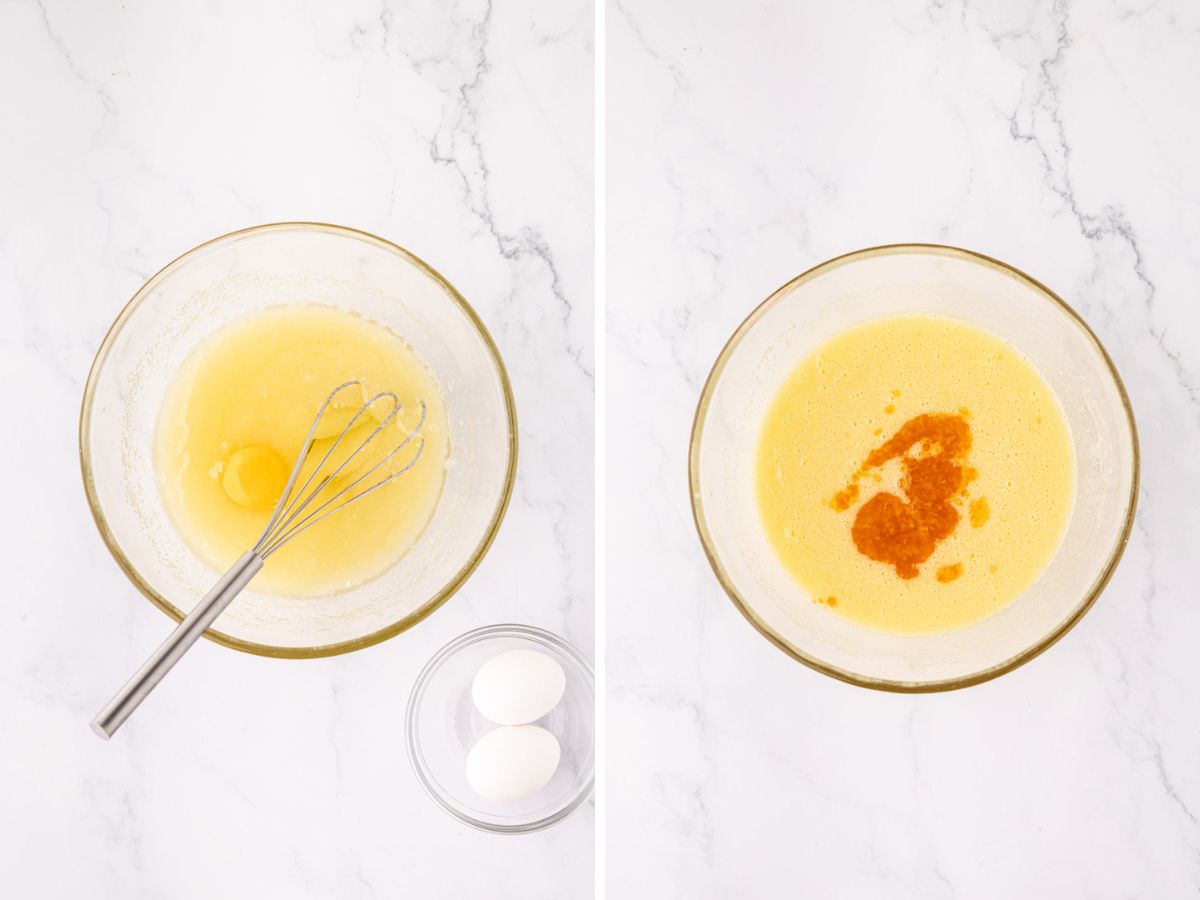
In a large bowl, melt butter at 30-second intervals until melted. You can also melt the butter in a 2-3 quart saucepan over low heat if you like.
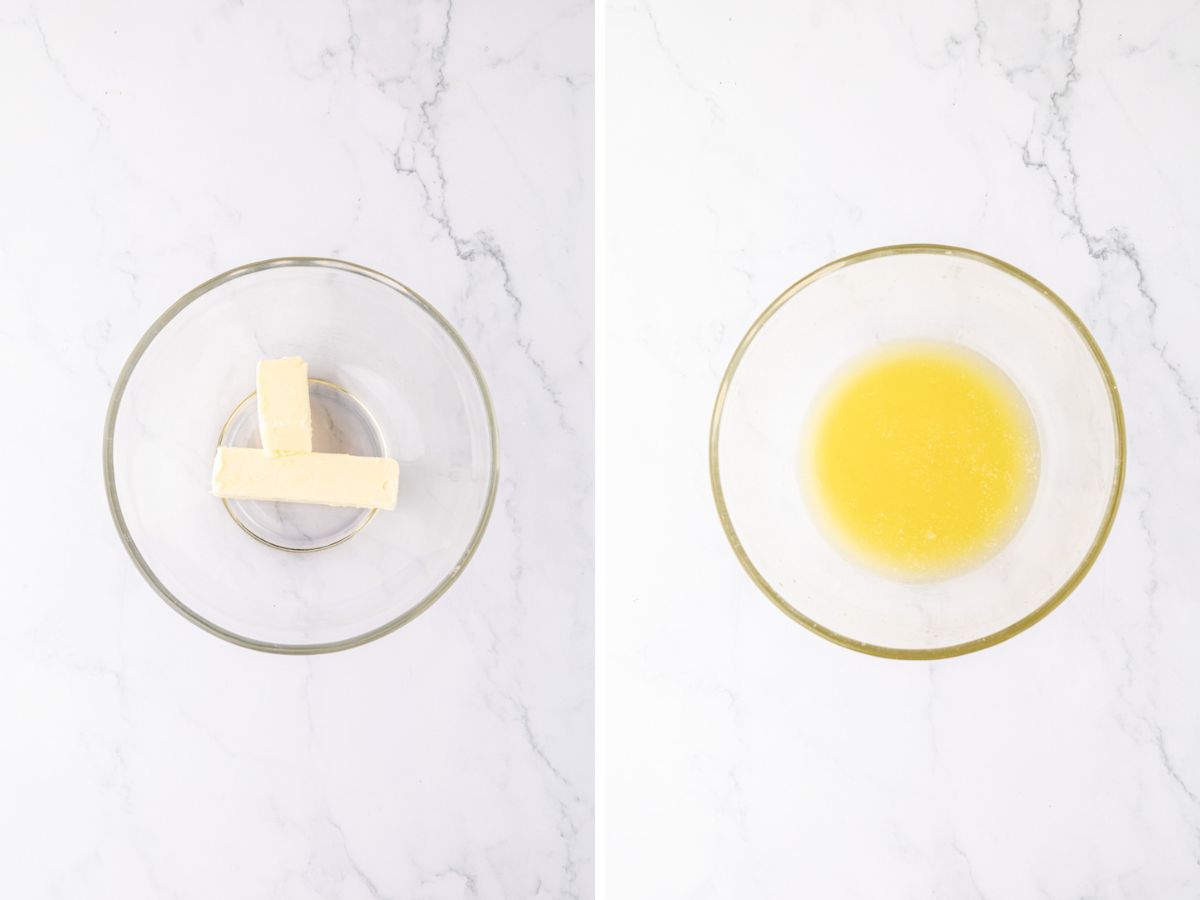
Once melted, whisk in the sugar until everything is well combined.
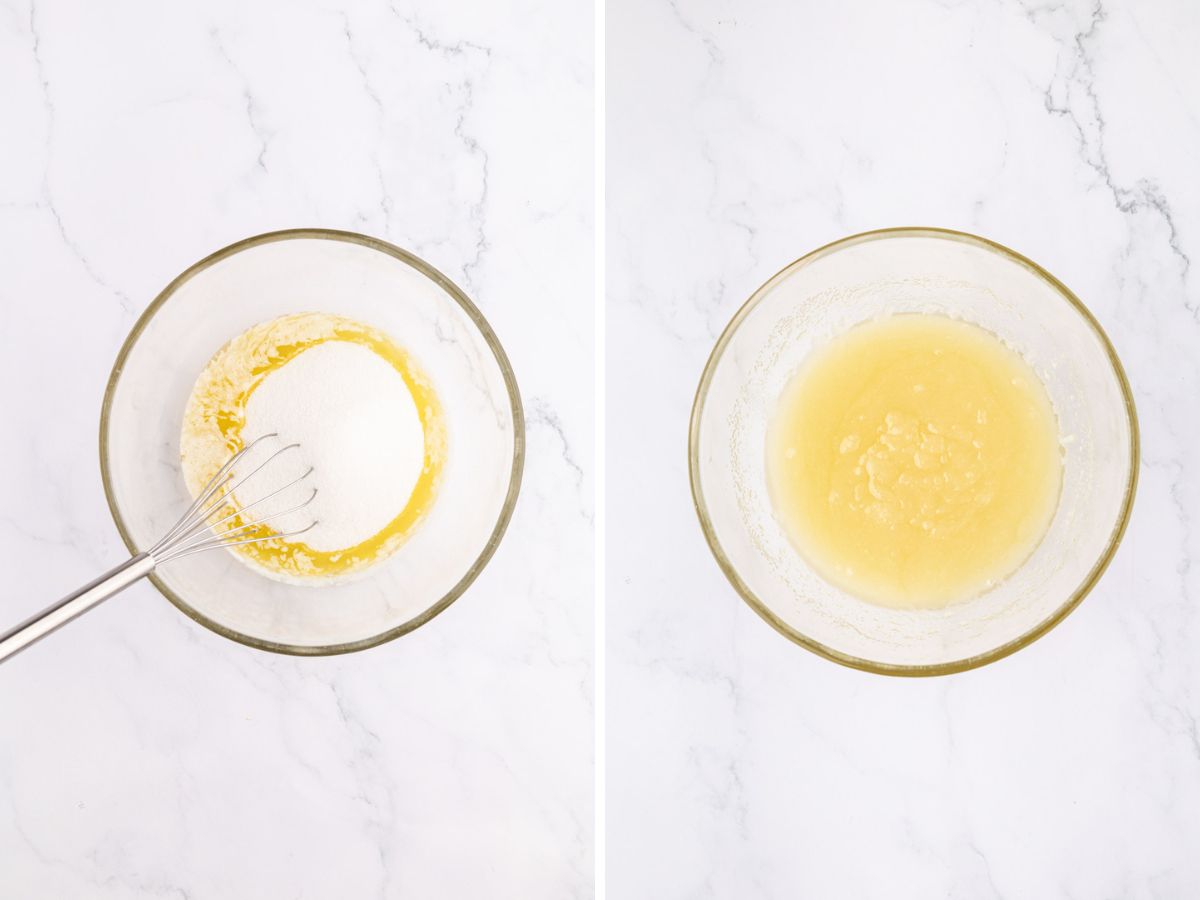
Next, add the eggs one at a time, whisking after each addition until they’re just incorporated. We want to add a little air in the batter so there is a little lift but not too much that they are a little fudgy, too!
Then, mix in the vanilla.
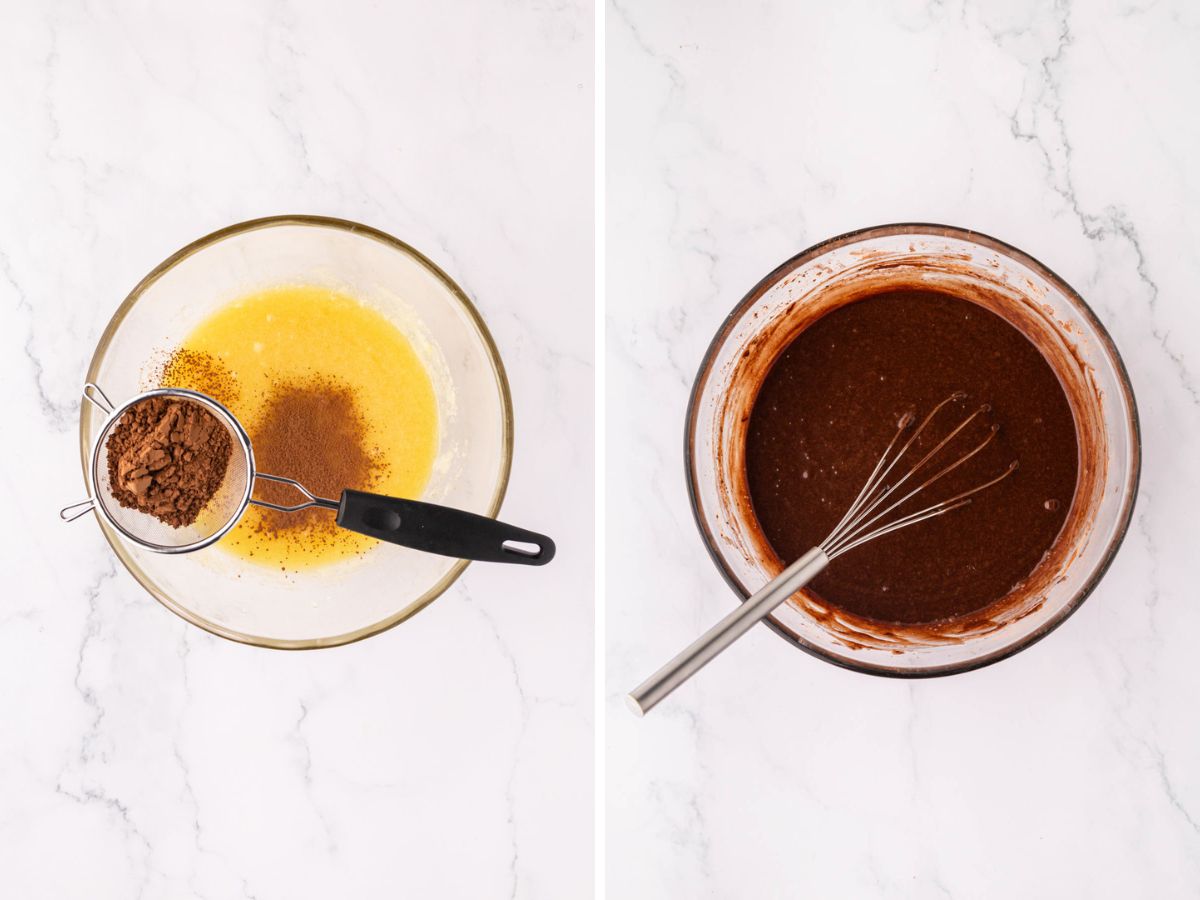
Now, gently whisk the cocoa powder into the batter (I like to sift it through a sieve to avoid any lumps).
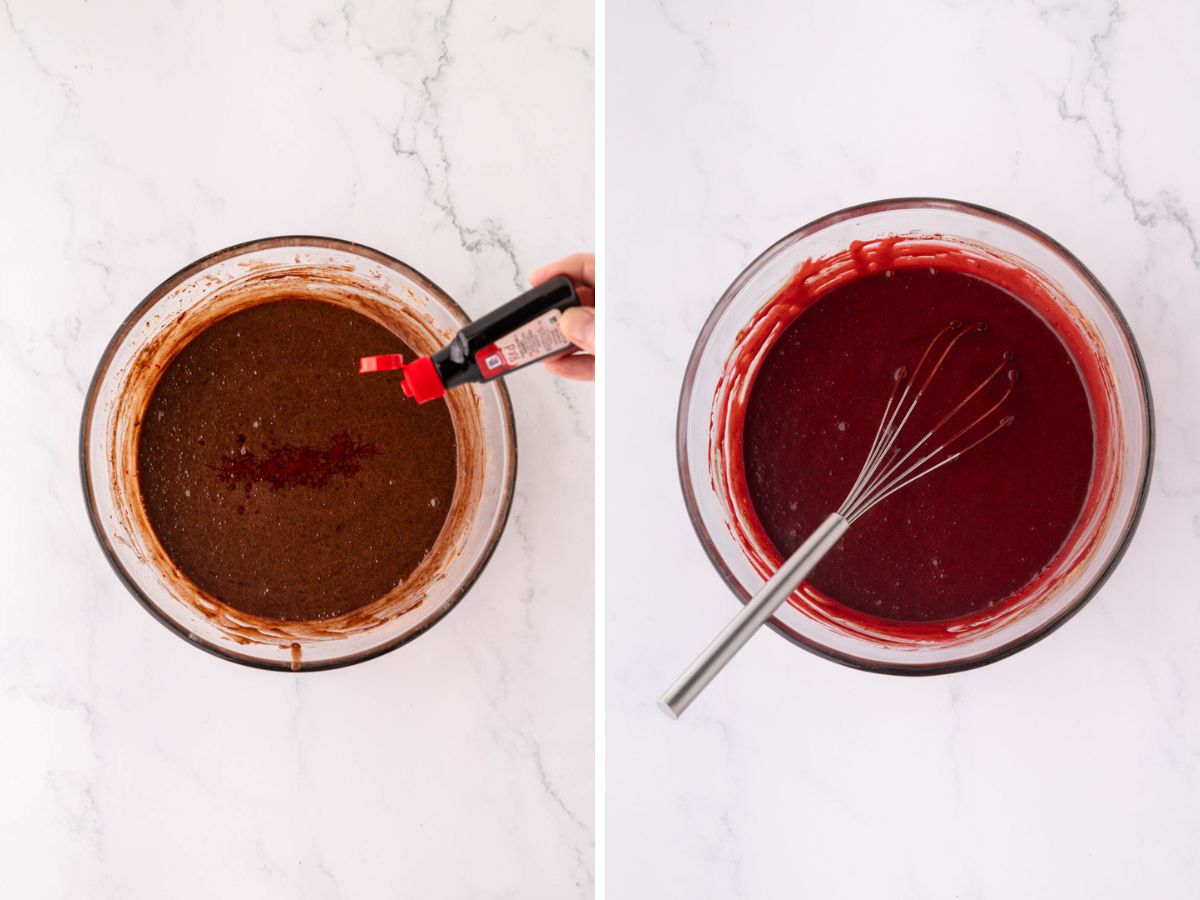
Stir in your red food coloring until the color is evenly blended.
If you’re using gel coloring, mix a bit of batter with the gel in a small bowl first, then stir that back into the main bowl to ensure it blends smoothly.
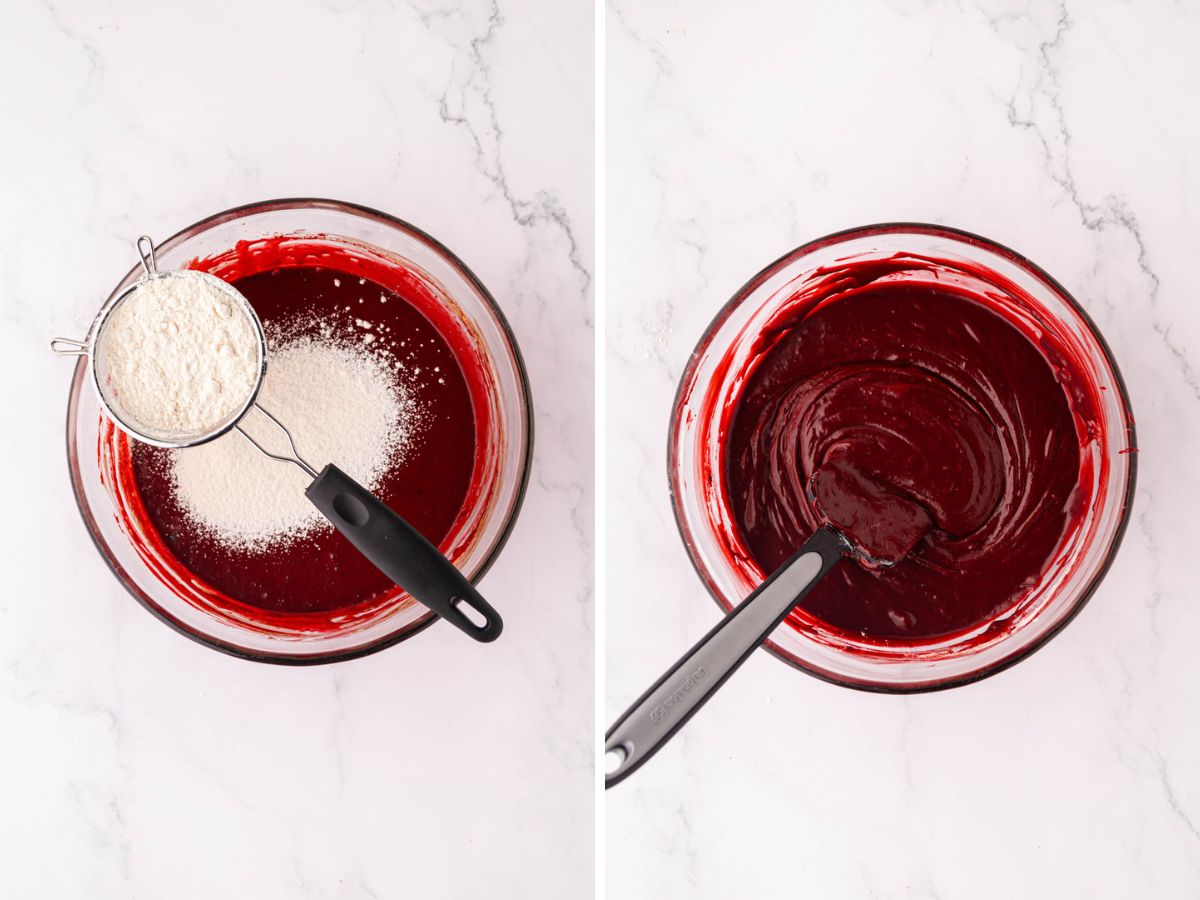
At this point, switch to a rubber spatula or wooden spoon and gently fold in the flour and salt (again, sifting helps prevent lumps). Once the flour is fully incorporated, stir in the vinegar until everything is well combined.
Step 3 | Bake
Pour the batter into your prepared pan and pop it in the oven.
Bake for 20-25 minutes, or until a wooden skewer or cake tester inserted in the center comes out with just a few moist crumbs.
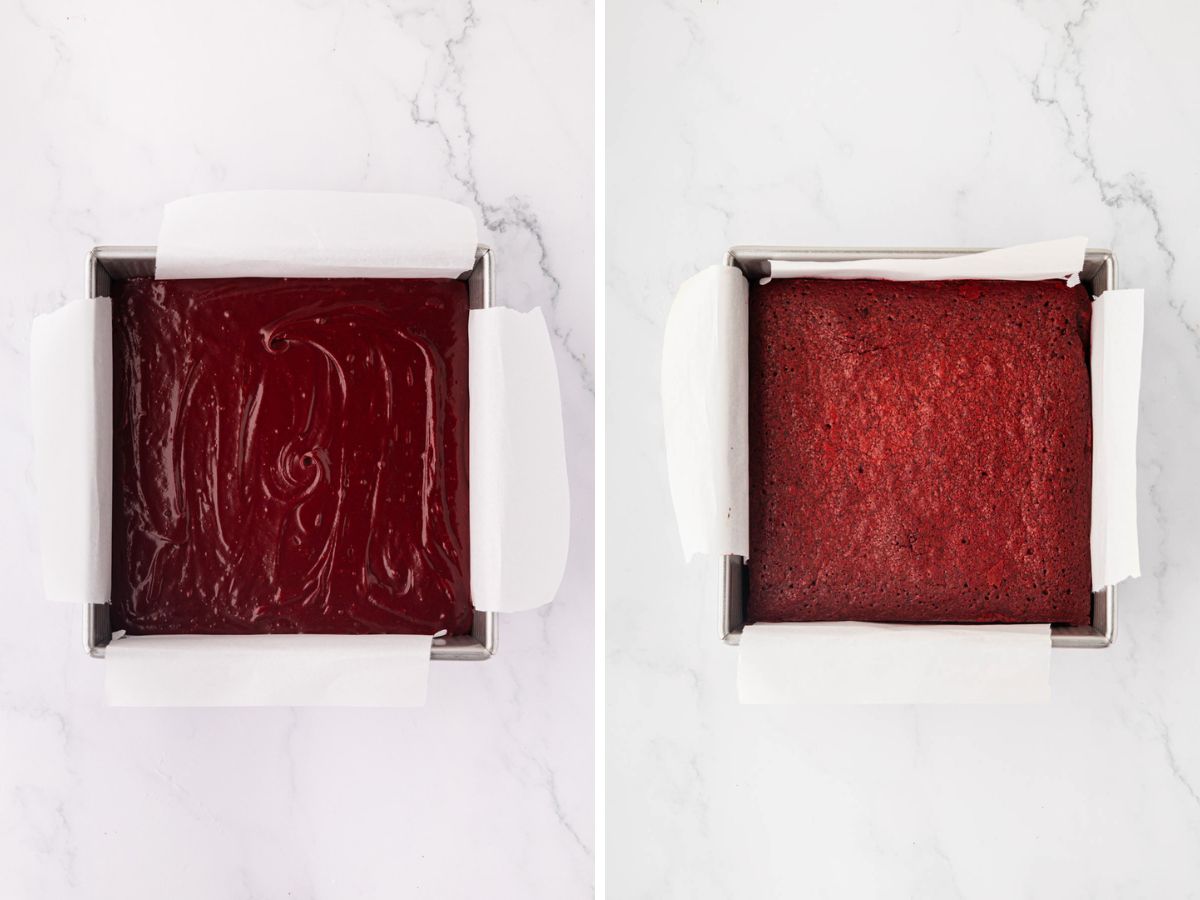
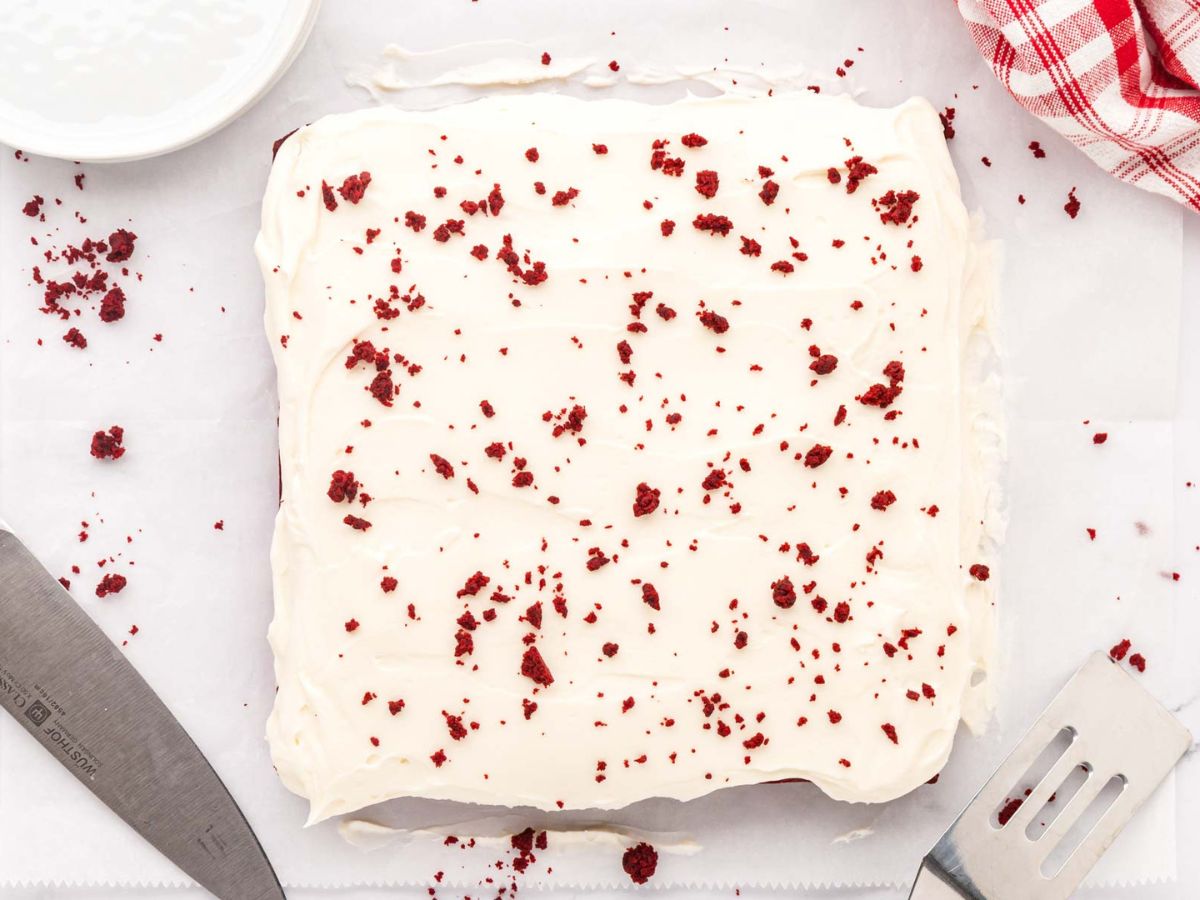
Let the brownies cool in the pan for 30 minutes, then lift them out using the parchment overhang and allow them to cool completely before frosting.
Step 4 | Add Cream Cheese Icing (optional)
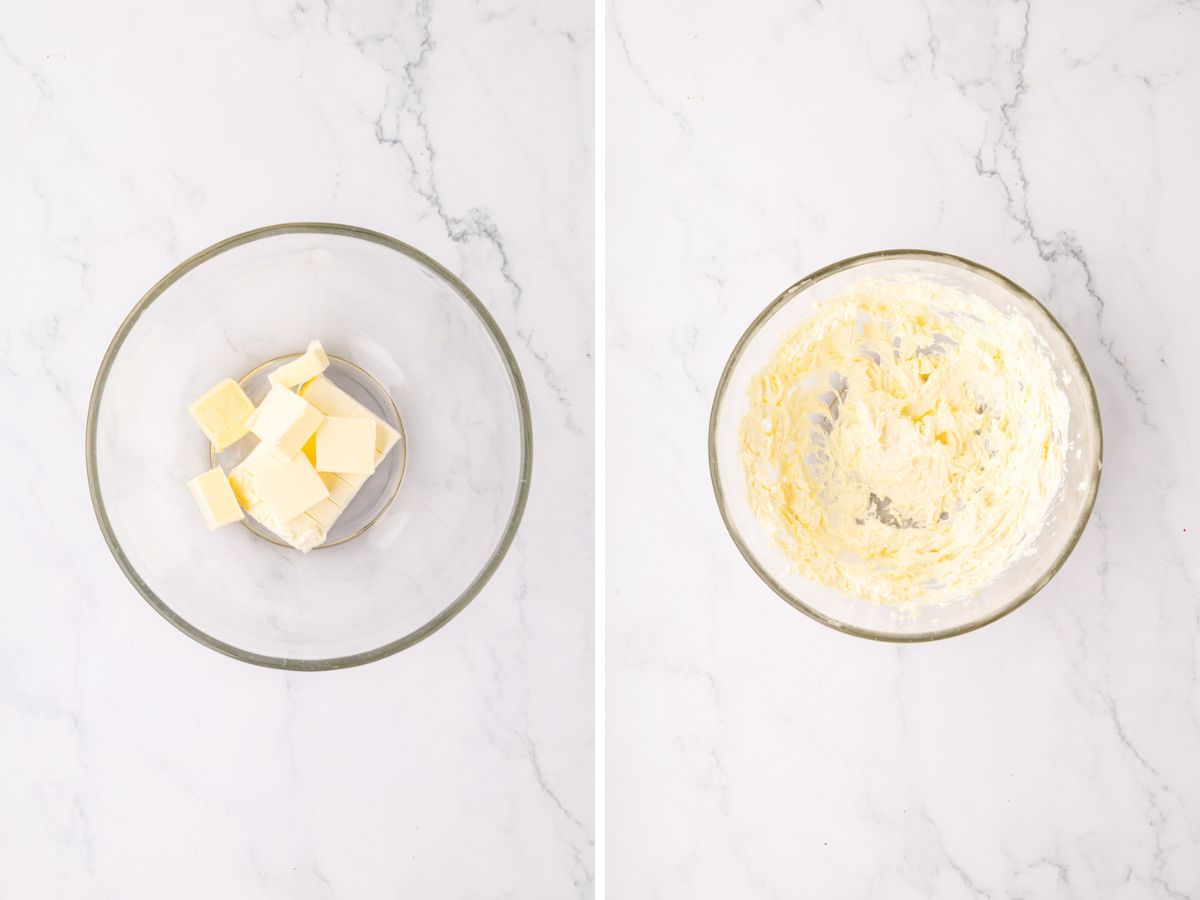
For the frosting, beat room-temperature butter and cream cheese with a mixer until smooth and creamy.
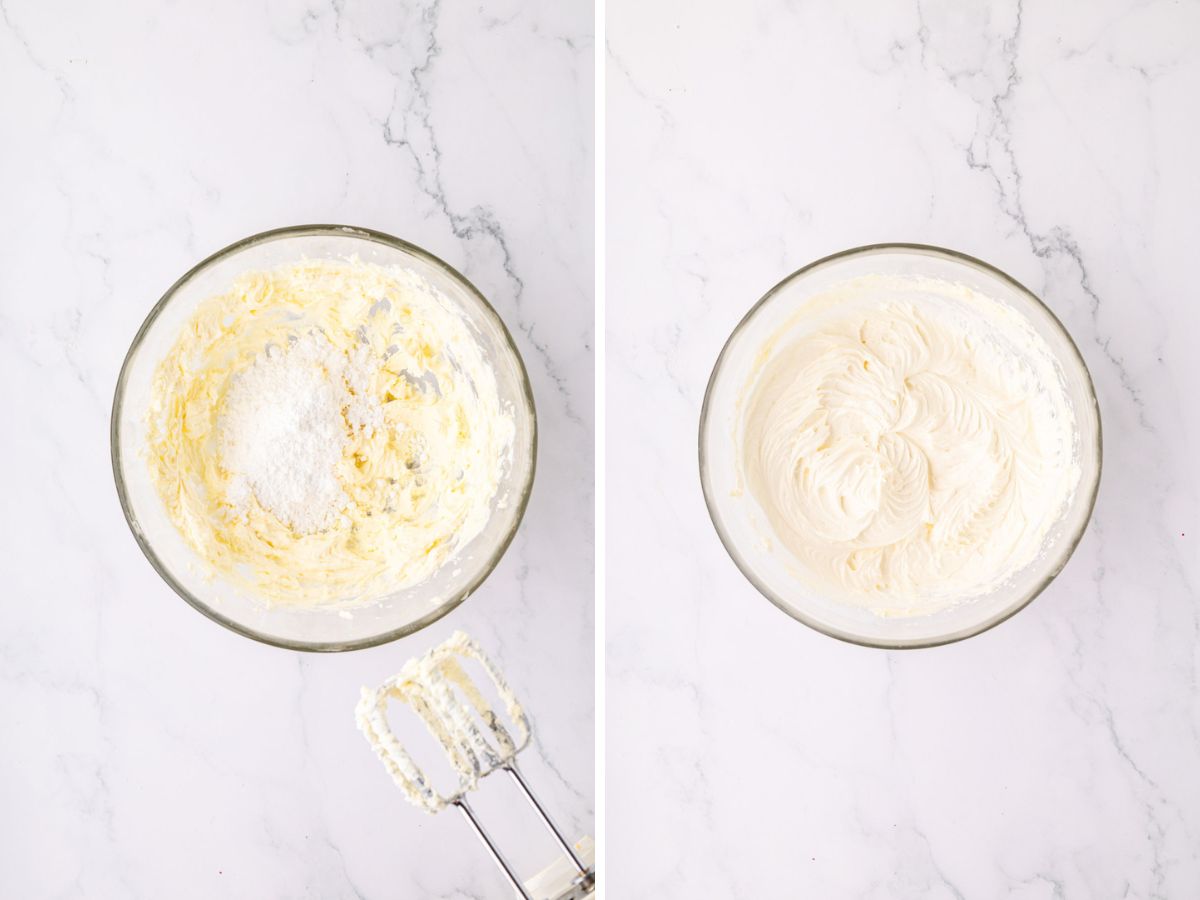
Slowly add the powdered sugar and mix until combined.
Once everything is incorporated, turn the mixer to high speed and whip the frosting for a couple of minutes until it’s light and fluffy.
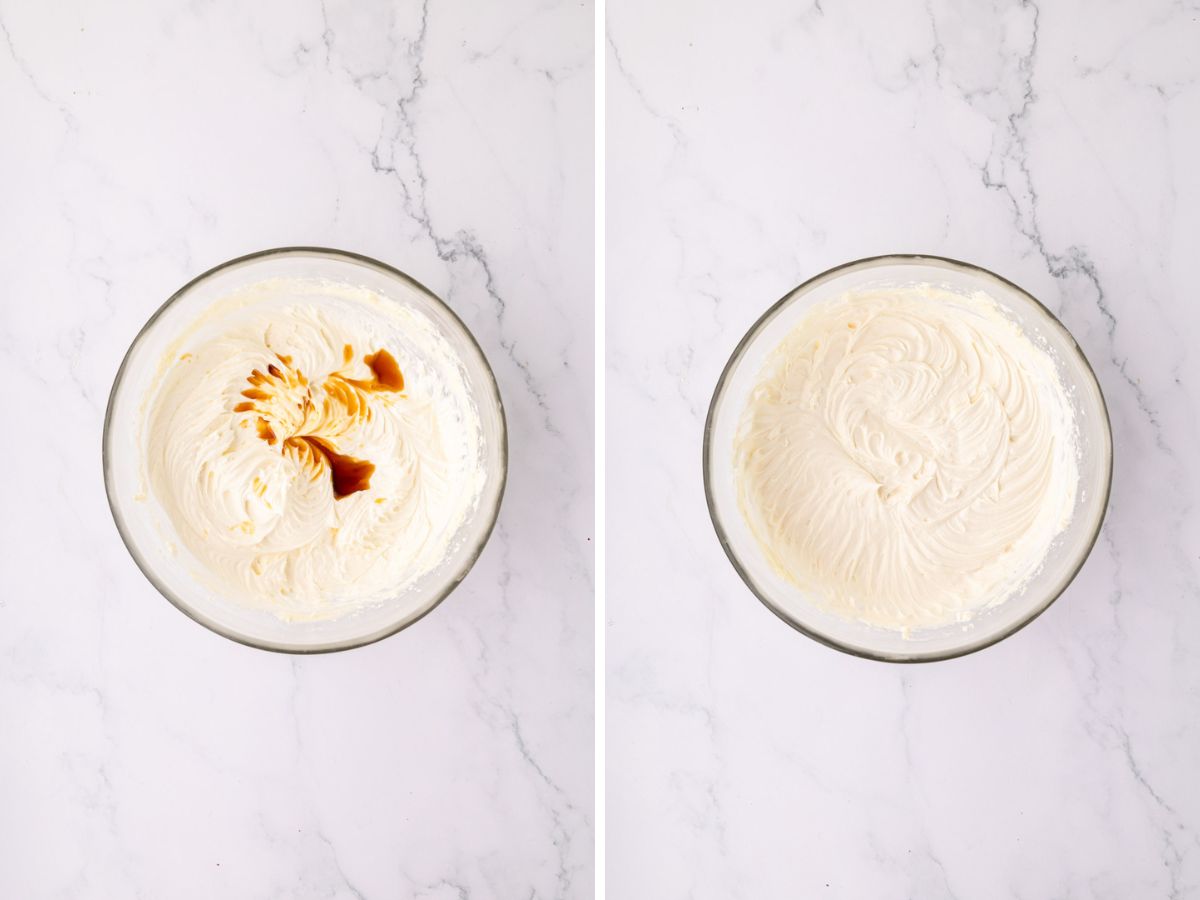
Add the vanilla and, if needed, 1-2 teaspoons of milk to adjust the consistency. Beat until everything is smooth.
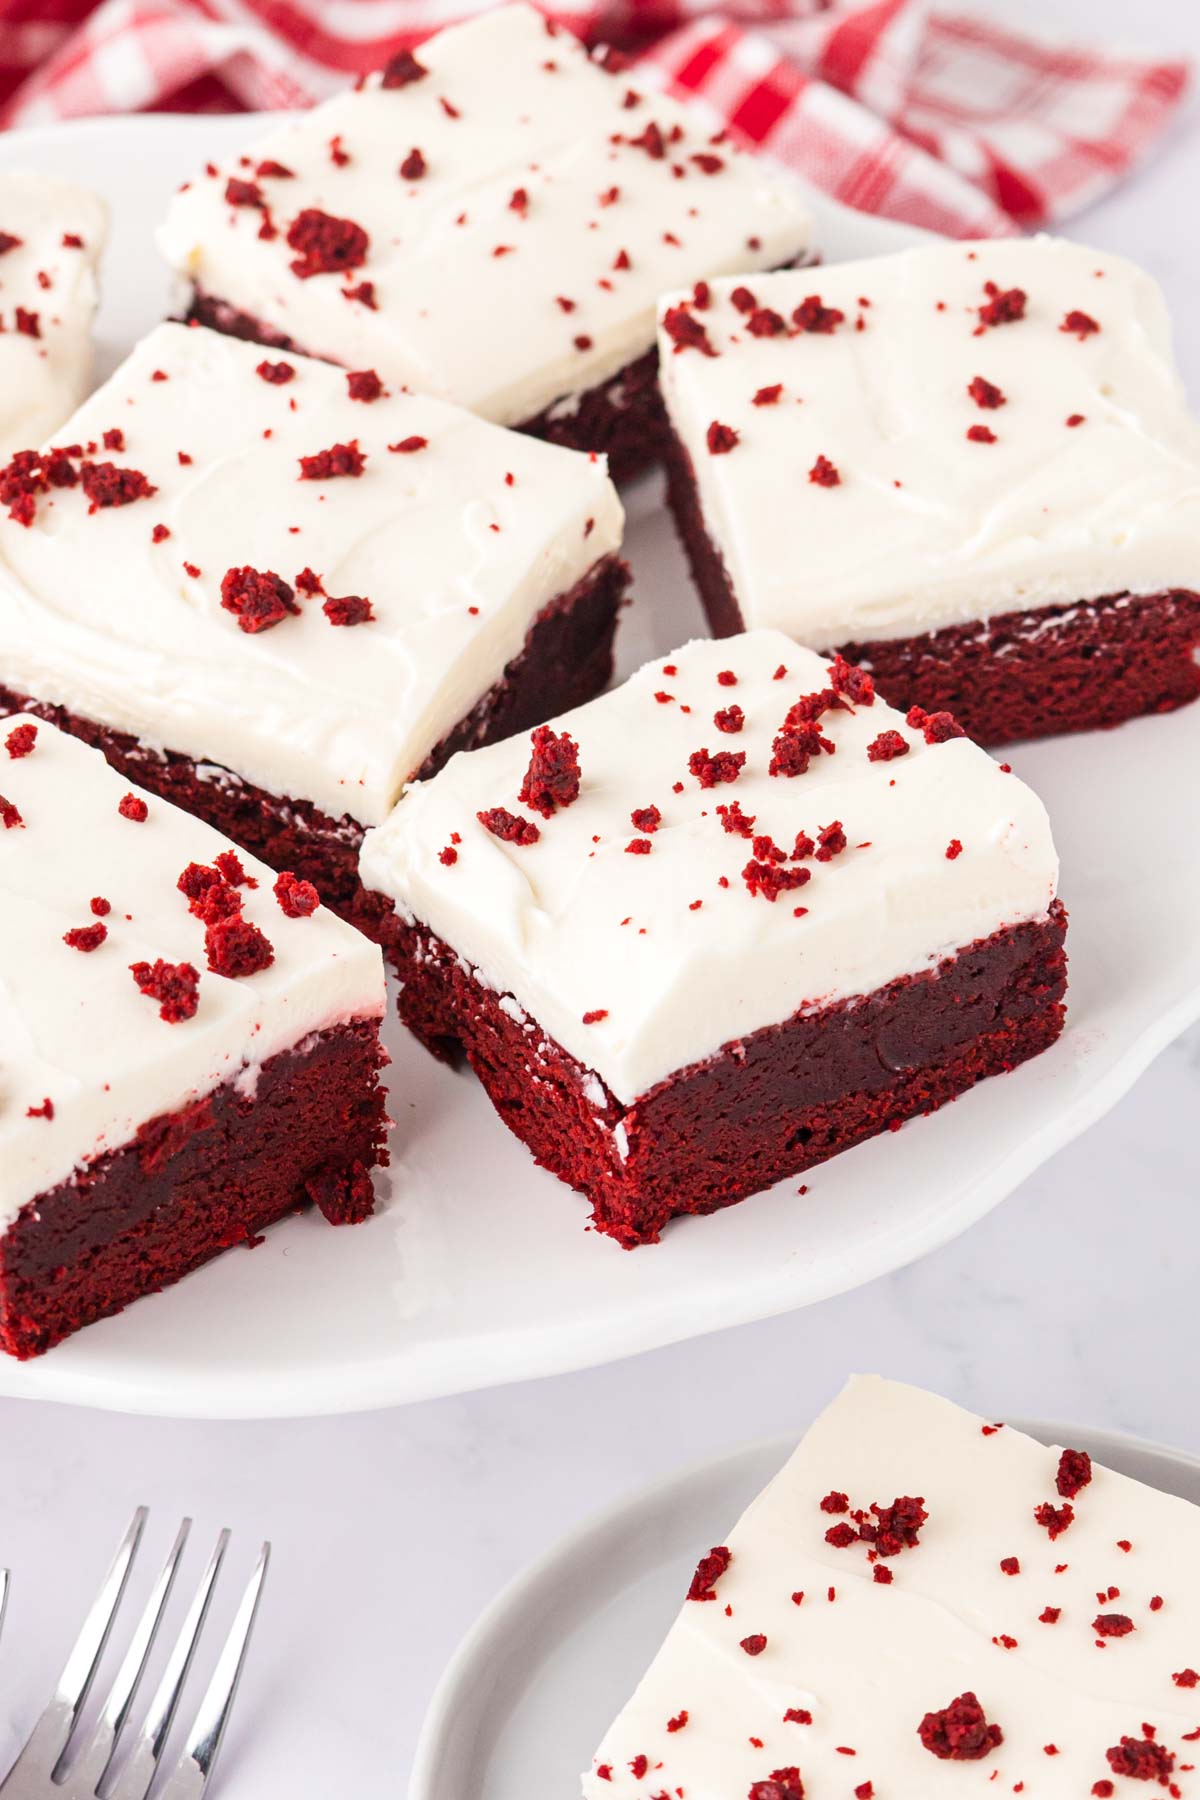
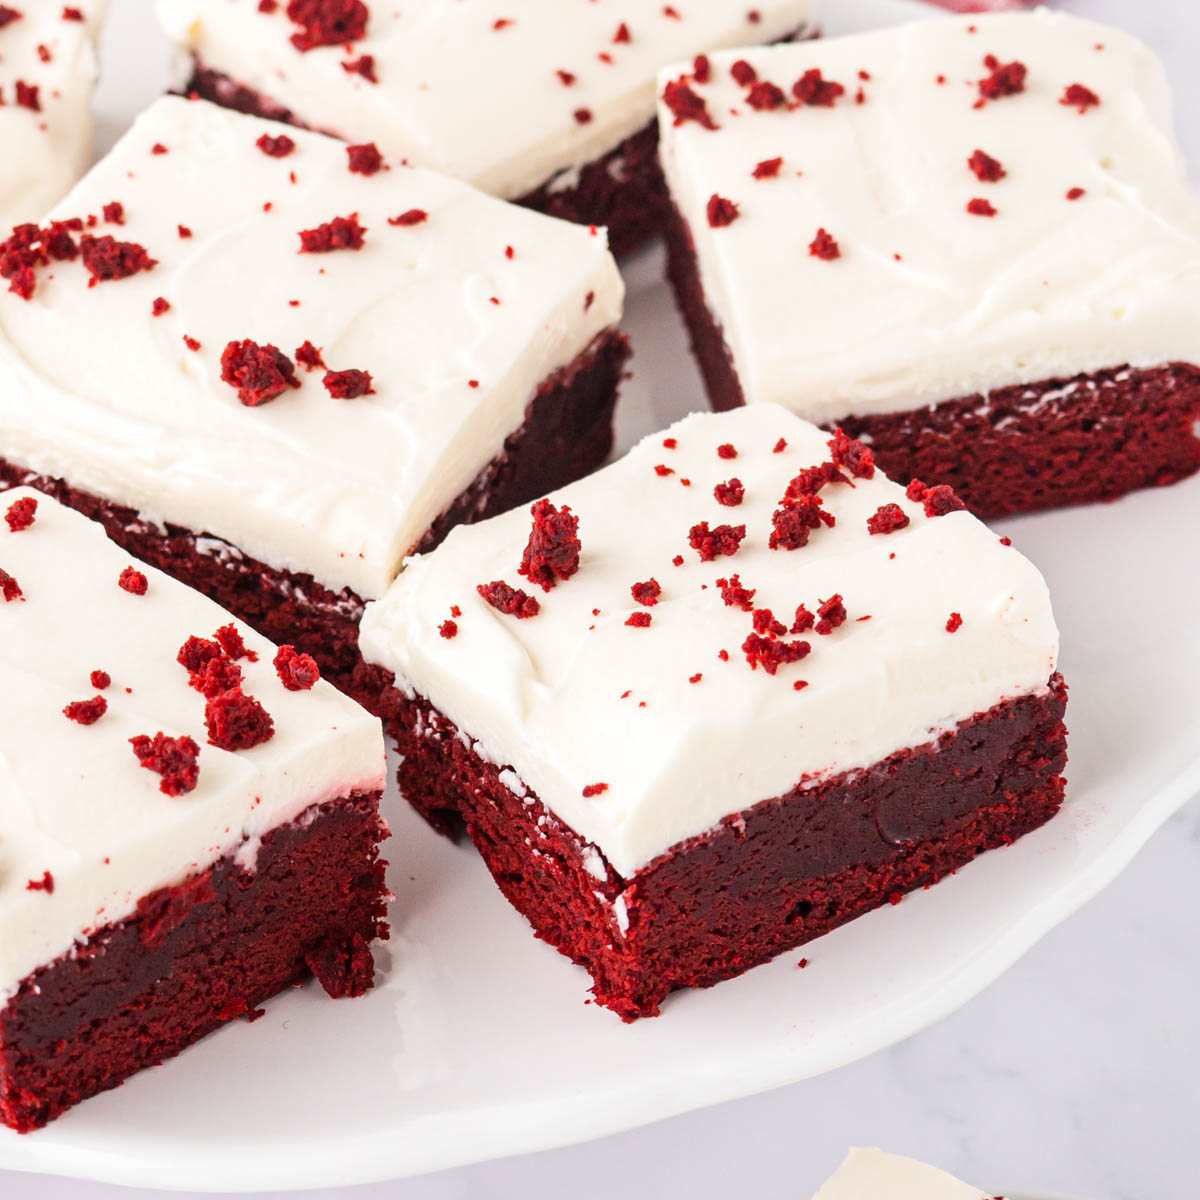
Now, spread that delicious frosting on your fully-cooled brownies, slice them up, and enjoy every bite!
Red Velvet Brownie variations
- Use green food coloring and make these for St. Patrick’s Day!
- Add 1 cup of white chocolate chips to the batter instead of frosting them.
- You can warm the brownies and serve them with a scoop of vanilla ice cream for a really sweet treat! Add a dollop of whipped cream and then drizzle with a bit of chocolate or caramel to put them over the top.
- These are also delicious as Red Velvet Brownie Cups or Bites.
- For Halloween, drizzle some red food coloring or gel icing on some edible eyeballs or Halloween eyeball candies. You can even place toy spider rings or any spooky candy.
Tips
- Do not over-mix the batter. This will add more air to the batter, making it less fudgy in texture. If you want a more cake-like brownie, really whip the eggs to incorporate more air. For a fudgy brownie brownie, lightly whip the eggs.
- Don’t overbake. This is so important if you want a chewy, fudge-like brownie.
- If your oven cooks unevenly, about 15 minutes into the cooking time, just rotate the pan for an even bake.
- Fully cool your brownies before icing them and slicing them.
- If you want an extra thick icing, I recommend making 1.5 batches of this icing.
- For perfectly sliced brownies, pop them in the freezer for 15-20 minutes before cutting. Use a sharp knife and wipe it clean between cuts for neat, even slices.
- Want to make a larger batch? Double the recipe and make it in a 9 X 13 pan.
How to Store This Recipe for Red Velvet Brownies
Storage:
- If you are not icing the brownies, they can be stored at room temperature for up to 5 days.
- If icing is used, brownies need to be stored in the refrigerator. Iced or uniced brownies can be stored in the refrigerator for up to 6 days.
Freezing:
Brownies will freeze well for up to 2 months.
- Double wrap these red velvet brownies with freezer safe wrap, or single wrap and place in a freezer-safe zip bag. Brownies may be frozen whole or in individual slices.
- Allow to thaw in the refrigerator overnight.
FAQs
Yes, you can. Use a 4-ounce bittersweet chocolate baking bar. Just chop and melt it in the microwave in 30-second intervals. Then, mix it with the sugar and butter mixture in place of the cocoa.
Using a warm, sharp blade or bench/dough scraper works great.
Let the brownies completely cool. You can even chill in the refrigerator for even more even slices.
Yes, start with about 1 ½ teaspoons and add up 3 teaspoons depending on desired color.
More Sweet Brownie Recipes
More from Soulfully Made
Hungry for more easy, home-cooked, delicious recipes?
Sign up for my free recipe club to get family-friendly recipes in your inbox each week! Find me sharing daily meal-time inspiration on Pinterest, Facebook, and Instagram.
Red Velvet Brownies
Click Stars To Rate
Ingredients
- ¾ cup butter - (1 ½ sticks)
- 1 ½ cups white granulated sugar
- 3 large eggs - room temperature
- 1 ½ teaspoons vanilla extract
- 6 tablespoons cocoa powder - sifted
- 1 ½ ounce red food coloring
- 1 cups all-purpose flour - sifted
- 2 tablespoons all-purpose flour - sifted
- ¼ to ½ teaspoon kosher salt - to taste – I used salted butter, and no salt added
- 1 teaspoon white vinegar
- 4 ounces block cream cheese - room temperature
- 4 tablespoons butter - room temperature
- 2 cups powdered sugar
- 1 teaspoon vanilla extract
- 1 – 2 teaspoons milk - (if needed to desired consistency)
Instructions
- Preheat the oven to 350℉. Line an 8-inch square cake pan with parchment paper, with some hanging over each side so that the brownies are easy to remove. If you don't have parchment pape, spray the entire pan with baking spray or butter or grease pan.
- In a large microwave-safe bowl, melt butter in 30-second increments until completely melted. (This can also be done in a 2-3 quart saucepan over low heat.) Add the sugar to the melted butter and whisk together until combined.¾ cup butter, 1 ½ cups white granulated sugar
- Add the eggs in 1 at a time and whisk until each is just incorporated. Then add in vanilla and whisk together. You want the eggs incorporated so don’t be afraid to whisk them in. Just don’t go overboard and overmix as we do not want to add too much air into the mixture as that makes the brownie cakey.3 large eggs, 1 ½ teaspoons vanilla extract
- Add the cocoa powder to the brownie batter (I tap through a sieve to avoid lumps) and whisk together gently until completely combined.6 tablespoons cocoa powder
- Add the liquid red food coloring to the bowl and mix until combined. (If using an alternate gel food coloring, take a couple of tablespoons of the batter and put it into a small bowl. Add your red gel food coloring to this bowl and mix it in until the gel is all incorporated and there are no lumps.) Then, add the mixture to the batter and mix until combined.1 ½ ounce red food coloring
- Switch from a whisk to a rubber spatula or wooden spoon, and fold the flour and salt into the batter (I tap through a sieve to avoid lumps).1 cups all-purpose flour, 2 tablespoons all-purpose flour, ¼ to ½ teaspoon kosher salt
- When there are no more lumps of flour, add the vinegar and mix in well.1 teaspoon white vinegar
- Pour the brownie batter into the prepared cake pan and bake for 20 – 25 minutes or until a wooden skewer or a cake tester comes out with just moist crumbs on it.
- The brownies should be cooled in the pan for 30 minutes. Then, remove them from the pan to cool completely before frosting them with the cream cheese
- In a stand mixer or with an electric mixer, beat the room-temperature butter and cream cheese together until smooth and combined.4 ounces block cream cheese, 4 tablespoons butter
- Add the powdered sugar and mix in slowly, once just combined, turn your mixer onto high speed and beat for a few minutes until light and fluffy.2 cups powdered sugar
- Add the vanilla and beat until incorporated.1 teaspoon vanilla extract
- Add 1 to 2 teaspoons milk(optional), if needed, to achieve the desired consistency, and beat until smooth.1 – 2 teaspoons milk
- Spread the cream cheese icing on the fully cooled brownies and slice to serve.
Notes
Storage:
- If you are not icing the brownies, they can be stored at room temperature for up to 5 days.
- If icing is used, brownies need to be stored in the refrigerator. Iced or uniced brownies can be stored in the refrigerator for up to 6 days.
Freezing:
Brownies will freeze well for up to 2 months.- Double wrap these red velvet brownies with freezer safe wrap, or single wrap and place in a freezer safe zip bag. Brownies may be frozen whole or in individual slices.
- Allow to thaw in the refrigerator overnight.
Want to Save this Recipe?
By submitting this form, you consent to receive emails from Soulfully Made.
Made these the other day. Let the brownies cool almost to room temperature and added the frosting. At the time, first brownie I thought too rich too much extract in the frosting. I put them in the fridge and sat over night. 12/10 patience is a virtue
Thank you, Dylan! I am so glad you enjoyed them!!
These brownies are insane!!!!! You know you are eating a brownie – they are dense and delicious. The frosting is perfect. I made a second batch for my neighbor as a thank you for watching our dog. She wants to know when she can watch the dog again.
Thank you so much, Paula! I am so happy to hear you loved them as much as we do! You sure know the way to keep those neighbors happy! 😉
Looking forward to mixing up a batch of these for this coming Valentine Day 2024.
I plan on using Cream Cheese Flavored Chocolate Chips in mine.
Thank you!
I love this recipe and I receive compliments each time I bake them for someone. Moist and Delicious, the brownie taste is there.
This recipe is a 10
Thank you so much, Jennifer! I am so glad you enjoy them and share them!
I am a terrible baker, I made these brownies and followed the exact recipe and they were fantastic! My boys didn’t even believe I made them!! ?? thank you! Saving this recipe!
Thank you, Ellen! I am so glad they were a hit and so happy to hear you will be making them again and again.