
This post may contain affiliate links. Please read our disclosure policy.
There is something about grilled corn on the cob that just feels like summer. The smell coming off the grill, butter melting the second it hits a hot ear, a little salt and seasoning making something so simple taste that good. It is the side dish people reach for first, every single time.
The best part is that it is genuinely easy once you know what you are doing. A little prep, the right heat, and a few minutes of attention at the grill is really all it takes. Whether you are feeding a crowd at a backyard cookout or just throwing a few ears on alongside dinner, this guide covers everything you need to get it right.
Growing up, one of our favorite fair foods was always the grilled corn. You could top it just about any way you wanted, and there was something special about standing there with butter dripping and seasoning on your lips, deciding between classic or something a little more adventurous. That tradition has followed us right into our own backyard, especially in the summer when the local Florida corn is at its very best.
We can get corn here year-round, but there is nothing quite like that fresh summer crop. Sweet, tender, and full of flavor straight off the grill, it does not need much. A little butter and the right seasoning, and it becomes the side dish that steals the show every single time.
Why You’ll Love This Recipe
Grilled corn is one of those sides that works for just about any occasion, from a quick weeknight dinner to a full backyard cookout spread. Here is why it earns a permanent spot on the menu all summer long.
- Three methods, one guide. Husk-on, direct on the grates, or wrapped in foil. Each gives you something a little different, and this guide walks you through all three so you can choose what fits your night.
- The flavor is unbeatable. A hot grill does something to fresh corn that no other cooking method can match. A little char, a little sweetness, and all that natural flavor comes forward in the best way.
- The topping options are endless. Classic butter and salt, bold Cajun, Old Bay, a full elote-style finish, or even a little cinnamon sugar. Grilled corn takes every direction beautifully.
- Easy to scale. Feeding two or twenty, corn on the grill fits right alongside whatever else you are already cooking without any extra equipment or complicated timing.
- Great corn starts at the store, farmstand or farmers market. Once you know what to look for, picking the right ear makes everything else fall into place. This guide covers that too.
How to Choose Fresh Corn on the Cob
Most grilled corn recipes start at the grill. This one starts at the store, because the best ear of corn you will ever cook is the one you picked right in the first place.
Here is what to look for before you get home.
- The husks: Look for bright green, tight, and slightly damp leaves. Pale yellow, dry, or cracked husks are a sign that the corn has been sitting too long. Pass on those.
- The Silks: The silky threads at the top should be pale yellow, light green, or golden brown and slightly sticky to the touch. Dry, black, or slimy tassels mean the corn is past its prime.
- Check for pests: Give the top a quick look for small brown holes. Those are signs of insects and are worth skipping.
- Pick it up: A good ear of corn should feel heavy and solid for its size. That weight means moisture, and moisture means juicy kernels on the grill.
- The squeeze test: Gently squeeze the middle of the ear through the husk. It should feel firm all the way through with no soft spots or squishy patches. You can feel whether the kernels are plump and packed without peeling anything back.
Ingredient Notes

- Fresh corn on the cob: The star of the show. The fresher the ear, the sweeter and more flavorful your corn will be right off the grill. Summer corn at peak season needs very little help.
- Butter: Real butter is the classic finish here. It melts into every kernel and carries whatever seasoning you put on beautifully. For dairy-free, a good plant-based butter works just as well.
- Olive oil: Used for direct grilling without husks. A light coat keeps the kernels from drying out and helps them pick up even color on the grates.
- Salt and pepper: The baseline for every method. Salt brings out the natural sweetness of the corn and makes every topping taste better.
See the Topping Ideas section below for seasoning options and flavored butters.
How to Grill Corn in the Husk
✱ Below shows step-by-step photos and instructions. For the complete recipe, along with ingredient amounts, scroll down to the recipe card.
This is the method most people reach for, and for good reason. The husk acts as a natural steamer, keeping the kernels juicy and tender while still letting a little smoky grill flavor sneak through. It is the best method when you want that classic, sweet, full-flavored ear of corn.
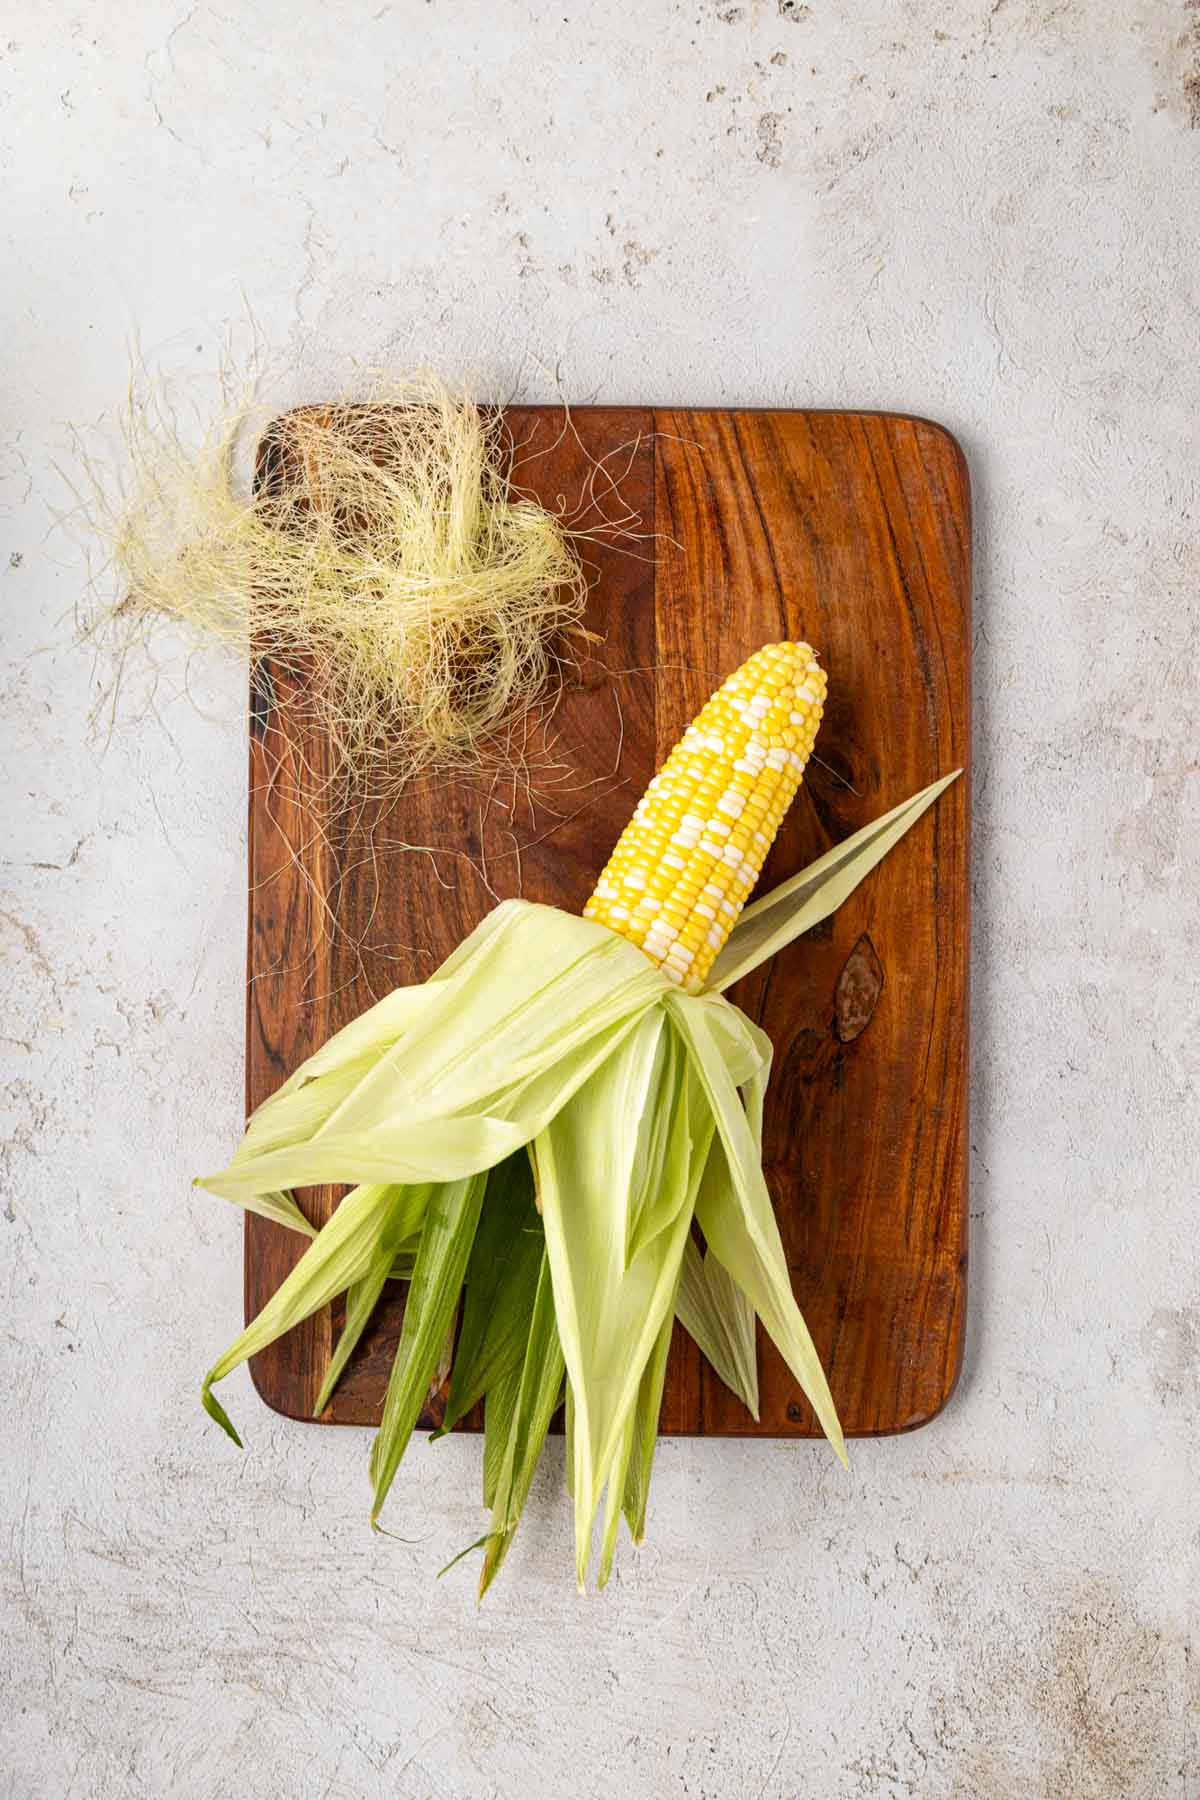
Step 1 | Prep the Corn
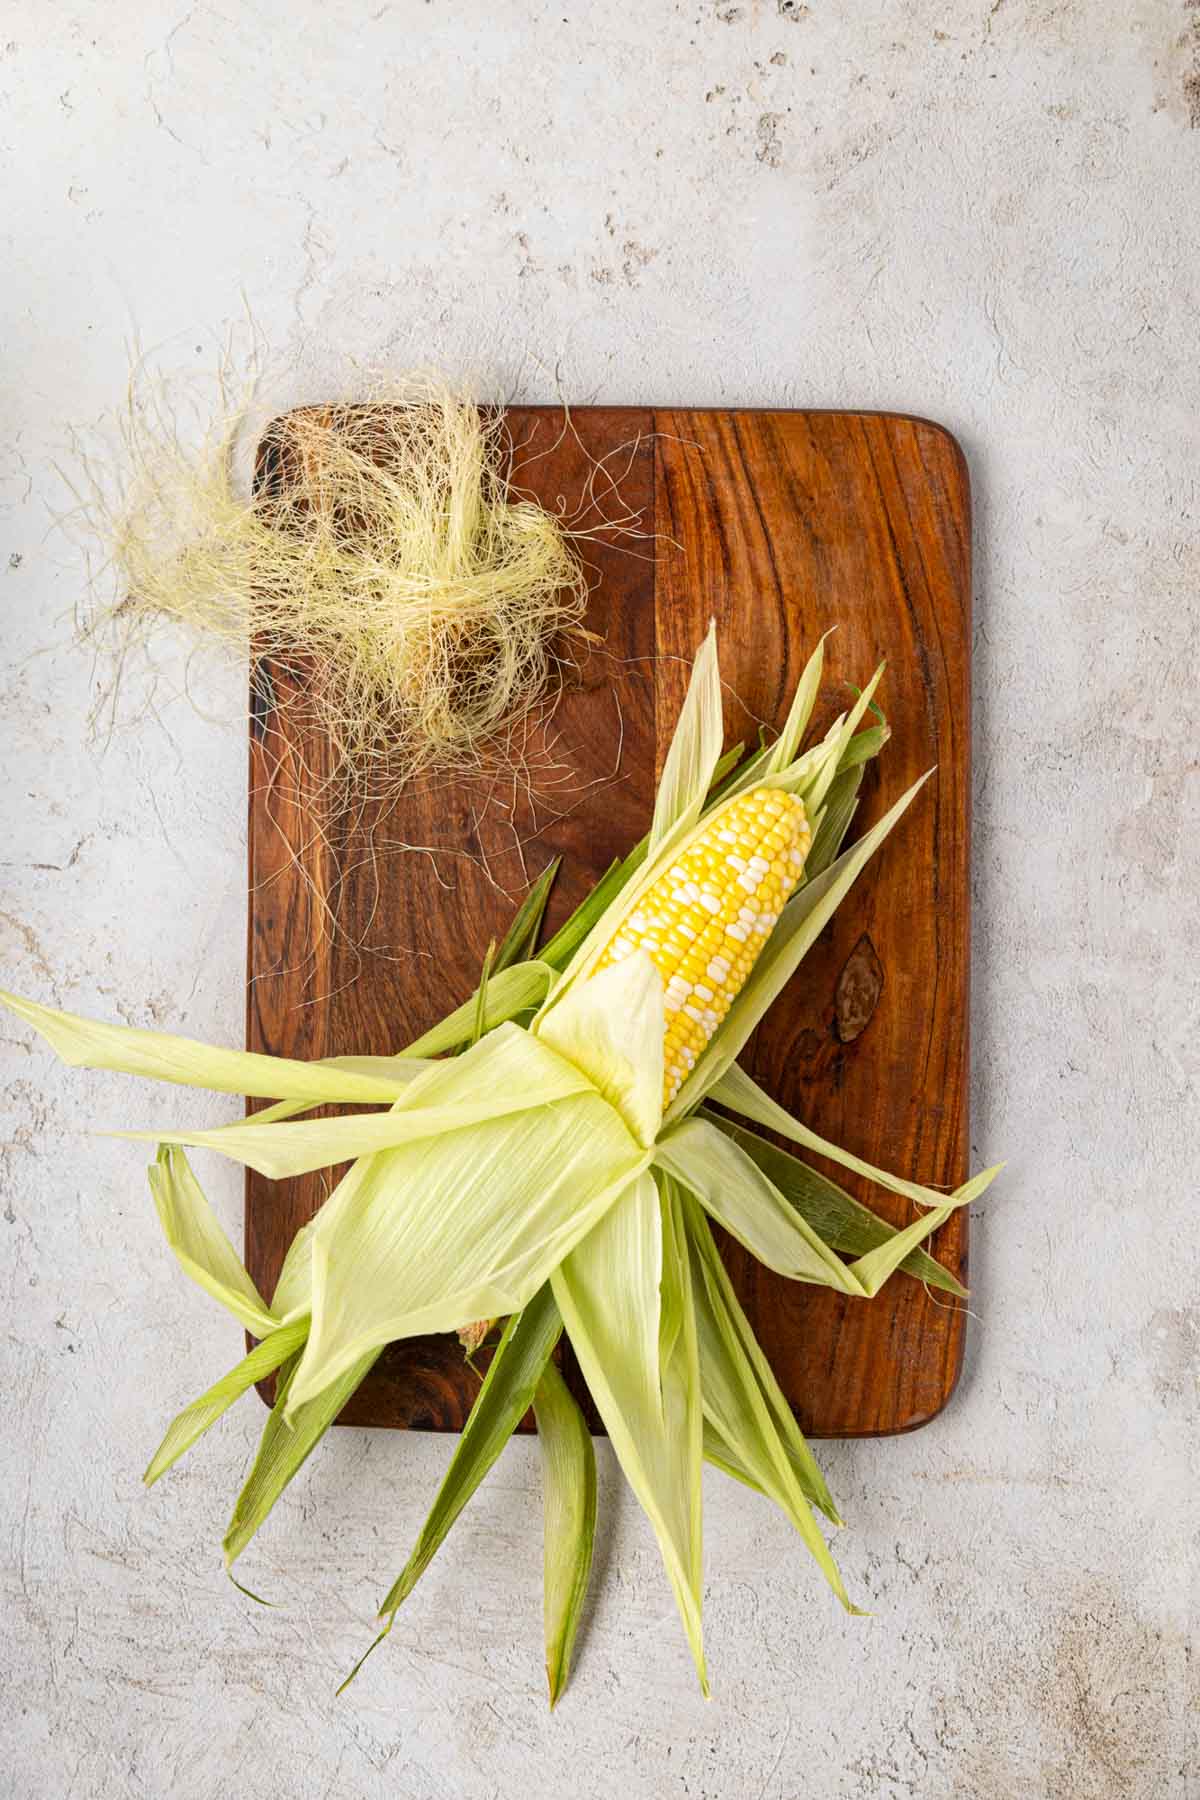
Peel back the outer layers of husk without detaching them from the base of the cob. Pull out all the silk strands. Get every bit you can. Any silk left behind will cook onto the kernels and is no fun to eat.

Give the ear a quick rinse under cool water to remove any dirt or stubborn silks. You can use your fingers or a light brush if needed.
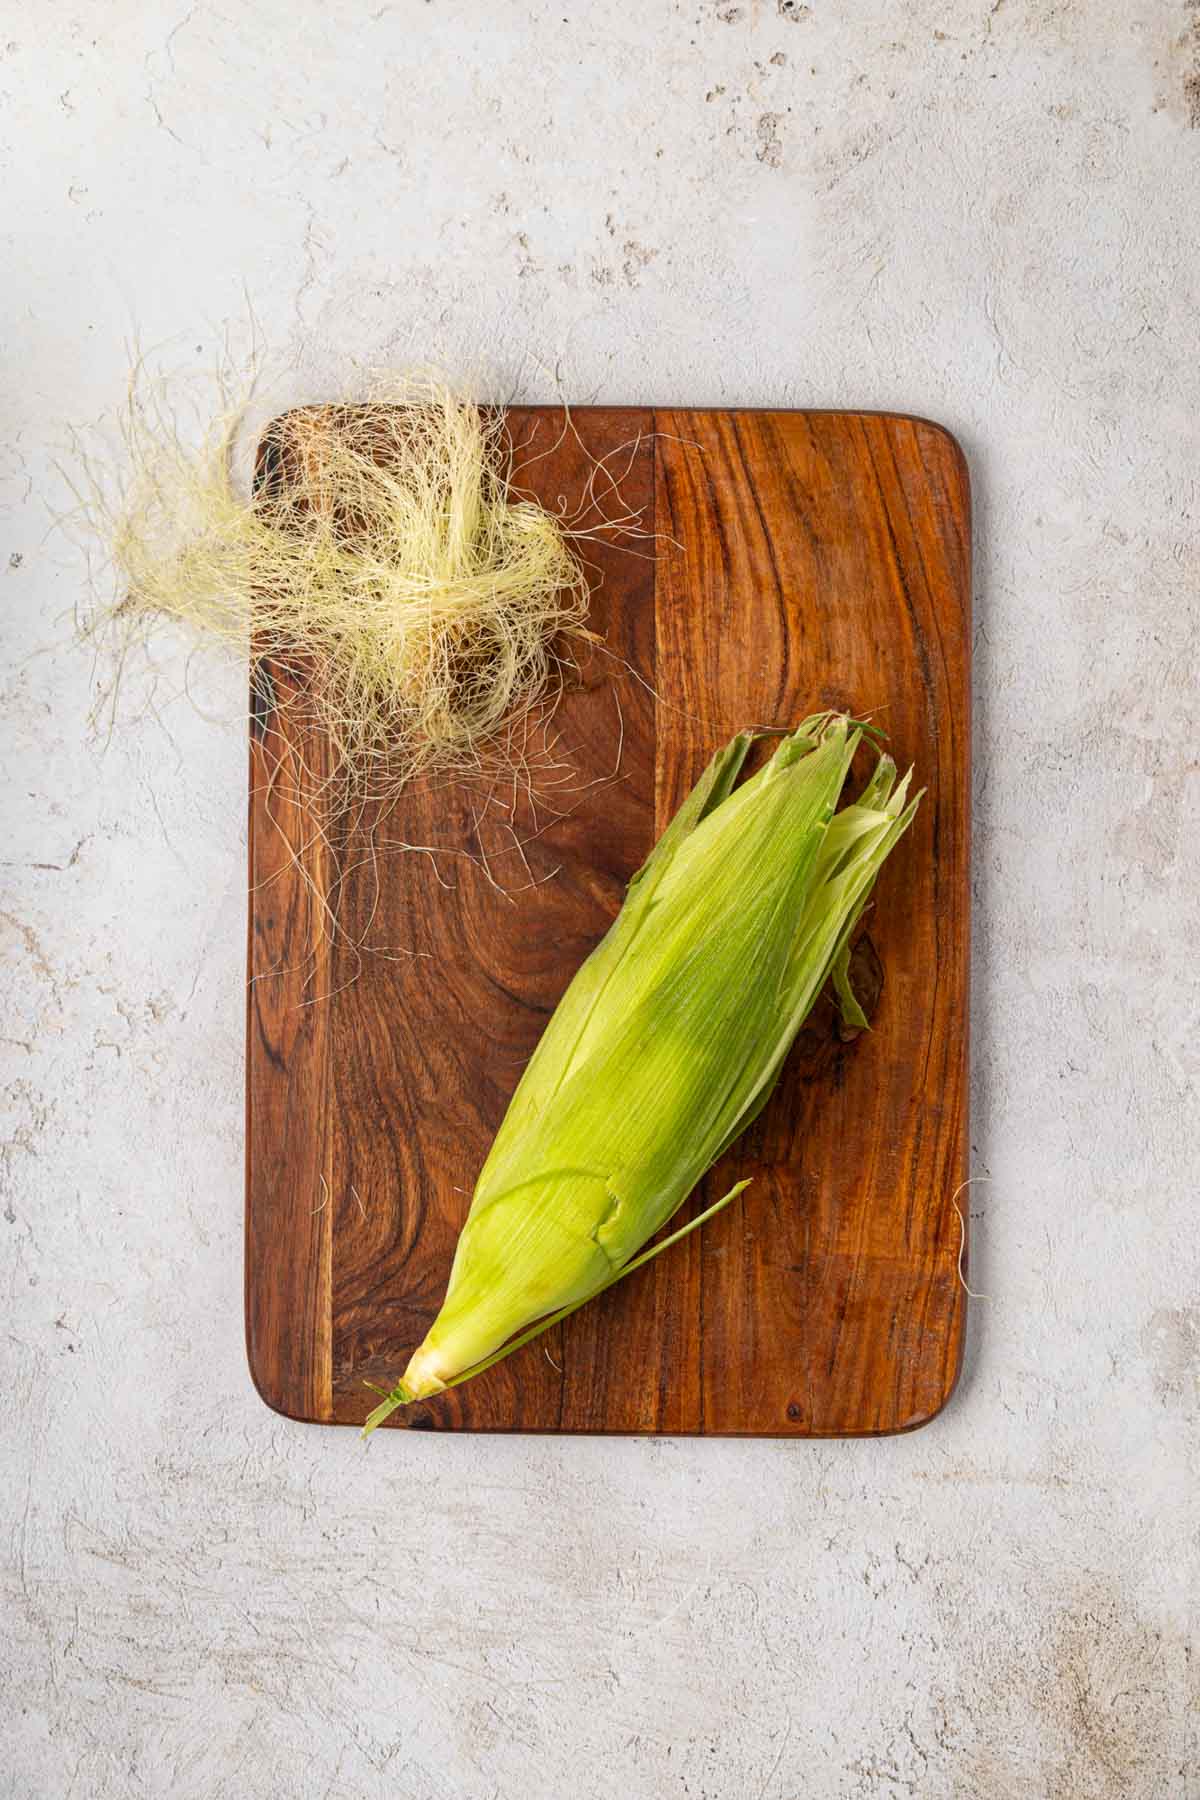
Once the silk is cleared, fold the husks back into place to cover the corn completely.
Step 2 | Soak
Submerge the cobs fully in a large bowl or pot of cold water. If they float, use a plate or heavy bowl to weigh them down. Soak for a minimum of 30 minutes.
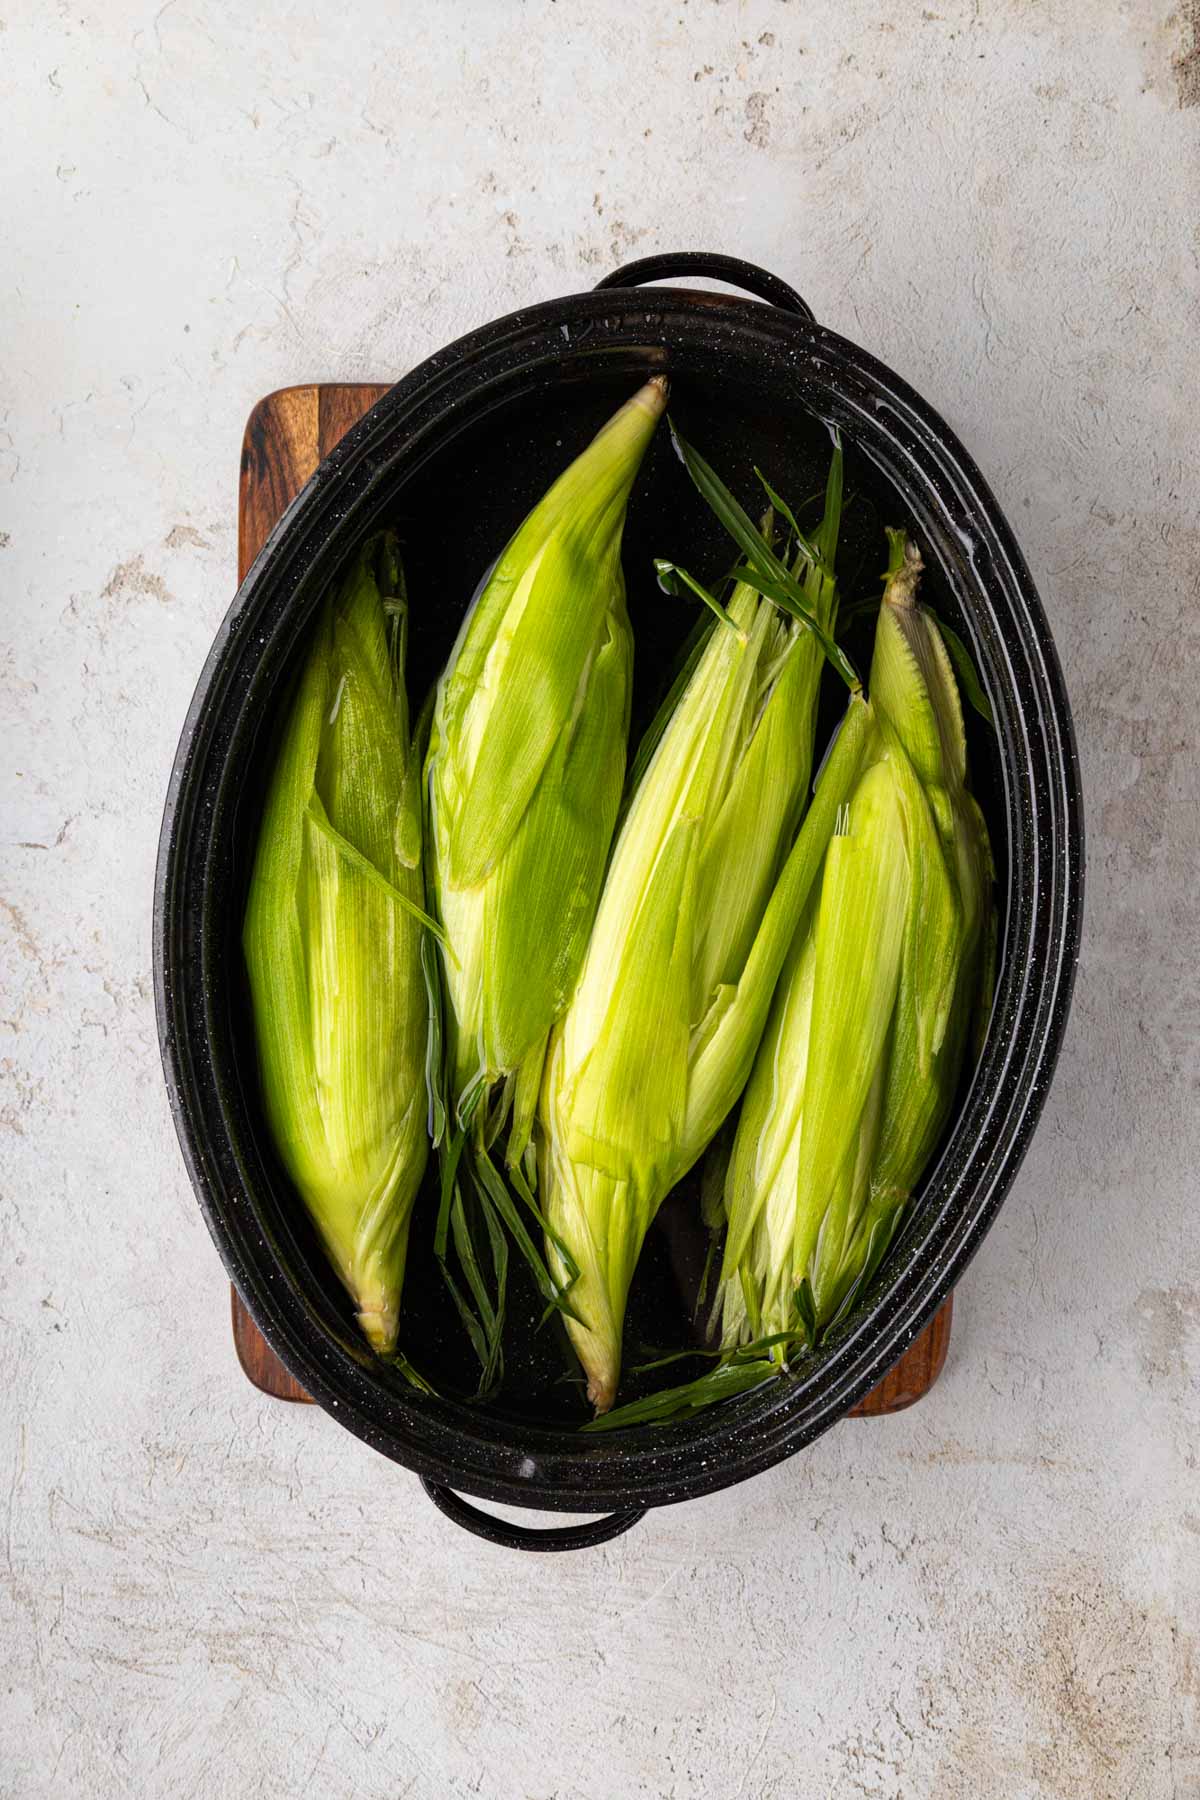
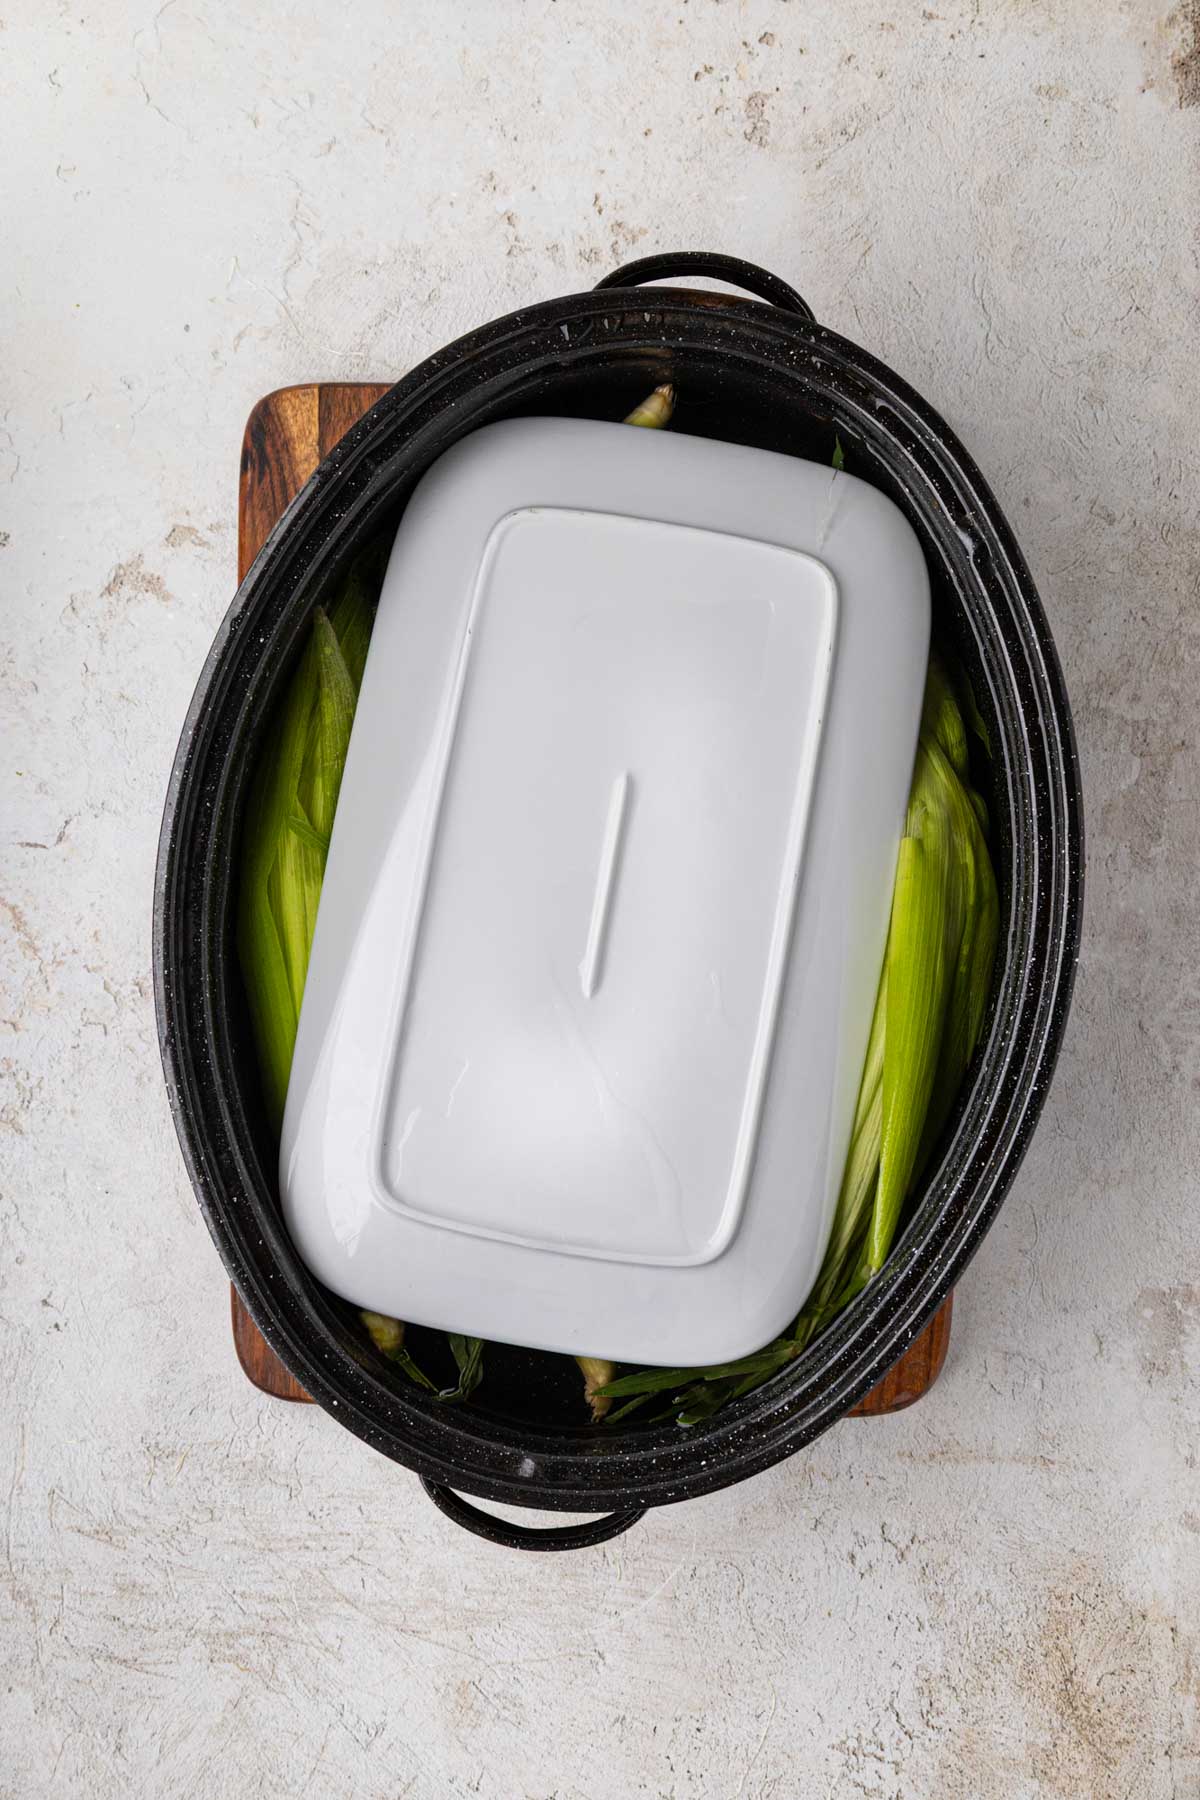
For the best results and the most moisture, soak up to 8 hours. Fully saturated husks create more steam inside and protect the corn from drying out on the grill. Do not skip this step. Dry husks can catch fire.
Step 3 | Preheat the Grill
Preheat your grill to medium-high heat, around 375°F to 400°F. Give it a full 10 to 15 minutes to come up to temperature. A properly preheated grill means even cooking from the start.
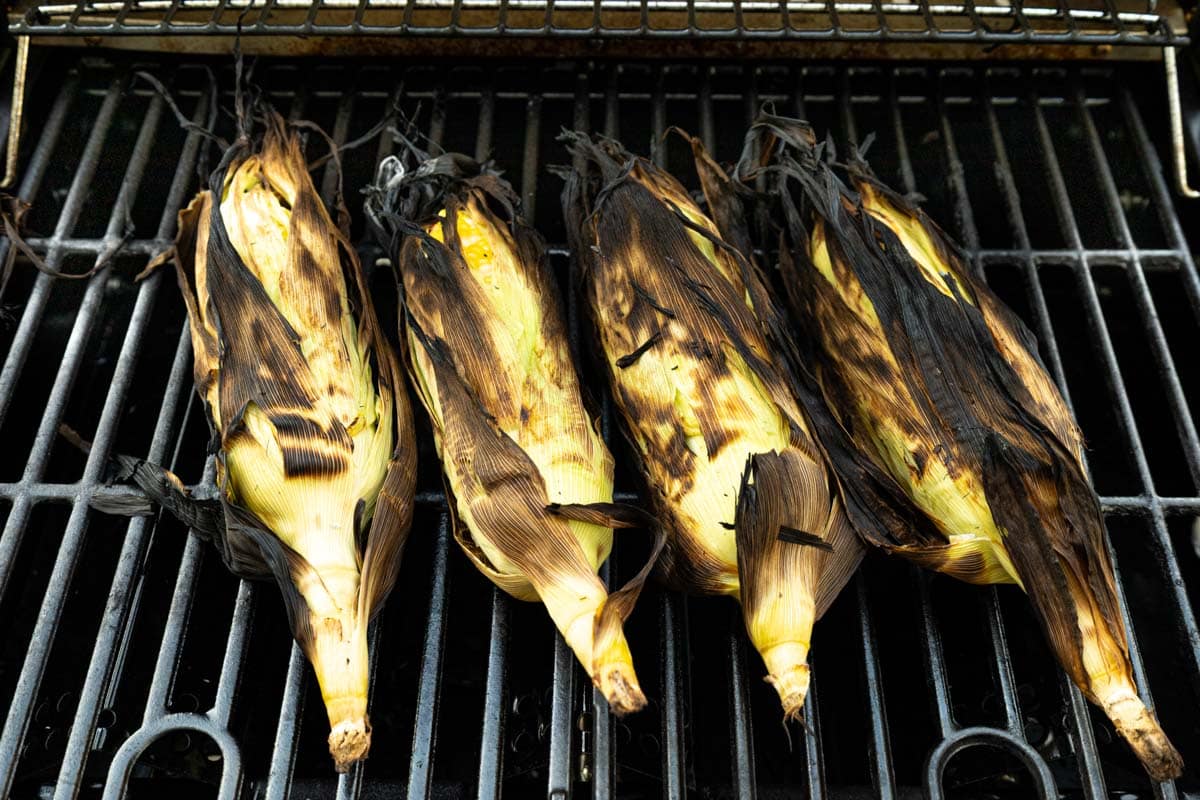
Step 4 | Grill
Shake the excess water off each cob and place them directly on the grill grates. Close the lid and cook for 15 to 22 minutes, turning every 5 minutes so the husks char evenly on all sides.
The outside will darken and char, which is exactly what you want. That char means the inside is steaming.
To check for doneness, peel back a small section of husk near the tip and look at the kernels. They should be plump, glossy, and bright yellow. Pale or slightly shriveled kernels need a few more minutes.
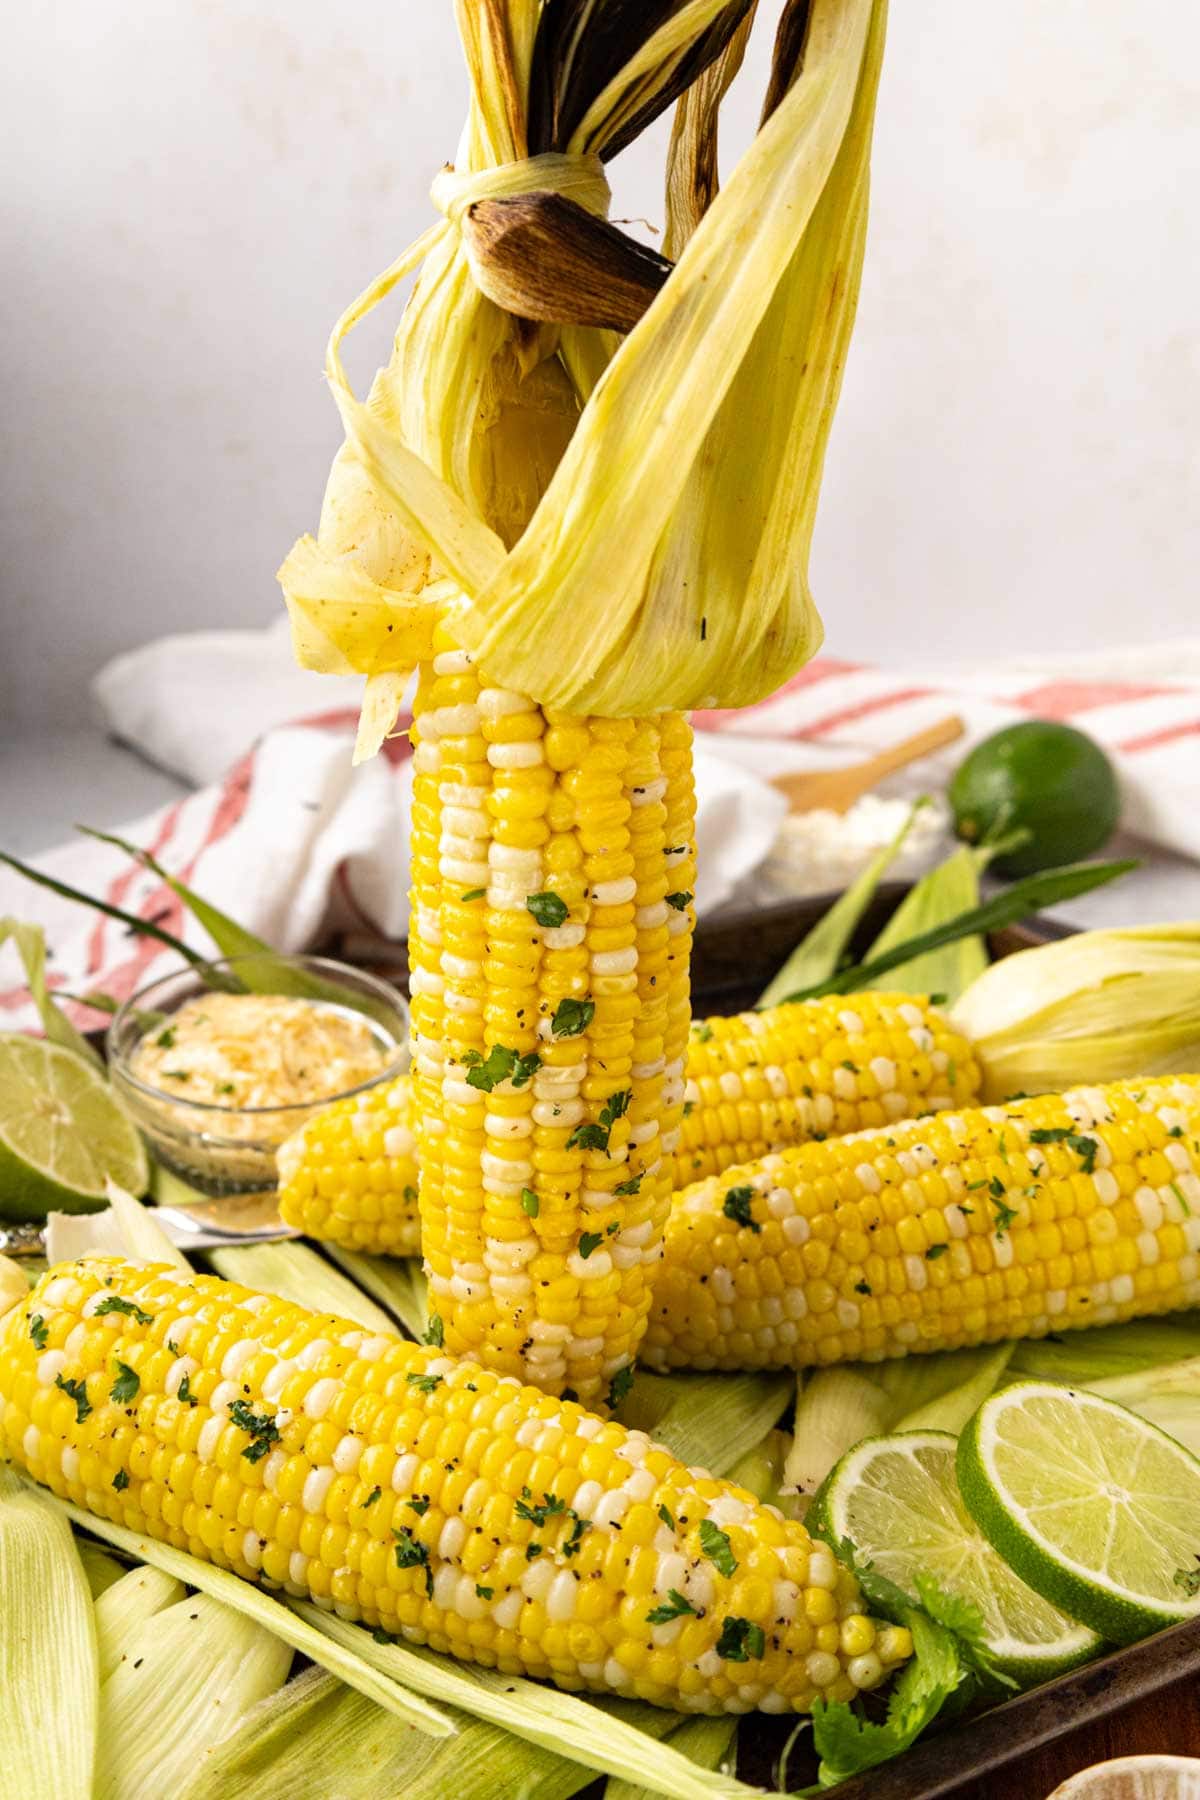
Step 5 | Rest and Peel
Remove the corn from the grill and let it rest for 5 minutes before peeling.
The husks hold a lot of heat and steam, and that short rest makes them easier to handle and pulls away more cleanly.
Any stubborn silk can be wiped off with a clean kitchen towel.
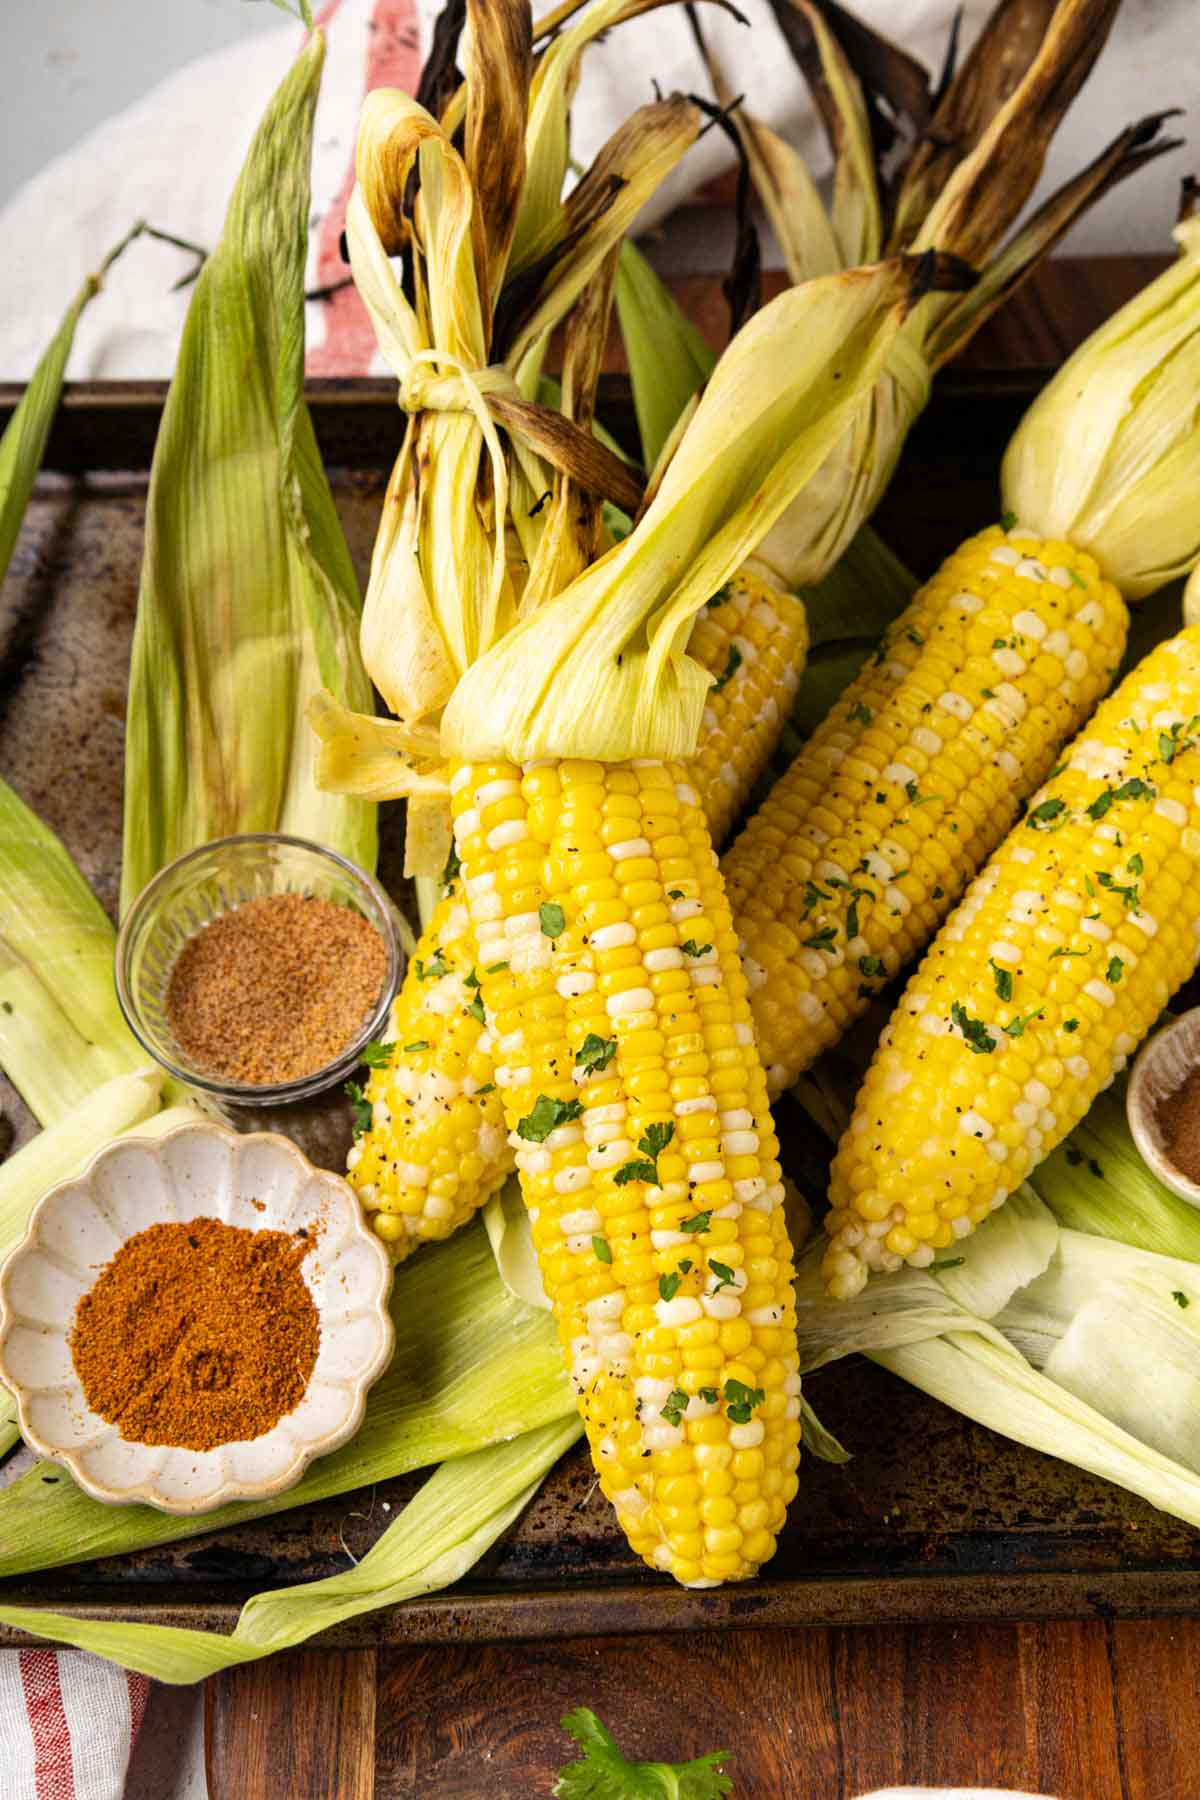
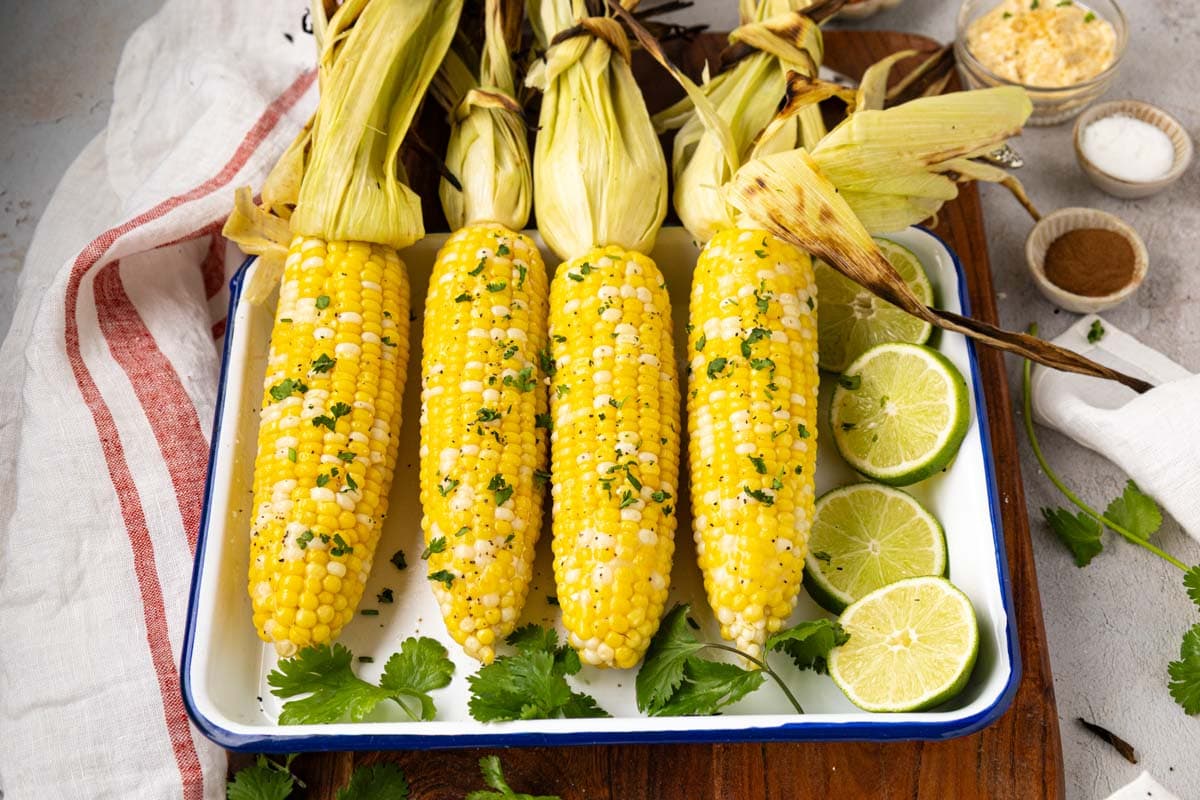
Step 6 | Top and Serve
Top with your choice of butter or seasoning while the corn is still hot.
See the Topping Ideas section below for all the options.
How to Grill Corn Without the Husk (Direct Grill)
This is the method for when you want real char and a stronger smoky flavor. The kernels make direct contact with the heat, which gives you those beautiful grill marks and a slightly more caramelized bite. It cooks faster than Husk-on but needs more attention.
It is also the best method if you are cutting the kernels off the cob for elote, a corn salad, or a topping for tacos or bowls.
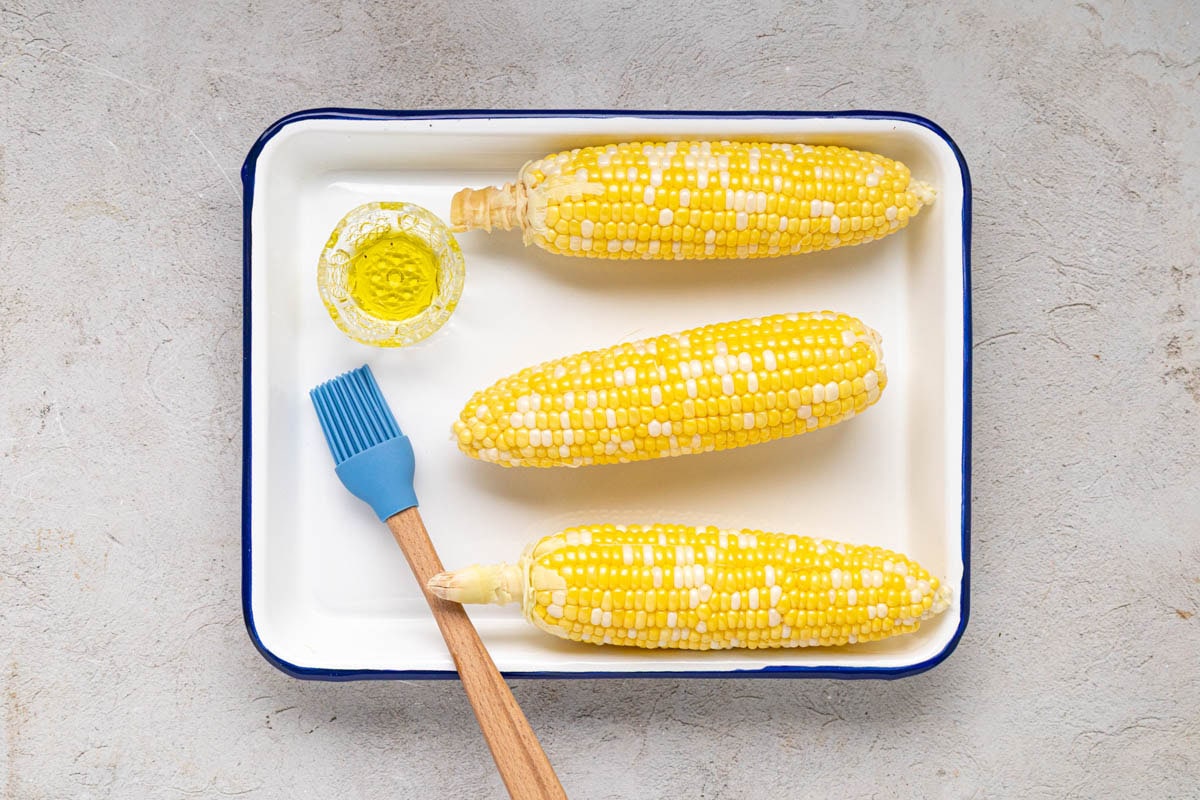
Step 1 | Prep the Corn
Remove the husks and silk completely (see pictures above in the with husks step 1).
Pat the cobs dry with a paper towel and brush all over with olive oil.
Season with salt and pepper.
Step 2 | Preheat the Grill
Preheat to medium-high heat, around 375°F to 400°F. A hot grill is especially important for direct grilling since there is no husk to protect the kernels from uneven heat..
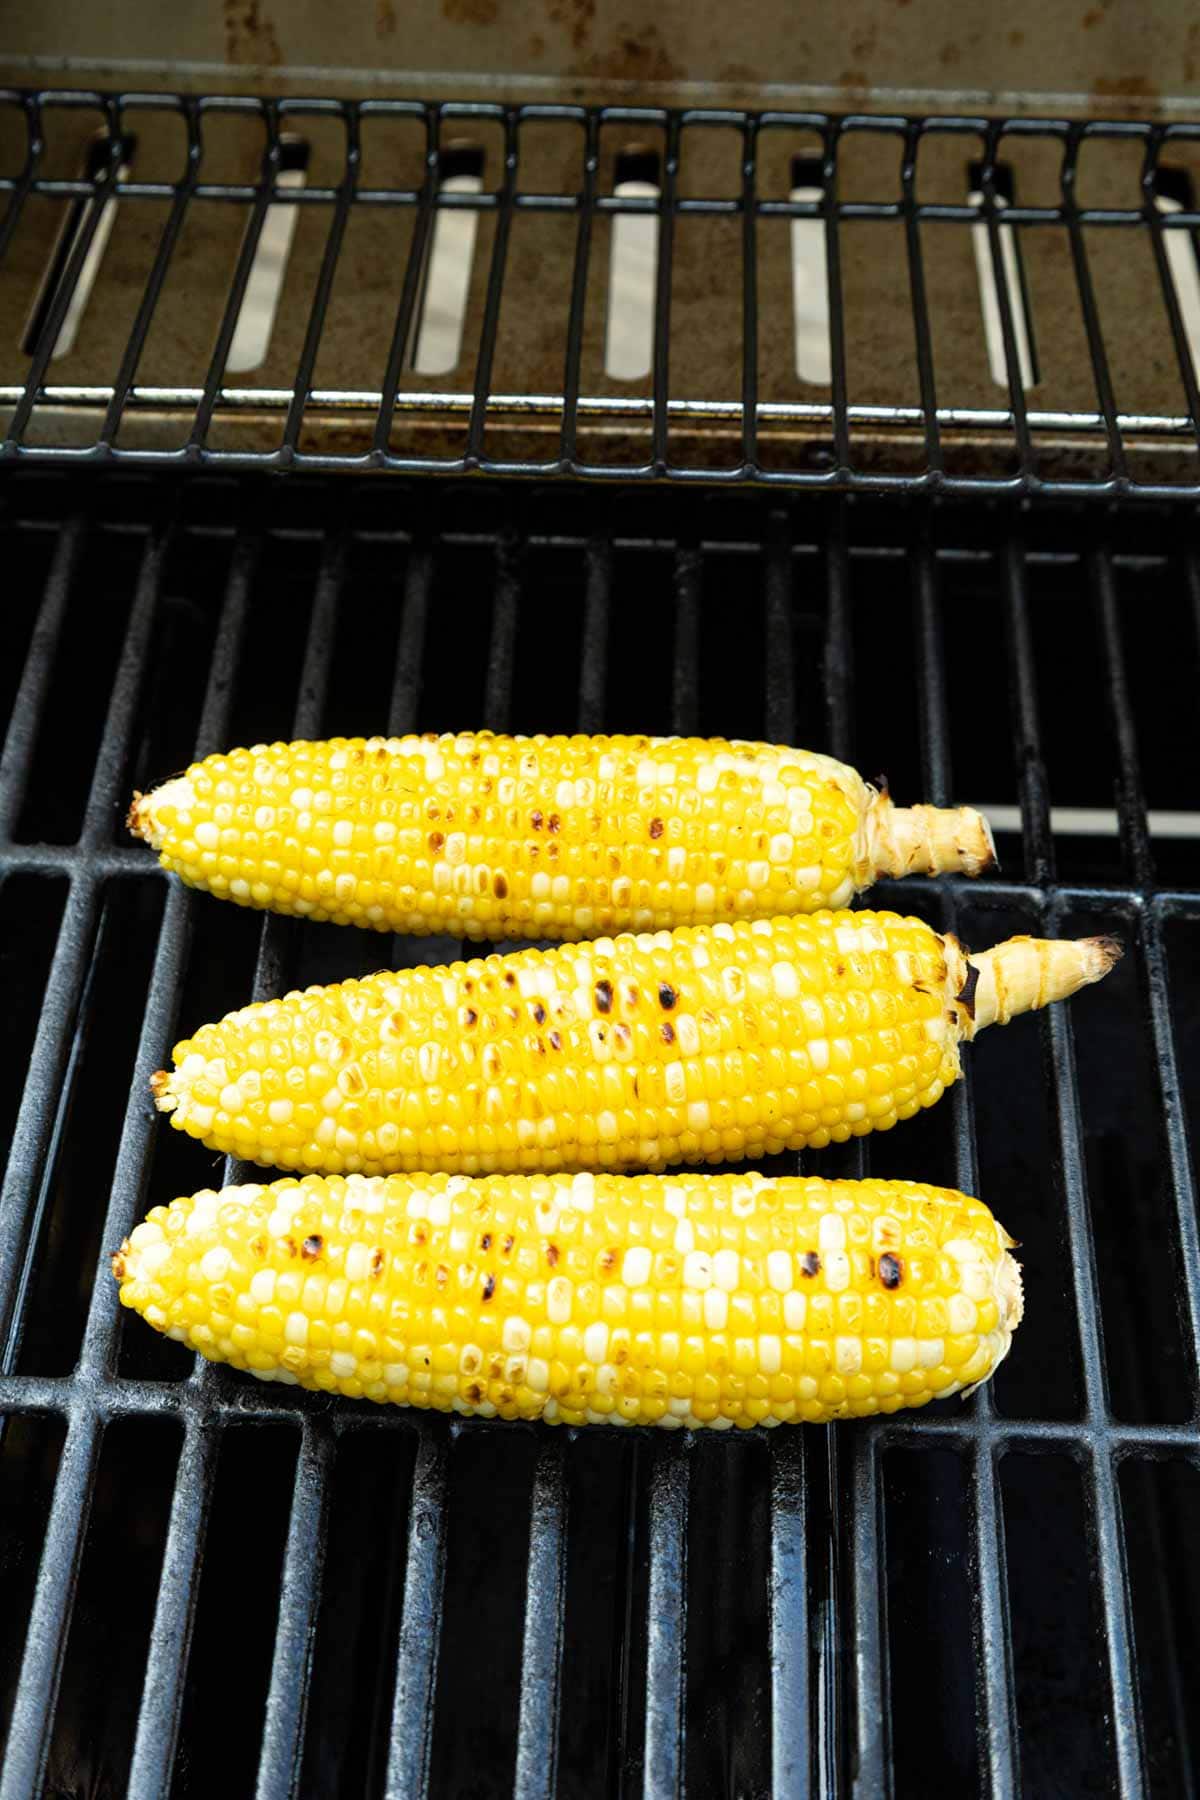
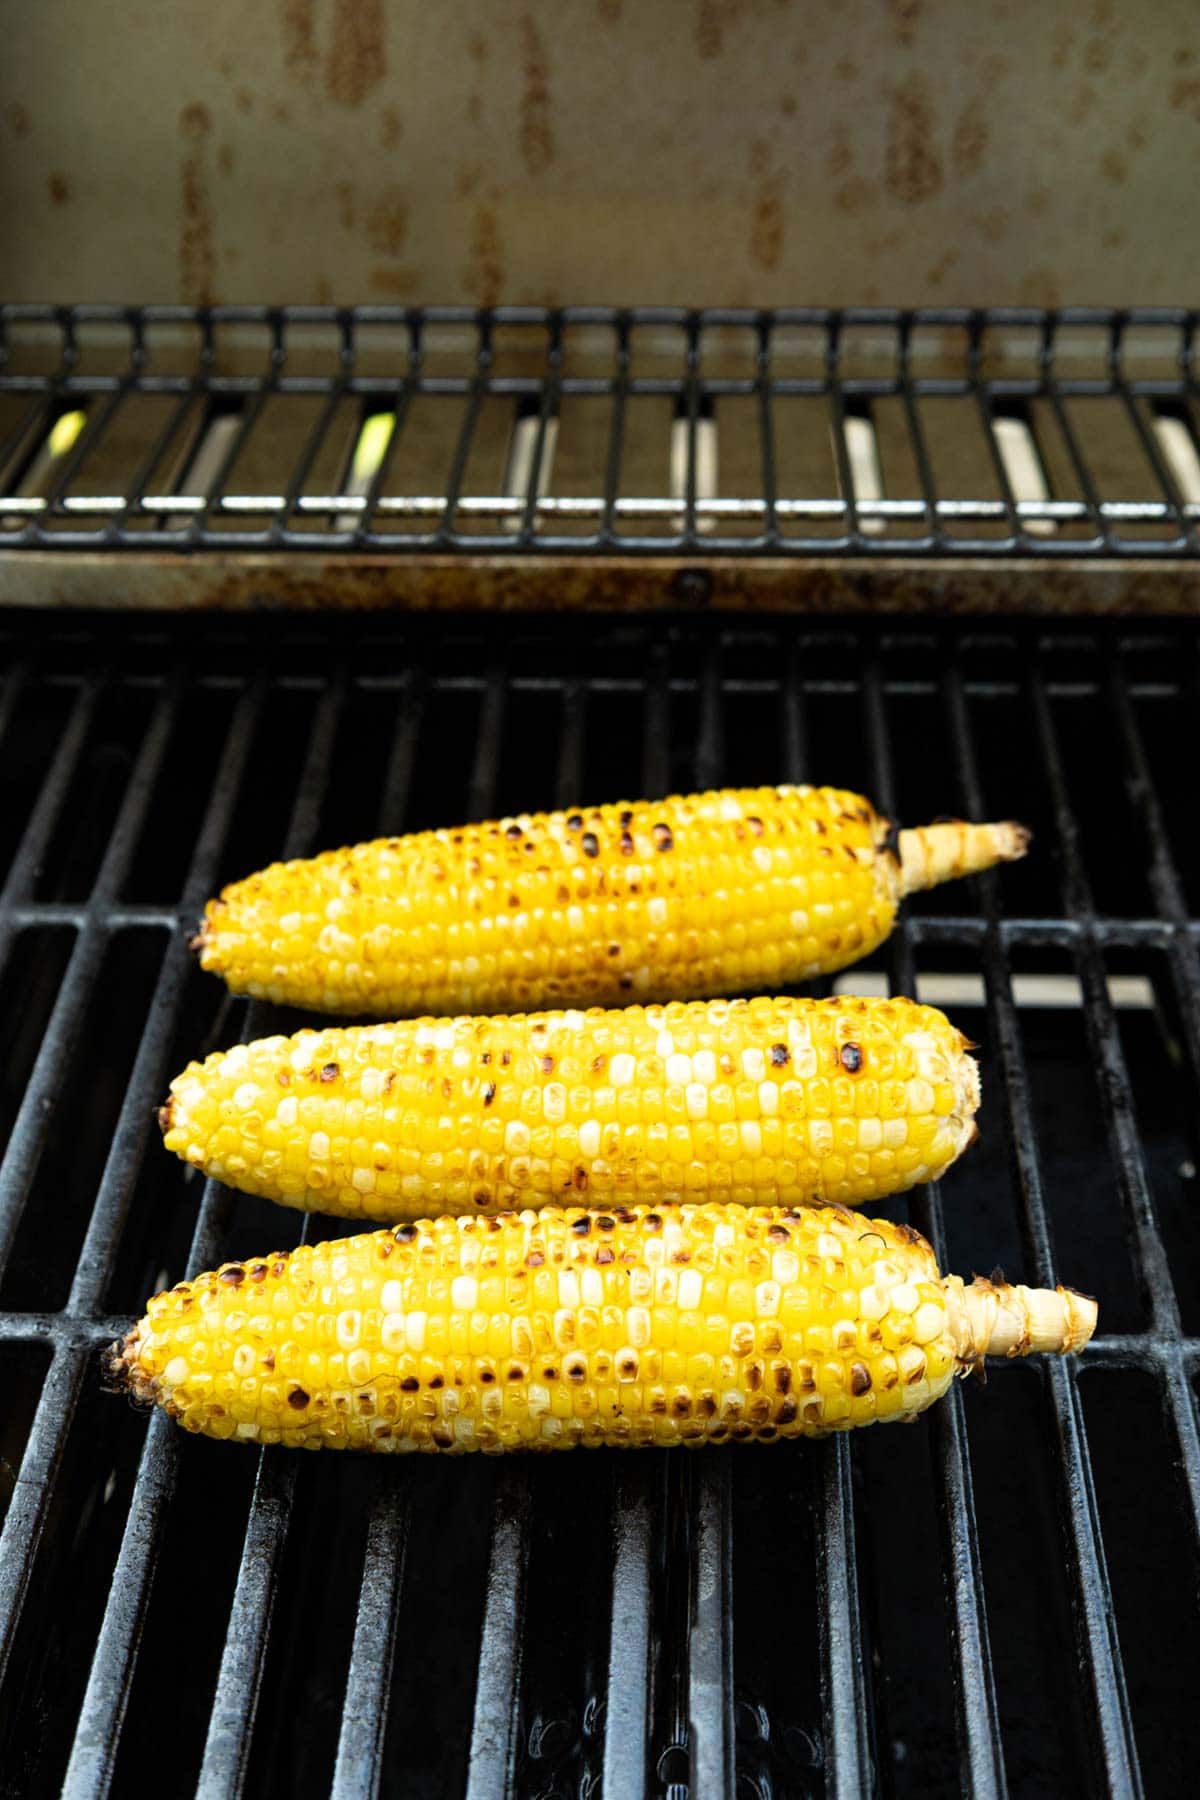
Step 3 | Grill
Place the oiled cobs directly on the grill grates.
Cook for 10 to 15 minutes, turning every 3 to 4 minutes to work your way around all sides.
You are looking for good grill marks and lightly charred, tender kernels. Stay close. Without the husk, corn can go from perfectly charred to overdone quickly.
Step 4 | Top and Serve
Pull the corn off the grill and top it immediately while hot.
How to Grill Corn in Foil
Foil-wrapped corn works similarly to husk-on but without the husk. It is a great option when your corn comes pre-shucked, when you want to season or butter it before it hits the grill, or when you are working with frozen corn.
You will not get that great char with this method, but the corn steams inside the foil and comes out tender and full of flavor.
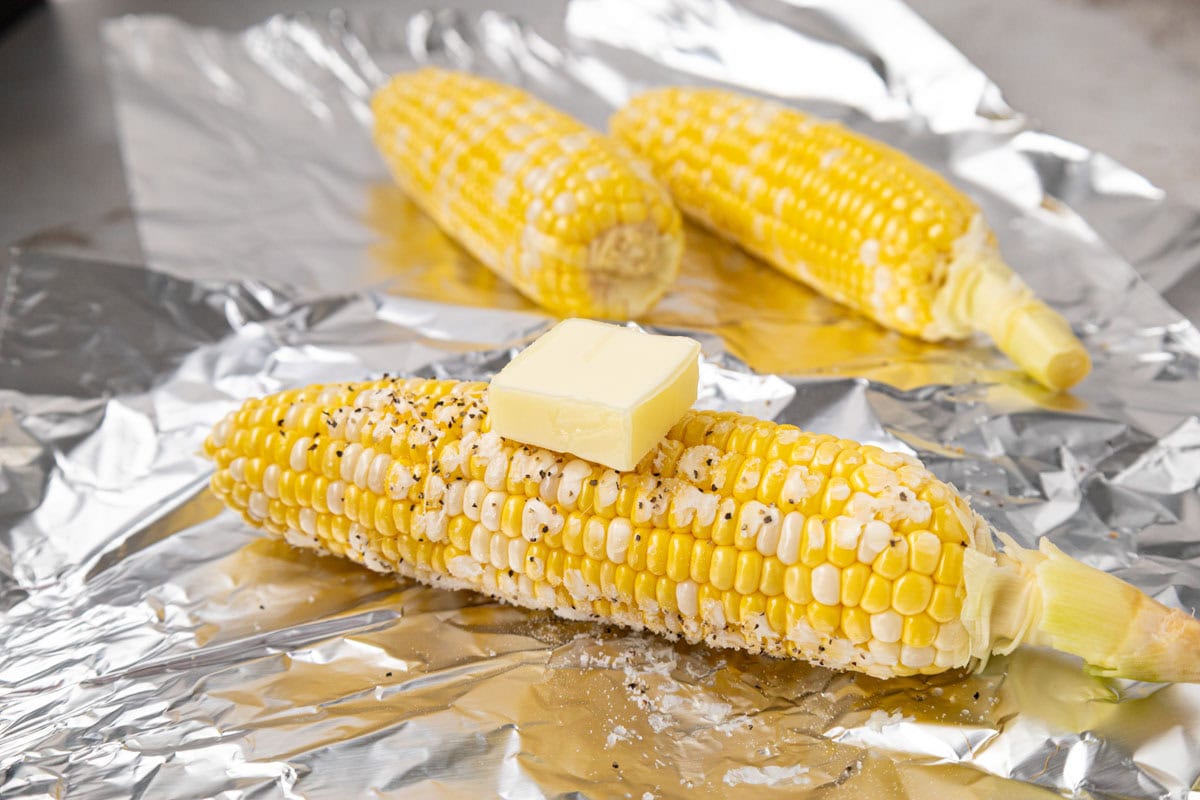
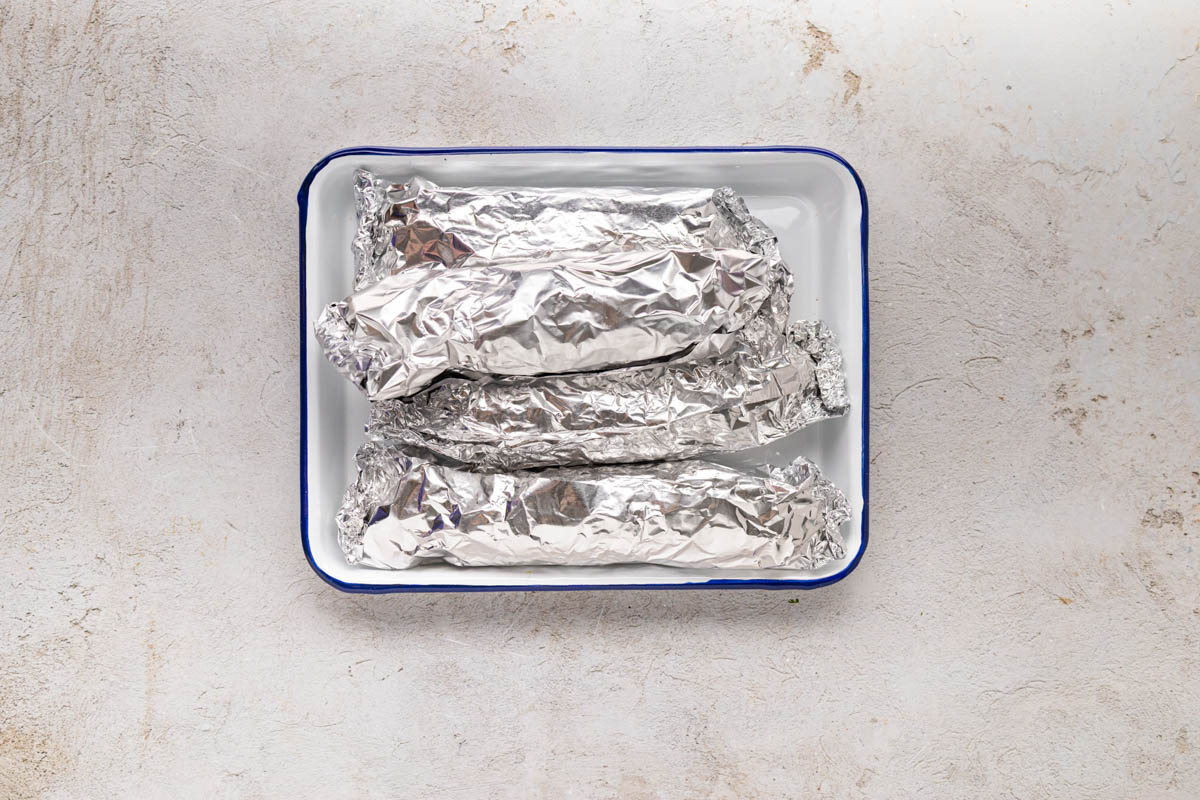
Step 1 | Prep the Corn
Remove husks and silk if not already done (see pictures above in with husk step 1).
Place each ear on a sheet of heavy-duty foil. Add a pat of butter and your seasoning of choice directly onto the corn, then wrap tightly, folding the ends closed so no steam can escape.
Step 2 | Preheat the Grill
Preheat to medium-high heat, around 375°F to 400°F.
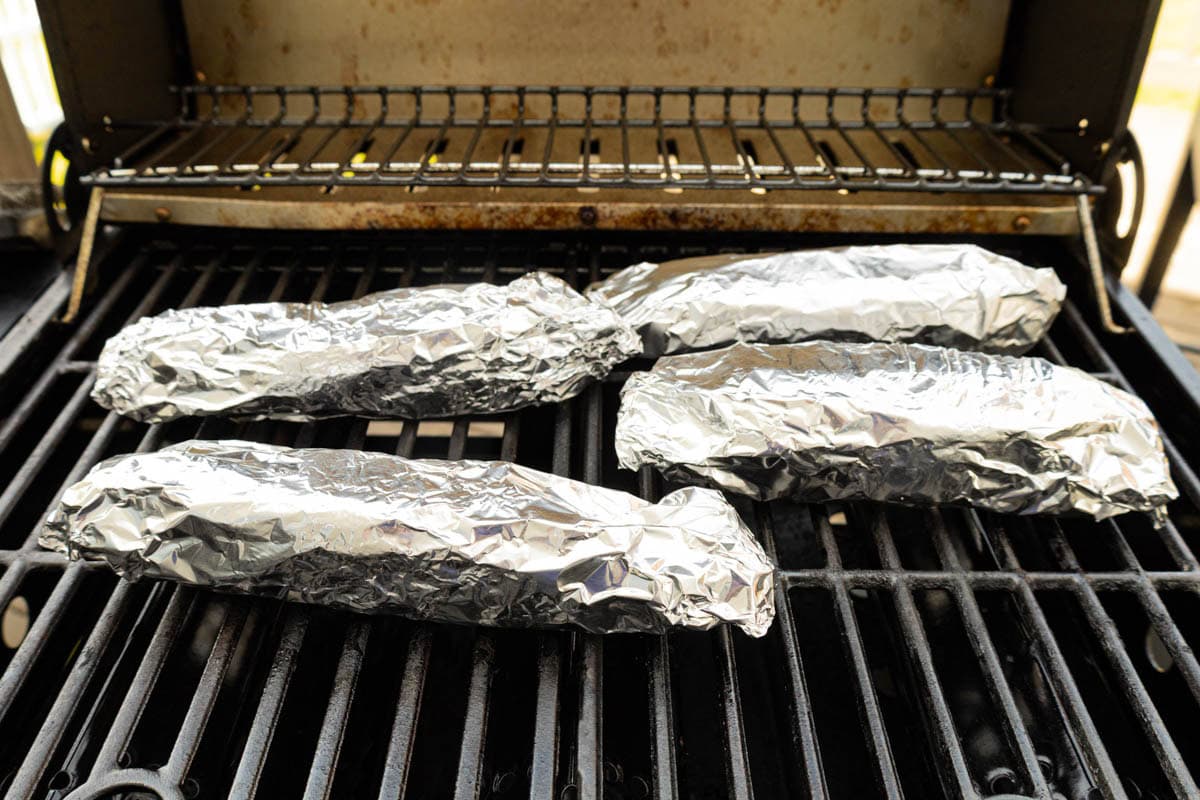
Step 3 | Grill
Place the wrapped cobs on the grill and cook for 15 to 20 minutes, turning halfway through. The corn steams inside the foil and will be tender all the way through when done.
Step 4 | Open Carefully and Serve
Use tongs to remove the packets from the grill. Open carefully, the steam inside is very hot. Top with additional butter or seasoning and serve.
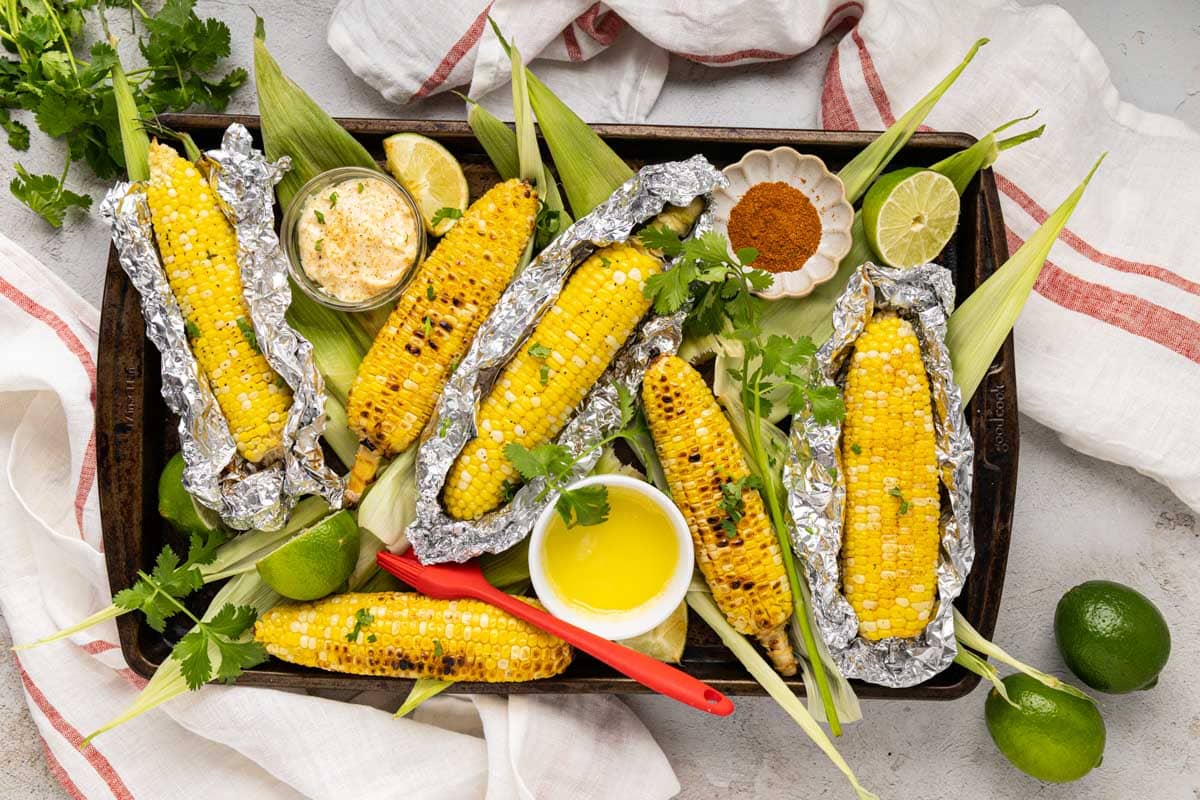
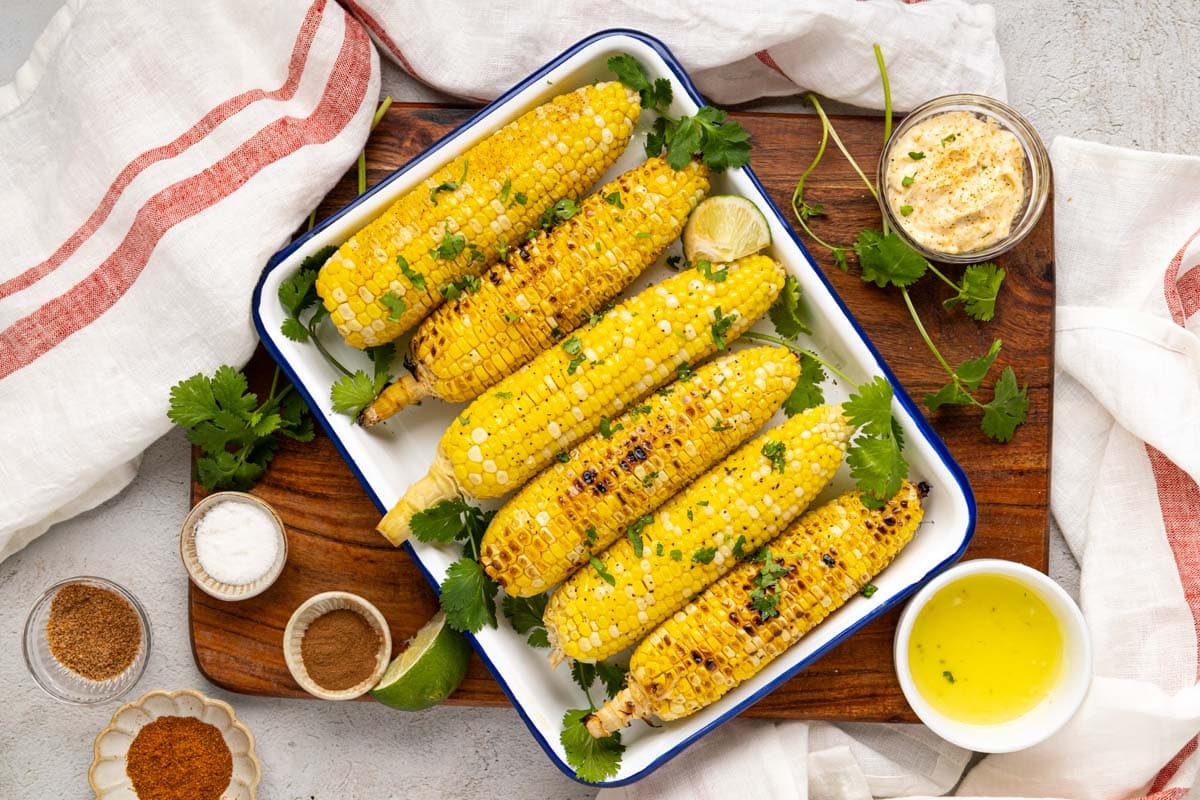
Grilled Corn Topping Ideas & Flavored Butters
This is where grilled corn gets fun. Once the corn is off the grill and still hot, it is ready for whatever direction you want to take it.
- Classic Butter: Three tablespoons of real butter, salt, and pepper. Simple, perfect, and never wrong.
- Old Bay Butter: Melt butter and brush it over the hot corn, then shake on Old Bay seasoning generously. A great option for a seafood-themed cookout or anytime you want something a little bolder without a lot of effort.
- Cajun Butter: Stir Cajun seasoning into softened butter and brush it over the corn right off the grill. Adds heat and a little smokiness that pairs especially well with direct-grilled corn.
- Sweet Cinnamon Sugar: Brush with butter and dust lightly with a mix of cinnamon and sugar. A little goes a long way, and it is a surprisingly good finish on sweet summer corn.
- Topped with Cinnamon Honey Butter: Think Texas Roadhouse butter meets corn = YUM!
- Elote-Style: This one is worth the extra few minutes. Stir together the juice of one lime, 3 tablespoons mayonnaise, and 1 tablespoon sour cream. Brush the mixture all over the hot corn. Sprinkle generously with ½ cup crumbled cotija cheese, ½ teaspoon elote seasoning or chili powder, and finish with fresh chopped cilantro and an extra squeeze of lime if you like.
Easy Variations
- Cotija cheese: If you cannot find cotija, crumbled feta is a solid substitute. It has a similar salty, crumbly texture and works beautifully in the elote topping.
- Elote seasoning: No elote seasoning on hand? Chili powder gets you most of the way there. Add a little cumin and a pinch of smoked paprika, and you are very close.
- Mayo in the elote topping: Not a fan of mayonnaise? Mexican crema is the closest swap, or use all sour cream for a tangier finish.
- Dairy-free: Swap in a good plant-based butter across any of the topping options. For the elote topping, use a dairy-free mayo and either skip the cotija or use a dairy-free alternative.
- Gluten-free: Corn is naturally gluten-free, making it a great option for guests with dietary needs. The place to pay attention is your seasonings. Cajun seasoning, Old Bay, elote seasoning, and chili powder can all vary by brand, and some blends include fillers or additives that contain gluten. Always check the label and look for certified gluten-free options where possible. If you are cooking for someone with celiac disease, read every label carefully before using any packaged seasoning.
- Grill pan on the stovetop: No outdoor grill? A cast-iron grill pan works beautifully. Brush the husked corn with olive oil, preheat the pan over medium-high heat for about 5 minutes until very hot, and cook for 10 to 15 minutes, turning every few minutes until you get good char marks on all sides. Same result, no backyard required.
Shortcuts & Time Savers:
Pre-shucked corn from the store works perfectly for the foil-wrapped or direct grill method and skips the husk prep entirely.
You can also soak husk-on corn up to 8 hours ahead and refrigerate it until you are ready to grill, which makes cookout prep much easier when you are feeding a crowd.
Tips for Grilling Corn on the Cob
- Remove all the silk before you soak. Once the husks are wet, silk strands are much harder to pull out cleanly. Get them all out first, fold the husks back into place, then soak.
- Do not rush the soak. Thirty minutes is the minimum, and it genuinely matters. Husks that are not fully saturated can dry out on the grill or catch fire. If you are prepping for a party, soaking up to 8 hours ahead is perfectly fine and makes the whole process easier.
- Preheat the grill fully. Corn on an underheated grill cooks unevenly. Give it 10 to 15 minutes at medium-high before anything goes on the grates.
- Stay close. Grilled corn is not a walk-away situation, especially when you are grilling direct. Turn the cobs every few minutes and keep an eye on them. The difference between perfectly done and overdone happens fast.
- Season while it is hot. Butter melts best, and seasoning sticks better when the corn comes straight off the grill. Do not wait.
Ways to Use Grilled Corn
Leftover grilled corn is too good to let go to waste. Cut the kernels off the cob and put them to work in some of these favorite recipes.
- Street Corn Pasta Salad: Grilled corn is a natural upgrade for pasta salad. The smoky char takes it to a whole new level.
- Mexican Street Corn Coleslaw: Swap fire-roasted corn for your leftover grilled kernels in this crowd-pleasing slaw. Bold elote flavors in every crunchy bite.
- Corn Salad with Fritos: This easy Frito Corn Salad is a potluck staple and grilled corn makes it even better. Creamy, crunchy, and always the first bowl to disappear.
- Street Corn White Chicken Chili: Stir grilled corn kernels into a classic White Chicken Chili for a smoky, hearty bowl full of street corn flavor.
What to Serve With Grilled Corn on the Cob
Grilled corn fits naturally next to just about anything coming off the grill. At our house it almost always lands next to burgers, grilled chicken, or a platter of Honey Chipotle Chicken Wings. The smoky heat from the chicken and a few ears of elote-style corn is one of my favorite summer combinations.
It is equally at home with grilled pork chops, ribs, and steaks. Round out the table with a cold macaroni pasta salad, a simple classic southern slaw, or a fresh creamy tomato salad, and you have a spread that feels like summer from the first bite to the last. Grill a few extra ears. They will not last long.
Storage, Make-ahead
Storage: Leftover grilled corn keeps well in the refrigerator for up to 4 days. Wrap individual cobs in foil or store in an airtight container. Reheat on the grill or in a 350°F oven for a few minutes, turning once, until warmed through.
Make Ahead: Soak husk-on corn for up to 8 hours, then refrigerate until you are ready to grill. If you are feeding a crowd, this is a great way to get the prep done early without any last-minute rush.
Freeze: Grilled corn freezes best when cut off the cob. Let it cool completely, slice off the kernels, and store it in a freezer-safe bag for up to 3 months. It is great stirred into soups, chowders, or salsas straight from the freezer.
Recipe FAQs
Only if you are grilling husk-on. The soak saturates the husks, so the corn steams from the outside in rather than drying out or catching fire on the grill. For direct or foil-wrapped grilling, no soaking is needed.
Peel back a small section of husk and look at the kernels. Plump, glossy, and bright yellow means they are ready. Pale or shriveled, give it a few more minutes.
Yes, and it is easier than you might think. Frozen corn can go straight from the freezer to the grill without thawing. Just brush each ear with olive oil and grill over medium-high heat for 10 to 15 minutes, turning every few minutes. The foil method works great here, too. Wrap each ear with butter and your seasoning of choice in aluminum foil, then grill for 12 to 15 minutes, turning halfway through. It will not have the same crispness as fresh summer corn, but it is a solid option when fresh is not available.
Yes. A cast-iron grill pan on the stovetop works great. Brush the corn with olive oil, preheat the pan over medium-high heat for about 5 minutes, and cook for 10 to 15 minutes, turning every few minutes until charred on all sides.
Hungry for more easy, home-cooked, delicious recipes?
Sign up for my free recipe club to get family-friendly recipes in your inbox each week! Find me sharing daily meal-time inspiration on Pinterest, Facebook, and Instagram.
Grilled Corn on the Cob
Click Stars To Rate
Ingredients
- 4 ears fresh corn on the cob
- 1 tablespoon olive oil - for direct grill method
- 3 tablespoons butter - melted
- salt - to taste
- black pepper - to taste
Instructions
- Peel back the outer husk layers without removing them from the base. Remove all silk strands, then fold the husks back into place.
- Submerge the cobs in a large bowl or pot of cold water. Use a plate to weigh them down if they float. Soak for a minimum of 30 minutes and up to 8 hours.
- Preheat the grill to medium-high heat, 375°F to 400°F.
- Shake excess water off the cobs and place them directly on the grill grates. Close the lid and cook for 15 to 22 minutes, turning every 5 minutes, until the husks are charred on all sides.
- To check for doneness, peel back a small section of husk near the tip. Kernels should be plump, glossy, and bright yellow. If they look pale or shriveled, continue cooking for a few more minutes.
- Remove from the grill and rest for 5 minutes. Peel back the husks, remove any remaining silk with a kitchen towel, and top as desired.
- Preheat the grill to medium-high heat, 375°F to 400°F.
- Remove husks and silk completely. Pat cobs dry and brush all over with olive oil.
- Place cobs directly on the grill grates. Cook for 10 to 15 minutes, turning every 3 to 4 minutes, until grill marks form and kernels are lightly charred and tender.
- Remove from the grill and top immediately while hot with butter and seasonings and serve.
- Preheat the grill to medium-high heat, 375°F to 400°F
- Remove husks and silk. Place each ear on a sheet of heavy-duty foil. Add a pat of butter and desired seasoning, then wrap tightly, folding the ends closed.
- Place foil packets on the grill and cook for 15 to 20 minutes, turning halfway through.
- Remove from the grill using tongs. Open carefully, steam insi
Notes
- Soak the husks. A minimum of 30 minutes is non-negotiable for husk-on grilling. Up to 8 hours works great if you are prepping ahead.
- Remove the silk before you soak. Wet silk is much harder to pull out cleanly.
- Do not walk away. Turn the corn every few minutes and keep an eye on it, especially when grilling direct.
- Use the visual test. Kernels should look plump, glossy, and bright yellow when done. Pale or shriveled means more time.
- Season while it is hot. Butter melts better, and seasoning sticks better straight off the grill.
Want to Save this Recipe?
By submitting this form, you consent to receive emails from Soulfully Made.