


This post may contain affiliate links. Please read our disclosure policy.
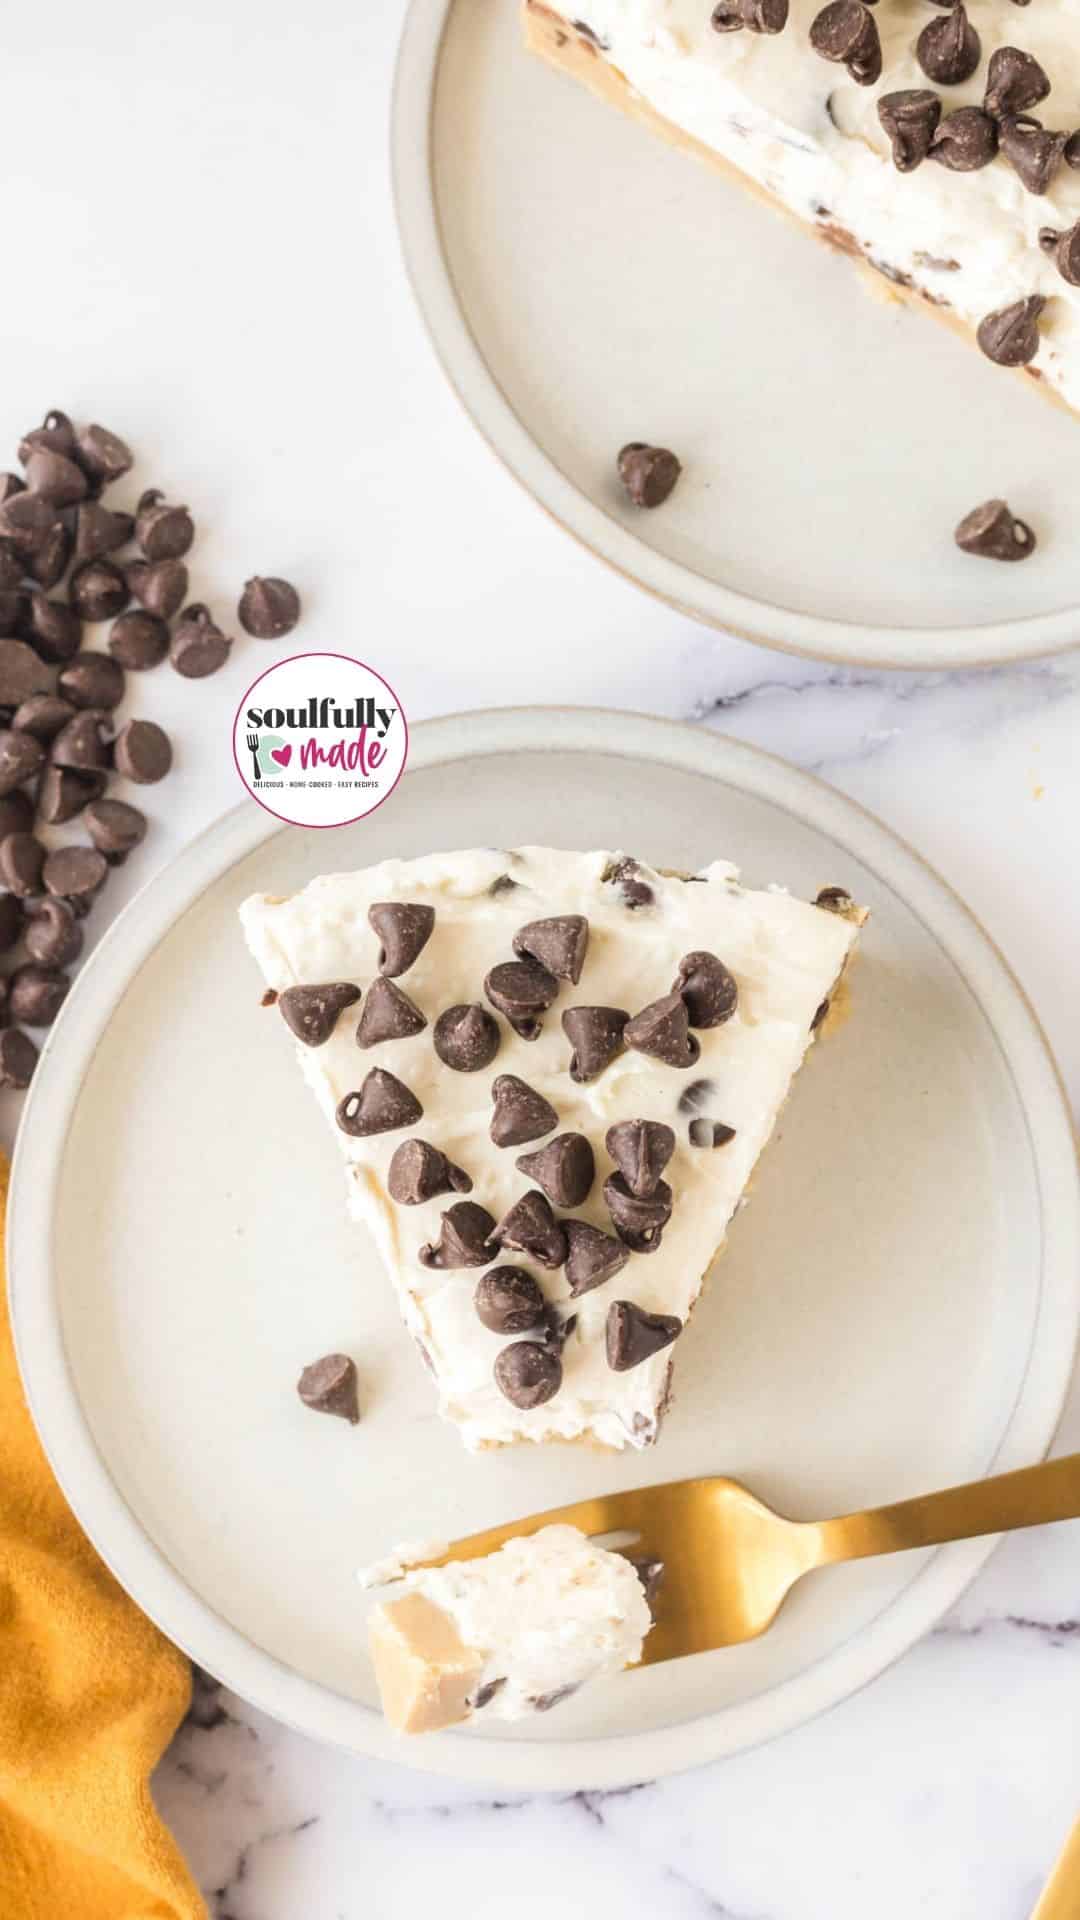
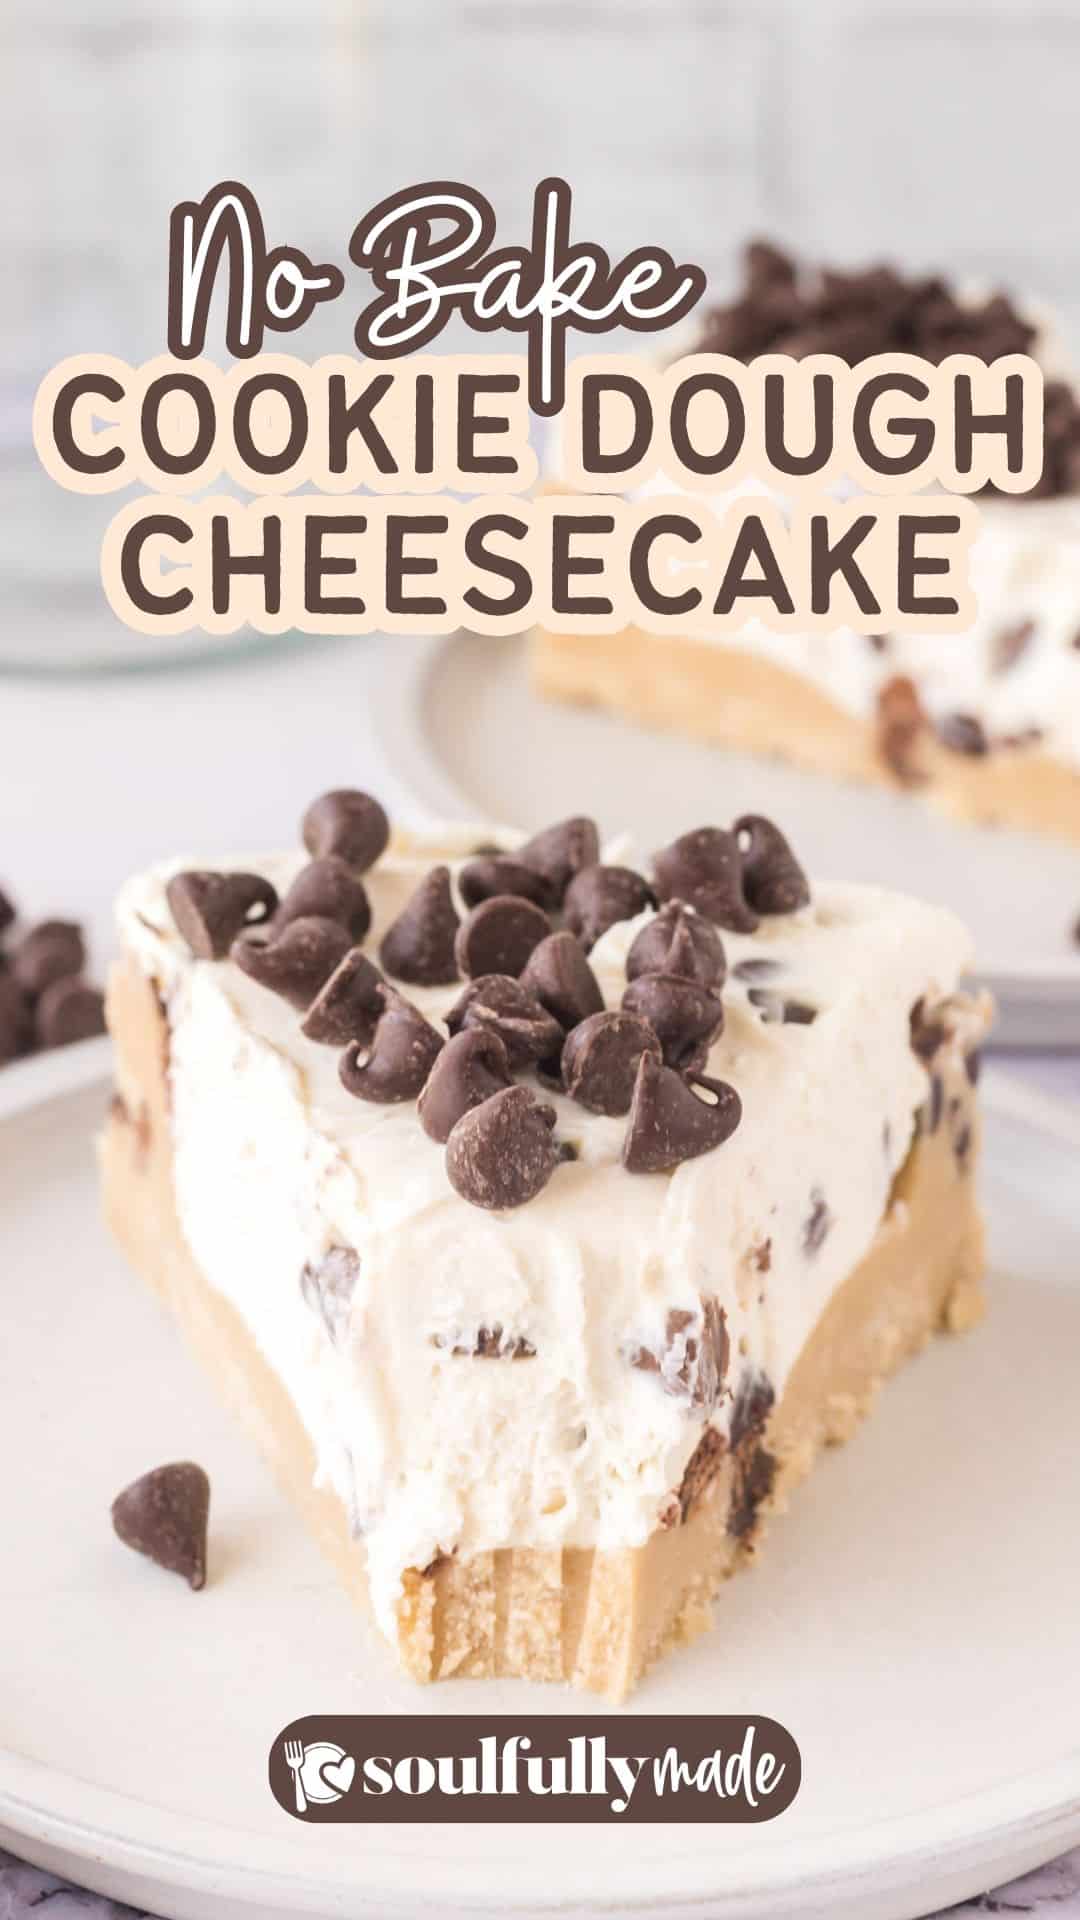
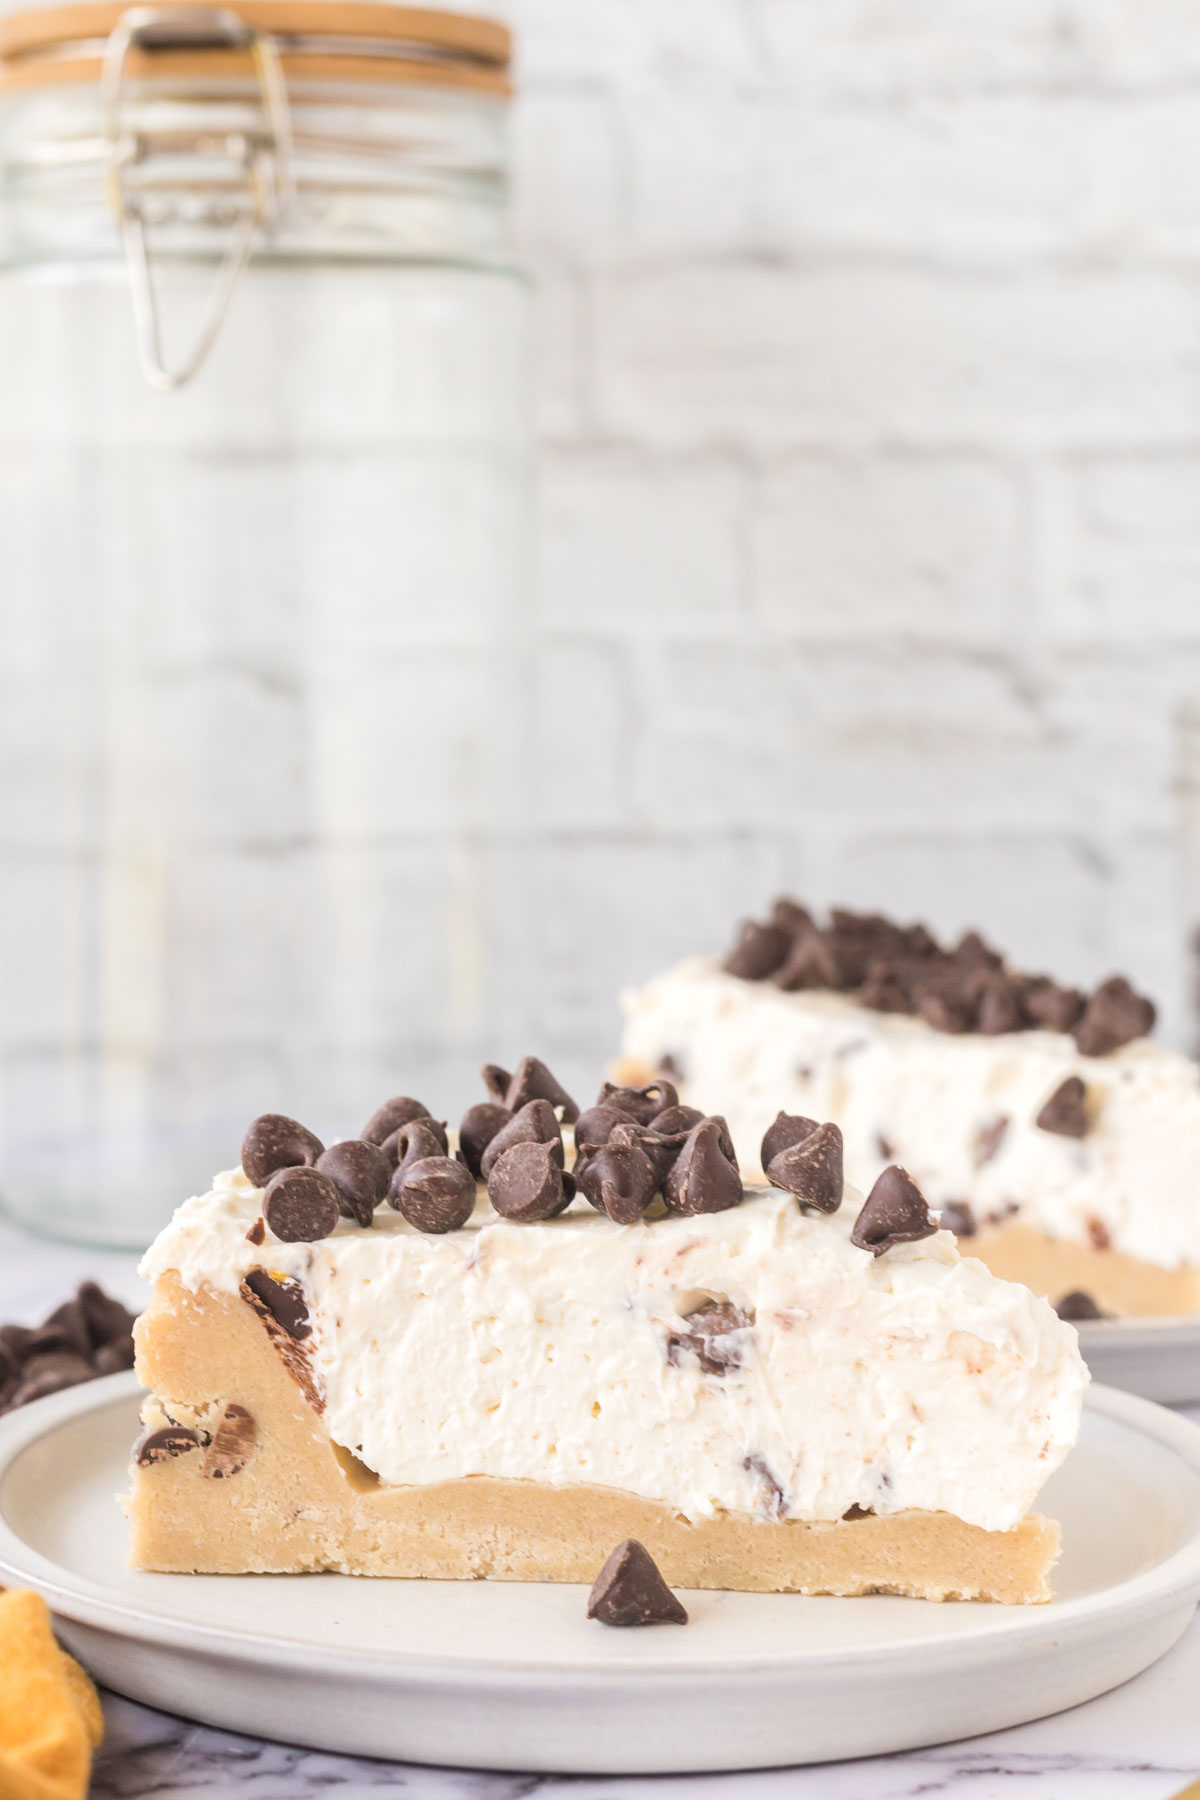
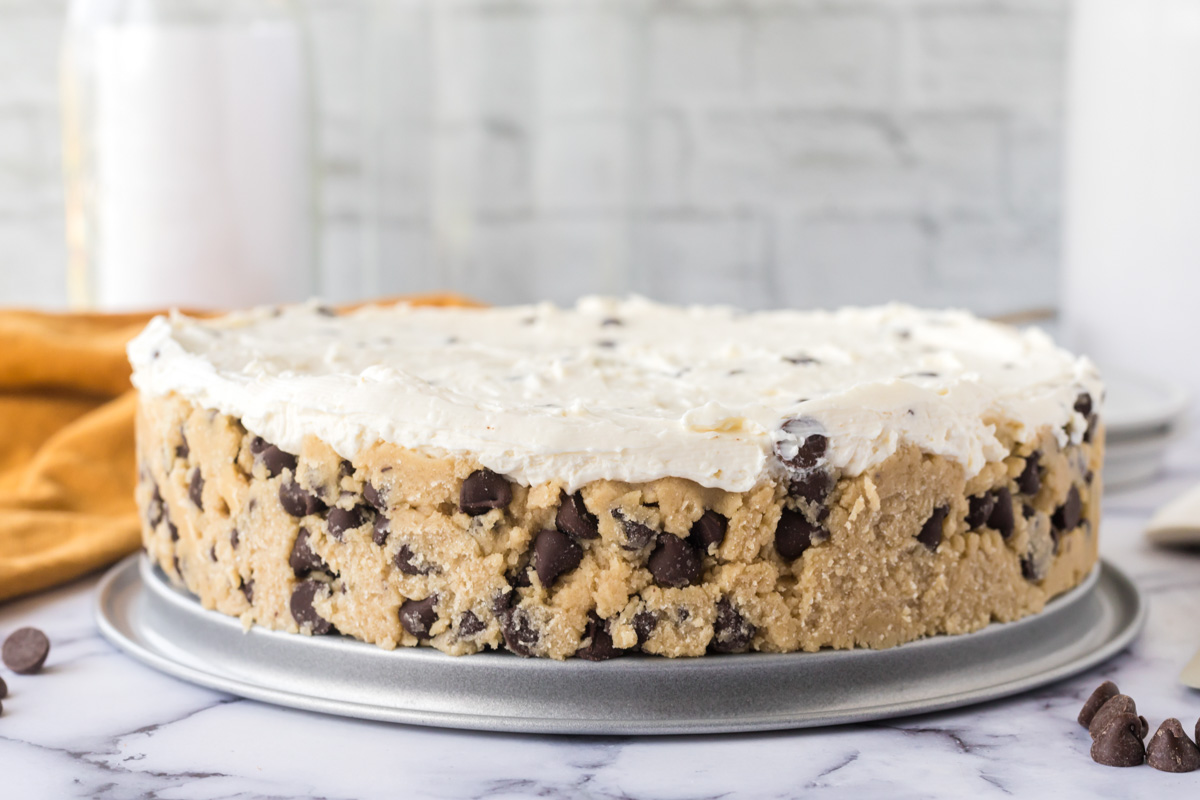
If you love chocolate chip cookie dough as much as we do, this No-Bake Cookie Dough Cheesecake is going to be a favorite. It’s got that soft cookie dough flavor in the crust and a creamy cheesecake filling on top. With a quick step to heat-treat the flour, you can enjoy every bite safely, and there’s no oven required beyond that.
We’re big chocolate chip cookie fans in my house, and it didn’t take much convincing when my son asked me to create a cookie dough cheesecake. I knew I wanted to keep it no-bake because that’s what gives you that classic, doughy cookie flavor in the crust.
Of course, there’s always that one little catch: raw flour. I’ve eaten my fair share of cookie dough straight from the bowl, but it’s safer to heat-treat the flour first. It only takes a few minutes, and once that step’s out of the way, you’ve got the best part: a safe-to-eat cookie dough base that tastes like the real thing and pairs perfectly with a creamy cheesecake filling.
Chocolate Chip Cookie Cheesecake Ingredients
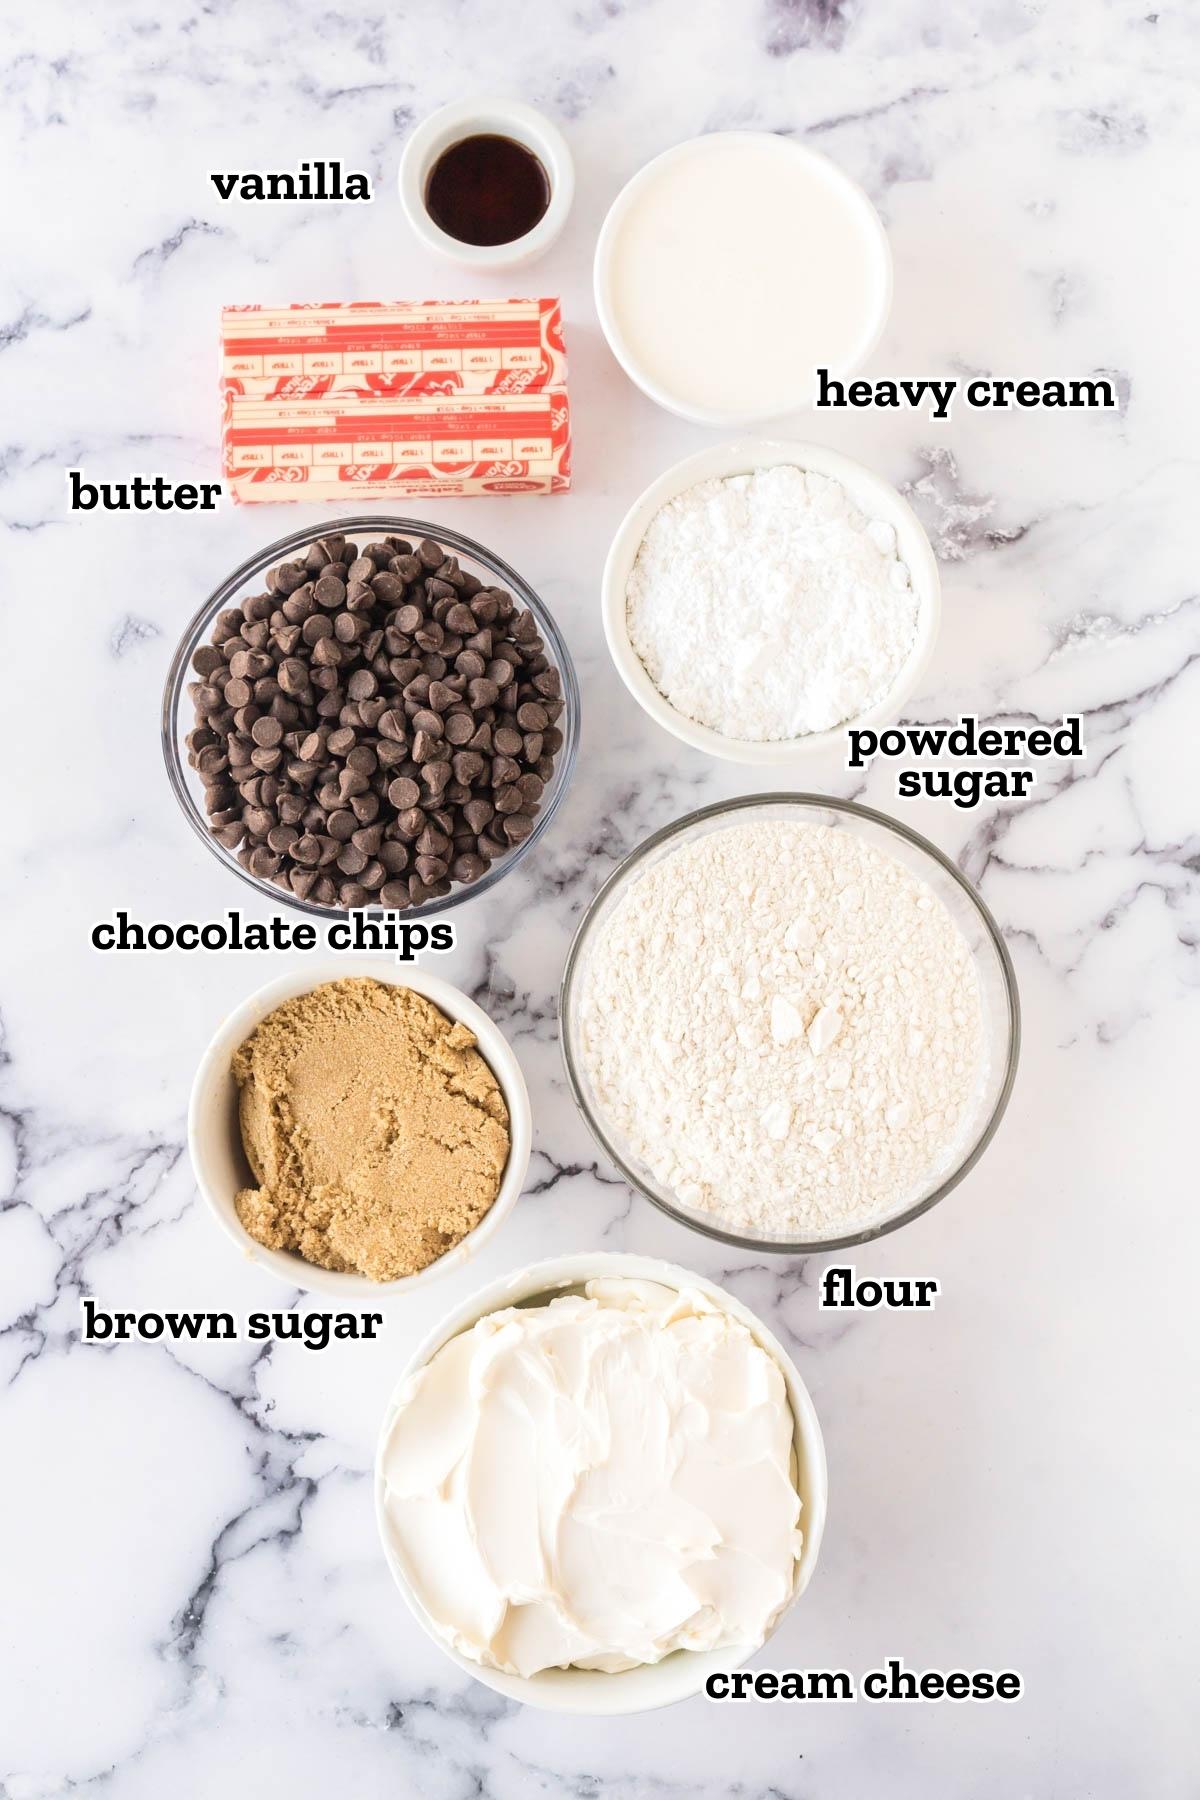
- Salted Butter: Use softened butter so it creams easily with the sugar. The salt balances sweetness, but if you only have unsalted butter, add a pinch of salt.
- Light Brown Sugar: Adds sweetness with a hint of molasses flavor. It’s what gives the cookie dough layer that authentic taste.
- All-Purpose Flour: Provides structure for the cookie dough crust. Be sure to heat-treat the flour first to make it safe to eat.
- Semi-Sweet Chocolate Chips: Mini chips work best because they mix evenly through the dough, ensuring chocolate in every bite.
- Cream Cheese: The base of the cheesecake filling. Softened cream cheese blends smoothly and prevents lumps in the batter.
- Heavy Whipping Cream: Whips into the filling for lightness and a creamy, mousse-like texture.
- Powdered Sugar: Sweetens the cheesecake layer and dissolves smoothly without leaving graininess.
- Vanilla Extract: Enhances the flavor of both the crust and filling, rounding out the sweetness
How To Make This Easy Cookie Dough Cheesecake Recipe
✱ Below shows step-by-step photos and instructions. For the complete recipe, along with ingredient amounts, scroll down to the recipe card.
No-Bake Cookie Dough
Step 1 | Cream Butter and Sugar
Let’s dive right in by setting out a medium-sized mixing bowl and combining the butter and sugar. Make your job much easier by using an electric hand mixer or stand mixer with a paddle attachment to cream the ingredients together until they are nice and smooth.
And don’t forget to scrape the sides of the bowl!

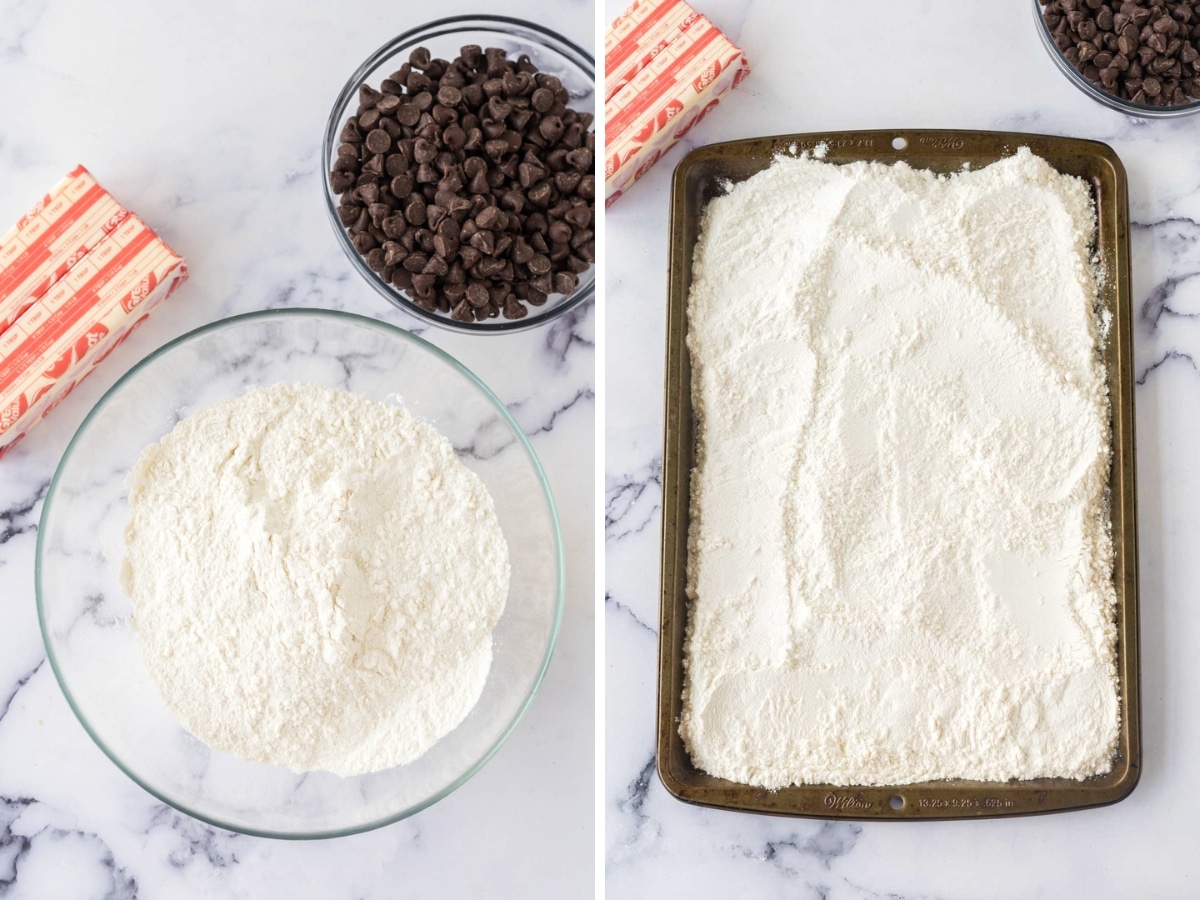
Step 2 | Whisk in the Flour
Once the butter and sugar are thoroughly creamed together, gradually whisk in the flour until it’s fully incorporated.
**If you want to heat treat the flour, do so before starting the recipe. See the tips section below the recipe instructions to discover how!
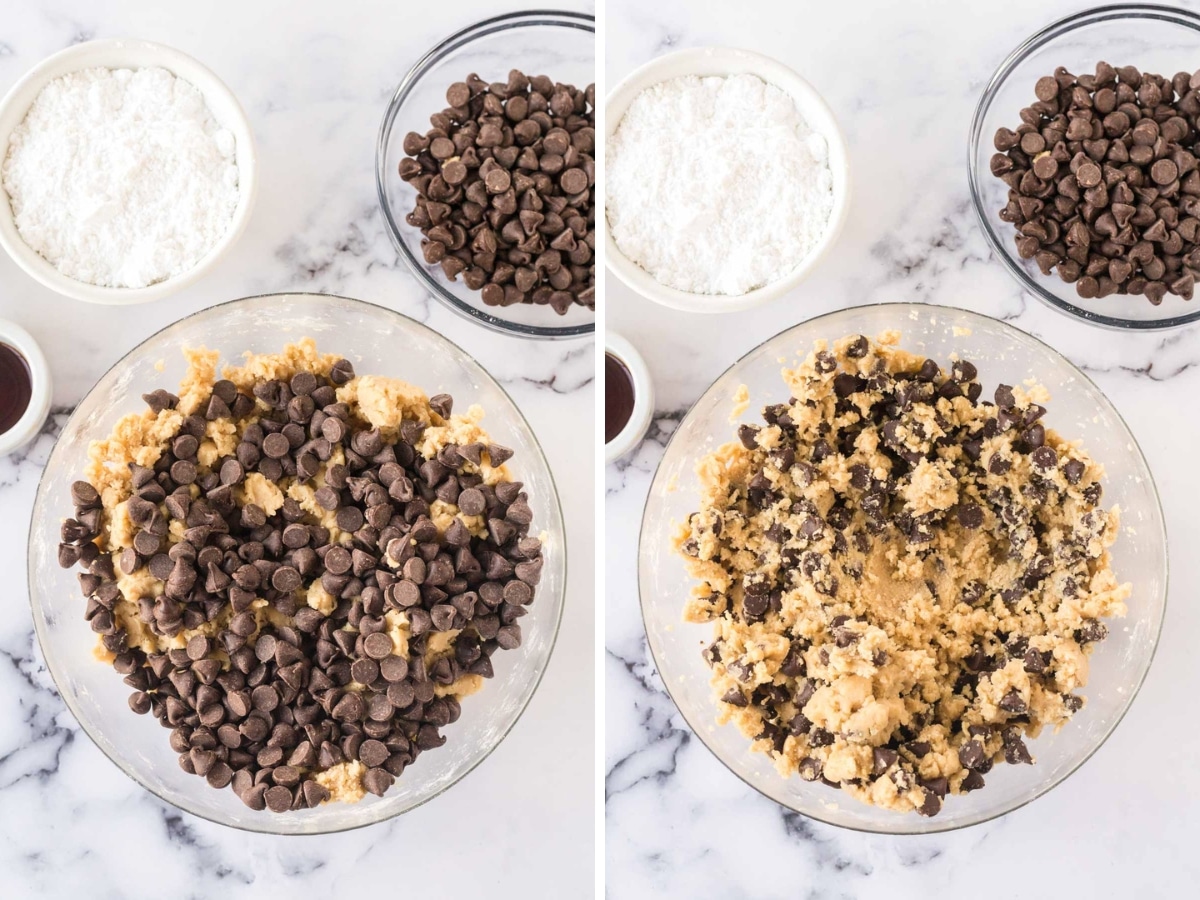
Step 3 | Add the Chocolate Chips and Press Dough into Pan
Next, gently fold the chocolate chips into the tasty cookie dough mixture until evenly distributed throughout.
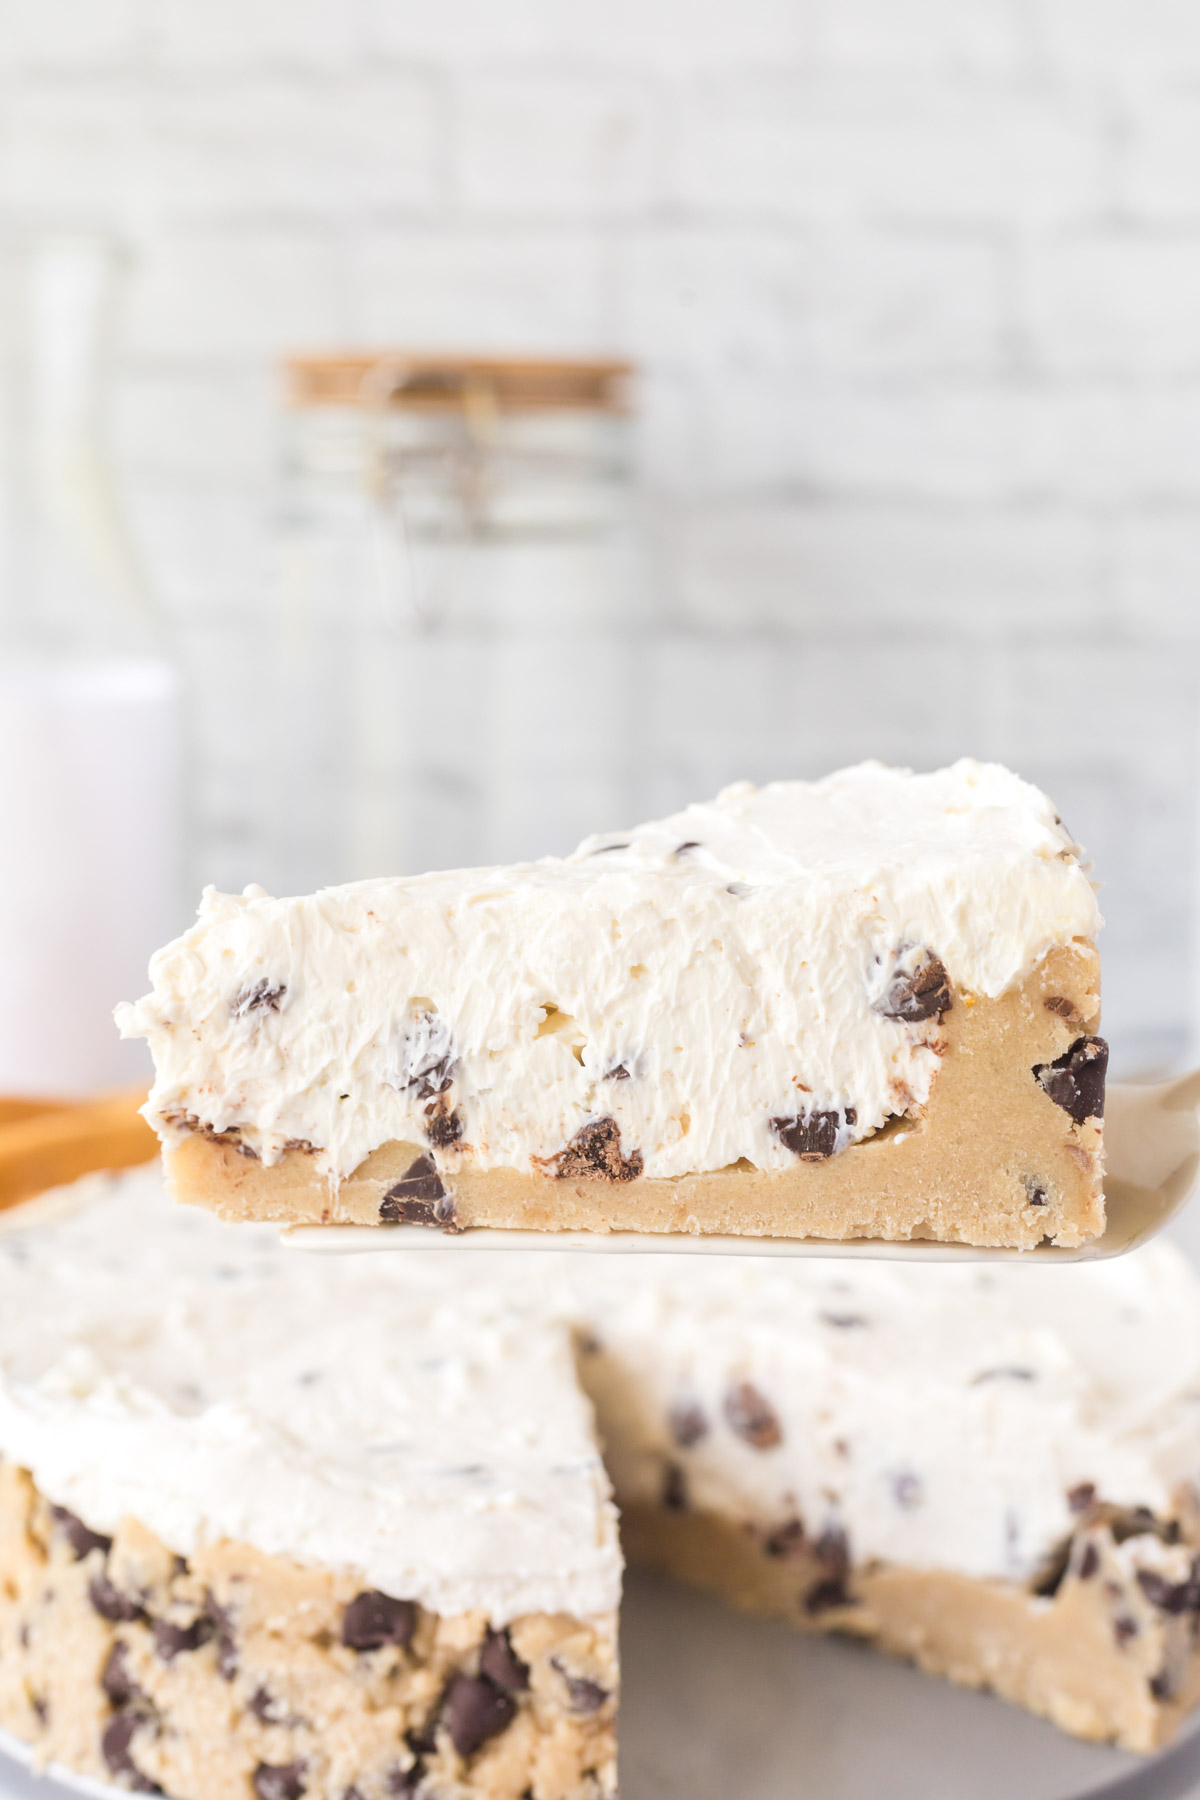
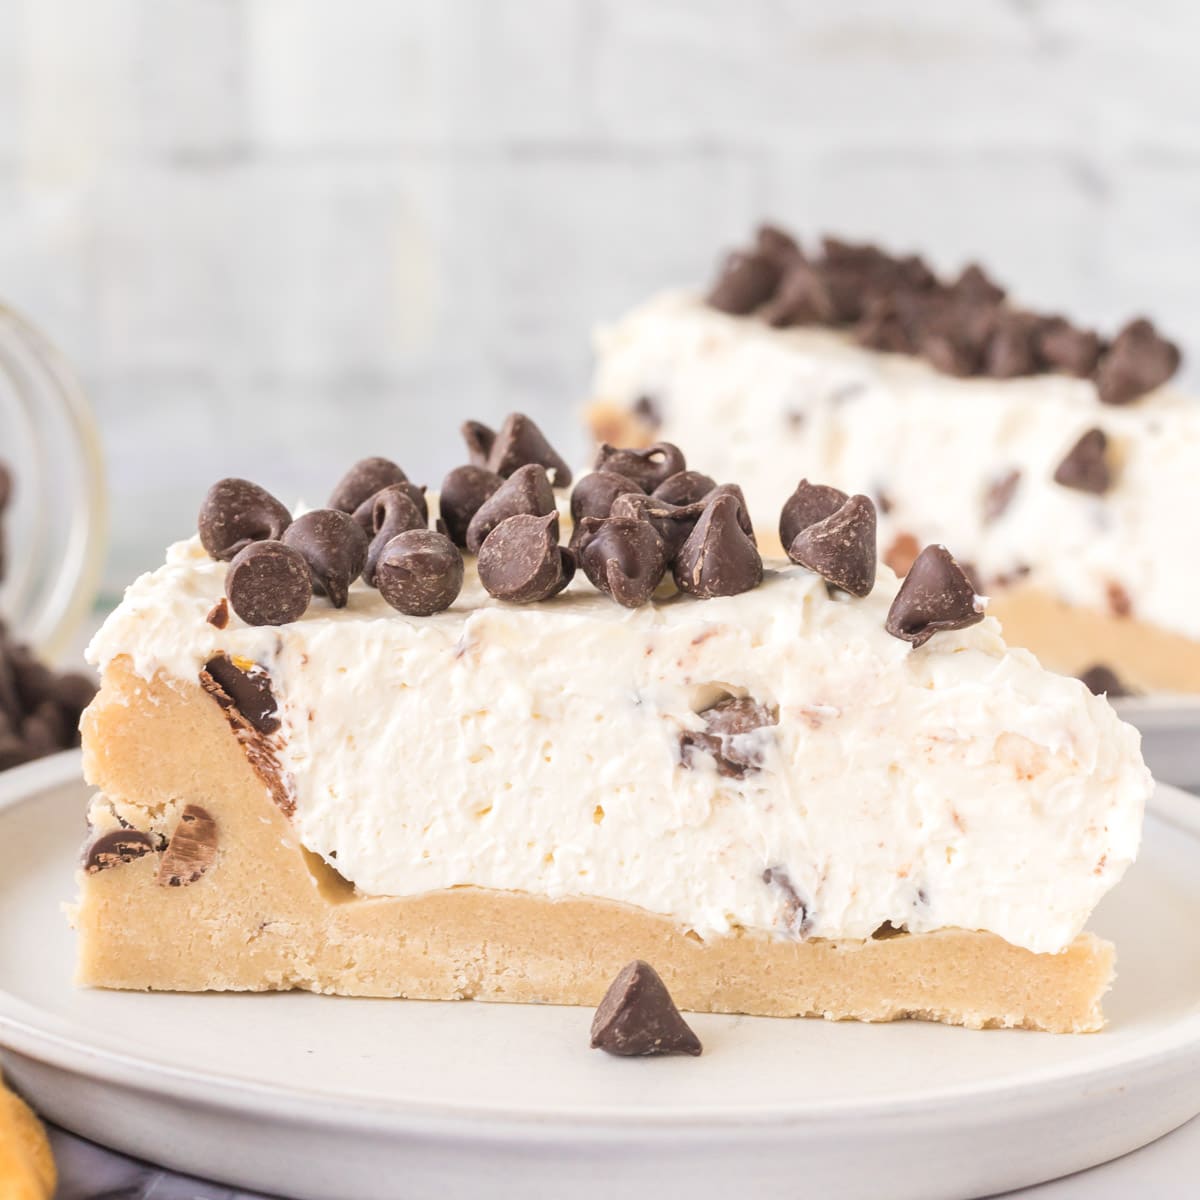
Then, press the cookie dough into a 10-inch springform to make a delicious cookie dough crust, and set the springform pan aside while you prepare the cheesecake filling.
No-Bake Cheesecake Filling
Step 4 | Combine Filling Ingredients
To make the creamy cheesecake filling, add the softened cream cheese, powdered sugar, vanilla, and heavy cream to a large bowl. Whip the cream cheese mixture together on medium speed until the mixture is smooth and creamy.
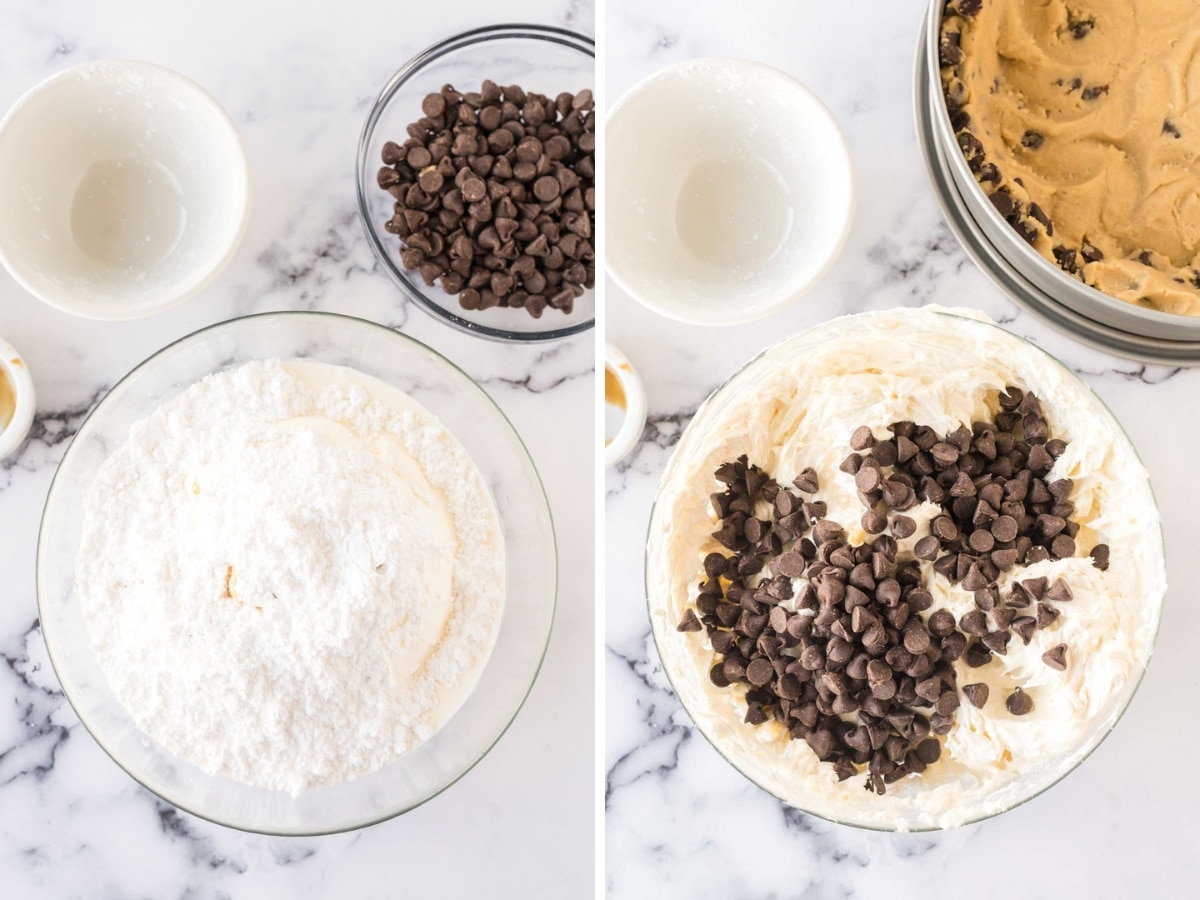
Step 5| Pour and Smooth Filling, Chill in Fridge, and Serve!
Then, pour the cheesecake batter into the springform pan on top of the homemade cookie dough and smooth the top with a rubber spatula or similar tool. Finally, place the cheesecake in the fridge for 3 hours to set.
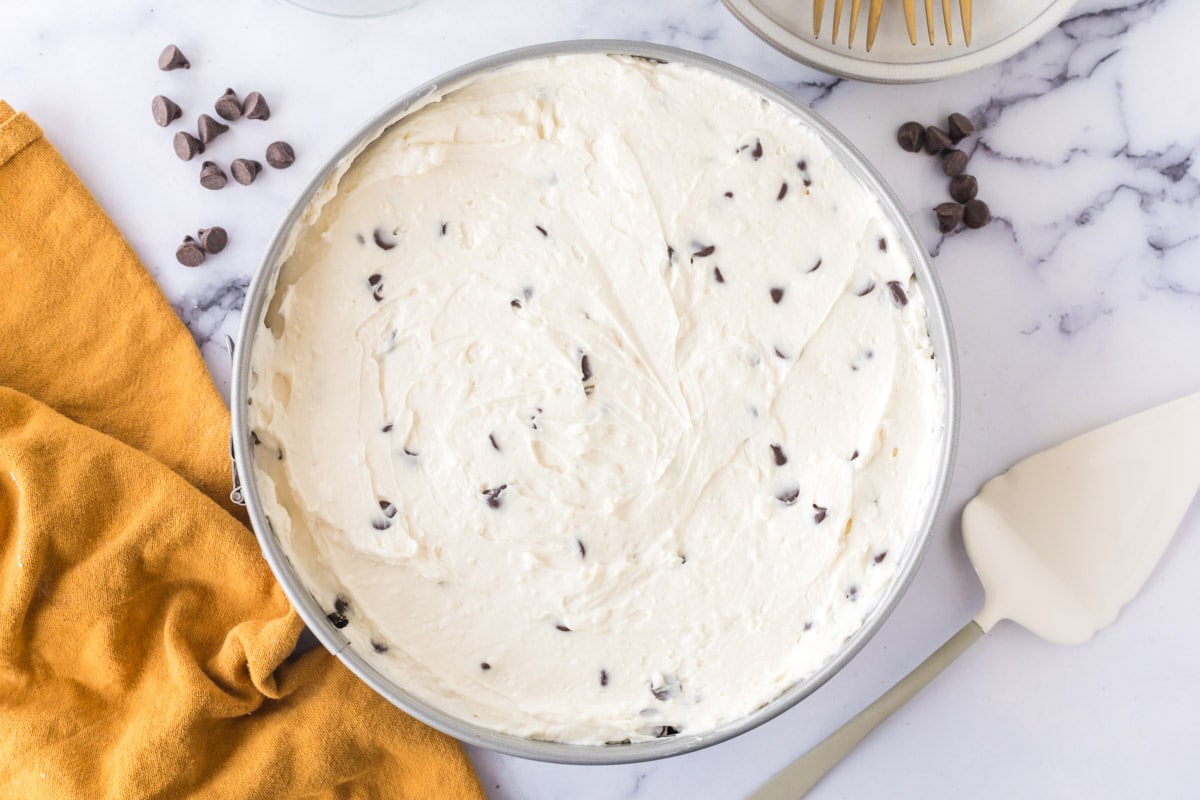
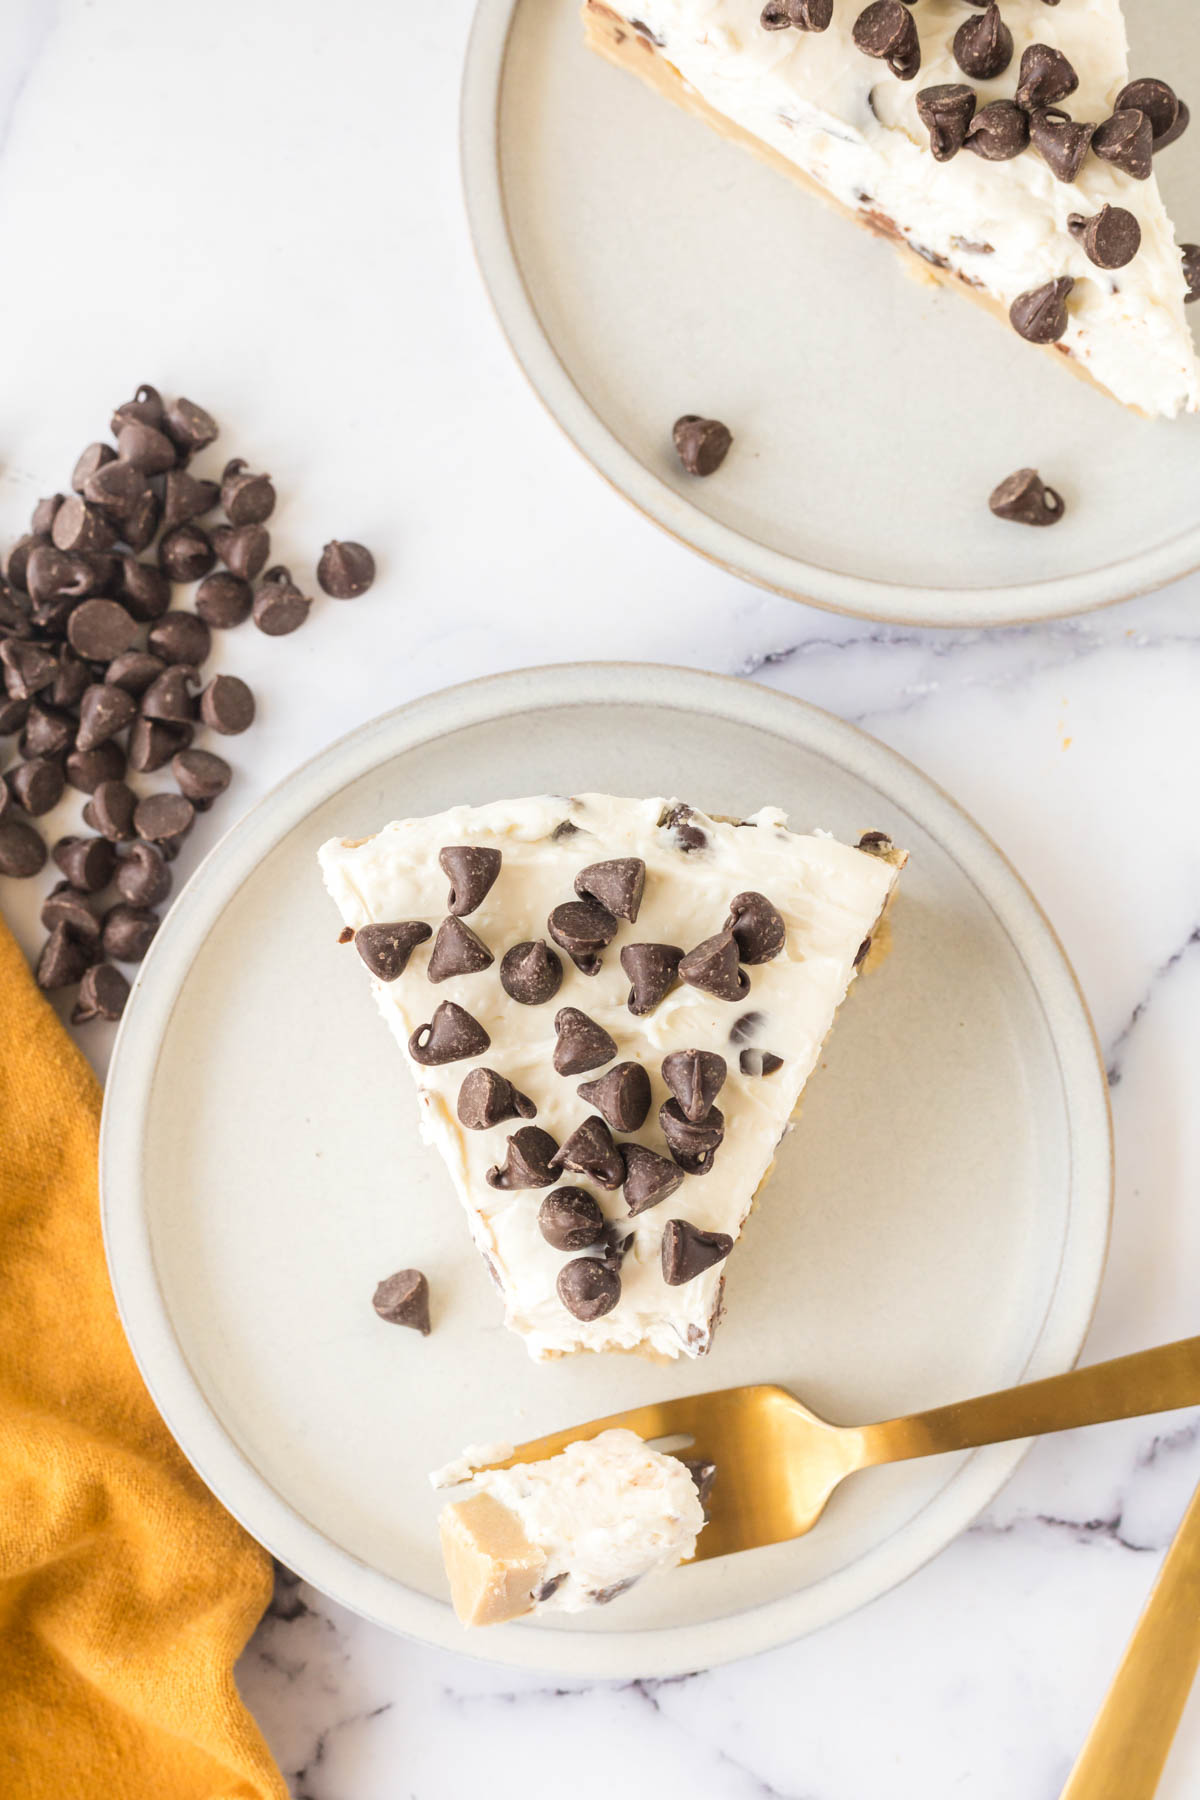
After a couple of hours, all that’s left to do is slice the tasty cheesecake, serve it with your favorite toppings, like whipped cream, caramel, or additional chocolate chips, and, of course, dig on in!
Cookie Dough Cheesecake Recipe Variations
- Buy Edible Cookie Dough: Although this delicious cheesecake is already easy to make, you can make it even more effortless by grabbing a pack of edible cookie dough from the store rather than making it from scratch. Don’t be confused with regular dough for chocolate chip cookies. Ensure you select dough that is clearly labeled as edible. It’ll save you a few more minutes and still tastes delicious.
- Cookie Dough Balls: Take this cookie dough cheesecake recipe to the next level by making extra dough to roll into little chunks and add throughout the cheesecake filling – yum!
- Oat Flour Dough: If preferred, substitute the all-purpose flour with oat flour to make this recipe gluten-free, while avoiding the need to heat-treat the raw flour. Almond or coconut flour will also work.
- Top with Chocolate Ganache: Bring out the sweet chocolate flavor from the cookie dough crust with a silky-smooth chocolate ganache on top of the cheesecake. Check out this chocolate brownie recipe to make a delicious chocolate ganache topping.
Cookie Dough Cheesecake Tips
- Heat-Treated Flour: Get rid of the pathogens and bacteria in your raw flour by heat-treating it first. See the section below.
- Keep it Clean: Avoid a mess by adding about a half cup or less flour at a time. Adding the entire measurement all at once may lead to a mess on your countertops.
- Full-Fat Cream Cheese: Use full-fat cream cheese for the creamiest results.
- Making the Cookie Dough Crust: If you have trouble pressing the cookie dough into the bottom of the pan, first use a rolling pin to roll out the dough on a piece of parchment paper. Then, transfer the dough to the pan and press to fill in any gaps.
How to Heat-Treat Flour
If you want to eliminate the pathogens and bacteria in your raw flour, try heat-treating it first. Here is how:
To keep this recipe totally no-bake, place the flour in a microwave-safe bowl or plate and microwave on high for 4-6 minutes.
You can also spread it on a baking sheet and bake for 5 minutes at 350 degrees F. Then, bring the flour temperature to 160 degrees F to make it safe for consumption. Let it cool down for about 30 minutes before using it in the recipe. Voila! Safe flour for your delicious no-bake creation.
What to Serve with Chocolate Chip Cookie Dough Cheesecake
Top your homemade cookie dough cheesecake with sugary-sweet Strawberry Jam, a dollop of fluffy Homemade Whipped Cream, and serve with a heaping scoop of No-Churn Strawberry Cheesecake Ice Cream. Now, that sounds like a party for your taste buds!
How to Store Chocolate Chip Cookie Cheesecake
Refrigerate: To keep the cheesecake fresh, cover it with plastic wrap in the springform pan or store it in an airtight container for up to 5 days in the refrigerator.
Freeze for Long-term Storage: Store the cheesecake in the freezer for one to two months. First, let it set completely, then transfer the cake to the freezer uncovered.
Once frozen, tightly wrap the cheesecake with plastic wrap or store it in a sealed container. Then, thaw overnight in the refrigerator or on the countertop for a couple of hours.
Cookie Dough Cheesecake Recipe FAQs
There are several ways to ensure your no-bake cheesecake is as thick as it should be. Remember to use room temperature cream cheese to give it the ideal structure, and don’t cut the time short for allowing the recipe to chill and set. If anything, keep it in the fridge for a little longer than three hours or up to 24 hours before serving to give it plenty of time.
And finally, be sure to whip the filling until the heavy cream it contains begins to form stiff peaks. This will give the cheesecake that lovely light and airy bite.
You’ll want the cream cheese for this recipe to be nice and soft so it easily blends into the filling mixture without dealing with large lumps. If you forget to set it out well before beginning the recipe, don’t worry– There are several ways to make it soft at the last minute!
One way is to place the cream cheese in a microwave-safe bowl and heat it for 10-second intervals about three or four times. Just be sure not to over-warm it. Another method is leaving the cream cheese wrapped in the foil and placing it in a bowl of hot water until softened.
More Unique Cheesecake Recipes
- Biscoff Cookie Butter Cheesecake Bars
- Blueberry Cheesecake Cookies Recipe
- Berry Cheesecake Salad Recipe
- Strawberry Oreo Cheesecake Cookies
- Apple Butter Cheesecake Tart
- Banana Pudding Cheesecake Parfait
Hungry for more easy, home-cooked, delicious recipes?
Sign up for my free recipe club to get family-friendly recipes in your inbox each week! Find me sharing daily meal-time inspiration on Pinterest, Facebook, and Instagram.
Cookie Dough Cheesecake Recipe
Click Stars To Rate
Ingredients
- 1 cup salted butter - softened
- ¾ cup light brown sugar
- 2 cups all-purpose flour - (to heat treat flour see notes and prep 30 minutes ahead)
- 2 cups semi-sweet chocolate chips
- 16 ounces cream cheese - softened
- ½ cup heavy whipping cream
- ½ cup powdered sugar
- 1 teaspoon vanilla extract
Instructions
- In a medium-sized mixing bowl, combine the butter and sugar. Use an electric hand mixer or stand mixer with the paddle attachment to cream the ingredients together until smooth.
- Once the butter and sugar are thoroughly creamed together, whisk in the flour until fully incorporated. (If you would like to heat treat the flour – see notes for directions)
- Gently fold the chocolate chips into the cookie dough until they are evenly distributed throughout the dough. Press the cookie dough into a 10-inch springform to form a crust. Set the springform pan aside while you prepare the filling.
- In a large mixing bowl, whip together the cream cheese, powdered sugar, vanilla extract, and heavy cream on medium speed until smooth and creamy.
- Pour the cheesecake filling into the springform pan and smooth out the top with a spatula. Place the cheesecake in the fridge for 3 hours to set.
- Slice, serve, and enjoy!
Notes
Want to Save this Recipe?
By submitting this form, you consent to receive emails from Soulfully Made.
I am going to be making this recipe this weekend and it sounds amazing, I don’t see how I won’t like it!!
would it be possible to freeze it!? Or would you not recommend doing that?
I have to transport it an hour, and I don’t want it to get warm (I will pack in a cooler with ice/ice packs.. thanks for your feed back!
Yes, you can freeze this for up to two months. So you can freeze and then transport it in a cooler. Hope you enjoy it!
I love the idea of an edible cookie dough crust instead of the traditional graham cracker crust. This is such an easy dessert to whip up, and the fact that it is no-bake is a bonus in the summer months!
Thank you, Elizabeth! I agree no-bake desserts are the way to go in the summer heat!
When you say no bake, I’m all in! My family will love this cause of the cookie dough and it’s cheesecake with chocolate chips! Yum!
Thank you, Janie! I am with you on the no-bake! Especially on a hot summer day!
I made this cheesecake for dessert after dinner last night and OMG was it delicious! Already can’t wait to make it again!
Thank you, Tayler! I am so happy to hear you enjoyed it!
Your recipes are always so easy to follow and turn out super delicious! I love how you make cooking and baking accessible for everyone.
Thank you, Alison. I try to keep them easy and delicious for everyone to enjoy! I appreciate hearing that!
Wow this was so decadent, I LOVE cookie dough and this dessert did not disappoint!
Thank you, Ali!